A/DA GroundDrill - 3 Bedienungsanleitung

Operating manual
Ground drill
Model: GroundDrill - 3
Manufacturer Address: WWW. ADAINSTRUMENTS.COM

GroundDrill - 3
Table of contents
1. Introduction ........................................................................................................................................................................................3
2. Safety rules and precautions..............................................................................................................................................................3
4. Assembly ..........................................................................................................................................................................................6
6. Motor .................................................................................................................................................................................................9
7. Adjusting the carburetor.....................................................................................................................................................................12
11. Prolonging the life of your machine..................................................................................................................................................14

MEASUREMENT FOUNDATION
GroundDrill - 3
3
DRESS
1. Wear a long-sleeved shirt and long pants closed at the culf.
3. Do not use the auger indoors or in poorly ventilated places. Exhaust is poisonous.

MEASUREMENT FOUNDATION
GroundDrill - 3
4
3. Wipe the auger body dry of any spilled gasoline after refuelling.
6. Store fuel in approved containers only and keep in a cool place.
stable position.
approaches it from the front.
9. Make sure the drill bit has stopped moving before placing on the ground.

MEASUREMENT FOUNDATION
GroundDrill - 3
Engine type: air-cooled, 2 stroke
Displacement: 49 cc
Palm grip
Engine
Drill
Gear case
Throttle lever

MEASUREMENT FOUNDATION
GroundDrill - 3
6
Gear case
Bolt x 3
Engine
Clutch shoe
Stud x 1
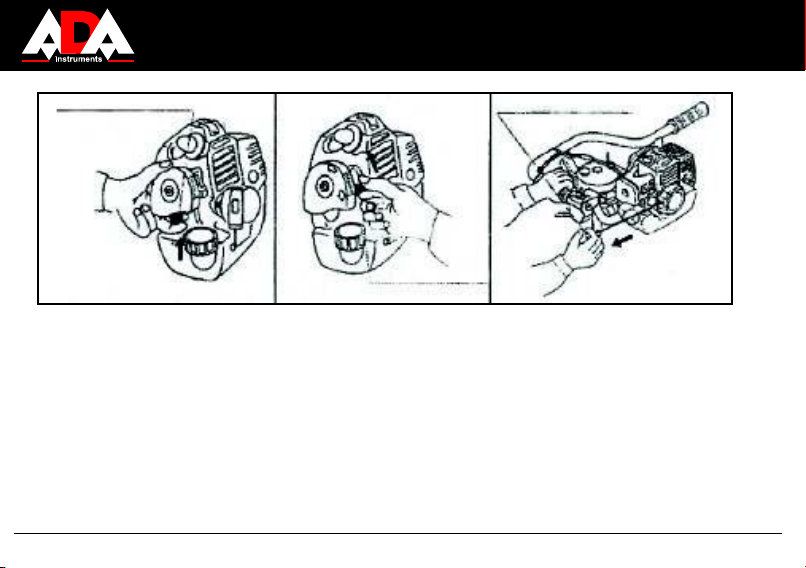
- Work open the connector case using a slotted
side to its counterpart on the gear case side.
- Reattach the connector case.
- Set the gear case on the engine and loosely
tighten the stud and nut.
3 holes, then tighten all 4 bolts securely and
evently.
Connector case
AConnector case
Throttle wire
(gear case side)
Throttle wire
(engine side)
Close in this direction

MEASUREMENT FOUNDATION
GroundDrill - 3
7
engine and gear case. Make sure col-
ors are match and connections are se-
curely tight.
the pin out from its hole.
- Align the pin holes on the gear shaft
and drill shank, and insert the drill
over the shaft.
- Reinsert the pin through the pin hole
covered.
Gear shaft
Clip band
Slide the
band
upwards
Drill shank
Pin
Slide the
clip band
downwards
Leads

MEASUREMENT FOUNDATION
GroundDrill - 3
- Do not add oil past the drain plug hole. To determine oil level, stand the auger on the drill. Oil level should be at the bottom of the
drain plug hole.
Gear case
Drain plug hole
Drain plug
Fill oil up to here

MEASUREMENT FOUNDATION
GroundDrill - 3
9
MOTOR
2-stroke oil. .
Caution: If you use an incorrect mixture of gaso-
line and oil, the engine may be damaged.
Zipper
Throttle cable adjustment screw
2. START
- Pump primer ball on bottom of carburetor about
- Move choke lever up for cold starts to block air
try again.
Throttle lever
Main On/Off switch
MEASUREMENT FOUNDATION
GroundDrill - 3
Primer ball
Choke lever
Pull start
- Make sure that throttle is set to idle.
The primer ball pumps gas through carburetor and back into the gas tank. It is not possible to over-prime the carburetor.
3. OPERATION
- Press or release throttle lever to get desired rpms.
Inhaltsverzeichnis
Andere A/DA Bohren Handbücher


