
Aficionado C883 Bedienungsanleitung

09.09 / V1.0
Read this manual carefully before using
your new Aficionado ice maker. It is
suggested that you keep the manual in a
safe place after reading it for future
reference.
User Manual
C883 / C887
• This product is designed for indoor use only.
• Appearance, design, color, and product parts
are subject to some changes without notice.
Aficionado
Icemaker

Table of Contents
1. Overview …………………………..……..………….……….…………………… 2
2. Recognize Safety Symbols, Words and Labels ….……..…….….……...... 3
3. Safety Precautions ……..………….….……….…………….…………… 4-5
4. Set-Up …….……………….…………….…..........…………………………… 6-7
5. Installation Specifications ………...…….…………………………… 7-9
6. Gravity Drain Pipe Model ………..…….……..……………………………… 10
7. Drain Pump Model ………………..……………..…………………………… 11
8. Product Installation …............................................................ 12-15
9. Operating the Ice Maker ……………………………………………… 16-17
10. Cleaning the Ice Maker ………………..…….………………………….. 18-19
11. Maintaining the Ice Maker ………….…..…………………………………. 19
12. Specifications ……..……….………………..…………………………….. 20
13. Troubleshooting Guide ………..……..…….……………………………….. 21
14. Warranty ….………………….……..………….………………………………. 22
1

1. Overview
Thank you for purchasing the Aficionado C88 Series Ice Maker. This product is a built-in type of ice maker
that may also be used for “free-standing” applications. Your ice maker is designed for indoor usage,
within your home, and should not be used for commercial purposes. The Aficionado C88 series ice
maker produces transparent, clear ice of the highest quality, at a rate of 70 lbs per day.
Proper installation of the ice maker is of the utmost importance. The unit should be installed by a qualified
technician or installer. A high quality water filter is mandatory (you need to purchase this separately), to
insure impurities are removed from the water, and to insure proper mechanical operation. Warranty is
honored only if a water filter is installed and properly maintained, because impurities in your drinking
water may also clog the ice maker system. This could result in unnecessary service calls not covered by
the warranty.
Before installing the ice maker, read your installation manual in full. It contains detailed instructions to be
observed during installation. If you read this manual carefully, you will be able to have the ice maker
installed safely and without any problems. Should you have any questions about its installation, please
contact your dealer.
Review the warranty information included in this manual. If service is needed, please call: (866) 327-5817.
This unit has a one year parts and labor guarantee, which includes in-home service.
Important Information! When designing and manufacturing the ice maker, safety matters. The
Aficionado C88 is designed according to UL standards. The company bears no responsibility or liability for
products that are subsequently modified or installed with parts not supplied or approved, or used
incorrectly. The company may modify or improve the design at anytime. Specifications, functions and
design in this manual and on the website may be changed at any time without prior notice.
2

2. Recognize Safety Symbols, Words and Labels
What you need to know about safety instructions
Warnings and Important Safety Instructions appearing in this manual are not meant to cover all possible
conditions and situations that may occur. Common sense, caution and care must be exercised when
operating, moving or cleaning this product.
Always contact your dealer, distributor, service agent or manufacturer about problems or conditions you do
not understand.
This is the safety alert symbol. It is used to alert you to potential
personal injury hazards. Obey all safety messages that follow this
symbol to avoid possible injury or death.
DANGER indicates an imminently hazardous situation which, if not
avoided, will result in death or serious injury.
WARNING indicates a potentially hazardous situation which, if not
avoided, could result in death or serious injury.
CAUTION indicates a potentially hazardous situation which, if not
avoided, may result in minor or moderate injury.
CAUTION used without the safety alert symbol indicates a
potentially hazardous situation which, if not avoided, may result in
property damage.
WARNING
CAUTION
CAUTION
3
DANGER

3. SAFETY PRECAUTIONS
Read all of the instructions before using this appliance. When using this appliance, always
exercise basic safety precautions, including the following:
1) Use this appliance only for its intended purpose as described in this use and care guide.
2) This ice maker must be properly installed in accordance with the installation instructions before it is
used. See grounding instructions in the installation section.
3) Never unplug your ice maker by pulling on the power cord. Always grasp the plug firmly and pull
straight out from the outlet.
4) Repair or replace immediately, all electric service cords that have become frayed or otherwise
damaged. Do not use a cord that shows cracks or abrasion damage along its length, the plug, or the
connector end.
5) Before cleaning or before making any repairs, turn switch to off position. Refer to “Cleaning the Ice
Production System” on page 19 for more information.
Note: If for any reason this product requires service, we strongly recommend that a certified
technician performs the service.
6) If your old ice maker is not being used, we recommend that you remove the door. This will reduce
the possibility of danger to children.
7) Do not operate your ice maker in the presence of explosive fumes.
SAVE THESE INSTRUCTIONS
4

Risk of child entrapment. Before you throw away your old ice maker,
take off the door. This will reduce the risk of danger to children.
Thank you for choosing our Aficionado
product. This easy-to-use manual will
guide you in getting the best use of your
ice maker.
Remember to record the model and serial
number. They are on a label in back of
the ice maker.
Model number
Serial number
Date of purchase
Staple your receipt to your manual. You will need it to obtain warranty service.
5
DANGER
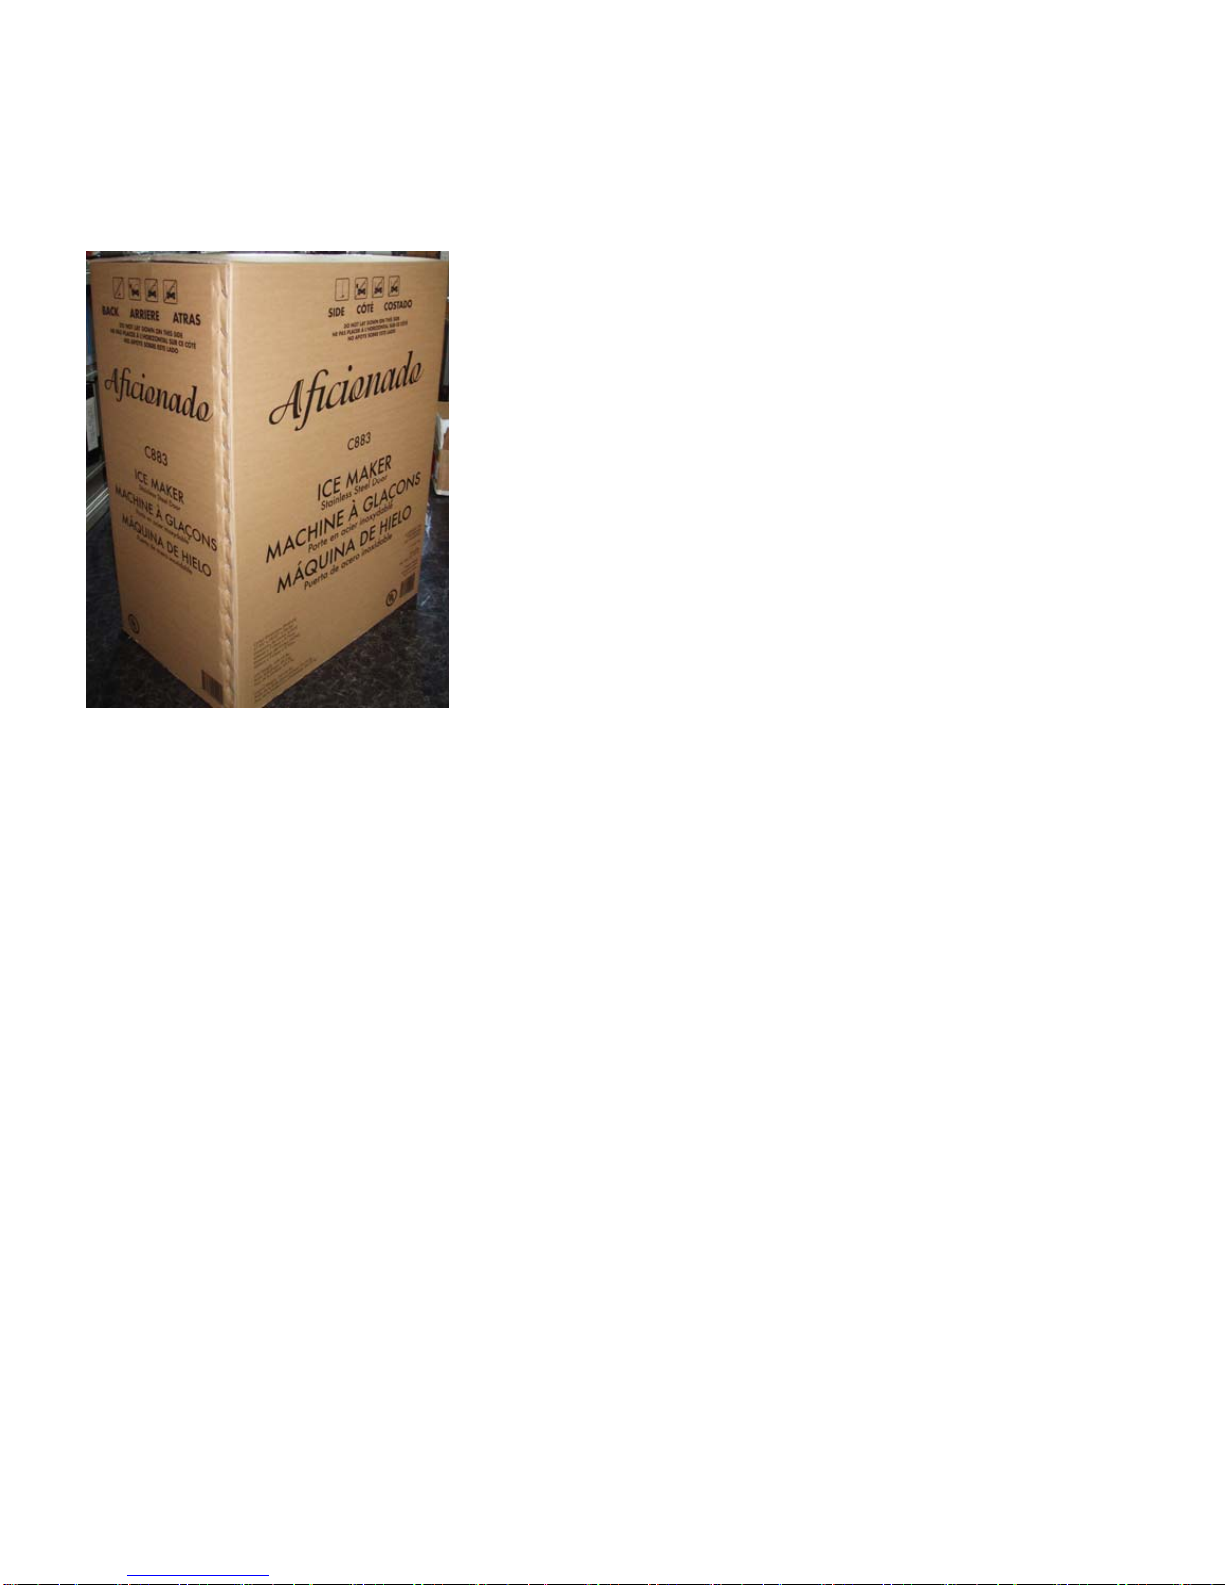
4. Set Up
After removing the packing materials, check the appearance of the
ice maker for possible defects or irregularities. Should the product
show any irregularity in its appearance, contact the dealer
immediately.
All packing materials (strings, box, Styrofoam, wood, etc.) should be
placed out of children’s reach and disposed of properly.
For safety, the product should be installed and used in accordance
with the User Manual.
Incorrect installation, or careless use of the product, may damage the
environment, humans, animals, and/or materials and property. The
manufacturer bears no responsibility for such damage or injury.
The automatic ice maker performs best at room temperature of
60°~75℉and a supply of water at 50℉.
The ice maker should be installed in a controlled indoor environment,
but NOT near heat generators such as radiators, stoves, or
dishwashers.
6
Air Flow
The ice maker draws indoor air through the left part of the kick plate/grill using a fan, and expels hot air
through the right part of the kick plate/grill. Do not place any material in front of the kick plate/grill, as this
disrupts the air flow. This results in reduced performance and, in the worst case, malfunction.
The ice maker should be operated within a temperature range of 50℉to 75℉.
Water Supply
The ice maker requires a continuous supply of drinking water at 20psi or higher pressure. The hydrostatic
pressure should not exceed 80psi.
Water Quality
There is no such thing as “perfectly pure” water. Water - even tap water - contains some impurities.
Rainwater absorbs impurities from the atmosphere or when it passes through soil. Some impurities
consist of solid particles called suspended solids and are filtered through micro filters. Some remaining
impurities cannot be filtered because they are chemically combined with water molecules. These
impurities are called dissolved solids.
The mineral content of ice produced by the ice maker is reduced compared to the water before conversion
into ice. Water containing a low level of impurities freezes rapidly. Impurities elevate the temperature of
water. Most impurities condensed in the water-tank of the ice maker form a hard precipitation called
“scale”.

This ice maker reduces the mineral level by circulating water during the ice production cycle (with excess
water removed via the outlet tube). Each cycle requires just over 20 ounces (0.64 quart) of water. For each
cycle, about 16 ounces (0.5 quart) is used in rinsing the water tank, with the remaining quantity removed
through the outlet pipe. In this process, some impurities unavoidably remain. They may accumulate on the
internal parts of the ice maker, forming abnormal ice pieces. Should a large quantity of mineral scale
accumulate, the lifespan of your ice maker may be reduced.
For best operation of the ice maker, impurities and minerals should be decomposed by washing with a
cleaning solution periodically. The method of cleaning the ice maker is described on pages 18 and 19.
In general, it is mandatory to use filtered water. Filters remove not only bad odors but also particles.
Dissolved solids may be treated with a reverse osmosis system, a condensed phosphate feeder, or a good
carbon filter. Neutral water is not recommended. Water softeners should not be used for the water
supply because they add minerals and soft ice may result. If you have any questions about the purity of
water, address your inquiry about water treatment to your Aficionado dealer, or to a water quality expert in
your area.
This product was thoroughly washed at the factory. However, check the cleanliness of the inside before use
and keep it clean during use.
5. Installation Specifications
Space requirements for installation
Prior to installing the ice maker, check whether the prepared opening dimensions, electrical power, and
piping position are correct. Refer to the installation specifications and drawings shown on the next few pages.
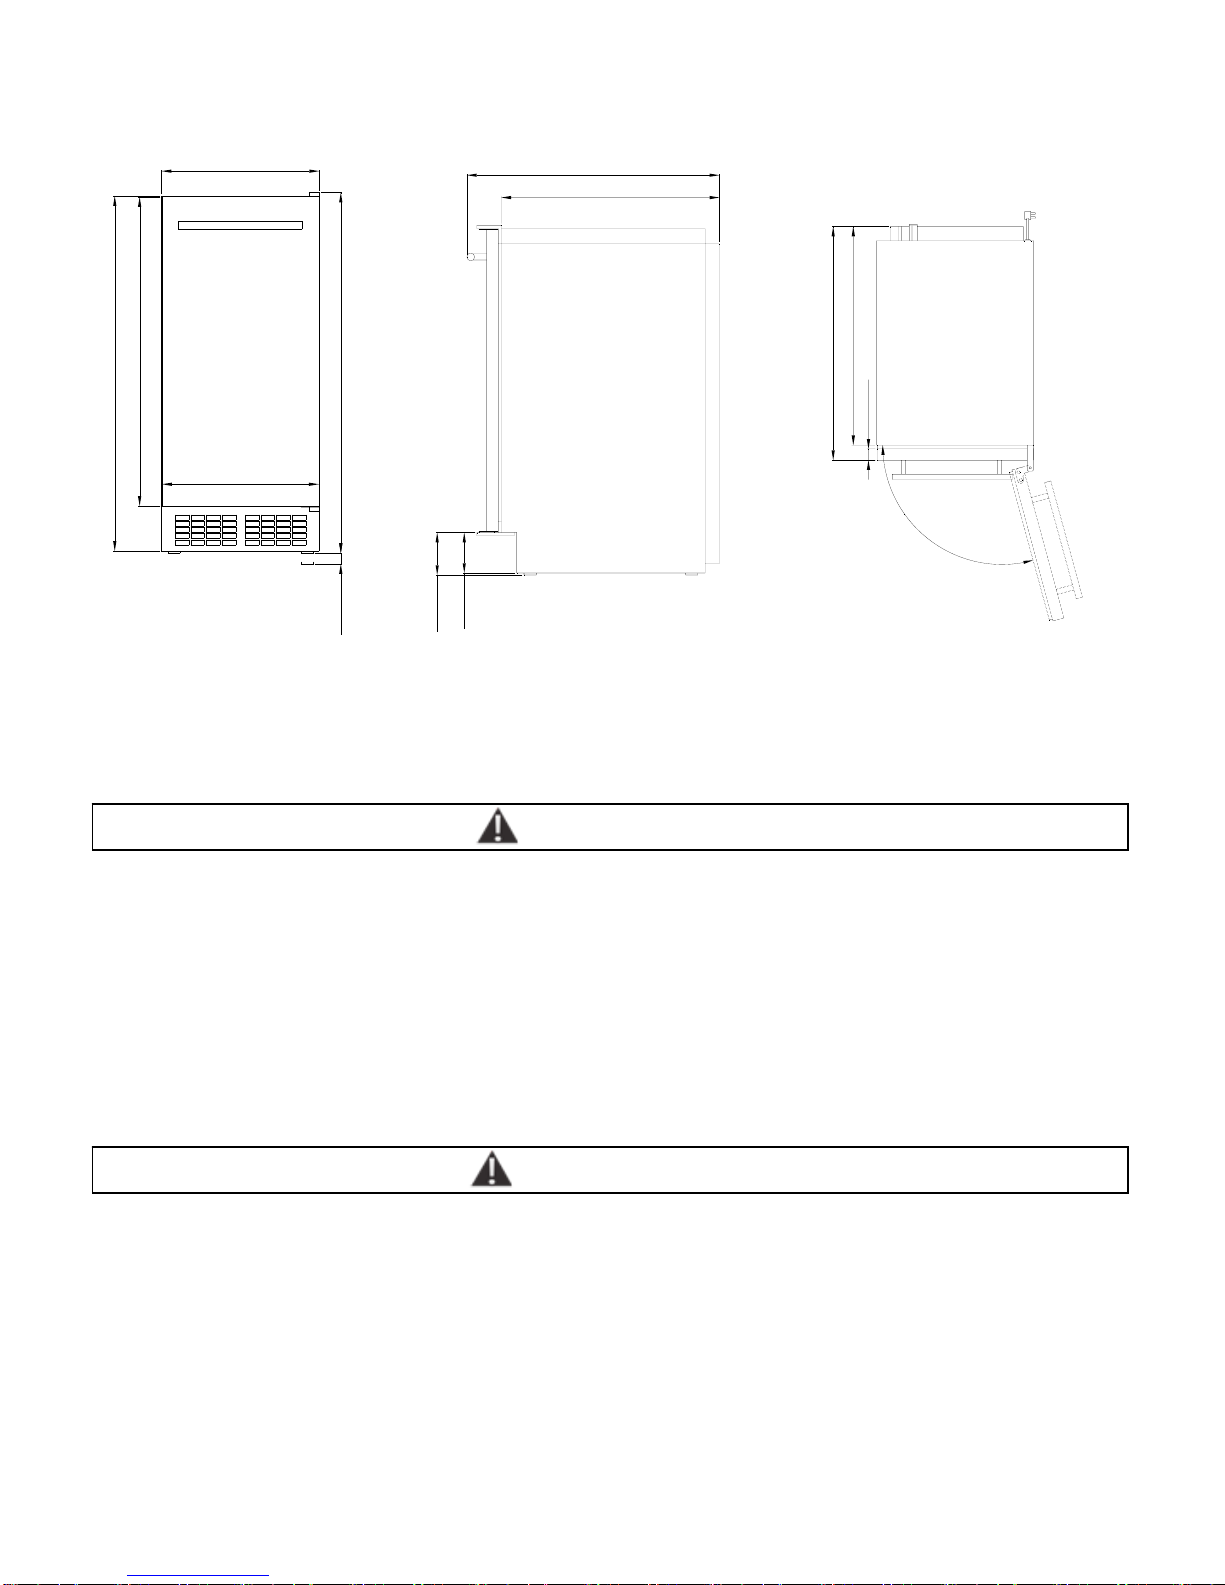
Prepared Opening Dimensions:
A) Rough Opening Depth: 24”
B) Rough Opening Width: 15”
C) Rough Opening Height: 34” min. to 35” max.
D) Min. Door Clearance: 15-1/2”
E) Min. Clearance at 90°: 17-1/8”
7
(A)
Rough Opening
Depth: 24”
TOP VIEW
TOP VIEW
(E)
Min. Clearance
at 90°: 17-1/8”
(D)
Min. Door
Clearance: 15-1/2”
90°
FRONT VIEW
(C)
Rough Opening
Height: 34” min.
to 35” max.
(B)
Rough Opening
Width: 15”
The front and rear of the ice maker must be perfectly leveled. If installed on an uneven floor, and the unit is
not leveled, ice clumping may occur due to improper drainage, as the drain is not able to process the water
fast enough.
Double check that proper leveling is accomplished by placing your level in at least 4 to 6 locations (front
right, front left, center front center middle center rear for instance).
Important Information! If the ice maker is installed in a corner, the door handle may limit the opening of
the door.
The finished bottom should be protected during installation to avoid possible damage when moving the
product.
Important Information! When moving the product using a hand truck or dolly, place the dolly at the side
of the product and tape the door shut to avoid possible opening during movement.
CAUTION
8
Fig. 1
Front View Fig. 2
Side View Fig. 3
Top View
CAUTION
34.0"(863.3)1.0"(25.4)
14.9"(378)
29.1"(740)
33.5"(850)
376
21.1"(538)
3.9"(100)
4.1"(105)
24.97"(634.2)
21.1"(538)
1.1"(27.8)
22.6"(575)
105°
Requirements for Power Supply
120 volt, 60Hz, dedicated 15-amp circuit breaker and electric power are required. A separate circuit is
required for grounding. The power cord of the product should be inserted into a suitable 3-prong grounding-
type outlet.
Important Information! A Ground Fault Circuit Interrupter (GFCI) is not recommended because the
operation of the product may be stopped.
Important Information! The provisions of the National Electric Code as well as any local laws and
instructions should be observed when installing the product.
Do not use extension cords or 2-prong adapters. The product must be fully grounded, according to
local/state/national electrical codes .
Requirements for Plumbing
Plan the arrangement of water supply pipes. Connect a 1/4" diameter copper pipe as the source of cold water.
Install a shutoff valve between the tap water pipe and the ice maker so that the user can control the water flow.
Do not install the shutoff valve at the back of the product where it cannot be reached. Do not use a self-
piercing valve. An inline water filter (not supplied) is required to keep the warranty in effect.
The tap water pressure should be maintained at levels between 20psi and 80psi. If an electrical outlet is
available at the back of the ice maker, installation may be easier. A clock-type inverted receptacle is
recommended for the overlay model, so that after 3/4” wood is applied, the unit fits flush in the front. Electric
power, inlet water pipe, and drain pipeline installation should satisfy all provisions for local laws and
regulations. For tap water position, refer to the installation specifications and drawings on pages 10 and 11.
Important Information! The product is designed for built-in or free-standing use. However, it may be
necessary to slide the icemaker forward for service. For this reason, do not install any material at the front,
upper or lower end of the product which could obstruct the ice makers forward movement.
After installing the ice maker, place shims under the product as needed to keep it level.
Installation on a Slab
Draw water to the drain position using the optional built-in drain pump. The pump can raise water up to 8
feet in height. Capability to raise water may be affected by piping.
Important Information! Piping/plumbing lines should be carried out in accordance with all local laws and
regulations.
9
WARNING
Andere Handbücher für C883
1
Dieses Handbuch passt für folgende Modelle
1
Inhaltsverzeichnis
Andere Aficionado Eiswürfelbereiter Handbücher


