Alfa Network AWIPH90 Bedienungsanleitung

AWIPH90 WiFi Phone
User Manual
Version 1.0

1
Table of Contents
Chapter 1 Overview of the WiFi Phone………………………………3
1.1 Front Panel and Keypad………………………………………………………. 3
1.2 Keypad function description………………………………………………….. 4
1.3 Main Screen……………………………………………………………………. 5
1.4 Entering and Editing text……………………………………………………... 5
1.5 Making a Phone Call…………………………………………………………... 6
1.5.1 Entering the phone number manually
1.5.2 Using the Phone Book
1.5.3 Using the Call History
1.5.4 Using the Quick Setting
1.5.5 Redial a Number
1.5.6 Answering a Call/ Reject a Call
1.5.7 Holding a Call / Transferring a Call
Chapter 2 Call History…………………………………………………8
Chapter 3 Message……………………………………………………...9
Chapter 4 Phone Book………………………………………………...10
Chapter 5 Call Settings………………………………………………..10
5.1 SIP Settings…………………………………………………………………….. 11
5.2 Call Waiting……………………………………………………………………..13
5.3 Call Forward…………………………………………………………………….13
5.4 NAT Settings…………………………………………………………………….14
5.5 Audio Settings…………………………………………………………………...14
5.6 DTMF Tone……………………………………………………………………...14
5.7 Skype Gateway………………………………………………………………….14
Chapter 6 Network Settings…………………………………………..15
6.1 IP Settings…………………………………...…………………………………. 15
6.2 WLAN Settings………………………………………………………………… 16
6.3 User Certificate………………………………………………………………….19
6.4 Root Certificate………………………………………………………………….21

2
Chapter 7 Phone Settings…………………………………………….. 23
7.1 Vibrator………………………………………………………………………….23
7.2 Ringer……………………………………………………………………………23
7.3 Ring Tones……………………………………………………………………... 23
7.4 Ringtone Volume………………………………………………………………..23
7.5 Language………………………………………………………………………..23
7.6 Backlight………………………………………………………………………...23
7.7 Speed Dial……………………………………………………………………….24
7.8 Web Configuration……………………………………………………………..24
Chapter 8 System Time……………………………………………… 25
8.1 Date Time Setting………………………………………………………………25
8.2 SNTP Setting……………………………………………………………………26
Chapter 9 Firmware Settings…………………………………………26
9.1 Firmware Version………………………………………………………………26
9.2 HTTP Server……………………………………………………………………27
9.3 Firmware Upgrade……………………………………………………………..27
Chapter 10 IP Camera
10.1 IP Camera Play………………………………………………………………..28
10.2 IP Camera IP…………………………………………………………………..28

3
Chapter 1 Overview of the WiFi Phone
1.1 Front Panel and Keypad
Figure 1.1.1 Front Panel and Keypad
Graphic LCD
Receiver
1
2
3
4
5
6
Power On/Off Key

4
1.2 Keypad function description
Key Description
0
Power on/off and End key
Display IP address key
Used to end or reject a call, or to return to standby mode.
1
Answer/Send key
Used to answer a call or dial a number.
2
Menu and select key
Used to enter into menu and move up and down to select items
In Input Mode, you can switch [123], [abc] and [ABC].
3
Left key: Phone Book and Select key
To search or add or delete the data of phone book
Press the button to go back to main menu
4
Right key: Quick Setting and Back key
To enter Quick Setting menu
0-9 Number key
Used for entering numbers and characters.
5 Unlock Key
Used to unlock the key ; Pound key: In entry mode
Skype Buddy List : Press to retrieve Skype Buddy List.
6
Asterisk key
In entry mode, use the asterisk key to enter ‘.’, ‘@’and ‘:’,’*’
Table 1.2.1: Keypad function description
5
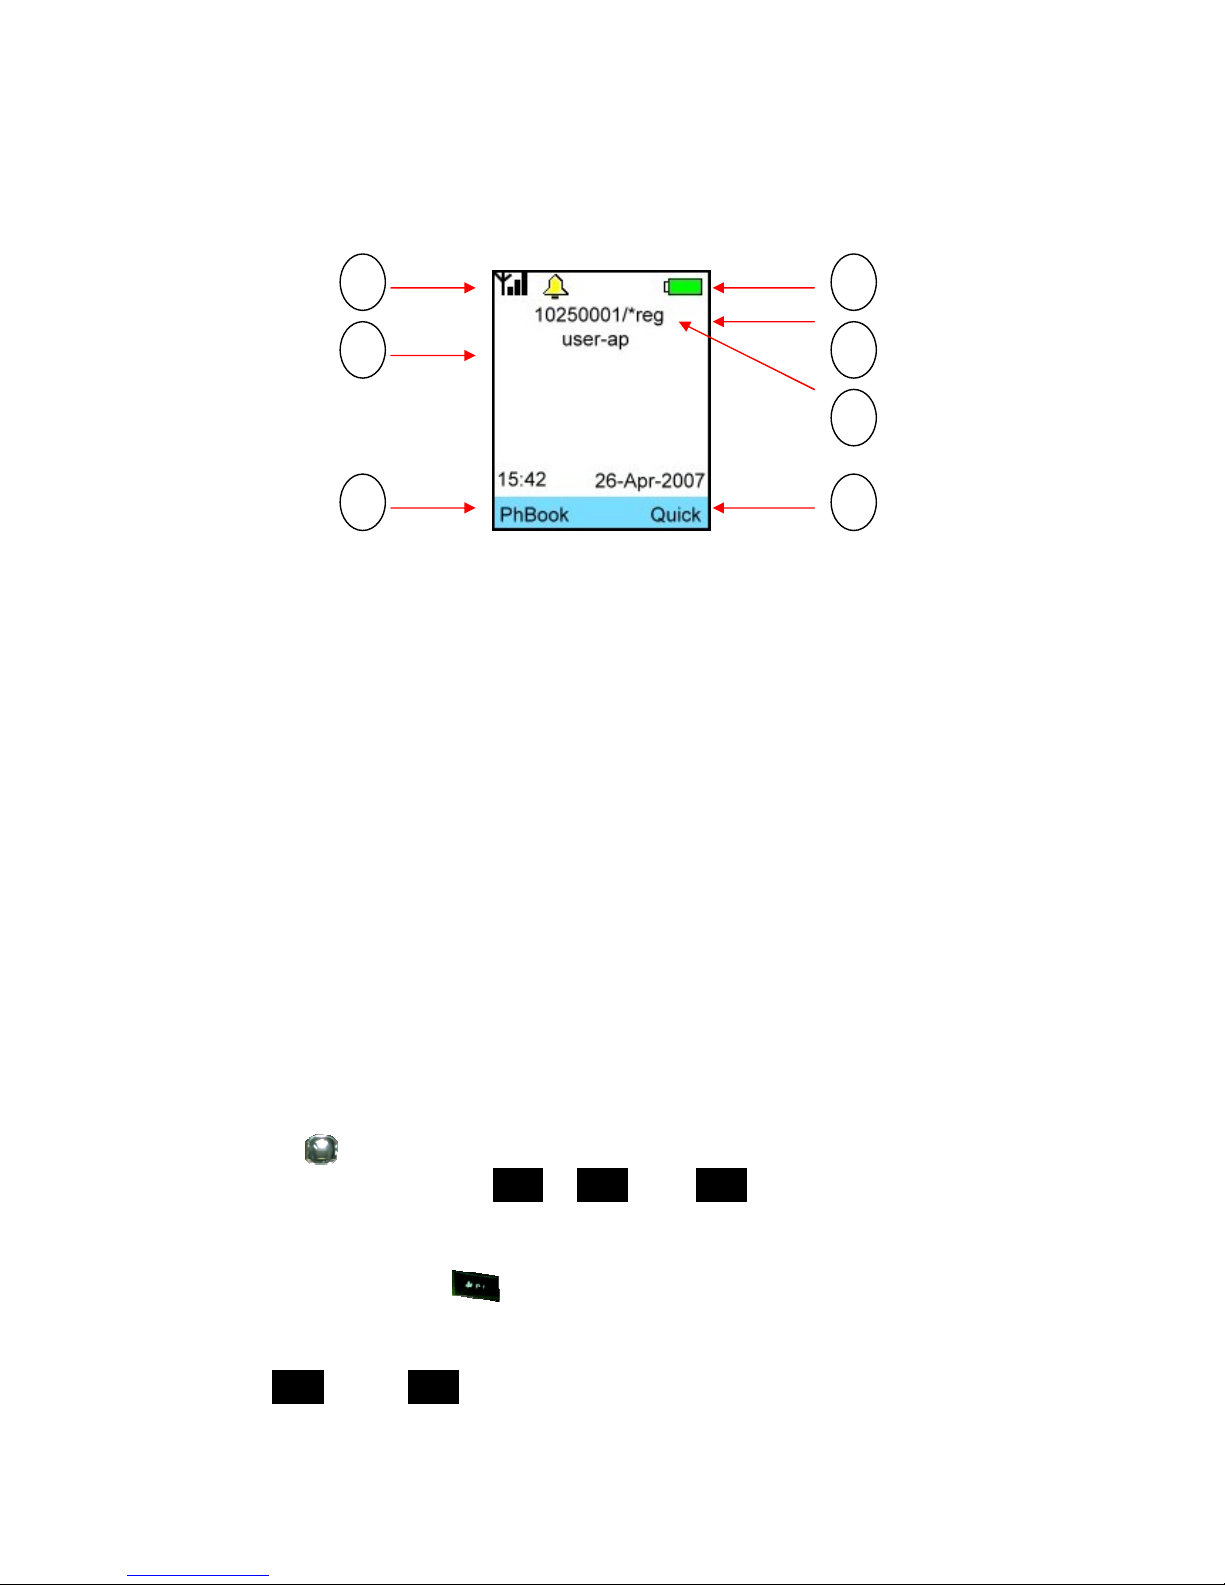
1.3 Main Screen
After powering on, the phone enters standby mode, with the main screen displayed as
shown in Figure 1.3.1
Figure 1.3.1
1 Battery icon
2 User name
3 Right soft key tab
4 Left soft key tab
5 AP information:
Showing which AP you are connecting
6 Signal strength icon
7 Registration status indicator: when SIP registration is enabled, the *reg indicates
WIFI PHONE has registered to the SIP Registrar successfully. If WIFI PHONE fails
to register to the SIP Registrar, a rotating line will appear at the same place.
1.4 Entering and Editing text
In many situations you need to enter numbers and characters in an entering field.
Please refer to the following guidelines:
•Press to switch between upper case character, lower case character and
numeric mode, with the icon , or shown at the middle of
the bottom of LCD screen respectively.
• In enter mode, Press to enter ‘.’‘@’ or ‘:’by pressing it once, twice or
three times respectively.
• In or mode, press numeric key ‘1’to enter a space or icons as
follows: “ . , $ % & _”
1
2
34
5
6
7
abc
ABC 123
ABC abc

6
• Press
to move the cursor.
• Press
to clear the number/character that the cursor points to.
• Press to abort the editing.
1.5 Making a Phone Call
1.5.1 Entering the phone number manually
You can enter phone number (needing SIP Proxy Server and SIP Registrar) or SIP
URL at the entering line. Then press to make a phone call. Please refer to
Figure 1.5.1
Figure 1.5.1
1.5.2 Using the Phone Book
You can search the Phonebook by name to get the phone number/SIP URL and make
a call. Please refer to Chapter 4.1 phonebook
1.5.3 Using the Call History
You can find the phone number/SIP URL from the Call History to make a phone call.
Please refer to Chapter 2.1 Call History
1.5.4 Using the Quick Setting
You can select several options of the major functions from “Quick Setting”. Such as
Site Survey, Key Lock, and change phone standby modes: General Mode/ Vibrator
Mode/ Ringer Mode/ Silent Mode.
7
1.5.5 Redial a Number
At the standby mode, press The list of placed calls is displayed. The latest
dialed number is highlighted, so you can redial this number directly by pressing the
left soft key.
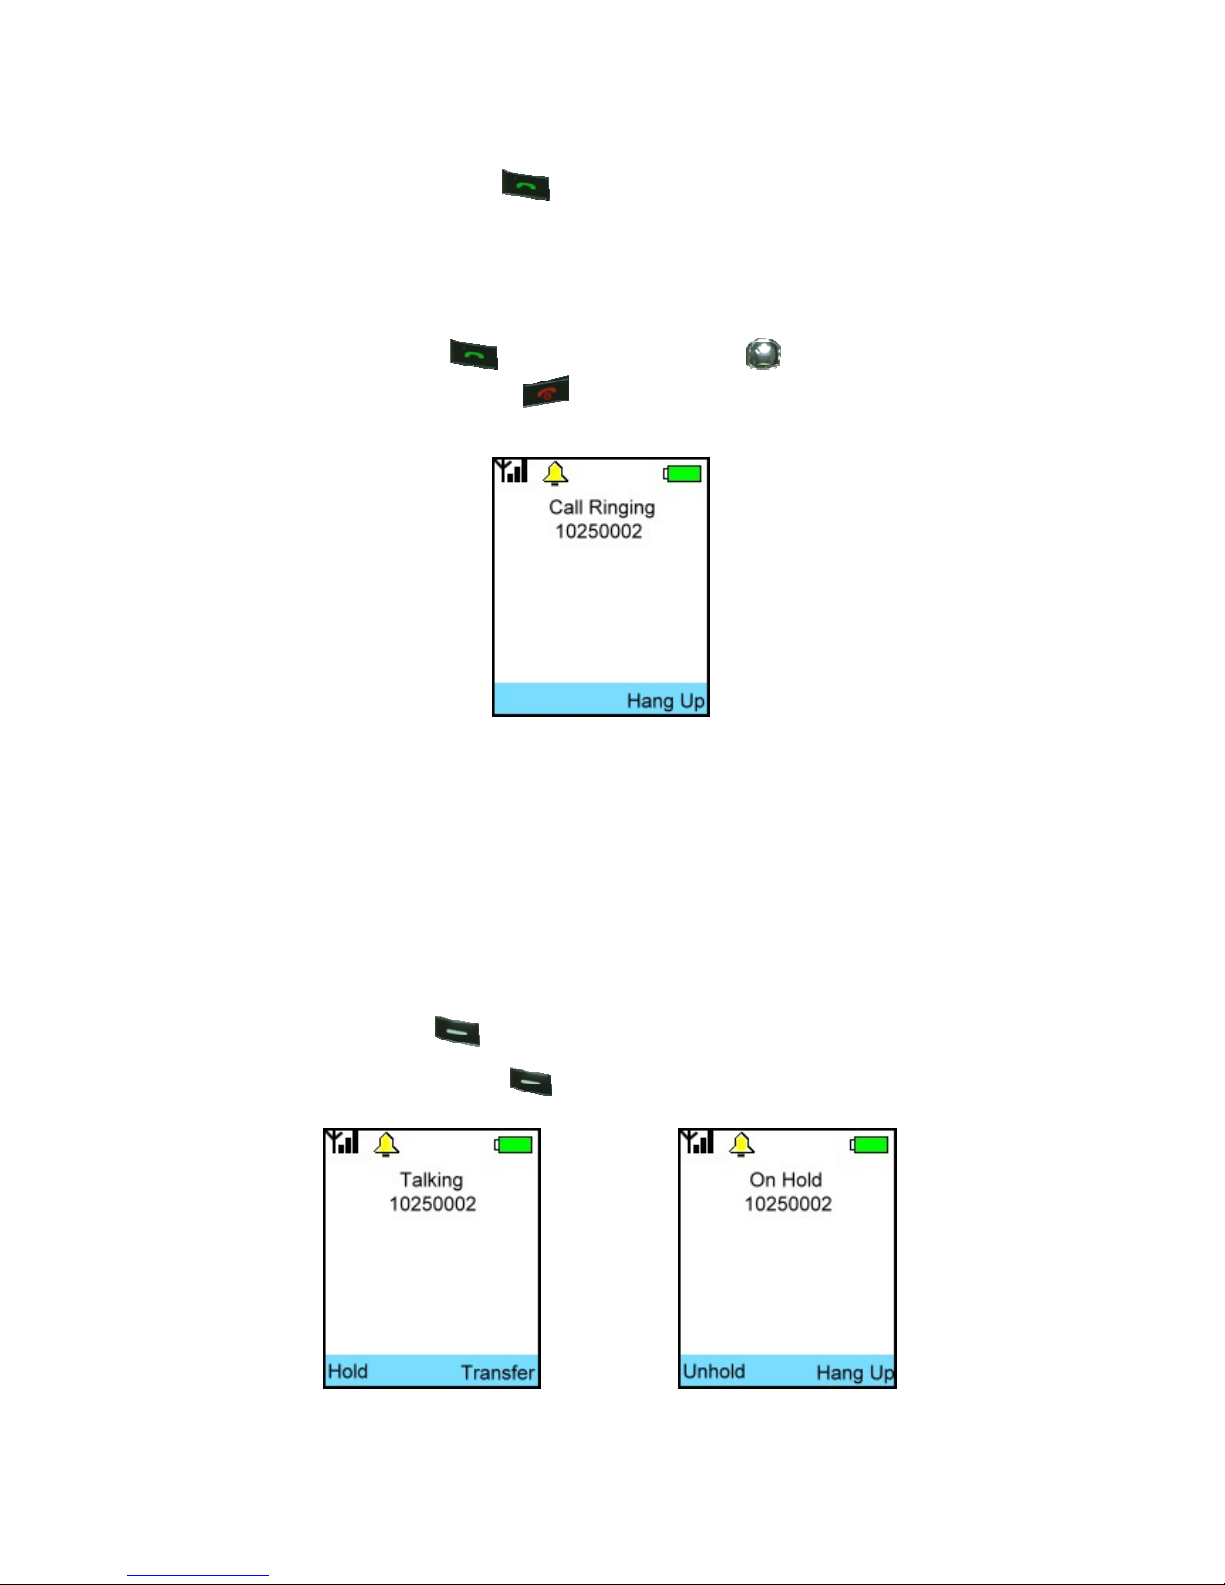
1.5.6 Answer a Call/ Reject a Call
To answer a call, press to accept. You can use key to adjust the
volume. To reject a call, press Please refer to Figure 1.5.2
Figure 1.5.2
Caller ID will be shown on screen as Figure 1.5.2
Caller will hear “ Ring back tone” as soon as the phone is calling out
Receiver will hear “ Ring tone ” as soon as a call is coming
If the receiver is busy, caller will hear busy tone back from receiver
1.5.7 Hold a Call / Transfer a Call
When talking, press to hold the call.
To resume the held call, press again. Please refer to Figure 1.5.3
Figure 1.5.3 Hold and resume a call

8
To transfer the call, press and press the third party’s number, then press
to make call out. Please refer to Figure 1.5.3
Chapter 2 Call History
2.1 Call History
Figure 2.1.1 provides information about accessing the main menu and using its
features.
Figure 2.1.1
Call Settings
Message
Call History
Network Settings
Phone Settings
System Time
Firmware Settings
Menu

9
Figure 2.1.2 shows the architecture of Call History menu.
Figure 2.1.2
You can find out all the records of Dialled /Answered/Missed/ Delete Records
Chapter 3 Message
3.1 Message
You can send and delete messages here. Also, you can find out the records of Inbox /
Outbox. To send a message, press to enter Menu and scroll to Message.
Then select Send Message to input your message and press to send out or
press to clear it.
The Message menu is displayed, as shown in Figure 3.1.1
Figure 3.1.1
Call History
Delete Records
Missed Calls
Answered Calls
Dialled Calls
Andere Handbücher für AWIPH90
1
Inhaltsverzeichnis
Andere Alfa Network Schnurloses Telefon Handbücher


