
Beeworks BW05 Bedienungsanleitung

BEEWORKS 05 STABILIZER
USER GUIDE
BeeWorks LLC
www.beeworksgear.com
Last Modified: November 11, 2015
Copyright © 2015 BeeWorks LLC. All rights reserved.

Table of Contents
What’s in the Case? 3
Getting Started 4
Step 1: Assemble the BW05 5
Step 2: Balance the Camera 7
Step 3: Calibrate the Sensors 9
Step 4: Select Mode of Operation 10
Inverted Operation 11
Attaching a Monitor 12
Tune the Stabilizer 13
Assembling the Kinetic Remote 14
Using the Kinetic Remote 16
Support 18
Page of 218
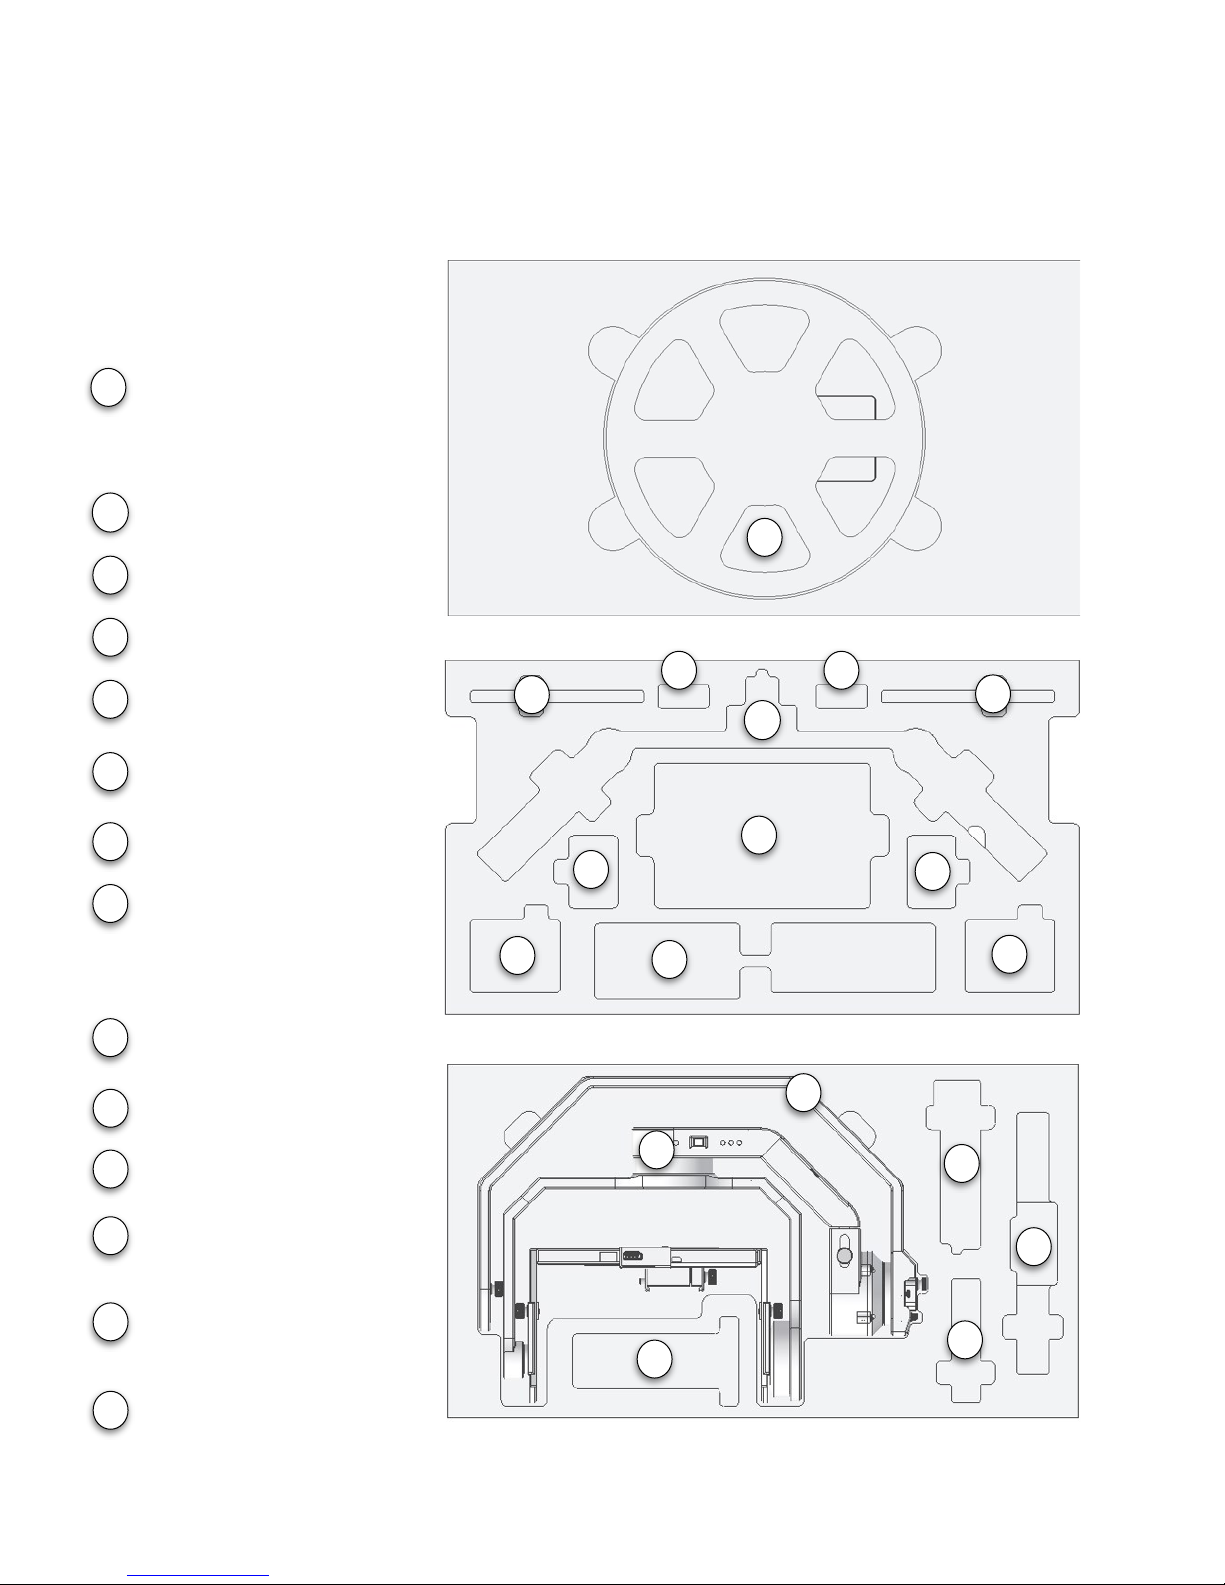
What’s in the Case?
"
Page of 318
12
2
4
3
3
7
8
8
6
6
5
5
9
2
3
4
5
6
7
8
Handlebar
BW05 Battery
Battery Charger
Thumb Screws
Kinetic Remote
Antenna (Optional)
Monitor (Optional)
Monitor Battery (Optional)
BW05 Stabilizer
Camera Plate
Stand Spine
Paralinx Receiver
(Optional)
Remote Antenna Case
(Optional)
Kinetic Remote
Controller (Optional)
Middle Layer
Bottom Layer
10
11
13
14
9
10
11
12
13
14
Stand Base
Case Lid
1
1

Getting Started
To start shooting with the BW05 stabilizer, you will accomplish the following steps:
1. Assemble the BW05
2. Balance the camera
3. Calibrate the sensors (recommended before each day of shooting)
4. Choose the mode of operation"
Page of 418
Stand Spine
Stand Base
Kinetic Remote
Controller

Step 1: Assemble the BW05
1. Watch the video (beeworksgear.com/support).
2. Set the stand base on a firm surface.
3. Attach the stand spine and stabilizer to the
stand base using your choice of one or two
thumb screws.
4. Attach the camera plate to your camera.
Position the lens cradle to support the camera
lens without inhibiting its operation (focus,
zoom, etc.)
5. Tighten the thumbscrew with a coin.
6. Adjust the lens cradle to fit snugly against the
lens.
7. Slide the camera plate onto the stabilizer and
tighten the thumbscrew.
8. Connect the battery. Place it in the battery
compartment, and replace the battery door.
9. Remove the two small thumb screws at the top
of the stabilizer and move them back to the
extra holes provided.
10. Keeping the stabilizer on the stand, attach the handlebar. The handle adjustment knobs
should face the operator (opposite the lens direction).
11. Fasten the handlebar using four (4) 1/4-20” thumbscrews.
Page of 518

TIPS FOR ASSEMBLY
*The case layout is designed so that gravity will pull the stabilizer into the correct position when
removed. When looking into the lens of the camera, the tilt (pitch) motor should be on the right
side. When putting the stabilizer in its case, rotate the tilt motor toward the panning motor. It is
likely that the camera height adjustments will need to be extended to fit properly in the case.
*To prevent the stabilizer from detaching from the stand when removed from the case, we
recommend attaching the stabilizer to the stand with the small thumbscrews before putting it
back into the case.
*There is a threaded hole available to use a second thumb screw between the stand and base.
This screw is designed to be an optional secondary mounting point for safety and stability
when mounting the stabilizer on moving objects. There are also additional 1/4-20 mounting
holes on the back and top of the stand spine, allowing you to mount it from multiple locations
in situations that require extra support (on moving vehicles, for example).
*Two suction cups can be attached to the back of the spine to attach it to smooth vertical
surfaces, such as windows or vehicles. In this configuration, the stand base should be
removed.
*Three suctions cups can be added to the bottom of the stand base to attach it to smoother
horizontal surfaces.
*Take care to avoid twisting the cables that run through the stabilizer motors. If the cables
become twisted, simply rotate the axis in the opposite direction to untwist them. Twisted
cables can impact stabilizer performance.
Page of 618

Step 2: Balance the Camera
1. Watch the balancing video (www.beeworksgear.com/support)
2. Place the stabilizer on the stand on a sturdy level surface.
3. Ensure that the BW05 power is OFF.
4. Adjust lens zoom (if applicable) to an appropriate level.
5. Remove the lens cap.
6. Ensure that all cables and accessories you intend to use are attached.
7. First, adjust the camera so that it sits upright and level. Move the camera plate forward or
backward to find a neutral position. Then tighten the thumb screw. (Step 7 label)
8. Find the neutral roll position by moving the adjustment left or right. (Step 8 label).
9. Point the lens 90 degrees up. Note whether it holds this position, drops forward (toward the
lens), or drops backward. Your goal is to have it hold position. If it falls forward, raise the
camera platform by adjusting the thumb screws (Step 9 label) on either side. If it falls
backward, lower the camera platform. Check that the left and right adjustment points are set
to the same value.
10. Point the lens 90 degrees down and verify that it holds position. The behavior should be the
same as the 90-degree up position.
Page of 718
Up/Down
Left/Right
Forward/Back
Panning
7
8
9
12
12
12
9
9
8
7

11. After adjusting the up/down balance, you may need to readjust the forward/back balance
from your initial balance point.
12. When the camera is able to rest in any position and has symmetrical behavior, check the
balance of the entire system. Set the camera in the neutral position and then tilt the
stabilizer sideways by 45 degrees. The stabilizer should not “fall” to one side around the
panning axis when tilted. If it does, adjust the telescoping section behind the pan motor at
the top of the stabilizer (Step 12 label above). For lighter camera/lens combinations, this
adjustment will remain all the way in (the most compact position). For heavier camera / lens
combinations, it may need to be adjusted out.
An ideally balanced stabilizer should hold any camera position with the stabilizer
motors turned off. In other words, it should not “fall” in one direction over the
other direction. If you roll and tilt the camera, it should rest in the position that
you put it. If you return the camera to center, it should rest in that position, as
well. Often, it is not possible to achieve a perfect balance because of the geometry
of the camera. In this case, strive for symmetry. For example, if you roll the
camera to the left, it should behave the same way as when you roll the camera to
the right.
TIPS FOR BALANCING THE CAMERA
*Once you balance a camera the first time, the common adjustments are the front-to-back
camera plate adjustment and the camera platform height adjustment. These adjustments
need to be made after each assembly out of the case or when changing lenses. The other
adjustments rarely need to change unless you are changing cameras.
*Double check that all thumbscrews are tight before operating. If an adjustment slips, it will
affect the balance and performance of the system.
*Adding or removing the lens cap, or changing cables will affect balance. If you make changes
to the camera setup, make the necessary adjustments to the balance.
*Take care to ensure that any installed cables do not impinge the movement of the stabilizer.
*Good balance is critical to good stabilizer and Kinetic Remote performance. Check the
balance each time you use the stabilizer. With practice, common balance adjustments should
take only a couple minutes.
*Heavier cameras require more precise balance than lighter cameras for good stabilizer
performance. If you have a large camera / lens combination, you should allow more time to
balance the system more precisely.
Page of 818

Step 3: Calibrate the Sensors
When you turn on the stabilizer, it should balance the camera in an upright position with the
horizon level. To ensure a proper alignment, the sensors in the system need to be calibrated
occasionally, particularly after changes in temperature or if you travel with the system. It is good
practice to calibrate the sensors before each day of shooting, as the process takes only 10
seconds.
1. Set the stabilizer on the stand on a sturdy level surface.
2. Attach and balance your camera.
3. Turn on the stabilizer and wait for the start-up sequence to complete (three green lights
flash).
4. Hold the stabilizer mode button down for two seconds.
5. The lights will blink red, and the motors will turn off to indicate “calibration” mode.
6. Gently tap the stabilizer button once to start the calibration sequence.
7. The stabilizer will wait one second for the button shake to dissipate and will then calibrate
the sensors. It takes about 10 seconds. Do not bump or move the stabilizer during
calibration.
8. When the calibration is complete, the lights will flash green, the motors will turn on, and the
stabilizer will return to normal operation.
TIPS FOR SENSOR CALIBRATION
*Calibration is not necessary every time you turn on the stabilizer. However, variables like air
pressure changes, temperature changes, and long periods of time can cause the calibration to
drift slightly. For best performance, we recommend calibrating each time you set up the
stabilizer at a new shooting location.
*It is possible to temporarily change the horizon point by turning follow mode off (three red
lights) when the camera is not in a neutral position. You can use this to your advantage, for
example, if you want to mount the camera when it is tilting up. To reset the neutral position in
this case, simply turn off the stabilizer and then turn it on again.
Page of 918
Step 4: Select Mode of Operation
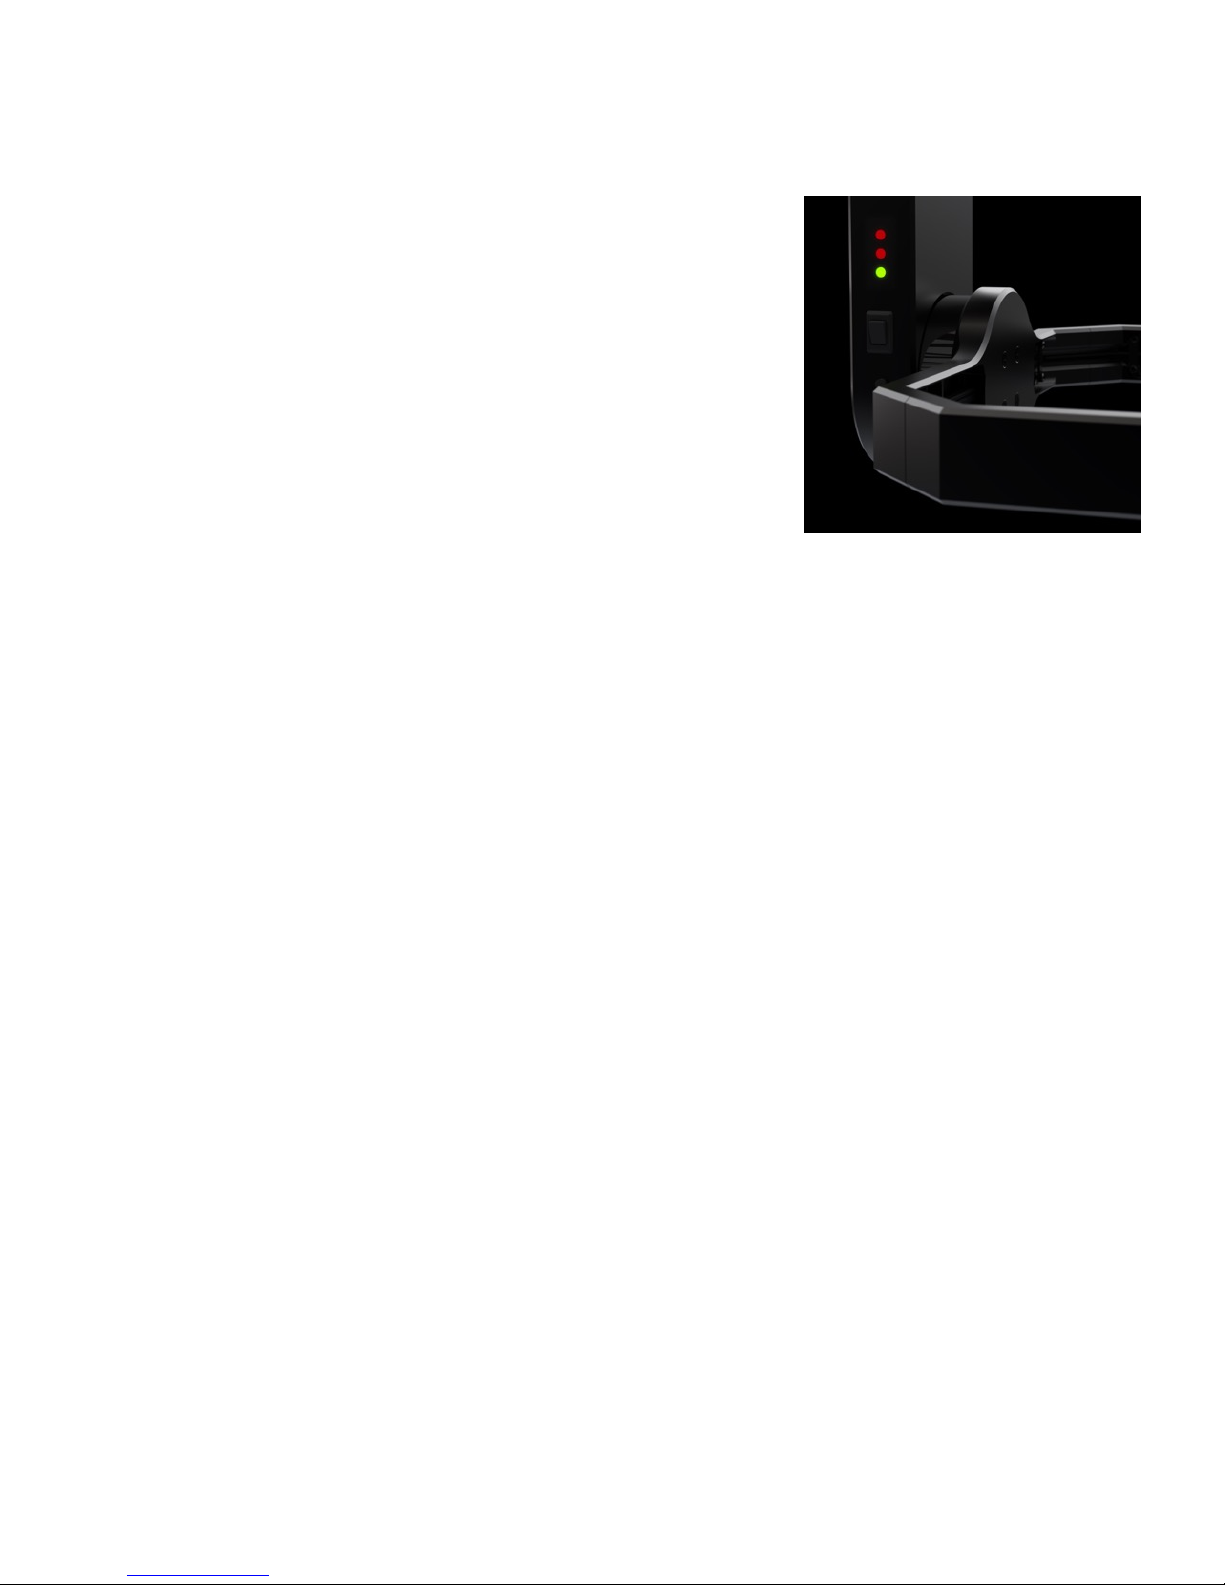
The BeeWorks 5 Stabilizer has four main modes of operations in
addition to the configuration mode described above. Change
modes by pressing the mode button on the side of the BW05.
The four primary modes of normal operation are:
•Pan Follow (One Green Light) - The stabilizer will follow
movements of the handlebar in panning.
•Pan/Tilt Follow (Two Green Lights) - The stabilizer will follow
movements in panning and tilting.
•Pan/Tilt/Roll Follow (Three Green Lights) - The stabilizer will
follow movements in all three axes.
•Follow Off (Three Dim Red Lights) - The stabilizer will hold the camera in a fixed position
regardless of handlebar movement. "
Page of 10 18
Inhaltsverzeichnis


