Brildor DTF Bedienungsanleitung

DTF
User manual
Brildor
everything for personalisation
INTRODUCTION
Pros
Cons
WARNING
DTF is a printing technique that employs special inks, similar to those used in Direct-to-Garment
printing. But unlike DTG printing, the ink will be printed on a lm, and special powder will be
used as an adhesive.
- The starting investment is much lower than that of DTG printing.
- Versatile application on both textile and rigid surfaces.
- Elasticity of the material once printed
- High durability and washing resistance
- On-demand printing without stock
- Regular maintenance is required to prevent clogging of the printhead.
- Slow printing system (A3 15-20min).
- Low garment breathability.
2
This device wasn't originally designed for this technique. Therefore, the
printer loses its warranty as soon as the inks are loaded.
Due to the sediment of the white ink, you will have to maintain the
system periodically, and it may shorten printhead durability drastically.
Please follow the maintenance tips.
www.brildor.com/en/

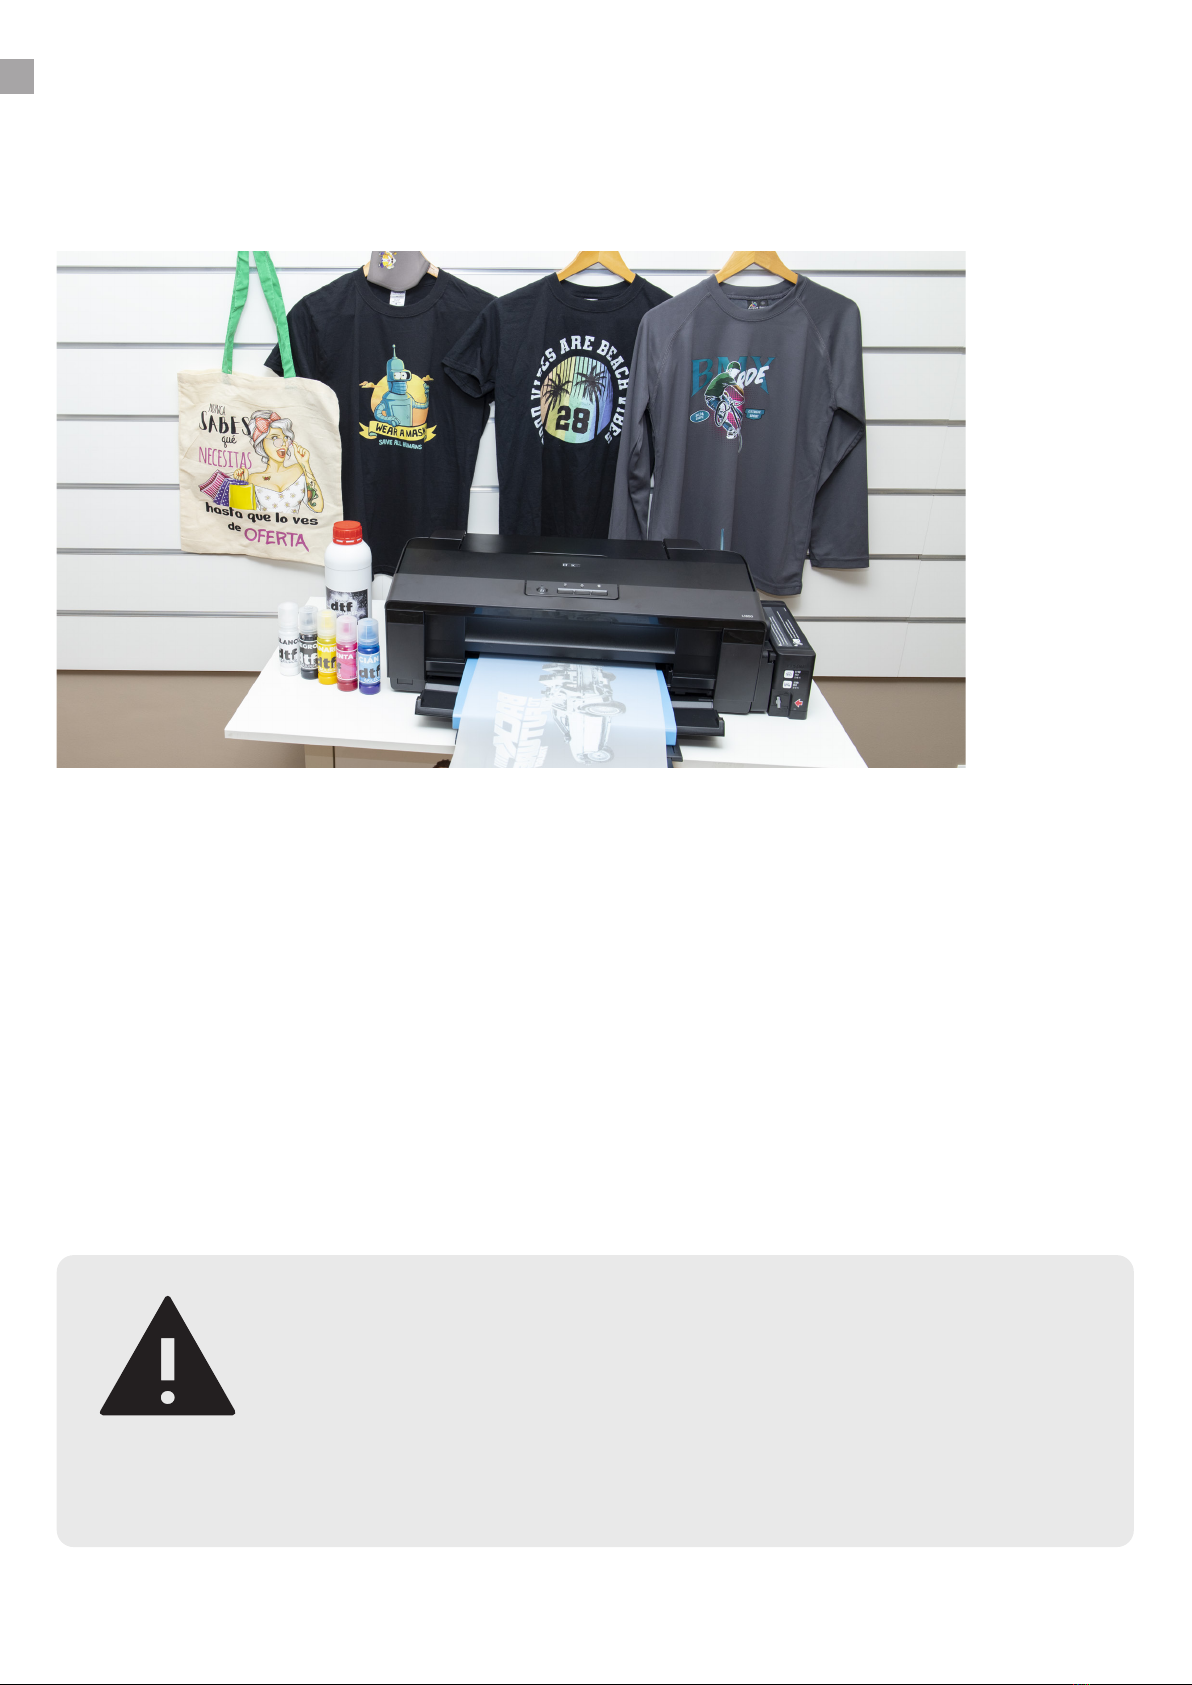
EQUIPMENT NECESSARY
Find here explained the equipment required to apply this technique. Our pack includes
everything apart from the press.
1 Use and installation of Acrorip is explained below.
2 Find a wide range of heat presses on our online store: http://bit.ly/3cBvKrC
PRINTER
PET FILM
DTF INKS
RIP SOFTWARE1
DTF POWDER
HEAT PRESS
A regular printer, modied in
order to print with DTF inks
A support capable of carrying
the wet and apply the powder
afterwards
Similar to high-elasticity textile
inks but more diluted
The software necessary for
accurate prints
An adhesive powder required
to stick the inks to the fabric
after a curing process
A heat press is necessary to
cure the powder and to apply
the transfer
3
www.brildor.com/en/

INDEX
1.
2.
3.
4.
Creating a Spot Color ................................................................................................ 8
Quick Start Guide ................................................................................................... 5
Parts ........................................................................................................................... 6
Layout tab ................................................................................................................ 11
Colour Management tab ........................................................................................ 12
Printing...................................................................................................................... 15
Installation .................................................................................................................. 7
Printer tab .................................................................................................................12
White Ink Control tab ............................................................................................. 13
Printing and pressing .............................................................................................. 16
Quick Start Guide
Creating a Spot Color
Acrorip Installation & Use
Using Acrorip
Printing and pressing
4
0.
www.brildor.com/en/

QUICK START GUIDE
5
Ink charging
After unpacking the printer, shake and charge the DTF
inks in the tanks. Make sure to load each ink into the
right tank. Use a funnel if necessary to prevent spills.
1.
Driver installation
You must install the driver. We will provide you with the
le, but you can download it from the manufacturer.
Follow the steps on your screen for a successful
installation.
3.
PRINTING
Having prepared the images, you can now print on the
lm, apply the powder, cure, and nally transfer them
onto the garment.
5.
First charge
Once the inks are loaded, connect the printer to an
electrical outlet and press the ink button for a few
seconds to start charging the system. This will take a
while Do not turn o the printer during this process.
2.
RIP installation
You need RIP software for the printer to read and print
the image properly. See the detailed installation process
below.
4.
www.brildor.com/en/
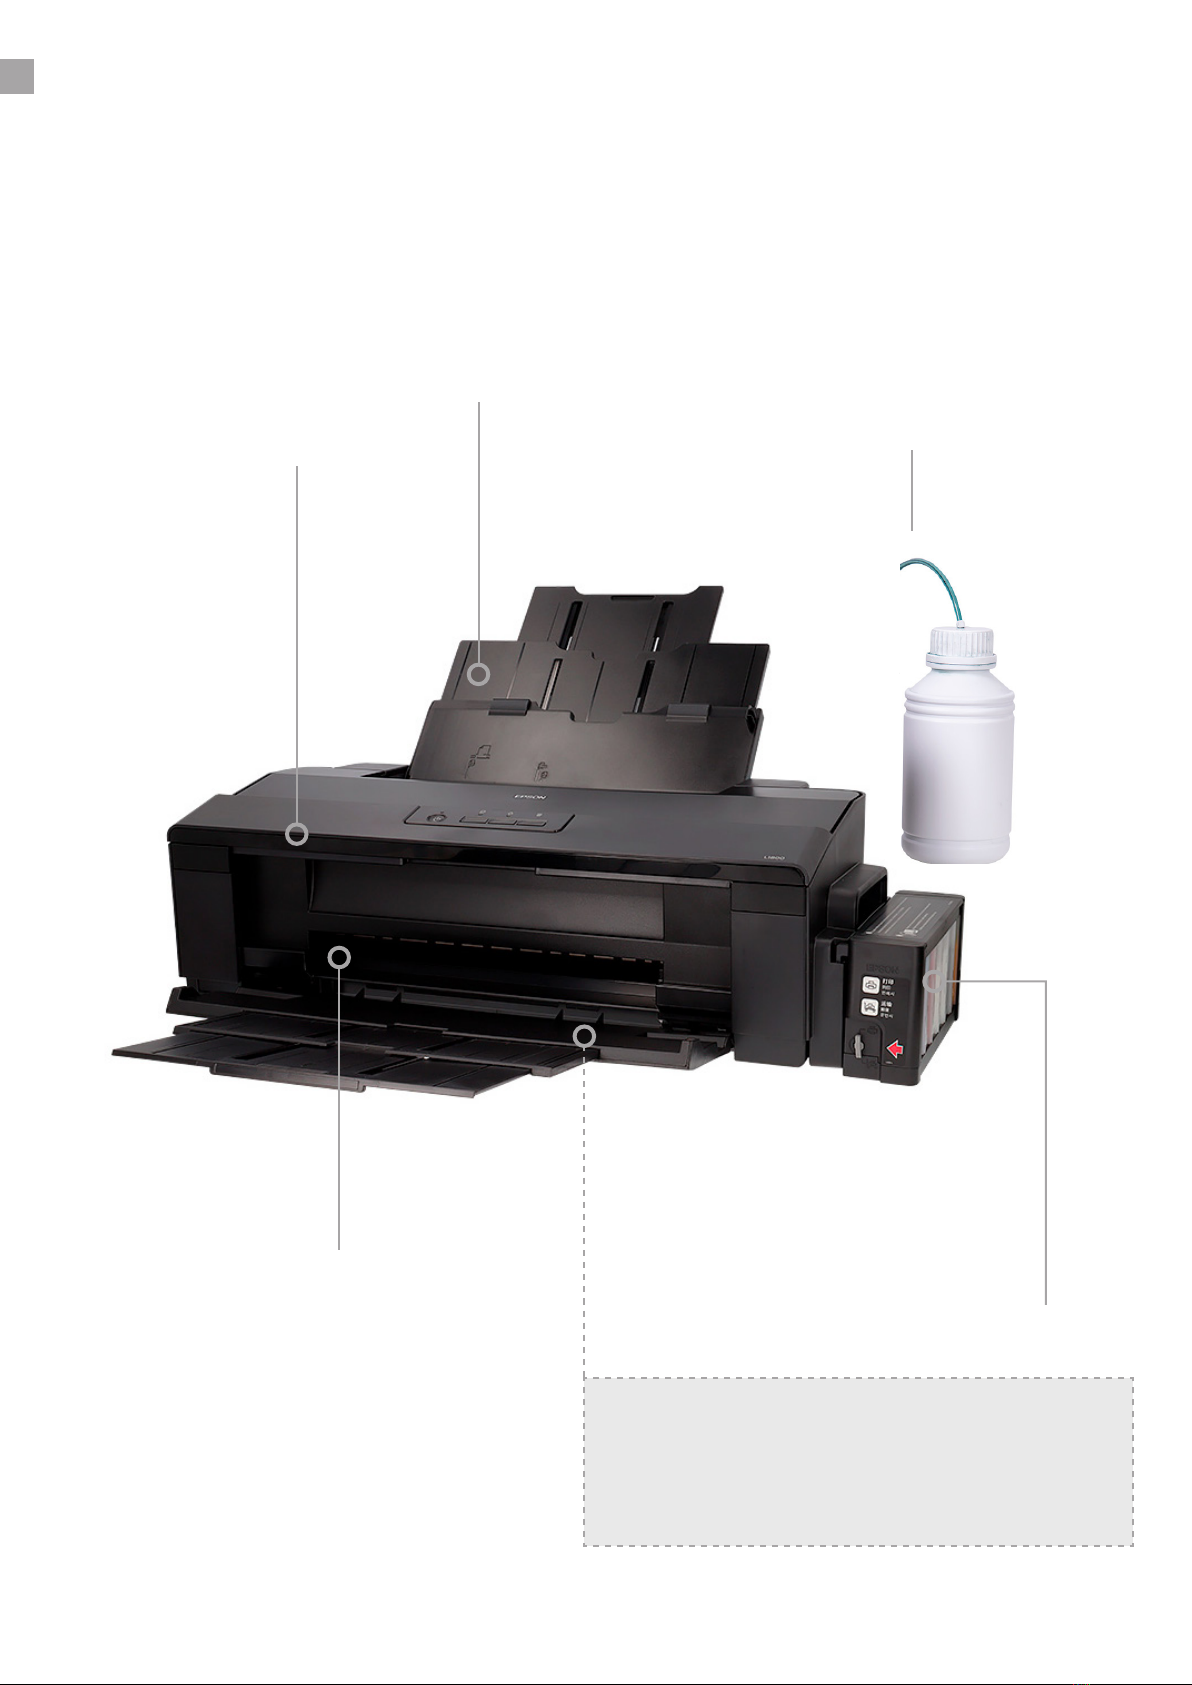
The paper must come out completely
at, so the output tray has been re-
placed to ensure that it does.
PARTS
6
The printer has been modied for DTF printing and prepared to work without leaving any
marks. That is why we’ve removed the rollers, added a waste ink collector unit for cleaning,
removed the lid opening sensor, labelled the white tanks, and added a tray for the paper to exit
horizontally.
Modied lid opening
Removed rollers
Paper input
tray
Ink tanks
Waste ink collector unit
(added)
www.brildor.com/en/

ACRORIP INSTALLATION & USE
7
INSTALLATION
Turn o your antivirus. Unzip the AcroV9 folder in C: (your PC’s primary hard drive)
You must add the les Acro90.exe and Acro90W.exe as an exception to your antivirus, or you
won’t be able to use the RIP.
Insert the Dongle (USB) in your PC to make it work.
1.
Right-click on Acro90W.exe and click on Properties. Go to the Compatibility tab and activate Run this
program in compatibility mode for Windows 98/ Windows Me. Select Run as an administrator.
Do the same with Acro90.exe.
www.brildor.com/en/

Go to the Channel tab, click on
the three stripes and choose
New channel
8
CREATING A SPOT COLOR
2.
Although you can import any image into Acrorip, we recommend using Spot color for the lower
layer of white ink. To create it, you will need to open the image in Photoshop with no background.
Select the image by right-
clicking on the thumbnail with
CTRL pressed.
www.brildor.com/en/

Click on the eye icon to make
the layer visible
Go to Edit/Fill and select
Contents: Black and 100%
opacity
Finally, save it as TIFF to load it
in AcroRIP.
9
The new channel must be of
the selected areas. You can
select the colour you want with
an opacity of 50% to be able to
see underneath.
www.brildor.com/en/

USING ACROPRIP
3.
Here we will explain the use of Acrorip. However, the parameters are approximate, and it is
necessary that you make your own tests to achieve optimal results.
10
Open the image, and it will
appear in your workspace
www.brildor.com/en/
Inhaltsverzeichnis
Andere Brildor Drucker Handbücher


