
Byron DIC-23312 Bedienungsanleitung

DIC-23312

2

Byron Table of Contents
3
Table of Contents
1 Safety ..........................................................................................................................................................................................................6
1.1 Installation Safety...............................................................................................................................................................................6
1.2 Operation Safety ................................................................................................................................................................................6
1.3 Battery Safety ....................................................................................................................................................................................6
2 Parts description .......................................................................................................................................................................................7
2.1 What's in the box................................................................................................................................................................................7
2.2 Indoor unit (Monitor)...........................................................................................................................................................................7
2.3 Outdoor unit (Doorbell) ......................................................................................................................................................................7
3 Installation..................................................................................................................................................................................................7
3.1 Electrical installation ..........................................................................................................................................................................7
3.2 Connecting the indoor unit (Monitor) to the outdoor unit (doorbell) ...................................................................................................7
3.3 Connecting the AC adapter................................................................................................................................................................8
3.4 Mount the indoor unit (monitor)..........................................................................................................................................................8
3.5 Mount the outdoor unit (doorbell).......................................................................................................................................................8
3.6 Connecting a gate opener (not included)...........................................................................................................................................8
3.7 Connecting a door lock (not included) ...............................................................................................................................................9
3.8 Insert SD card ....................................................................................................................................................................................9
3.9 Replace call button ............................................................................................................................................................................9

Table of Contents Byron
4
4 Preparation before use..............................................................................................................................................................................9
5 BYhome App ..............................................................................................................................................................................................9
6 Using the app ...........................................................................................................................................................................................10
6.1 App setting .......................................................................................................................................................................................10
6.2 Operation .........................................................................................................................................................................................11
6.3 Intercom ...........................................................................................................................................................................................11
6.4 Album...............................................................................................................................................................................................11
6.5 Notifications .....................................................................................................................................................................................11
6.6 Device settings.................................................................................................................................................................................11
7 Basic functions indoor unit (monitor) ...................................................................................................................................................11
7.1 Unlocking your door or gate with a RFID tag ...................................................................................................................................11
7.2 Answering a call...............................................................................................................................................................................12
7.3 Registering RFID tags......................................................................................................................................................................12
7.3.1 Registering an administrator tag ....................................................................................................................................... 12
7.3.2 Registering a user tag....................................................................................................................................................... 12
7.4 Cancelling a user tag .......................................................................................................................................................................12
7.5 Cancelling all user tags....................................................................................................................................................................13
8 Home screen and menus ........................................................................................................................................................................13
8.1 Live view ..........................................................................................................................................................................................13

Byron Table of Contents
5
8.2 Internal call.......................................................................................................................................................................................13
8.3 Photo / video recordings ..................................................................................................................................................................13
8.4 Settings ............................................................................................................................................................................................14
8.4.1 Photos / videos ................................................................................................................................................................. 14
8.4.2 Image settings................................................................................................................................................................... 14
8.4.3 Volume.............................................................................................................................................................................. 14
8.4.4 Master and slave settings ................................................................................................................................................. 14
8.4.5 Date/Time/Language ........................................................................................................................................................ 14
8.4.6 System information ........................................................................................................................................................... 14
8.4.7 Reset................................................................................................................................................................................. 15
9 Firmware update ......................................................................................................................................................................................15
10 Technical Data .........................................................................................................................................................................................15
11 Cleaning and maintenance .....................................................................................................................................................................15
12 Declaration of Conformity.......................................................................................................................................................................15
13 Environment.............................................................................................................................................................................................16

Instruction manual
6
1 Safety
• Please read these instructions carefully before installing and
using the product.
• Do not cut the power supply cable to extend it; the device
(transformer) will not work with a longer cable. Do not plug in the
device until all the wiring has been finished.
• Before starting the installation, power off the current.
• Before using the product, make sure that the battery cover is
covered. Do not open the cover during use, unless the battery is
replaced. Only after replacing the battery can the product be
used.
• Only use attachments/accessories specified or provided by the
manufacturer (such as the exclusive supply adapters, batteries,
etc.).
• Outdoor camera shall not be exposed to dripping or splashing,
and direct sunshine.
1.1 INSTALLATION SAFETY
• Keep children and bystanders away while installing the products.
Distractions can cause you to lose control.
• Do not overreach when installing this product. Keep proper
footing and balance at all times. This enables better control in
unexpected situations.
• This product is not a toy. Mount it out of reach of children.
1.2 OPERATION SAFETY
• Do not operate electrically powered products in explosive
atmospheres, such as in the presence of flammable liquids ,
gases, or dust. Electrically powered products create sparks which
may ignite the dust or fumes.
• The warnings, precautions, and instructions discussed in this
instruction manual cannot cover all possible conditions and
situations that may occur. It must be understood by the operator
that common sense and caution are factors which cannot be built
into this product, but must be supplied by the operator.
• Do not expose the Power Adapter of this product to rain or wet
conditions. Water entering the Power Adapter will increase the
risk of electric shock.
• Do not abuse the Power Cord. Never use the cord for unplugging
the plug from the outlet. Keep cord away from heat, oil, sharp
edges or moving parts. Damaged or entangled cords increase the
risk of electric shock.
• The adapter must match the outlet. Never modify the plug in any
way. Unmodified plugs and matching outlets will reduce risk of
electric shock.
1.3 BATTERY SAFETY
• CAUTION: RISK OF EXPLOSION IF BATTERY IS REPLACED
BY AN INCORRECT TYPE. DISPOSE OF USED BATTERIES
ACCORDING TO THE INSTRUCTIONS.
• Disposal of a battery into fire or a hot oven, or mechanically
crushing or cutting of a battery can result in an explosion.

Instruction manual
7
• Leaving a battery in an extremely high temperature surrounding
environment can result in an explosion or leakage of flammable
liquids or gas.
• A battery subjected to extremely low air pressure may result in an
explosion or the leakage of flammable liquid or gas.
2 Parts description
2.1 WHAT'S IN THE BOX
1. Indoor unit (monitor)
2. Outdoor unit (doorbell)
3. Mounting plate outdoor unit (doorbell)
4. Mounting plate indoor unit (monitor)
5. AC adapter
6. Cables
7. RFID tags
8. Additional call button for outdoor unit
9. Instruction manual
10. Screws and plugs
2.2 INDOOR UNIT (MONITOR)
1. Microphone
2. Speaker
3. Touchscreen
4. MicroSD card slot
2.3 OUTDOOR UNIT (DOORBELL)
1. Microphone
2. Camera
3. Speaker
4. RFID
5. Call button (replaceable, extra button included)
6. Lock release time switch
7. Doorlock / gate switch
8. Register button (On the back of the unit)
3 Installation
3.1 ELECTRICAL INSTALLATION
To connect the terminals, you will need the following tool:
üA small screw driver.
A. On the indoor unit (monitor): Loosen the terminal screws (see
sticker on the monitor for position).
B. Place the wires.
C. Fasten the terminal screws.
D. On the outdoor unit (doorbell): Loosen the terminal screws (see
sticker on the doorbell for position).
E. Insert the wires.
F. Fasten the terminal screws.
3.2 CONNECTING THE INDOOR UNIT
(MONITOR) TO THE OUTDOOR UNIT
(DOORBELL)
To connect the terminals, you will need the following tool:
üA small flat head screw driver.
EN

Instruction manual
8
A. On the monitor: Loosen the terminal screws. (See sticker on the
monitor for position.)
B. Insert the wires (See sticker on the monitor for position.)
C. Fasten the terminal screws.
D. On the outdoor unit (doorbell): Loosen the terminal screws. (See
sticker on the outdoor unit for position.)
E. Insert the wires. (See sticker on the outdoor unit for position.)
F. Fasten terminal screws.
3.3 CONNECTING THE AC ADAPTER
To connect the terminals, you will need the following tool:
üA small flat head screw driver.
A. On the monitor: Loosen the terminal screws. (See sticker on
monitor for position.)
B. Insert the wires of the AC adapter with the cable shoes. (See
markings on wires for ‘+’ or ‘- ‘.)
C. Fasten the terminal screws.
D. After wiring the outdoor unit: Plug in the AC adapter into a
compatible wall outlet.
3.4 MOUNT THE INDOOR UNIT (MONITOR)
To mount the monitor, you will need the following tools:
üA suitable screwdriver for the included screws.
üA drill and suitable drill bit for the included screw plugs.
A. Position the provided mounting plate where desired.
B. Mark the screw positions with a pen.
C. Drill the necessary holes.
D. Insert the plugs.
E. Pull the required cables through the mounting plate.
F. Fasten the mounting plate with the screws.
G. Attach the monitor to the mounting plate.
3.5 MOUNT THE OUTDOOR UNIT
(DOORBELL)
To mount the outdoor unit, you will need the following tools:
üA suitable screwdriver for the included screws.
üA drill and suitable drill bit for the included screw plugs.
A. Position the provided mounting plate where desired.
B. Mark the screw positions with a pen.
C. Drill the necessary holes.
D. Insert the plugs.
E. Use a knife or sharp object to puncture the cable gland.
F. Pull the required cables through the cable gland.
G. Fasten the mounting plate with the screws.
H. Attach the outdoor unit to the mounting plate.
I. Fasten the screw at the bottom.
3.6 CONNECTING A GATE OPENER (NOT
INCLUDED)
To connect the gate opener, you will need the following tool:
üA small flat head screw driver.
A. On the outdoor unit: Loosen the terminal screws. (see sticker on
the outdoor unit for position)
B. Insert the wires. (see sticker on the outdoor unit for position)
ðIt is important that the + and – wires are in the correct position.
A. Fasten the terminal screws.
B. On the gate opener: (See the manual provided with your gate
opener.)

Instruction manual
9
3.7 CONNECTING A DOOR LOCK (NOT
INCLUDED)
It is possible to connect a lock to the outdoor unit that can be opened,
using the monitor. Door locks are sold separately. Article no: DB5005
& DB5005L
To connect the door lock, you will need the following tool:
üA small flat head screw driver.
A. On the outdoor unit: Loosen the terminal screws. (see sticker on
the outdoor unit for position)
B. Insert the wires (any order)
C. Fasten the terminal screws.
D. On the lock: Loosen the two terminal screws. (Please check the
manual of your door lock for more details.)
E. Insert the wires (any order)
F. Fasten the terminal screws.
3.8 INSERT SD CARD
Make sure the device is not connected to the power adapter
when inserting the SD card.
üThe SD card is required for recording footage (including cloud
storage) as well as continuous firmware updates of the device.
Follow below procedure to insert the SD card:
A. On the side of the doorbell you can find the SD card slot. Insert
the SD card (max. 128GB).
3.9 REPLACE CALL BUTTON
An extra call button is added to the box. This button is marked with a
bell to avoid confusion on where to push.
The original call button (without marking) on the outdoor unit is
replaceable.
You can use the blank button for engraving your name.
4 Preparation before use
Connect the indoor unit (monitor) to Wi-Fi
1. Press the setting icon
2. Press the Wi-Fi icon
3. Select the Wi-Fi network you want to use
4. Input the Wi-Fi password and press the ‘Enter’ icon to confirm
5. Your device is now connected to Wi-Fi
5 BYhome App
App installation
A. Open the App Store (iOS) or Google Play Store (Android) on your
mobile device.
B. Search and install BYhome app.
C. The BYhome app icon appears on your phone.
ðWhen you open the app for the first time, you are asked to allow
notifications. Please do so, in order to have the app work
properly.
EN
Instruction manual
10
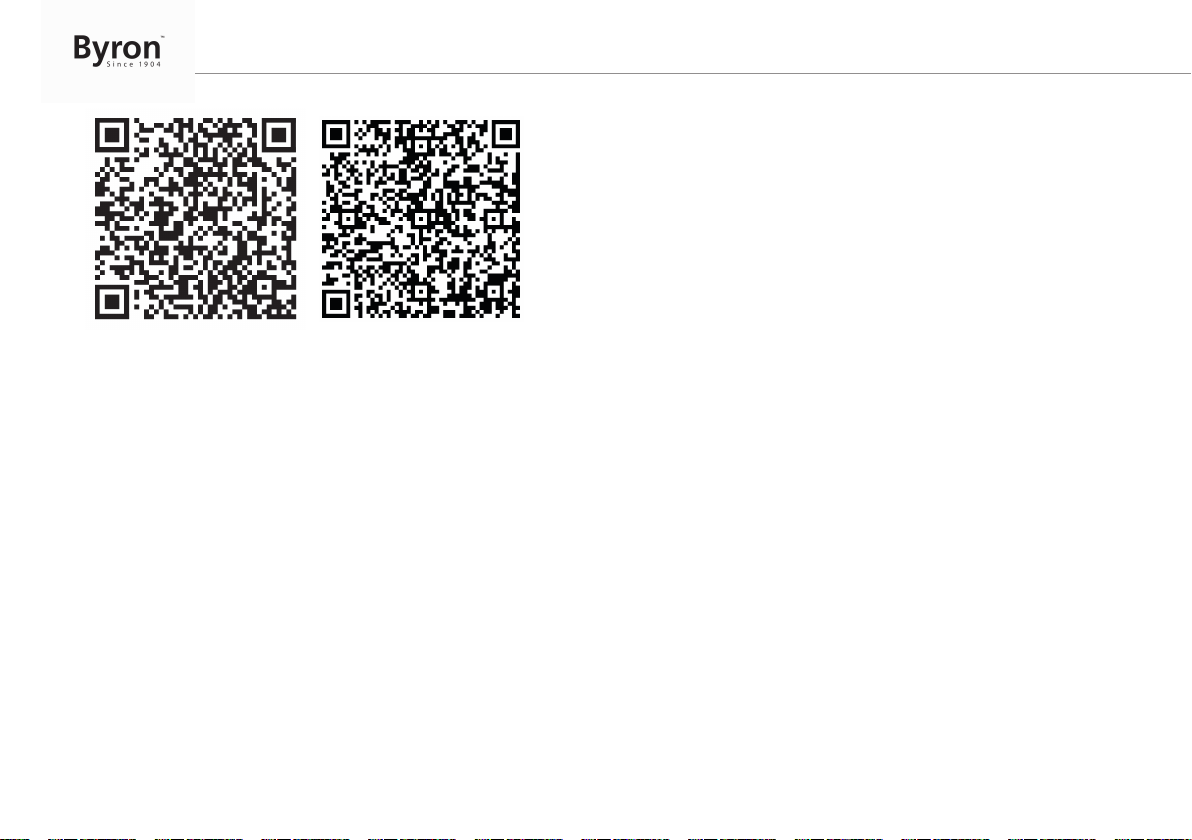
ByHome app for iOS ByHome app for Android
ByHome QR
Before you can add a devise to the app, you will need to log in first. If
you do not already have an account, you will have to create one:
A. Open the BYhome app on your smartphone.
B. Tap on “Register account”.
C. In the next menu, fill in your email address.
ðNote: Make sure there is no extra 'space' behind your email
address, this can be caused by using the automatic fill in
function from your smartphone.
D. Now fill in a password. The password should be 6 to 12
characters. It is case sensitive.
E. Tap on “Confirm”.
ðA verification mail will now be sent to your email address.
F. Open the email. If you can’t find the email, please check your
unwanted email (spam).
G. Click on the link in the email to verify your account.
ðYou can now log in with the account you created.
Add device
A. Open the app on your smartphone and click the “+” icon.
B. Click “WiFi Video Door phone”.
C. Click ‘Next’.
D. Click the found device.
E. Set the device name, then click ‘Next’.
F. Click the monitoring area.
G. Set a user name and password, then click save.
ðDevice is added successful.
6 Using the app
6.1 APP SETTING
Press the menu icon.
In this menu you can:
1. View user’s account:
- Fill in the user name, gender and mobile number (optional)
- Change password
- View service agreement and privacy terms
- Delete account.
2. View album of recorded photos and videos
3. Set a ringtone
4. Find app settings:
- Wi-Fi only for streaming
- Allow or disregard push notifications
- Do Not Disturb
- List of devices
5. Sign out
Andere Handbücher für DIC-23312
1
Inhaltsverzeichnis
Sprachen:
Andere Byron Hausautomation Handbücher


