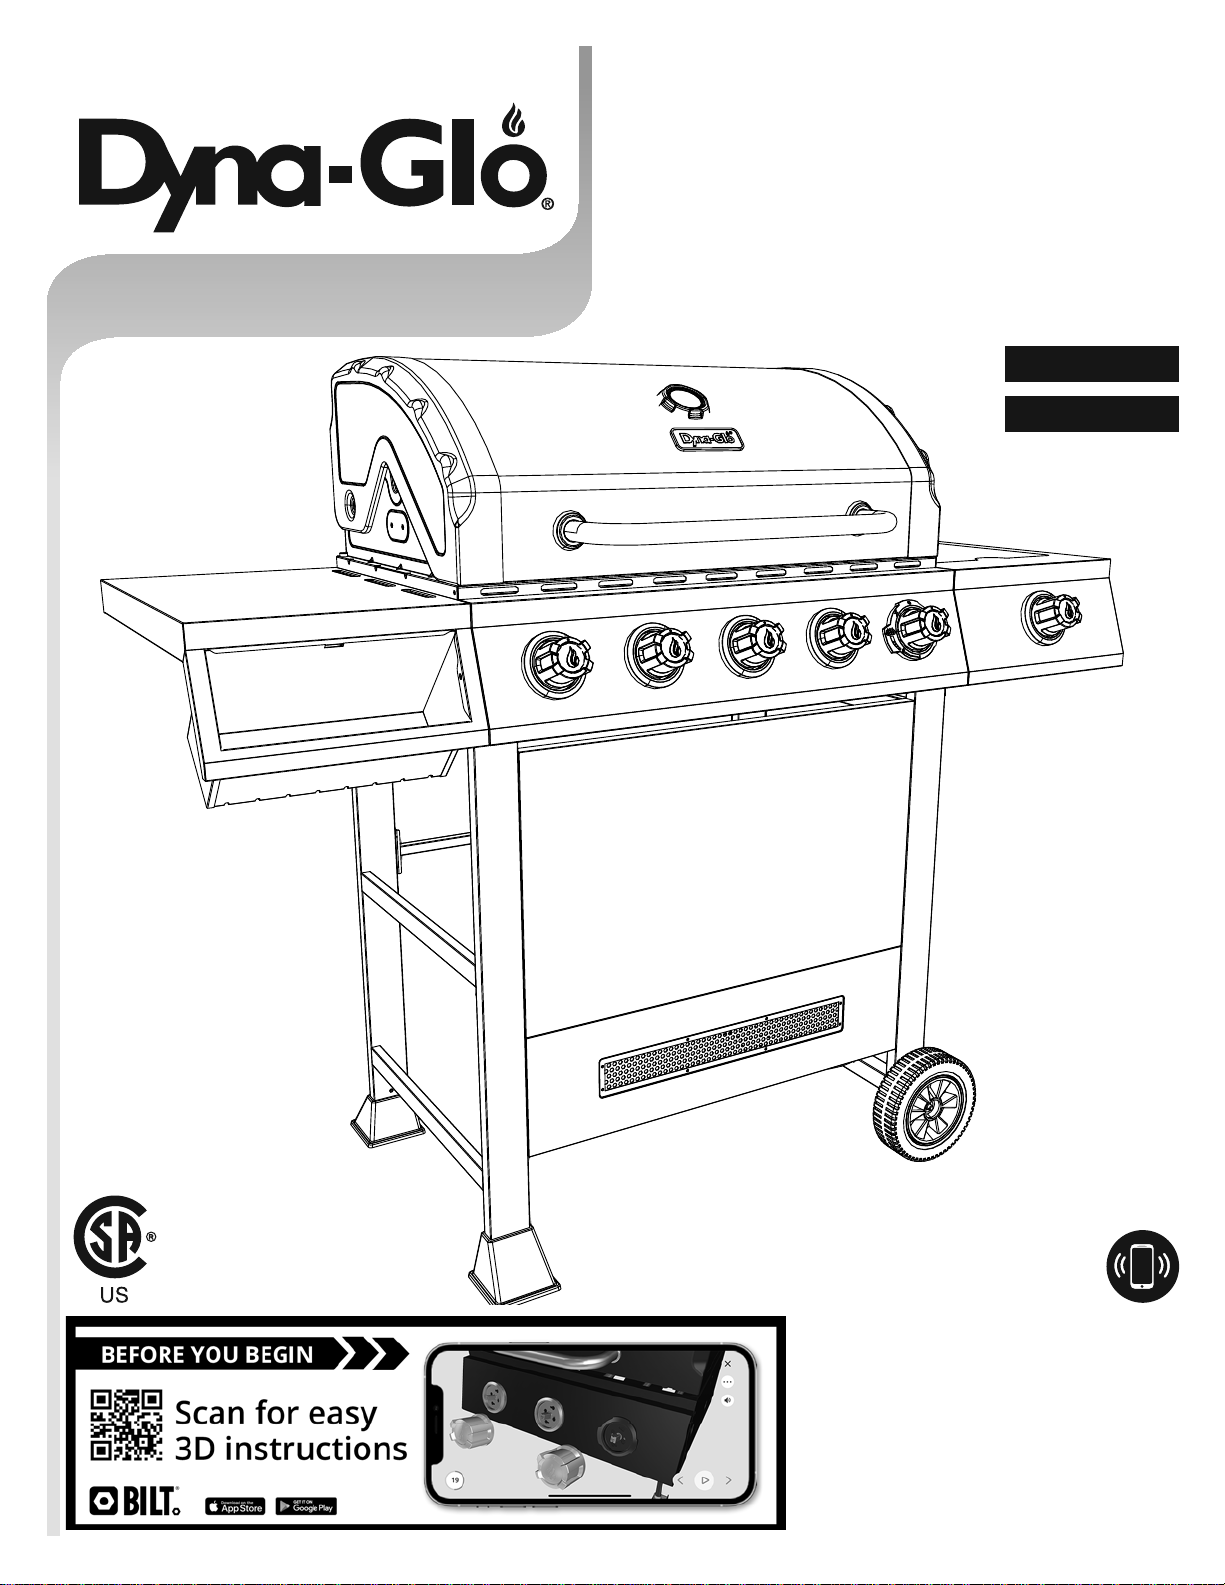
Dyna-Glo DGH474CRN Bedienungsanleitung

Français p.
Español p.
112721
5-BURNER NATURAL GAS
GRILL WITH SEARPLUS™
BURNER AND SIDE BURNER
Model #DGH474CRN/DGH474CRN-D
Questions, problems, missing parts?
Before returning to your retailer,
call our customer service
department at 1-877-447-4768,
8:00 a.m. – 4:30 p.m., CST,
Monday – Friday or e-mail us at
Français p. 29
Español p. 57

2
Table Of Contents
Assembler/Installer: This manual contains important information necessary for the proper
assembly and safe use of this appliance. Read and follow all warnings and instructions before
assembling and using this appliance. Leave these instructions with the consumer.
Consumer/User: Follow all warnings and instructions when using this appliance.
Retain these instructions for future reference.
If you smell gas:
1. Shut off gas to the appliance.
2. Extinguish any open flame.
3. Open lid.
4. If odor continues, keep away from
the appliance and immediately call your
local fire department.
1. Do not store or use gasoline or other
flammable liquids or vapors in the
vicinity of this or any other appliance.
2. An LP (liquid propane) cylinder not
connected for use shall not be stored
in the vicinity of this or any other
appliance.
3. This grill is for outdoor use only and
shall not be used in a building, garage,
under overhangs or any other enclosed
area.
4. Do not leave a lit grill unattended.
Keep children and pets away from the
grill at all times.
DANGER WARNING
Safety Information...............................................................................................................................3
Package Contents...............................................................................................................................5
Hardware Contents.............................................................................................................................6
Preparation...........................................................................................................................................6
Assembly Instructions........................................................................................................................7
Operation Instructions......................................................................................................................16
Care and Maintenance......................................................................................................................20
Troubleshooting ................................................................................................................................23
Limited Warranty ...............................................................................................................................24
Replacement Parts List ....................................................................................................................25

3
Please read and understand this entire manual before attempting to assemble, operate or install the
product. If you have any questions regarding the product, please call customer service at: 1-877-447-
4768, 8:00 a.m. – 4:30 p.m., CST, Monday – Friday.
DANGER
CAUTION
Safety Information
t%POPUVTFJOBOFYQMPTJWFBUNPTQIFSF,FFQHSJMMBSFBDMFBSBOEGSFFGSPNDPNCVTUJCMF
materials, gasoline and other ammable vapors and liquids.
WARNING: THIS PRODUCT AND THE FUELS USED TO OPERATE
THIS PRODUCT (NATURAL GAS), AND THE PRODUCTS
OF COMBUSTION OF SUCH FUELS, CAN EXPOSE YOU TO
CHEMICALS INCLUDING BENZENE, WHICH IS KNOWN TO THE
STATE OF CALIFORNIA TO CAUSE CANCER AND REPRODUCTIVE
HARM.
For more information go to: www.P65Warnings.ca.gov.
t Never use charcoal or lighter uid with the grill.
t Do not use gasoline, kerosene or alcohol for lighting.
t This grill is not intended to be used in or installed on recreational vehicles and/or boats.
t Never attempt to operate this grill using propane.
t Always employ a qualied service agency to install all necessary natural gas supply plumbing,
manual shutoff valve, and quick-connect ttings.
t Always open grill lid slowly and carefully as heat and steam trapped within the grill can burn
you severely.

4
t%POPUQMBDFUIFHSJMMVOEFSPWFSIFBE
combustible construction or awnings.
Minimum clearance from sides and back
of unit to combustible construction, 36
inches (914.4mm) from sides and back.
NOTE: The installation must conform with
local codes or, in the absence of local
codes, with either the National Fuel Gas
Code, ANSI Z223.1/NFPA 54, Natural
Gas and Propane Installation Code, CSA
B149.1, or Propane Storage and Handling
Code, B149.2.
t Do not store or use gasoline or other ammable liquids or vapors in the vicinity of this or any
other appliance.
t An LP cylinder shall not be stored in the vicinity of this or any other appliance.
t This grill is for use with natural gas only.
t Never attempt to attach this grill to the self-contained propane system of a boat, camper
trailer, motor home or house.
t Do not attempt to move the grill while it is lit or when it is hot. The casters should be locked
when not moving the grill.
t Do not use the grill unless it is completely assembled and all parts are securely fastened and
tightened.
t ,FFQBMMDPNCVTUJCMFJUFNTBOETVSGBDFTBUMFBTUJODIFTDNBXBZGSPNUIFHSJMMBUBMMUJNFT
t Do not touch metal parts of grill until it has completely cooled (about 45 minutes) to avoid
burns, unless you are wearing protective gear (pot holders, gloves, BBQ mittens, etc.).
t Do not alter this grill in any manner.
t Clean and inspect the hose before each use. If there is evidence of abrasion, wear, cuts, or
leaks, the hose must be replaced prior to operating the appliance. The replacement hose
assembly will be that which is specied by the manufacturer.
t Move gas hoses as far away as possible from hot surfaces and dripping hot grease.
t ,FFQUIFHSJMMTWBMWFDPNQBSUNFOUCVSOFSTBOEDJSDVMBUJOHBJSQBTTBHFTDMFBO*OTQFDUUIFHSJMM
before each use. Do not obstruct the ow of gas or ventilation air.
t 5IFVTFPGBMDPIPMQSFTDSJQUJPOPSOPOQSFTDSJQUJPOESVHTNBZJNQBJSUIFPQFSBUPSTBCJMJUZUP
properly assemble or safely operate the grill.
t Do not leave a lit grill unattended. Keep children and pets away from the grill at all times.
t Do not place this grill on any type of tabletop surface. The grill should be placed on a at and
level surface.
t Do not use the grill in high winds.
36in
914.4mm
36in
914.4mm
WARNING
Safety Information
CAUTION
36in
914.4mm
36in
914.4mm

5
Package Contents
PART DESCRIPTION QTY.
A Hood Handle 1
B Temperature Gauge 1
C Temperature Gauge Bezel 1
D Grill Body Assembly 1
E$POUSPM,OPC 5
F Grease Pan 1
G Grease Cup 1
H Warming Rack 1
I Cooking Grate For Main Burner 2
J Heat Tent For Main Burner 4
,Left Side Table 1
L Cooking Grate For Sear Burner 1
M Heat Tent For Sear Burner 1
N Right Side Burner Body 1
O Left Leg Assembly 1
PART DESCRIPTION QTY.
P Leg End Cap 2
Q4NPLFS#PY'SPOU4VQQPSU 1
R4NPLFS#PY3FBS4VQQPSU 1
S Cart Rear Support 1
T Cart Front Panel - Upper 1
U4NPLFS#PY"TTFNCMZ 1
V Cart Front Panel - Lower 1
W"YMF 1
X Wheel 2
Y Right Leg Assembly 1
Z Condiment Tray 1
A1 $POUSPM,OPCGPS4FBS#VSOFS 1
B1 Side Burner Grate 1
C1 Side Burner 1
D1 4JEF#VSOFS$POUSPM,OPC#F[FM 1
E1 Quick disconnect coupling 1
J
IC
B
D
E
K
L
MN
Q
G
H
O
R
Z
F
P
T
S
U
A1
X
Y
W
V
D1
C1
B1
E
E1
A

6
THIS UNIT IS HEAVY. Two people required for safe assembly.
Two people required for safe assembly. Some parts may contain sharp edges.
Wear protective gloves if necessary. Read and follow all safety statements,
warnings, assembly instructions and use and care instructions before attempting
to assemble and use.
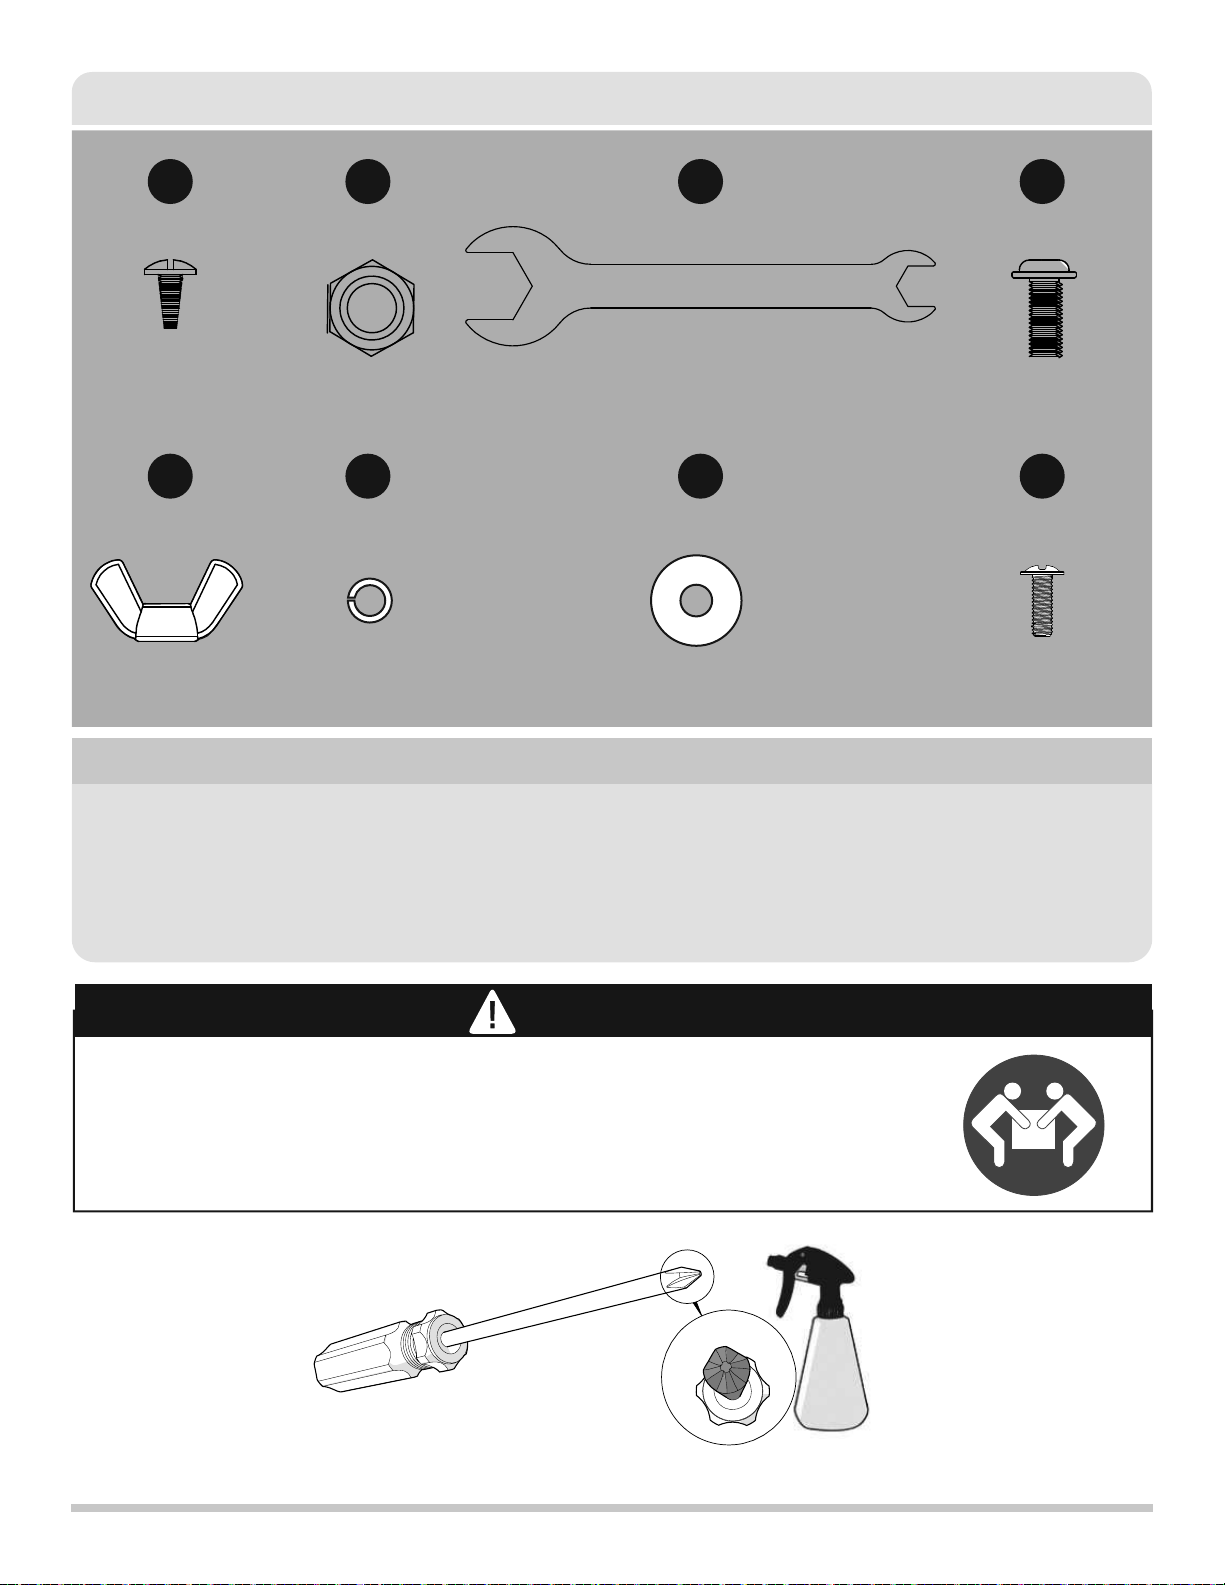
Hardware Contents
Preparation
CC
AA BB DD
.Y
Screw
M10 Nut
2X 26X
2X
2X
2X
2X
M6 Wing
Nut M6 Plain
Washer
FF GG
M6 Spring
Washer
EE
M10
Wrench
Before beginning assembly of product, make sure all parts are present. Compare parts with package
contents list on previous page and hardware contents above. If any part is missing or damaged, do not
attempt to assemble the product. Contact customer service for replacement parts.
Estimated Assembly Time: 50 minutes with 2 people.
Tools Required for Assembly and Leak Testing (not included): Phillips screwdriver, Spray bottle
CAUTION
.Y
Screw
10X
HH
2X

7
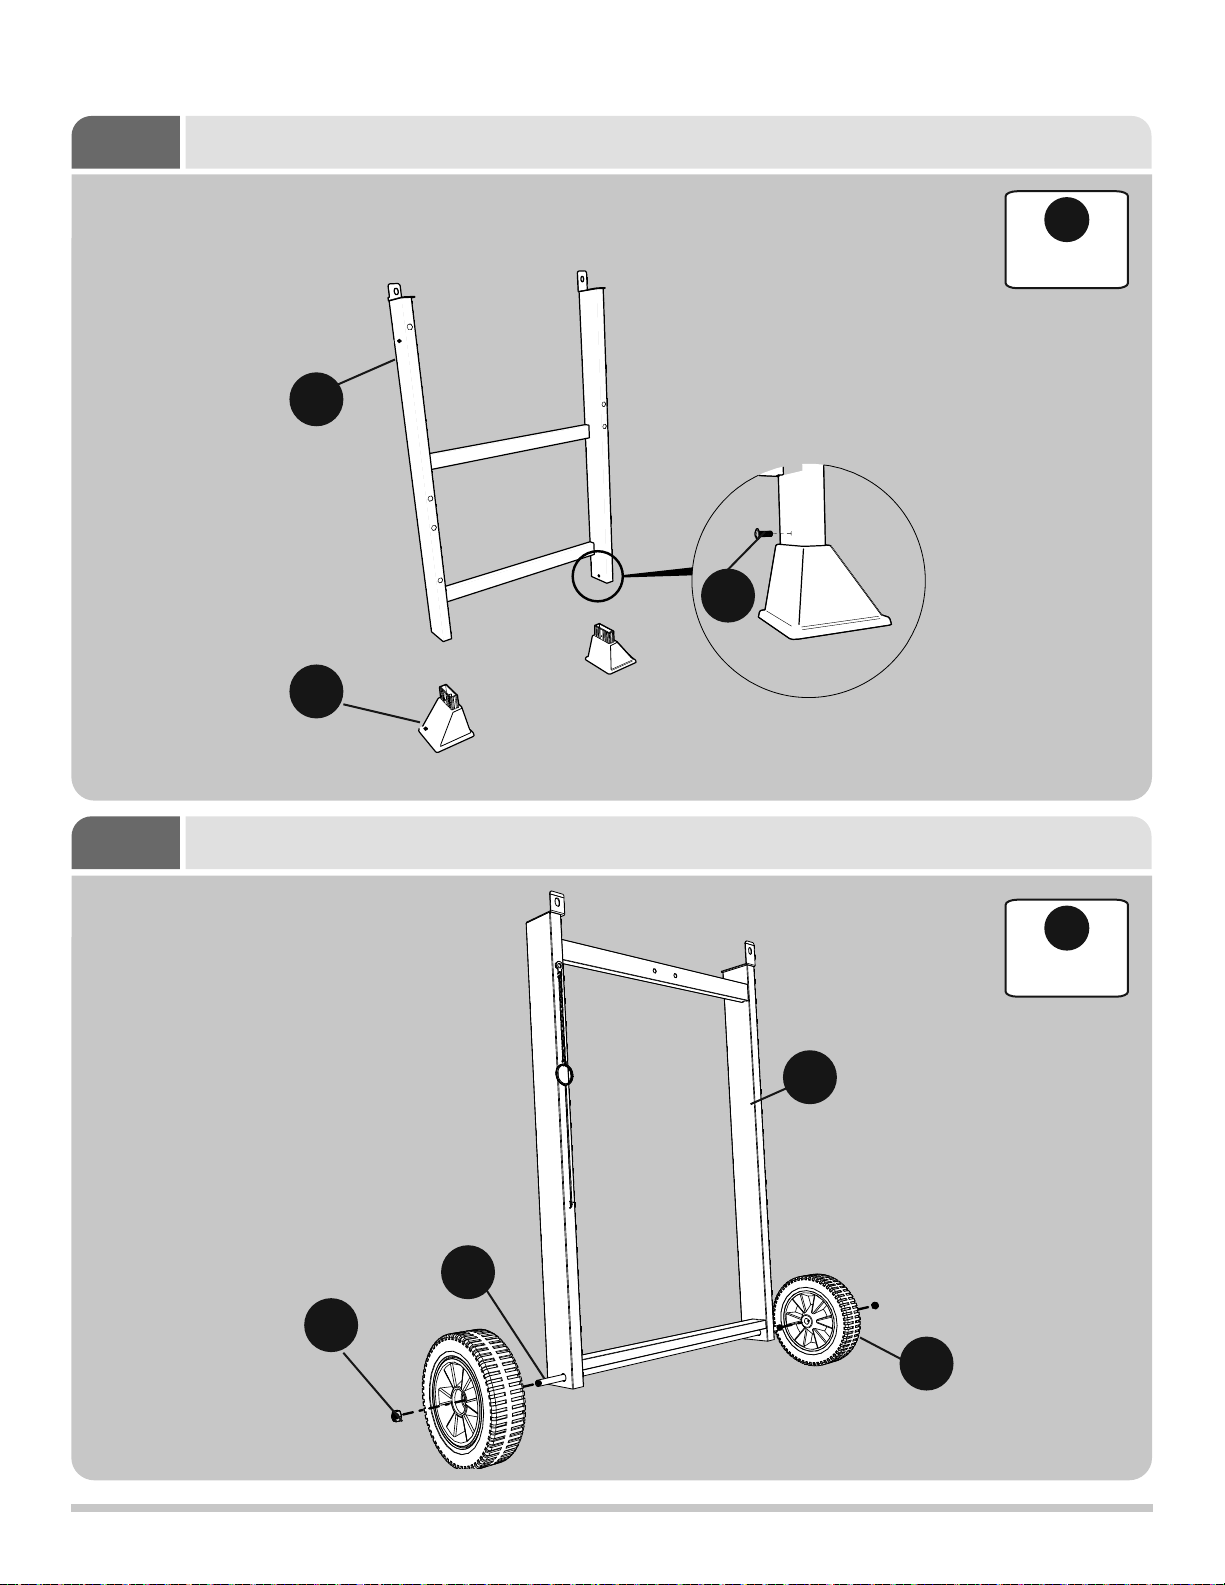
1
2
Assembly – Left Leg
Assembly – Right Leg
Assembly Instructions
AA
2X
BB
2X
O
P
AA
W
BB
Y
X

8
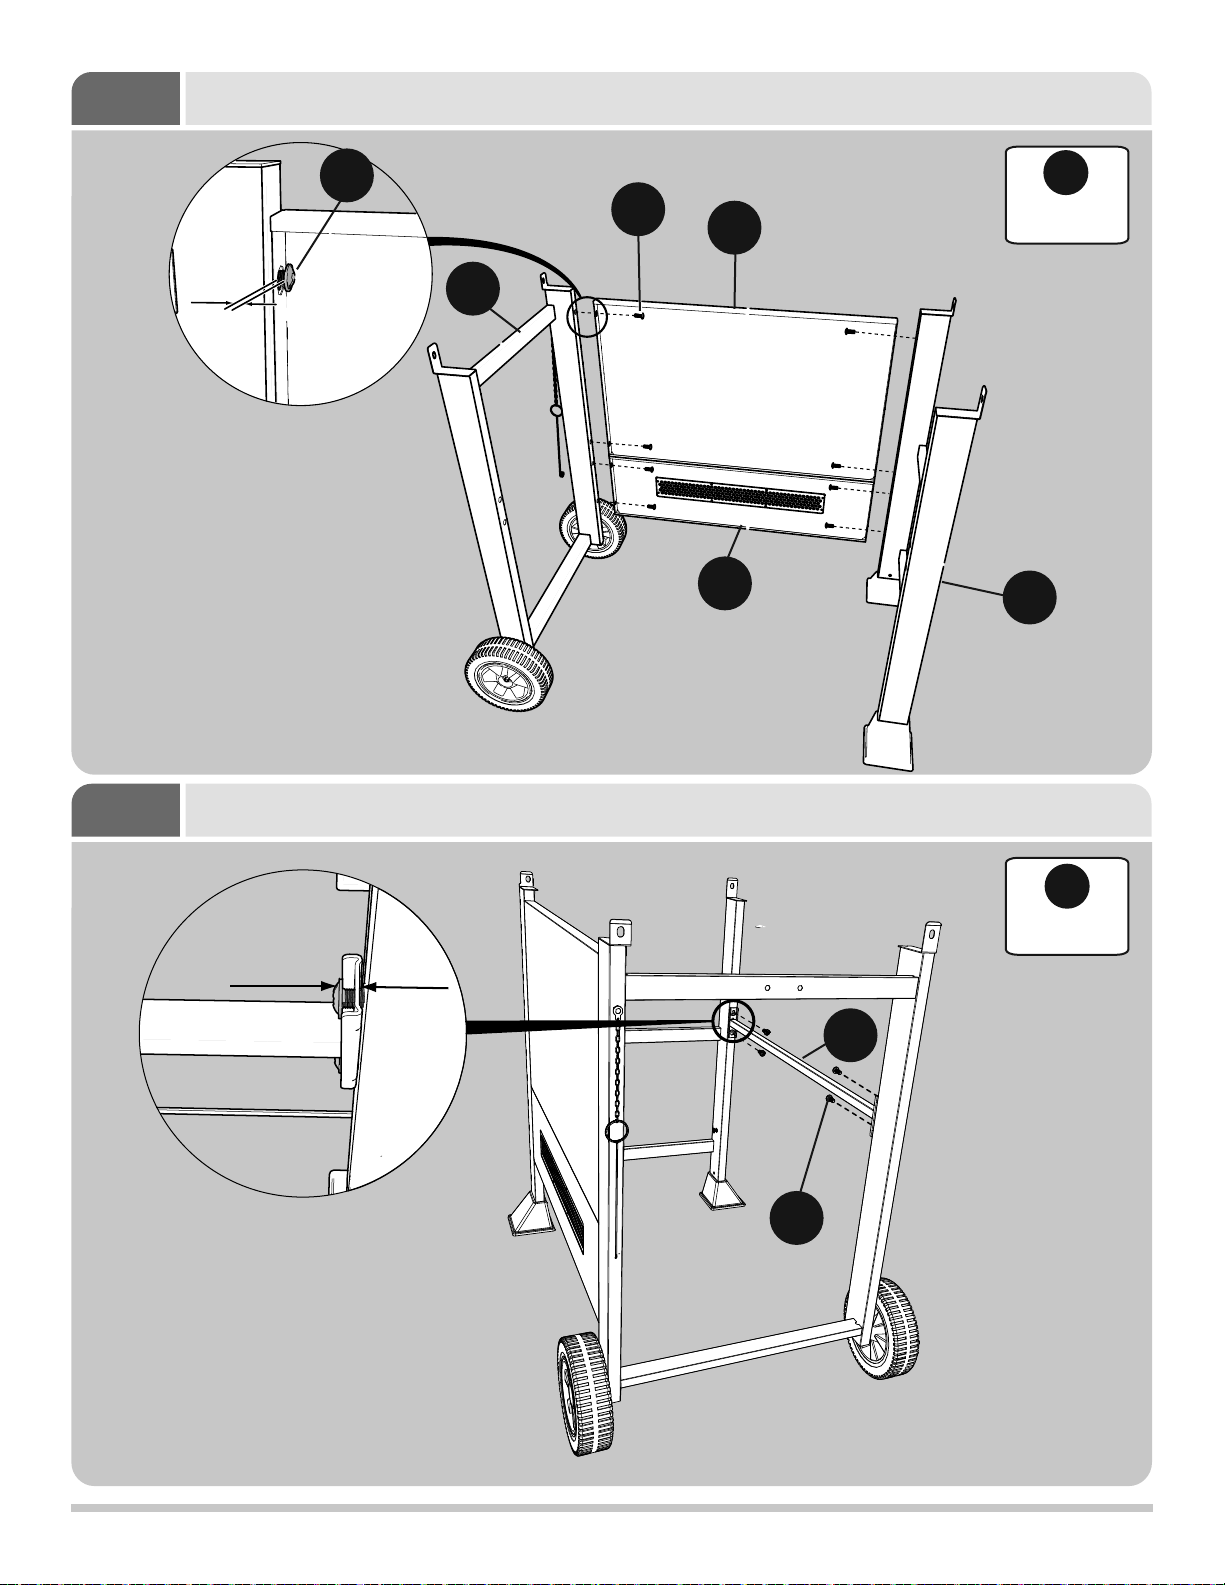
3
4
Assembly – Cart Front Panels
Assembly – Back Exclusion Bar and Cart Rear Support
DD
8X
DD
4X
Y
DD
VO
T
5 Threads
DD
DD
5 Threads
S

9
5
6
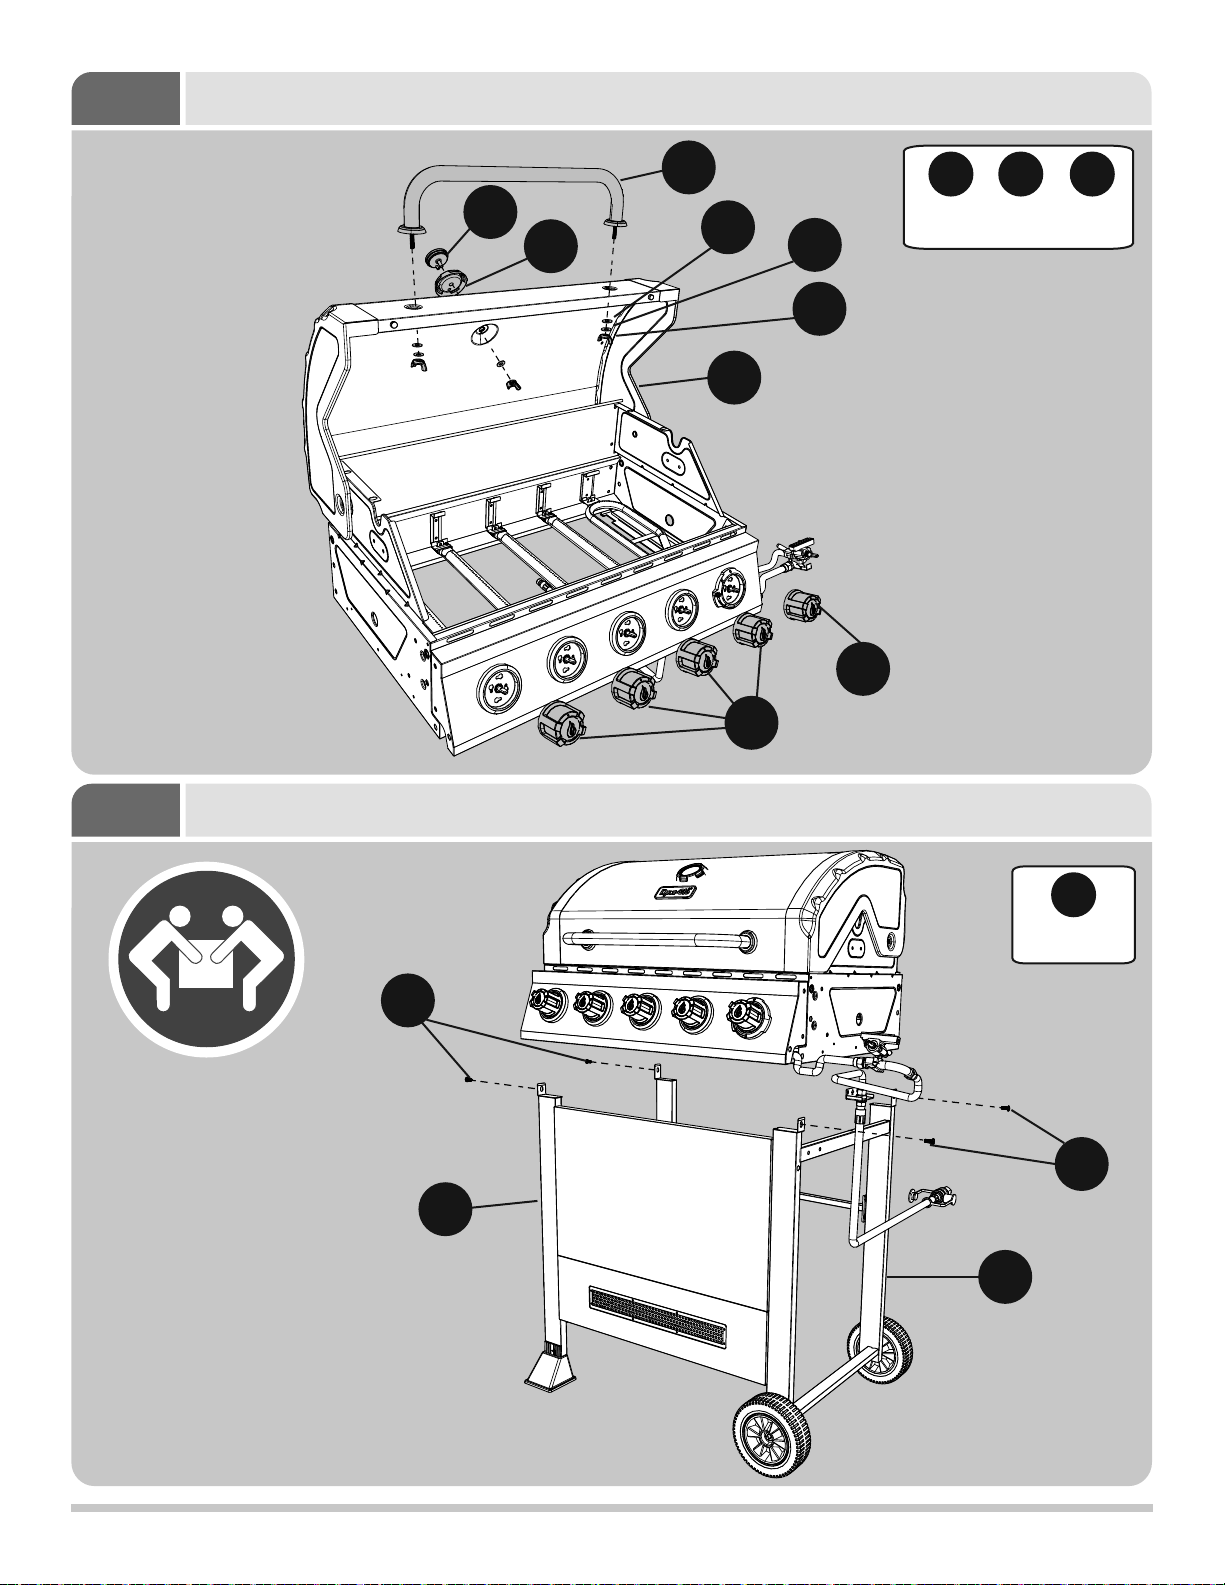
Assembly – Handle, Knobs, and Temperature Gauge
EE
2X
FF
2X
GG
2X
D
GG
A1
EE
FF
C
B
A
E
Assembly – Grill Body to Base
CAUTION:
2 people required
for safe assembly.
NOTE: Fully tighten all nuts from front
panel and back brace screws at this time.
O
DD
Y
DD
DD
4X

10
7
A
B
C
Assembly – Left Side Table and Condiment Tray
DD
5X
HH
2X
DD
DD
DD DD
HH
HH
5 Threads
Rear shown,
same for front
Rear shown,
same for front
Same for
other side
K
K
Z
Tab
Slot
Tab
Slot
Dieses Handbuch passt für folgende Modelle
1
Inhaltsverzeichnis
Sprachen:
Andere Dyna-Glo Brenner Handbücher