GE AGMO5 Betriebsanleitung

Safety Instructions . . . . . . . . .2, 3
Operating Instructions
Control knob models . . . . . . .6, 7
Touch pad models . . . . . . . . . .4, 5
Care and Cleaning
Air Filter . . . . . . . . . . . . . . . . . . .7
Front Grille and Case . . . . . . . . .8
Outdoor Coils . . . . . . . . . . . . . . .7
Installation Instructions . . .9–13
Troubleshooting Tips . . . . . . .14
Normal Operating Sounds . . . .15
Consumer Support
Consumer Support . . . . . . . . . .20
Product Registration . . . . . .17, 18
Warranty . . . . . . . . . . . . . . . . . .19
49-7446 11-02 JR
AGF05
AGM05
AGQ05
AGV05
Owner’s Manual and
Installation Instructions
Write the model and serial numbers here:
Model # __________________________
Serial # __________________________
Find these numbers on a label on the
side of the air conditioner.
Air Conditioners
www.GEAppliances.com
Room

Consumer Support Troubleshooting Tips Operating Instructions Safety InstructionsInstallation Instructions
2
IMPORTANT SAFETY INFORMATION.
READ ALL INSTRUCTIONS BEFORE USING.
WARNING!
For your safety, the information in this manual must be followed to minimize the risk of fire, electric shock
or personal injury.
■Use this appliance only for its intended
purpose as described in this Owner’s
Manual.
■This air conditioner must be properly
installed in accordance with the Installation
Instructions before it is used.
■Never unplug your air conditioner by pulling
on the power cord. Always grip plug firmly
and pull straight out from the receptacle.
■Repair or replace immediately all electric
service cords that have become frayed or
otherwise damaged. Do not use a cord
that shows cracks or abrasion damage
along its length or at either the plug or
connector end.
■Turn the mode control to OFF and unplug
your air conditioner before making any
repairs or cleaning.
NOTE: We strongly recommend that any
servicing be performed by a qualified
individual.
■For your safety…do not store or use
combustible materials, gasoline or other
flammable vapors or liquids in the vicinity
of this or any other appliance.
■ All air conditioners contain refrigerants,
which under federal law must be removed
prior to product disposal. If you are getting
rid of an old product with refrigerants, check
with the company handling disposal about
what to do.
SAFETY PRECAUTIONS
Do not, under any circumstances, cut or remove
the third (ground) prong from the power cord.
For personal safety, this appliance must be
properly grounded.
The power cord of this appliance is equipped
with a 3-prong (grounding) plug which mates
with a standard 3-prong (grounding) wall
outlet to minimize the possibility of electric
shock hazard from this appliance.
Have the wall outlet and circuit checked by
a qualified electrician to make sure the outlet
is properly grounded.
Where a 2-prong wall outlet is encountered,
it is your personal responsibility and obligation
to have it replaced with a properly grounded
3-prong wall outlet.
The air conditioner should always be plugged
into its own individual electrical outlet
which has a voltage rating that matches the
rating plate.
This provides the best performance and also
prevents overloading house wiring circuits
which could cause a fire hazard from
overheated wires.
See the Installation Instructions, Electrical
Requirements section for specific electrical
connection requirements.
HOW TO CONNECT ELECTRICITY

3
Consumer SupportTroubleshooting TipsOperating InstructionsSafety Instructions Installation Instructions
GEAppliances.com
WARNING!
Because of potential safety hazards under certain
conditions, we strongly recommend against the
use of an extension cord.
However, if you must use an extension cord,
it is absolutely necessary that it be a UL-listed,
14 gauge, 3-wire grounding type appliance
extension cord having a grounding type plug
and outlet and that the electrical rating of the
cord be 15 amperes (minimum) and 125 volts.
CAUTION:
DO NOT use an extension cord with any of
the 230/208 volt models.
USE OF EXTENSION CORDS—115-Volt models only
Because of potential safety hazards under certain
conditions, we strongly recommend against the
use of an adapter plug.
However, if you must use an adapter, where
local codes permit, a temporary connection may
be made to a properly grounded 2-prong wall
outlet by use of a UL-listed adapter available at
most local hardware stores.
The larger slot in the adapter must be
aligned with the larger slot in the wall outlet
to provide proper polarity in the connection
of the power cord.
When disconnecting the power cord from the
adapter, always hold the adapter in place with
one hand while pulling the power cord plug
with the other hand. If this is not done, the
adapter ground terminal is very likely to break
with repeated use.
If the adapter ground terminal breaks, DO NOT
USE the air conditioner until a proper ground
has been established.
Attaching the adapter ground terminal to a wall outlet
cover screw does not ground the appliance unless the
cover screw is metal, and not insulated, and the wall
outlet is grounded through the house wiring. You should
have the circuit checked by a qualified electrician to
make sure the outlet is properly grounded.
USE OF ADAPTER PLUGS—115-Volt models only
READ AND FOLLOW THIS SAFETY INFORMATION CAREFULLY.
SAVE THESE INSTRUCTIONS

Consumer Support Troubleshooting Tips Operating Instructions Safety InstructionsInstallation Instructions
■ To ensure proper operation, aim the remote
control at the signal receiver on the air
conditioner.
■ The remote control signal has a range of
up to 21 feet.
■ Make sure nothing is between the air conditioner
and the remote control that could block the
signal.
■ Make sure batteries are fresh and installed
correctly as indicated on the remote control.
About the controls on the air conditioner—models with touch pads.
Features and appearance will vary.
4
Air Conditioner Controls Remote Control
Controls
ON/OFF Pad
Turns air conditioner on and off.
Display
Shows the set temperature or time remaining
on timer.
MODE
Use to set the air conditioner to COOL or
FAN mode.
Increase ▲ /Decrease ▼Pads
Use to set temperature when in COOL mode.
FAN Pad
Use to set the fan speed to LOW (F1), MED (F2)
or HIGH (F3).
ENERGY SAVER (on some models)—Controls
the fan.
ON—The fan and compressor cycle on and
off. This results in wider variations of room
temperature and humidity. Normally used
when the room is unoccupied. NOTE: The fan
will continue to run for a short time after the
compressor cycles off.
OFF—The fan runs all the time, while the
compressor cycles on and off.
This feature must be set at OFF in order to
use the fan settings (on the mode control).
TIMER Pad
ON—When the air conditioner is off, it can be
set to automatically come on in 1 to 12 hours
at its previous setting. Each touch will set the
timer in hours.
OFF—When the air conditioner is on, it can
be set to automatically turn off in 1 to 12
hours. Each touch will set the timer in hours.
To cancel the timer, press the TIMER pad
until the display time disappears.
Remote Control Signal Receiver
Remote Control
Fan on
Cool on
Timer on
Energy
Saver on

GEAppliances.com
Lights next to the touch pads on the air conditioner
control panel indicate the selected settings.
COOL Mode
Use the COOL mode with HIGH (F3), MED (F2) or
LOW (F1) fan for cooling. Use the INCREASE ▲ /
DECREASE ▼ pads to set the desired temperature
between 60°F and 86°F in 1°F increments.
An electronic thermostat is used to maintain the
room temperature. The compressor will cycle on and
off to keep the room at the set level of comfort. Set
the thermostat at a lower number and the indoor air
will become cooler. Set the thermostat at a higher
number and the indoor air will become warmer.
NOTE: If the air conditioner is off and is then turned on
while set to COOL, it will take approximately 3 minutes
for the compressor to start and cooling to begin.
Cooling Descriptions
For Normal Cooling—Select the COOL mode and
HIGH (F3) or MED (F2) fan with a middle set
temperature.
For Maximum Cooling—Select the COOL mode
and HIGH (F3) fan with a lower set temperature.
For Quieter & Nighttime Cooling—Select the
COOL mode and LOW (F1) fan with a middle set
temperature.
NOTE: If you switch from a COOL setting to OFF or to
a fan setting, wait at least 3 minutes before switching
back to a COOL setting.
FAN Mode
Use the FAN at HIGH (F3), MED (F2) or LOW (F1) to
provide air circulation and filtering without cooling.
Since fan only settings do not provide cooling,
a temperature setting will not be displayed.
Consumer SupportTroubleshooting TipsOperating Instructions
Safety Instructions Installation Instructions
5
Air Direction
Fingertip pressure on the louvers lets you control
the air direction left, right, straight ahead or any
combination of these directions.
Additional controls and important information.

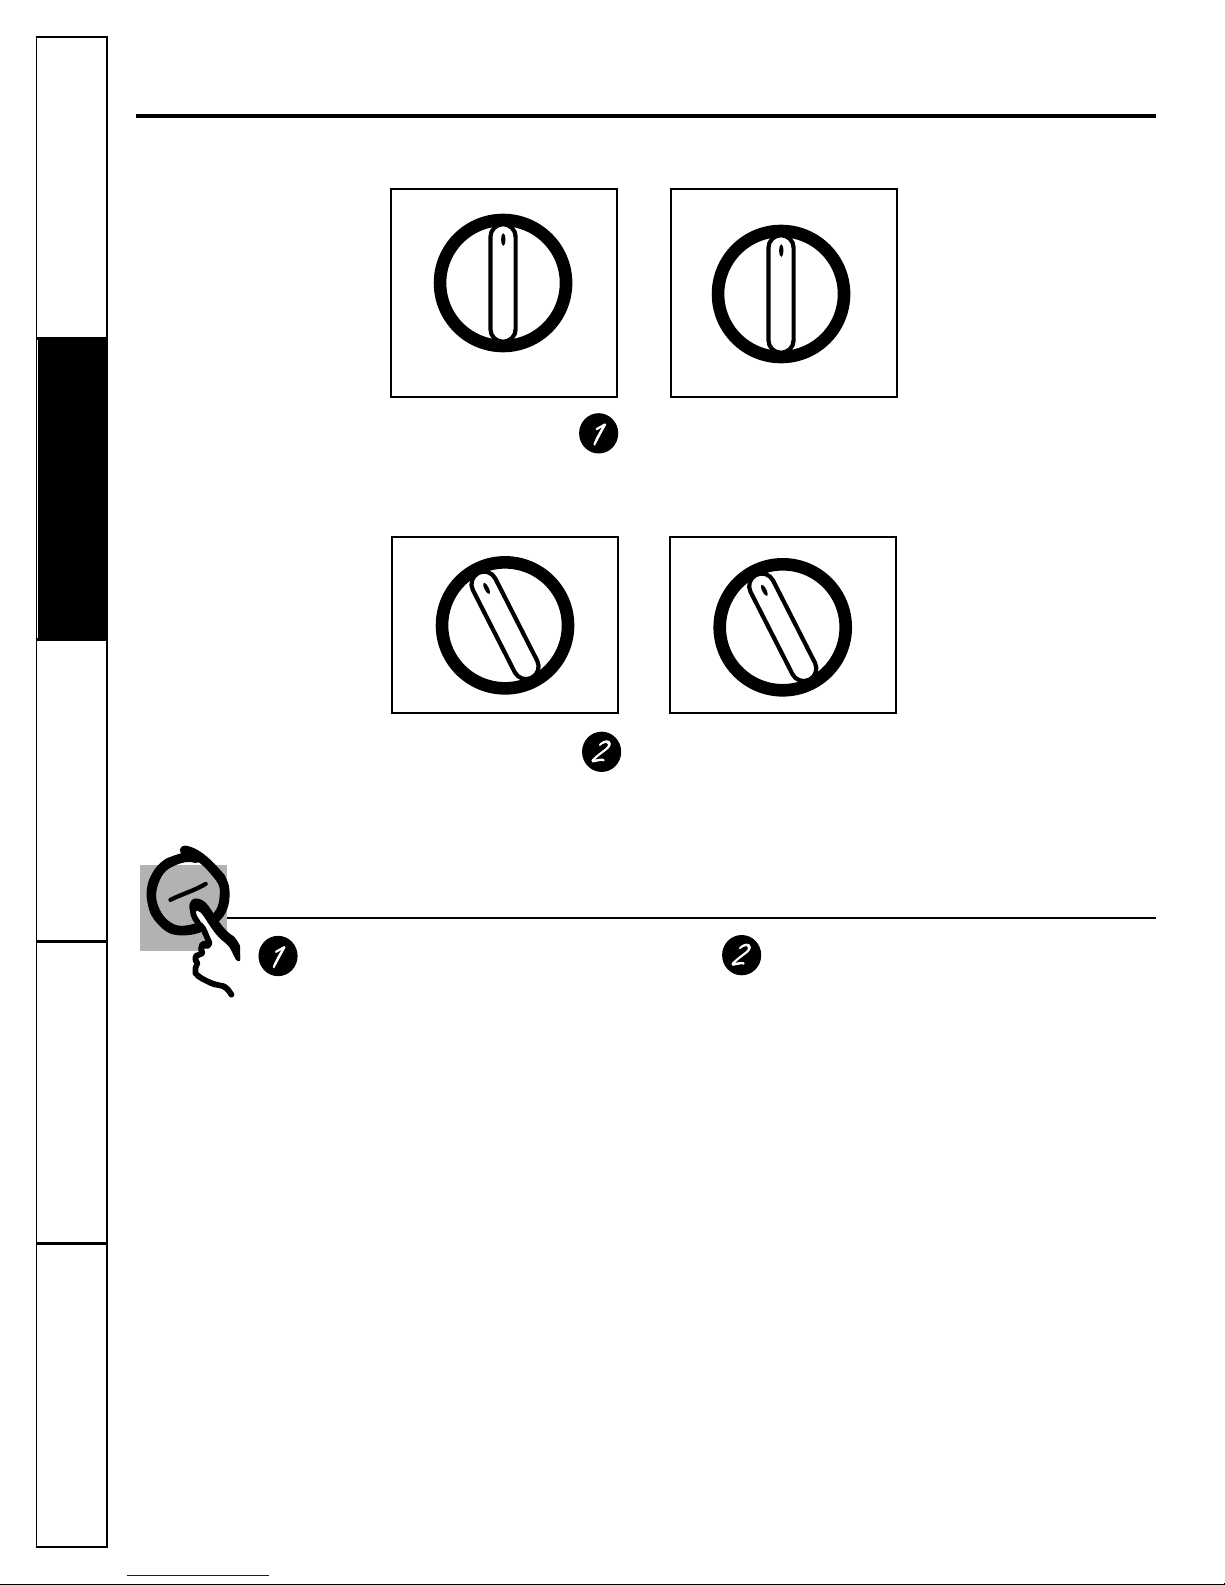
About the controls on the air conditioner—models with control knobs.
Features and appearance will vary.
Controls
Mode Control
HI COOL , MED COOL and LO COOL provide
cooling with different fan speeds.
HI FAN and LO FAN provide air circulation and
filtering without cooling.
NOTE: If you move the mode control from a cool
setting to OFF or to a fan setting, wait at least
3 minutes before switching back to a cool setting.
Cooling Descriptions
For Normal Cooling—Select HI COOL or MED COOL
with the temp control at midpoint.
For Maximum Cooling—Select HI COOL with the
temp control at the highest number available
on your knob.
For Quieter & Nighttime Cooling—Select LO COOL
with the temp control at midpoint.
Temp Control
The temp control is used to maintain the
room temperature. The compressor will cycle
on and off to keep the room at the same level
of comfort. When you turn the knob to a
higher number the indoor air will become
cooler. Turn the knob to a lower number and
the indoor air will become warmer.
MODE
Your model will have one of the above type controls.
TEMP
Your model will have one of the above type controls.
OFF
LO
FAN
LO
COOL
HI
FAN
HI
COOL
OFF
LO
FAN
MED
COOL
HI
FAN
HI
COOL
HI
COOL
LO
COOL
1
2
34
5
61
2
3
45
6
7
8
Consumer Support Troubleshooting Tips Operating Instructions Safety InstructionsInstallation Instructions
6

The air filter behind the front grille should be
checked and cleaned at least every 30 days or
more often if necessary.
Clean the filter with warm, soapy water. Rinse and
let the filter dry before replacing it.
CAUTION: DO NOT operate the air conditioner without a
filter because dirt and lint will clog it and reduce performance.
To remove (on some models):
Grasp the tab and gently pull the filter up and out.
To remove (on some models):
Open the inlet grille downward by pulling out
the upper corners of the inlet grille.
Using the tab, push down on the filter to release
it and pull it out.
Consumer SupportTroubleshooting TipsOperating InstructionsSafety Instructions Installation Instructions
7
Care and cleaning of the air conditioner.
Air Direction
Fingertip pressure on the louvers lets you control
the air direction left, right, straight ahead or any
combination of these directions.
GEAppliances.com
Additional controls and important information.
Outdoor Coils
The coils on the outdoor side of the air conditioner
should be checked regularly. If they are clogged
with dirt or soot they may be professionally
steam cleaned, a service available through your
GE service outlet.
Filter
tab
Grasp
corner
Grasp
corner
Air Filter

Front Grille and Case
Turn the air conditioner off and remove the plug
from the wall outlet before cleaning.
To clean, use water and a mild detergent. Do not
use bleach or abrasives.
To remove the front grille:
Remove the knobs (on some models). Then,
on some models, remove the screw beneath
the bottom knob. Press in on the lower left
side of the case and pull the grille forward.
Gently press inward on the right side of the
case and pull the lower right side of the grille
forward to release from the slot.
Lift the top of the grille up and off to release
from the tabs.
To replace the grille:
Hook the front of the grille onto the tabs
on the top of the case.
Snap the bottom right side of the grille into
the case slot.
Snap the bottom left side of the grille into
the case slot and replace the screw. Attach
the knobs.
C
B
A
C
B
A
Care and cleaning of the air conditioner.
8
Consumer Support Troubleshooting Tips Operating Instructions Safety InstructionsInstallation Instructions

Consumer SupportTroubleshooting TipsOperating InstructionsSafety Instructions Installation Instructions
9
Preparing to install the air conditioner.
Read these instructions completely and carefully.
NOTE TO INSTALLER: Leave these instructions with
the air conditioner after installation is completed.
NOTE TO CONSUMER: Keep this Owner’s Manual
and Installation Instructions for future use.
IMPORTANT NOTES:
For personal safety, this air conditioner must be
properly grounded.
It is important to have the wall outlet and circuit
checked by a qualified electrician if there is any
doubt as to whether a proper ground exists.
Follow National Electric Codes (NEC) and/or local
codes and ordinances.
CAUTION:
Do not, under any circumstances, cut or
remove the third (ground) prong from the
power cord.
Do not change the plug on the power
cord of this air conditioner.
Aluminum house wiring may present
special problems—consult a qualified
electrician.
Before You Begin
These models require 115/120-volt a.c.,
60 Hz grounded outlet protected with
a 15-amp time delay fuse or circuit
breaker.
The 3-prong grounding plug minimizes the
possibility of electric shock hazard. If the wall outlet
you plan to use is only a 2-prong outlet, it is your
responsibility to have it replaced with a properly
grounded 3-prong wall outlet.
Electrical Requirements
■Phillips head screwdriver
■Flat blade screwdriver
■Ruler or tape measure
■Scissors
■Pencil
■Level
Tools You Will Need

Window Installation Instructions
Parts Included
Air conditioner
Window sash seal
Support brackets (3)Type A (5) Type B (11)
Foam top window gasket
Top mounting rail
Sliding panels
10
Consumer Support Troubleshooting Tips Operating Instructions Safety InstructionsInstallation Instructions
Security bracket (1)
Dieses Handbuch passt für folgende Modelle
11
Inhaltsverzeichnis
Sprachen:
Andere GE Klimaanlage Handbücher

GE
GE AJCS 06 LZ Bedienungsanleitung

GE
GE AHP10 Bedienungsanleitung

GE
GE AEE18DQ Originalbetriebsanleitung

GE
GE AJCM 08 ACF Series Betriebsanleitung

GE
GE AHH08 Betriebsanleitung

GE
GE AGM14AJ Bedienungsanleitung

GE
GE AJCQ06LCC Montageanleitung

GE
GE APCA10NXMGN1 Betriebsanleitung

GE
GE ASQ28DL Handbuch

GE
GE Carry Cool ATM04 Schulungshandbuch