HandyTech HELP V Bedienungsanleitung


MOD. FT04 rev.01
HELP V (use and maintenance) Ed. 3 - updated: 12/2018
- 1 –
Congratulations on the purchase of the lifter HELP V.
We wish You an advantageous use.
The lifter HELP V is very easy to use and extensively described in these
instructions.
Read the use and maintenance instructions carefully before using the
vehicle.
Symbolism
NOTA
PROCEDURE
ATTENTION –very important information
This manual is composed by 6 chapters, chapter 3,4 and 5 are dedicated to the use.
1. General information - Pag. 2
2. Safety - Pag. 2
3. Use - Pag. 3
4. What to do if… - Pag. 9
5. Emergency system - Pag. 10
6. Maintenance - Pag. 12
Power supply 12 V
In compliance with all the characteristics regarding the DIRETTIVE MACCHINARI 2006/42/CE
and the COMPATIBILITA’ ELETTROMAGNETICA 2014/30/CE.
Instructions based on a standard configuration, possible changes can be made according to the customer’s requirements
and the characteristics of the vehicle.
Handytech reserves the right to change the product without any forewarning.

MOD. FT04 rev.01
HELP V (use and maintenance) Ed. 3 - updated: 12/2018
- 2 –
1. General information
HELP V is a light and compact lifter which, installed near
the sliding door, allows to lift a person with his
wheelchair, with a maximum load of 200kg (250 kg
optional).
All the operations are carried out by a remote control.
The lifter platform allows to lift the person on the
wheelchair from the ground to the floor of the vehicle,
facing a drop of maximum 700mm. Then, thanks to the
rotation of the platform, it allows the entrance into the vehicle. Its particular structure allows to load the
person on the wheelchair with a lateral space of 1000mm.
With one easy operation it is possible to close the platform of the lifter and then to leave free the
space near the door .
Moreover, HELP V is provided with a manual emergency system.
2. Safety
The system must only be used for the purposes it was created for; any other use is considered as
improper.
CARROZZERIA 71 s.r.l. is not liable for any damage caused by incorrect system use.
Explain how HELP V works to anyone who has to work on your vehicle (car dealer, repair centre,
mechanic, etc.), and also to all those who use it.
In these cases disconnect the whole system.
If it is necessary to effectuate maintenance operations and repairs to the vehicle, we advise
You to give to the operator the telephone number of the installer of the system for further
indications.
It is advisable, after 2 years, in collaboration with Your local Handytech Centre, to check
the status of the whole system and maybe to replace some parts.
Moreover, we remember to you, that out of the warranty period, the maintenance program is at Your
discretion and risk, but the advice is to follow it carefully, because the negligence could cause
malfunctions of the system and could create dangers during the utilization of the device.
Maintenance operations of the device during the warranty period and out the warranty period are to
be borne by the customer.
The manufacturer guarantees the product for 24 months, only if the maintenance operations
have been implemented by an authorized Handytech Centre.
It is advisable to use the lifter HELP V on a flattest terrain possible and to avoid muddy and
gravel grounds
During the use it is necessary to check that near the lifter there are not people, animals or
objects that could interfere with the movement of the lifter.

MOD. FT04 rev.01
HELP V (use and maintenance) Ed. 3 - updated: 12/2018
- 3 –
3. Use
□Before starting every operation, engage the handbrake of the vehicle.
□Completely open the sliding door and check that the space available allows the rotation and the
way down of the lifter and that there is the possibility to move the wheelchair.
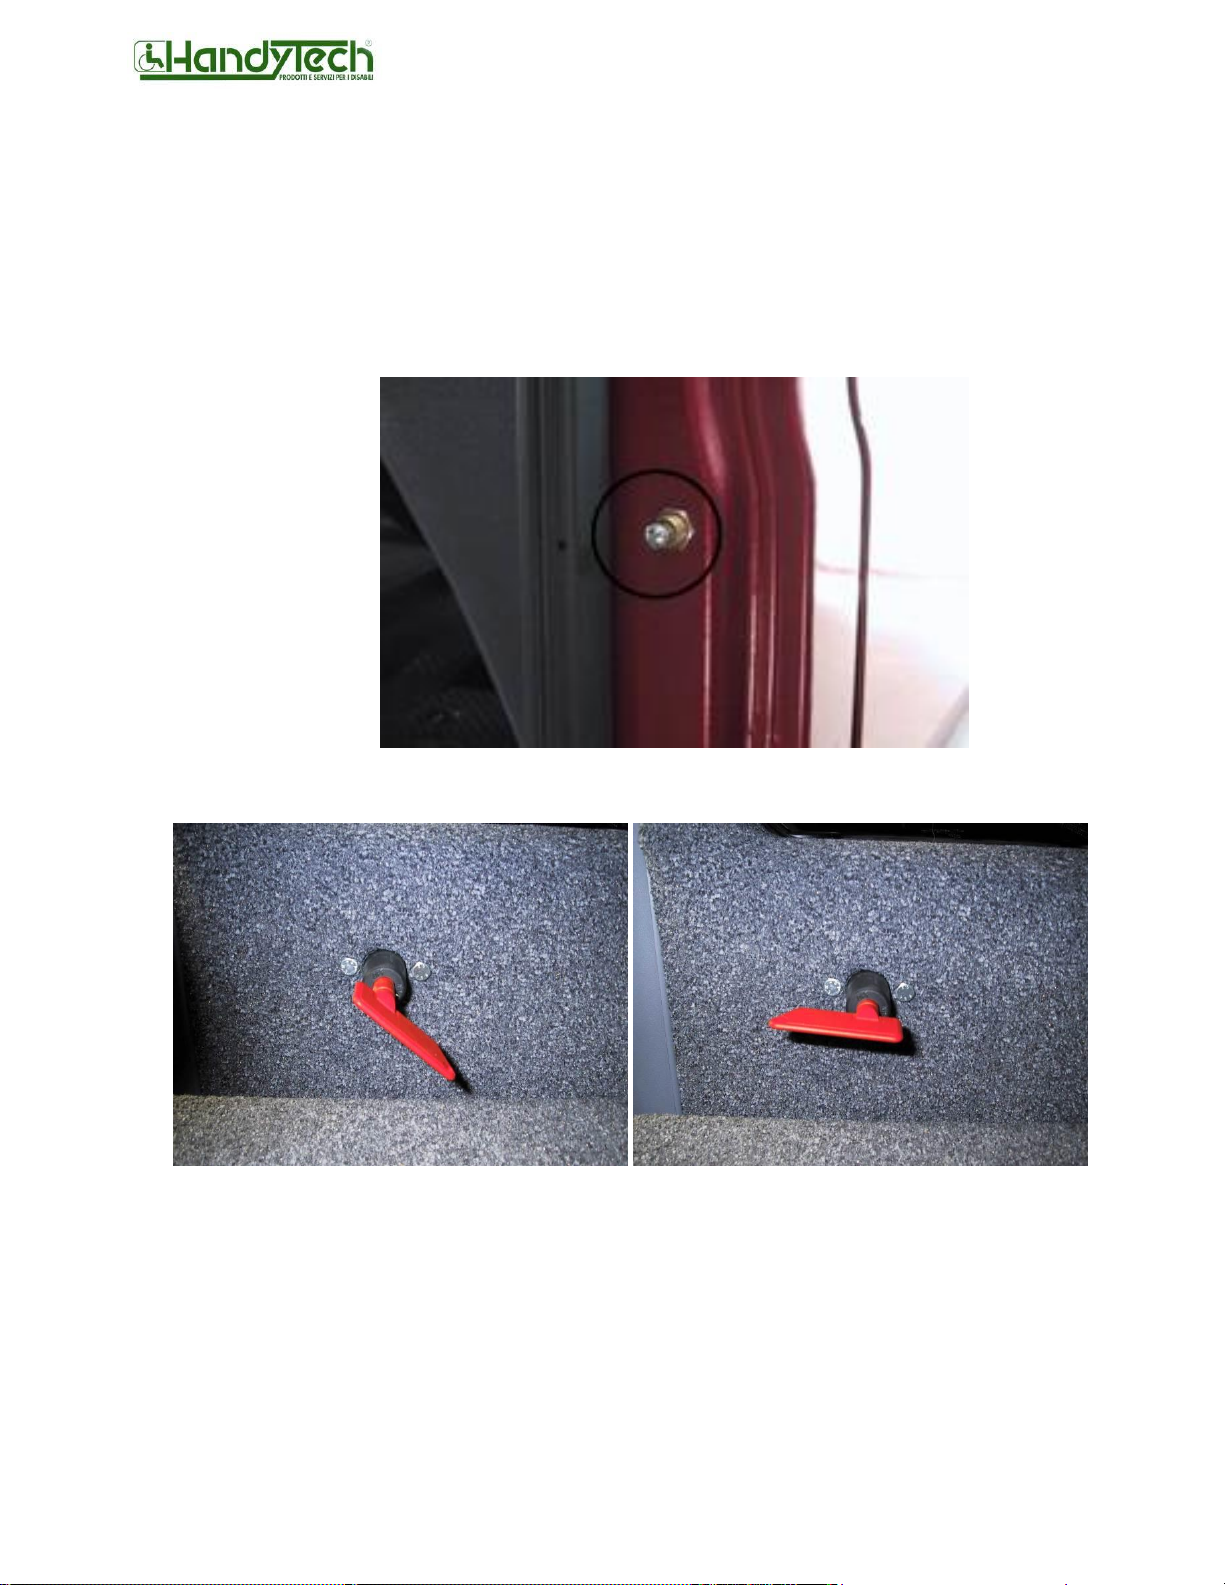
In some cases, at installer’s discretion, it can be installed a limit switch on the door sill of the
vehicle that inhibits the working of the lifter with the closed door (Photo 1).
Photo 1
□Turn the battery master switch in mode ON (Photo 2,3).
Photo 2 deactivated Photo 3 activated
□If the lifter is installed on a vehicle used by a person that will be the driver, the battery master
switch can be left in mode ON; it must be deactivated only if the vehicle is stopped for a long
time.

MOD. FT04 rev.01
HELP V (use and maintenance) Ed. 3 - updated: 12/2018
- 4 –
Turning the battery master switch in mode on will activate the red LED on the control unit box
(Photo 4).
Photo 4
□If the two half of the platform are closed, it is necessary to place vertically the front part lifting it
until getting a 120 degrees angle with the other half, and then take it back to about 90 degrees
with the platform, as shown in Photo 5,6,7.
Photo 5 closed platform Photo 6 120° degrees Photo 7 90° degrees

MOD. FT04 rev.01
HELP V (use and maintenance) Ed. 3 - updated: 12/2018
- 5 –
The opening operation of the lifter cannot be carried out with the two half of the
platform closed because it can create a collision with the door on some type of
vehicles (Photo 8).
Photo 8
□Take the remote control from the hook and, once checked that near the lifter there are no
people, animals or objects, start the opening operation (Photo 9,10).
Photo 9 Photo 10
Chiusura
Apertura
Salita
Discesa

MOD. FT04 rev.01
HELP V (use and maintenance) Ed. 3 - updated: 12/2018
- 6 –
□Push the way up button and keep pressed until the lifter will stop. Then push the rotation button
which activates also the bumper, paying attention to the completely opening of the door to avoid
a collision of the platform with this last one.
Once the rotation is completed, push the way down button until the platform touches the ground.
This operation will be automatically interrupted by the limit switch.
Before starting the way up it is necessary to check that the wheelchair and the
person together do not exceed the 200 kg (250kg optional) that is the
maximum load of the platform.
□Go on the platform from the rear part of the vehicle towards the front part, so that the wheels of
the wheelchair press the front part of the platform, overtaking the resistance of the springs and
bringing the front half on the same level of the rear half (Photo 11, 12).
Photo 11 Photo 12
NO
SI

MOD. FT04 rev.01
HELP V (use and maintenance) Ed. 3 - updated: 12/2018
- 7 –
Complete the operation making the wheels of the wheelchair touch the safety stop on the front
half of the platform and then block the wheelchair using the original brakes (Photo 13).
Photo 13
□Check the right positioning of the wheelchair on the platform, push the way up button until the
position of maximum lift and then push the button to close the platform, paying attention to a
possible collision of the rear right wheel with the door (due to an incorrect positioning of the
wheelchair on the platform) (Photo 14,15).
Photo 14correct positioning Photo 15 incorrect positioning
Moreover, on some type of small vehicle, it is necessary to pay attention to the possibility of the
collision between the head of the person and the upper part of the door sill: in these cases lower
or bend the head during the rotation.
□Once the rotation is completed, the bumper will deactivate itself. Push the way down button until
the platform touches the floor of the vehicle, then go back with the wheelchair slowly: during this
phase the front part of the platform will lift through the springs. This operation must be carried out
with attention to avoid the kickback of the flap on the feet of the person.

MOD. FT04 rev.01
HELP V (use and maintenance) Ed. 3 - updated: 12/2018
- 8 –
□If necessary, close the front part of the platform by lifting the mechanical unblocking knob fixed
on the upright, taking with the other hand the flap towards yourself first, and then closing it on the
rear part of the platform (Photo 16,17,18).
Photo 16 Photo 17 Photo 18
□Carefully block the wheelchair and the person inside the vehicle using the proper anchorage
systems.
□Deactivate the battery master switch taking it back in the mode OFF in order to avoid any
interference with the electronical parts of the vehicle (Photo 19).
Photo 19
□Close the sliding door.
Check the right positioning and the right anchorage of the wheelchair and of the
passenger inside the vehicle.
Obviously, to carry out the unloading operation, follow the previous instructions
in a reverse way.

MOD. FT04 rev.01
HELP V (use and maintenance) Ed. 3 - updated: 12/2018
- 9 –
WHAT TO DO IF …
1. The lifter does not move when pushing the way up button
Check that the battery master switch is in mode ON.
Check the right connection of the connector of the remote control (Photo 20).
Check the integrity of the maxi fuse 20 A in the engine compartment of the vehicle
(Photo 21).
Check the integrity of the fuse 1 A in the control unit box.
Photo 20 Photo 21
If the problem is already existing, carry out the following operations in emergency conditions.
Dieses Handbuch passt für folgende Modelle
1
Beliebte Hebesystem Handbücher anderer Marken

morse
morse 82H-124 Bedienungsanleitung

Braun
Braun NL955 Series Bedienungsanleitung

haacon
haacon 1889.10 Bedienungsanleitung

Protekt
Protekt AT 252 Bedienungsanleitung

R. Beck Maschinenbau
R. Beck Maschinenbau HS 600 Bedienungsanleitung

Nova Technology International, LLC
Nova Technology International, LLC NAS Series Bedienungsanleitung

Genie
Genie Z-60/34 Bedienungsanleitung

Screen Technics
Screen Technics INTERFIT Vertical Up Lift Bedienungsanleitung

Mortuary Lift
Mortuary Lift ULTIMATE 1000 Bedienungsanleitung

Custom Equipment
Custom Equipment Hy-Brid 3 Series Programmierhandbuch

Custom Equipment
Custom Equipment Hy-Brid Lifts 2 Series Programmierhandbuch

Hy-Brid Lifts
Hy-Brid Lifts HB-P3.6 Programmierhandbuch