
Hiniker 5710 Bedienungsanleitung

FLAIL CHOPPER SHREDDER
MODEL 5710
(WITH IDENTIFICATION No.’s ENDING 100 AND HIGHER)
OPERATOR’S MANUAL
DO NOT USE OR OPERATE THIS EQUIPMENT UNTIL THIS MANUAL
HAS BEEN READ AND THOROUGHLY UNDERSTOOD
PART NUMBER 79202099


TITLE
To The Purchaser 1
TO THE PURCHASER
This product is designed and manufactured to
give years of dependable service, when prop-
erly maintained and used for the purpose for
which is intended. Never allow anyone to oper-
ate this equipment until they fully understand the
complete contents of this manual. It is the re-
sponsibility of owner’s, who do not operate this
equipment, to insure the operator is properly in-
structed and is fully aware, and understands, the
contents of this manual. It is also the owner’s re-
sponsibility to insure that anyone operating this
equipment is mentally and physically capable of
so doing.
Important information is contained in this manual
to help insure safe and efficient operation.
If you have any questions about this manual, or
the equipment discussed therein, contact your
HINIKER dealer.
THIS IS THE SAFETY ALERT SYMBOL.
IT ALERTS AN OPERATOR TO INFOR-
MATION CONCERNING PERSONAL
SAFETY. ALWAYS OBSERVE, AND HEED,
THESE INSTRUCTIONS, OTHERWISE DEATH,
OR SERIOUS INJURY CAN RESULT!
All references to LEFT or RIGHT means view-
ing the equipment from the rear and facing the
tractor.
This Operator’s Manual is shipped with this
equipment. If it has not been supplied to you,
contact your HINIKER dealer for a replacement.
ALWAYS OBTAIN ORIGINAL HINIKER SER-
VICE PARTS BECAUSE SUBSTITUTE PARTS
COULD ADVERSELY AFFECT EQUIPMENT
PERFORMANCE AND WARRANTY.
All photos in this manual refer to paragraph(s)
preceeding the photo.
A TRIPLICATE (3 COPIES) DELIVERY REPORT
IS TO BE FILLED OUT BY YOUR HINIKER
DEALER WHEN YOU ACCEPT THIS EQUIP-
MENT.
ONE COPY IS TO BE GIVEN TO YOU. DO NOT
ACCEPT THIS EQUIPMENT UNTIL YOU ARE
SATISFIED ALL ITEMS THEREON HAVE BEEN
CHECKED, AND YOU UNDERSTAND THEM.
Check that your dealer has forwarded the
HINIKER delivery report copy, along with the
machine serial number, because it helps main-
tain maximum service and warranty benefits.
This does not put you on any mailing list and
information thereon is not available to others.
Your machine’s serial number plate is at (1).
FIGURE 1 PHOTO NO. 2979A
Record the following information for later
reference when obtaining service parts:
Purchase Date:________________________
Purchaser’s Name:_____________________
Dealer’s Name:________________________
Machine Serial #:_______________________

TITLE
TABLE OF CONTENTS
79202099 12/05 Manual/79202099
ASSEMBLY
Aftermarket Hydraulics ..........................................................................................45-46
Basic Machine ......................................................................................................39-42
W/Loading Chute ..................................................................................................42-45
W/Shredding Plate .....................................................................................................42
Offloading .................................................................................................................. 39
FIELD PREPARATION
Chopper/Shredder
Hitch ..........................................................................................................................11
PTO ......................................................................................................................11-12
Rockshaft & wheels ..............................................................................................12-13
Towing .......................................................................................................................14
Tractor .......................................................................................................................11
GENERAL
Specifications ............................................................................................................ 47
To Purchaser ...............................................................................................................1
Storage....................................................................... ............................................... 18
LUBRICATION ............................................................................................................19-21
OPERATION
General .................................................................................................................16-17
Height Adjustment ......................................................................................................17
Shredding or Chopping .............................................................................................. 18
SAFETY
Before Operation .........................................................................................................4
Decal Location ........................................................................................................7-10
During Operation .........................................................................................................5
General....................................................................... ..............................................3-4
Service ........................................................................................................................6
Towing .........................................................................................................................5
SERVICE
Belts .....................................................................................................................24-25
Drive Shaft Bearing ........................................................... ........................................28
Gearbox ...................................................................... ......................................... 29-30
Hardware ................................................................................................................... 23
Knives ..................................................................................................................23-24
PTO ......................................................................................................................30-38
Rotor Bearings ......................................................................................................25-26
Shearbar ....................................................................................................................24
Sheaves ...............................................................................................................26-28
Wheel Bearings ....................................................................................................28-29
TROUBLESHOOTING ......................................................................................................22
WARRANTY .....................................................................................................................49
2 Table of Contents

TITLE
THIS IS THE SAFETY ALERT SYMBOL.
IT ALERTS AN OPERATOR TO INFOR-
MATION CONCERNING PERSONAL
SAFETY. ALWAYS OBSERVE, AND HEED,
THESE SYMBOLS AND INSTRUCTIONS, OTH-
ERWISE DEATH, OR SERIOUS INJURY CAN
RESULT!
Operator safety is a principle concern in equipment
design and distribution. However, many accidents
occur because a few seconds of thought, and a
more careful approach to handling, were ignored.
ACCIDENTS CAN BE AVOIDED BY KNOWING,
AND FOLLOWING, THE PRECAUTIONS CITED
IN THIS MANUAL.
For better viewing, certain photos may show a
safety shield open or removed. This equipment
should never be operated without factory installed
shields in place.
Replace any decals that are not readable, or miss-
ing. Their ordering numbers and proper location
are shown in the DECAL LOCATION section of
this manual. Keep decals free of dirt, grease, etc.
Throughout this manual, and on all safety related
decals, a safety alert symbol, along with the signal
word CAUTION, WARNING or DANGER will be
found. These are defined as follows:
CAUTION: A reminder for proper safety
practices and directs attention to fol-
lowing them. Decals of this class are
yellow and black.
WARNING: A reminder for proper safety
practices and what can happen if they
are ignored. This has a more serious
consequence than CAUTION. Decals of this
class are orange and black.
DANGER: Denotes a most serious safe-
ty hazard. It is a reminder for observing
the stated precautions and what can
happen if they are ignored. Decals of this class
are red and white.
SAFETY
There are other decals, and copy, in this manual
that pertain to protecting the equipment. They are
not directly related to operator safety. These have
black letters on a white background to distinguish
them from safety decals. They lack the safety alert
symbol, but carry the words NOTICE or IMPOR-
TANT defined as follows:
NOTICE: INFORMS THE READER OF SOME-
THING THAT CAN CAUSE MINOR MACHINE
DAMAGE, OR POOR PERFORMANCE, IF IG-
NORED.
IMPORTANT: WARNS THE READER OF PO-
TENTIALLY MORE SERIOUS MACHINE DAM-
AGE, OR POOR PERFORMANCE IF IGNORED.
GENERAL
1. If the Operator’s Manual is missing from this
equipment, obtain a replacement from your
HINIKER dealer. If you sell this equipment, in-
sure the new owner acknowledges receipt of
this manual.
2. Read this manual thoroughly. Make sure the
operator understands it and knows how to op-
erate this equipment safely. Farm equipment
can kill or injure an untrained, or careless, op-
erator.
3. Do not attempt to handle and service this
equipment, or direct others to do the same,
unless you know how to do it safely.
4. Keep all shields and guards in place.
5. Keep hands, feet, hair and clothing away from
moving parts.
6. Disengage PTO, stop tractor engine, set
brakes and wait for all motion to stop before
adjusting, or servicing, this equipment.
7. Keep off, keep others off, and insure everyone
is clear before starting, actuating hydraulics,
and during equipment operation.
Safety 3

8. Do not service, or otherwise handle, a unit
in a raised position unless it is securely
blocked against unexpected falling.
9. Keep all front flipper shields in place and
free swinging.
10. Never operate in areas littered with glass,
rocks, metal, etc. Use cab tractor if operat-
ing in unfamiliar areas. Keep cab windows
clean to maintain good visibility.
11. Escaping hydraulic/diesel fluid under pres-
sure can penetrate the skin causing serious
injury.
DO NOT use your hand to check for leaks. Use
a piece of cardboard.
Tighten all connections before pressurizing hy-
draulic lines.
If fluid is injected into the skin, get medical atten-
tion to prevent serious infection.
12. Discipline yourself to always visually inspect
this equipment for any excessively worn,
damaged, or cracked parts before starting
use. Replace these with genuine HINIKER
parts.
13. Stalk shredding/windrowing often involves a
combustible environment. Carry a fire extin-
guisher and first aid kit with tractor.
14. OSHA requires farm employers to meet cer-
tain safety standards. Become familiar with,
and comply with them.
15. Do not alter this equipment to the extent of
compromising safety and performance.
16. Do not substantially operate tractor in a
closed building.
17. Ag chemicals can be dangerous. Always fol-
low the manufacturer’s label safety precau-
tions when using them.
18. Do not assume everyone is as safety con-
scious as yourself.
BEFORE OPERATION
1. Insure unit’s PTO assembly is fully engaged
with gearbox and tractor shafts and SLID-
ING COLLARS ARE RETURNED TO THEIR
LOCKED POSITIONS.
2. NEVER allow improperly supervised minors,
or anyone else, to operate this equipment. It
is your responsibility to insure that any op-
erator is mentally and physically capable of
so doing.
3. DO NOT OPERATE THE CHOPPER/
SHREDDER WITH A 1000 RPM TRACTOR.
THIS WILL SERIOUSLY OVERSPEED THE
ROTOR.
4. Do not “jump start” the tractor from along
side it. Start tractor only from seat.
5. Lock any swinging tractor drawbar before
hooking up. Use a cross retainer in end of
the hitch pin.
6. Disengage PTO, stop tractor engine, and re-
move key before hooking up chopper/shred-
der PTO.
7. Clear area of people, and debris, before en-
gaging tractor PTO. Be alert for blind areas
of operation. Slow down PTO and “feather”
into engagement to prevent unnecessary
stress on driveline.
8. DO NOT OPEN MACHINE SHIELDS WITH
TRACTOR ENGINE RUNNING.
9. Do not stand close to, immediately behind
or in front of, a running chopper/shredder.
4 Safety

DURING OPERATION
1. Gradually bring unit up to operating speed
and check for any abnormal vibration, or per-
formance. IF ABNORMAL VIBRATION IS
PRESENT AT ANY TIME, IMMEDIATELY DIS-
ENGAGE PTO, STOP TRACTOR ENGINE,
REMOVE KEY AND DETERMINE/CORRECT
CAUSE BEFORE PROCEEDING.
2. Disengage PTO, stop tractor engine, remove
key and allow EQUIPMENT TO COME TO A
COMPLETE STOP before:
- Cleaning, unclogging, lubricating, inspecting,
or otherwise servicing, any part of this equip-
ment.
- Connecting or disconnecting the chopper/
shredder from the tractor.
- Allowing anyone else near the equipment.
- Dismounting from the tractor seat and parking
the equipment.
- Placing any part of your body in dangerous
proximity to chopper/shredder.
3. When parking this equipment, lower it to full
“down” position. Set the tractor brakes and
block wheels if on an extreme slope.
4. Never stand behind loading spout, or in trail-
ing wagon, where flying material impacts.
5. Be fully aware that a loading trailing wagon
will exert high force and/or momentum on the
chopper/shredder. These can cause danger-
ous “jacknifing”, or loss of steering control, un-
der certain circumstances:
- Inadequate tractor size and/or ballasting.
- Excessive towing speed.
- Poor tractor brakes.
- Hilly operation in combination with any of the
above.
TOWING
1. When towing on public highways:
- Use an aftermarket safety towing chain be-
tween the trail hitch and the towing tractor.
- Use a tractor of sufficient size, and weight, re-
quired for field operation.
- Do not tow faster than 25 MPH (40 kph).
- Check local regulations on towing width and
warning lights.
2. Never tow machine in field mode with the PTO
detached from the tractor and hooked to the
gearbox.
3. HINIKER choppers/shredders are provided
with an ASAE SMV (slow moving vehicle) em-
blem and a mounting socket therefor.
4. At sundry locations, RED (rear facing) and AM-
BER (forward facing) reflectors are provided.
Insure these do not become defaced or cov-
ered with debris.
5. If towing with a trailing wagon, apply above
safety rules to the trailing wagon, such as:
- Local width warning lights regulations.
- Using an aftermarket safety towing chain be-
tween the chopper/shredder and the wagon.
- Keeping a SMV (slow moving vehicle) emblem
visable at the rear of the wagon.
- Be especially aware of Item 5 under DURING
OPERATION in previous column.
Safety 5

6 Safety
SERVICE
1. Service information herein is intended for deal-
ers and others correspondingly competent.
If you are not experienced and/or capable of
handling such service, do not attempt it.
2. Disengage PTO, stop tractor engine, remove
key and allow EQUIPMENT TO COME TO A
COMPLETE STOP before:
- Cleaning, unclogging, lubricating, inspecting,
or otherwise servicing, any part of this equip-
ment.
- Connecting or disconnecting the shredder from
the tractor.
- Allowing anyone else near the equipment.
- Placing any part of your body in dangerous
proximity to chopper/shredder.
3. Do not service, or otherwise handle, a chop-
per/shredder in a raised position unless it is
securely blocked against unexpected falling.
4. Chopper/shredders operate in a naturally vibra-
tory environment. Discipline yourself to always
visually inspect this equipment for any exces-
sively worn, damaged, or cracked parts before
starting. Replace these with genuine HINIKER
parts.
5. DO NOT SERVICE END DRIVE BELTS WHEN
TRACTOR IS RUNNING!
6. Replace all shields removed for service, and
check PTO shield for free rotation, before op-
erating this equipment.
REMEMBER - ACCIDENT PREVENTION IS PART
OF YOUR JOB!

TITLE
Decal Location 7
DECAL LOCATION
It is an owner’s and dealer’s responsibility to
insure clear, complete decals are maintained
on equipment, whether operating or offered for
sale.
Information herein is provided for proper decal
ordering and placement.
Decal surfaces should be free of dirt, grease,
etc. Temperatures should be above 50° F. To ap-
ply, remove the smaller part of the decal backing
paper and apply this part of the exposed adhe-
sive to the desired location. Peel the other part
of the backing paper slowly off and smooth out
the entire decal.
FIGURE 2 PHOTO NO. 3219
FIGURE 3 PHOTO NO. 3220
FIGURE 4 71505166 LOGO 5700
FIGURE 5 71505168 LOGO Hiniker
FIGURE 6 71505168 LOGO Hiniker
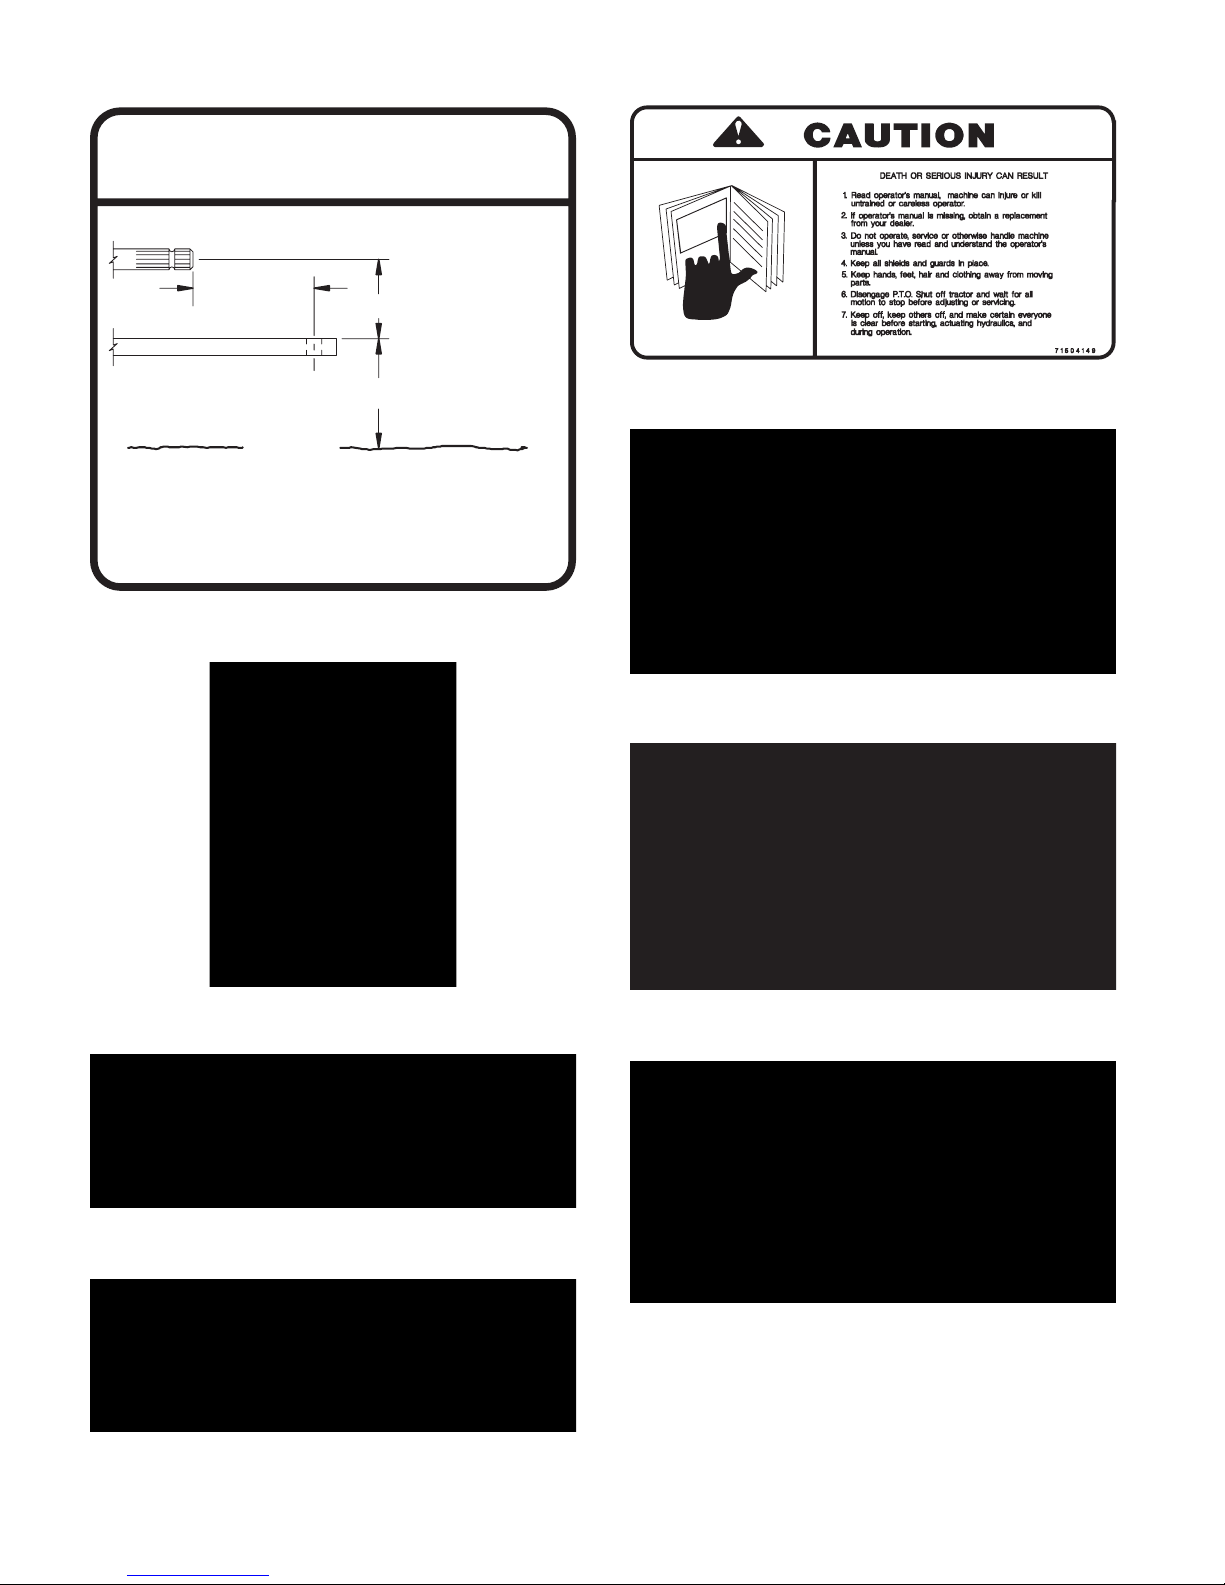
FIGURE 7 71504136 Important: Maintain Tires...
FIGURE 8 71503213 Important: Maintain Belts...
FIGURE 9 71504145 Important: Operate...
8 Decal Location
GROUND
TRACTOR
1. FOR TRAIL HITCH OPERATION, INSURE
TRACTOR HAS THESE DIMENSIONS.
IMPORTANT
71504146
540 RPM=14
1 3/8 PTO 8” MIN. 12” MAX.
540 RPM 13” TO 20”
FIGURE 10 71504146 Important: Hitch...
FIGURE 11 715-03174 Lift...
FIGURE 12 850-001-285 Tape - Yellow Reflector
FIGURE 13 850-001-305 Tape - Red Reflector
FIGURE 14 71504149 Caution Read Manual...
FIGURE 15 71504135 Caution: Safety Chain...
FIGURE 16 71504128 Caution: 540 RPM...
FIGURE 17 715-03056 Caution: Reverse 25 MPH...
Inhaltsverzeichnis


