KLAU Geomatics Phantom 4 Bedienungsanleitung


Table of Contents
Table of Contents..................................................................................................................................2
Disclaimer.............................................................................................................................................2
Hardware Overview..............................................................................................................................3
Mounting Kit....................................................................................................................................3
nstallation............................................................................................................................................4
Antenna Bracket..............................................................................................................................4
Battery Bracket................................................................................................................................6
PPK & PPP Bracket.........................................................................................................................8
Antenna & Antenna Cable.............................................................................................................10
Electrical Connections........................................................................................................................13
Wire Harness Overview.................................................................................................................13
Wire Harness Overview Cont........................................................................................................14
Camera Connection........................................................................................................................15
Before Flying......................................................................................................................................16
Disclaimer
!
" #$%
Rev1
2

Hardware verview
Mounting Kit
1. PPK/PPP Mounting Bracket
2. Battery Mounting Bracket
3. Antenna Mounting Bracket
4. Alcohol Swabs
5. Dual-Lock Strips
Rev1
3

Installation
Antenna Bracket
•Klau installation kits will include Dual-Lock and Double Sided tape required for mounting.
However, if you swap the mounting kit to another drone, the double sided tape will need to
be replaced. We recommend using a quality ‘outdoor’ rated tape such as 3M.
•Prepare the drone by cleaning the area where the bracket will be mounted using the provided
alcohol swabs or an equivalent. Ensure the are is dry before proceeding. [Figure 1]
•Double sided tape should be attached to the antenna bracket as shown. [Figure 2]
•Find the centre position of the drone then attach the mounting bracket. Care should be taken
to ensure the bracket is mounted in the centre of the drone and that the double sided tape has
adhered properly. [Figure 3 & 4]
Figure 1:
Figure 2:
Rev1
4
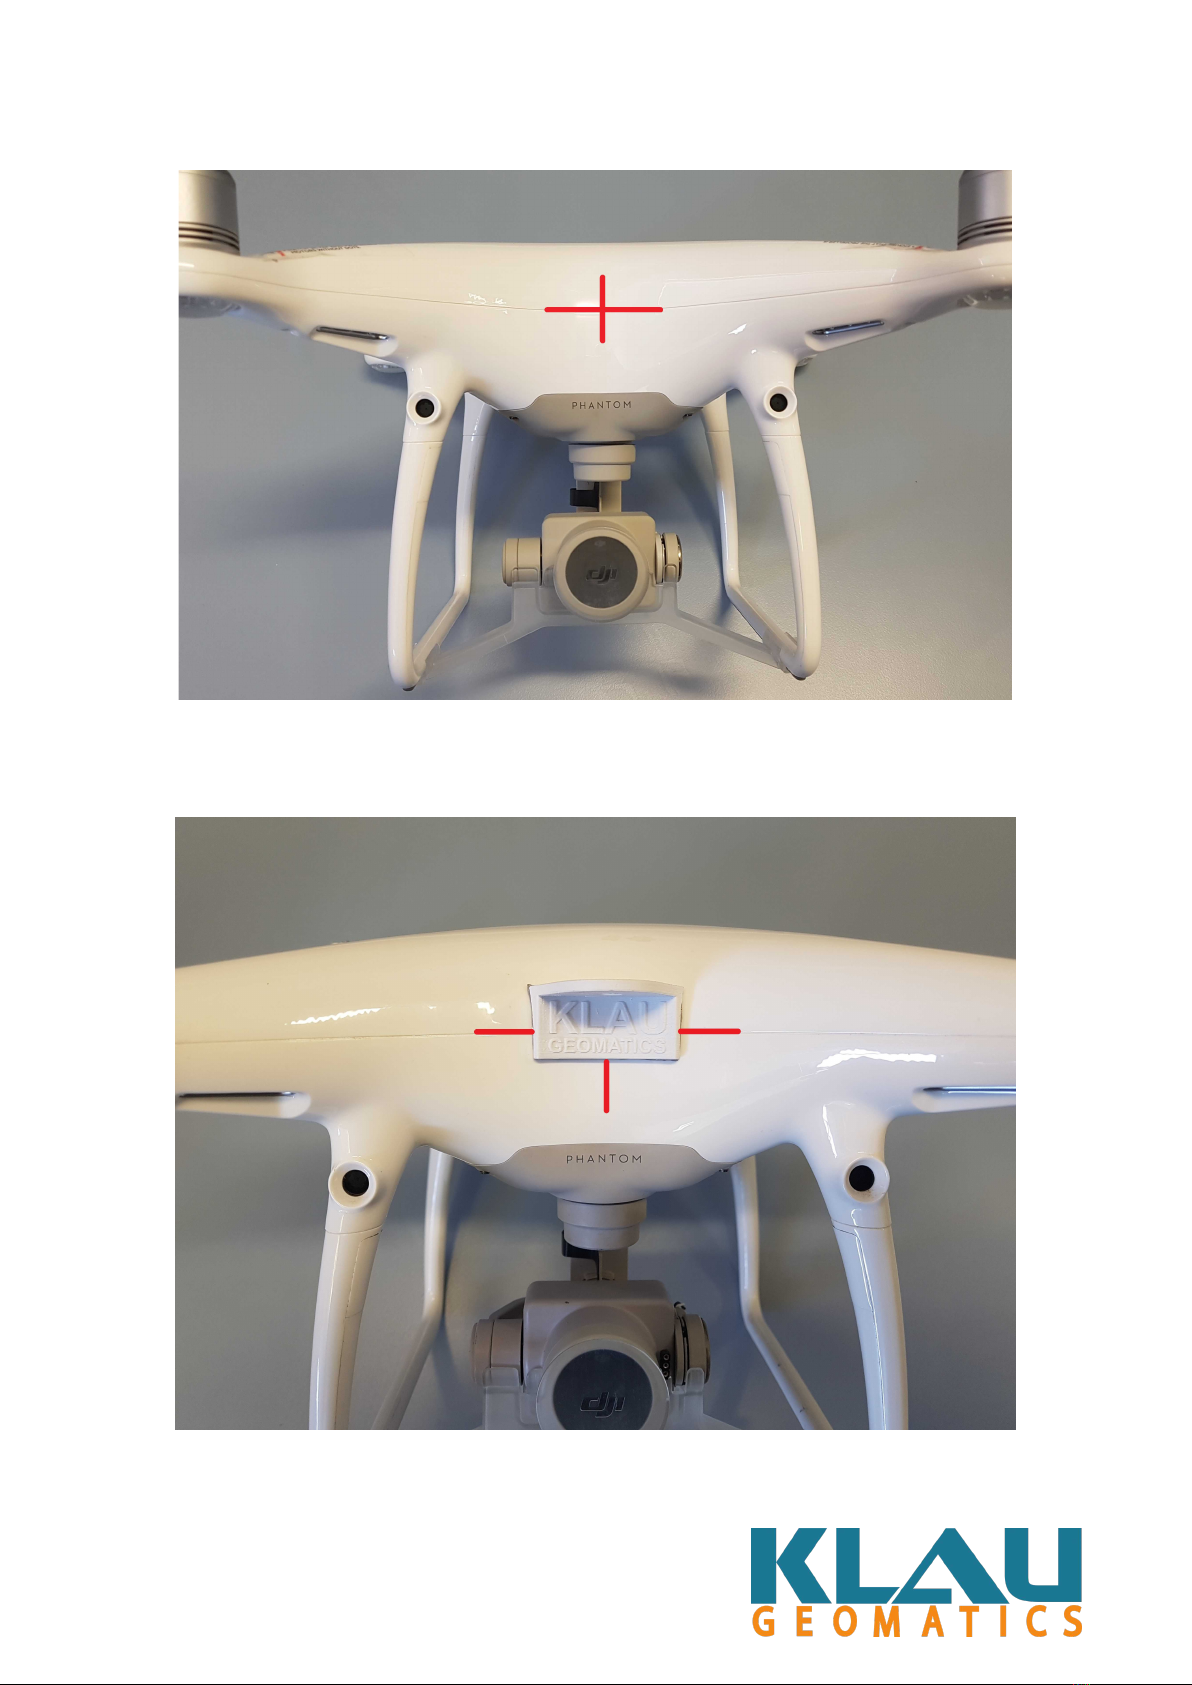
Figure 3:
Figure 4:
Rev1
5

Battery Bracket
•Ensure that the “Forward” marking is towards the front of the drone. [Figure 1]
•With gentle pressure applied, the Battery Bracket will click into position and should sit as
shown below. The Battery Bracket should be mounted on the left leg when looking at the
drone face on. [Figure 2]
•Attach a piece of the supplied Dual-Lock to your battery. The Dual-Lock should be centred
as best as possible on the battery. [Figure 3]
•The battery can now be affixed to the battery bracket. [Figure 4]
Figure 1:
Figure 2:
Rev1
6

Figure 3:
Figure 4:
Rev1
7

PPK & PPP Bracket
•The Klau PPK/PPP Bracket will click into place with gentle pressure in the same way as the
Battery Bracket. t should be mounted on the Right leg when looking at the drone face on.
[Figure 1]
•Ensure all 3 attachments points are secured. [Figure 2]
•The PPK or PPP unit can now be clicked into place as shown. [Figure 3 & 4]
Figure 1:
Figure 2:
Rev1
8

Figure 3:
Figure 4:
Rev1
9

Antenna & Antenna Cable
•Place the threaded SMA connector of the Antenna Cable through the hole in the mounting
bracket on its under-side as illustrated. [Figure 1] You should have roughly 5mm of thread
exposed on the top of the bracket.
•Thread your antenna onto the SMA connector. The Antenna will screw down until it is
touching the bracket. This fitting should be firm enough not to move but not excessively
tight. [Figure 2]
•As a safety measure, please ensure your antenna cable is sitting snug against the body of
your drone where it cannot possibly be hit by the props. Also take note of the cable paths
illustrated in pictures. [Figure 3]
•Once the antenna cable is positioned correctly, and the Antenna has been tightened down
onto its bracket, connect the other end of your antenna cable to your PPP or PPK unit.
[Figure 4]
Figure 1:
Rev1
10
Inhaltsverzeichnis
Andere KLAU Geomatics Drohne Handbücher


 Bedienungsanleitung")


