
Listen AmpConnect621 Bedienungsanleitung
PN: 8072 Rev 042622
AMPCONNECT 621 USER MANUAL
© COPYRIGHT 2020 - 2021 LISTEN, INC.

Rev 042622

AmpConnect 621TM Instruction Manual Contents i
Contents
Contents. . . . . . . . . . . . . . . . . . . . . . . . . . . . . . . . . . . . . . . . . . . . . . . . . . . . . . . . . . . . . i
Limited Warranty. . . . . . . . . . . . . . . . . . . . . . . . . . . . . . . . . . . . . . . . . . . . . . . . . . . . . iii
Product Overview . . . . . . . . . . . . . . . . . . . . . . . . . . . . . . . . . . . . . . . . . . . . . . . . . . . . 1
Front Panel Indicators . . . . . . . . . . . . . . . . . . . . . . . . . . . . . . . . . . . . . . . . . . . . . . . . . . . . . . . . . . . 2
Back Panel Connections . . . . . . . . . . . . . . . . . . . . . . . . . . . . . . . . . . . . . . . . . . . . . . . . . . . . . . . . . 2
Installation . . . . . . . . . . . . . . . . . . . . . . . . . . . . . . . . . . . . . . . . . . . . . . . . . . . . . . . . . . 3
Requirements . . . . . . . . . . . . . . . . . . . . . . . . . . . . . . . . . . . . . . . . . . . . . . . . . . . . . . . . . . . . . . . . . . 3
System Settings . . . . . . . . . . . . . . . . . . . . . . . . . . . . . . . . . . . . . . . . . . . . . . . . . . . . . . . . . . . . . . . . 4
Test Connections and Procedures . . . . . . . . . . . . . . . . . . . . . . . . . . . . . . . . . . . . . . 5
Microphone Array - Power Averaging. . . . . . . . . . . . . . . . . . . . . . . . . . . . . . . . . . . . . . . . . . . . . . . 5
Single Loudspeaker Test . . . . . . . . . . . . . . . . . . . . . . . . . . . . . . . . . . . . . . . . . . . . . . . . . . . . . . . . . 6
Two Loudspeaker Test . . . . . . . . . . . . . . . . . . . . . . . . . . . . . . . . . . . . . . . . . . . . . . . . . . . . . . . . . . . 7
Microphone Test . . . . . . . . . . . . . . . . . . . . . . . . . . . . . . . . . . . . . . . . . . . . . . . . . . . . . . . . . . . . . . . . 8
Hardware and Calibration. . . . . . . . . . . . . . . . . . . . . . . . . . . . . . . . . . . . . . . . . . . . . . 9
SoundCheck Hardware Configuration . . . . . . . . . . . . . . . . . . . . . . . . . . . . . . . . . . . . . . . . . . . . . . 9
Latency Changes . . . . . . . . . . . . . . . . . . . . . . . . . . . . . . . . . . . . . . . . . . . . . . . . . . . . . . . . . . . . . . 11
AmpConnect 621 Hardware Configuration. . . . . . . . . . . . . . . . . . . . . . . . . . . . . . . . . . . . . . . . . . 13
Listen Hardware Tab. . . . . . . . . . . . . . . . . . . . . . . . . . . . . . . . . . . . . . . . . . . . . . . . . . . . . . . . . . . . 14
SoundCheck Calibration Configuration . . . . . . . . . . . . . . . . . . . . . . . . . . . . . . . . . . . . . . . . . . . . 15
Self Test Sequence . . . . . . . . . . . . . . . . . . . . . . . . . . . . . . . . . . . . . . . . . . . . . . . . . . . . . . . . . . . . . 16
Amplifier Calibration. . . . . . . . . . . . . . . . . . . . . . . . . . . . . . . . . . . . . . . . . . . . . . . . . . . . . . . . . . . . 17
Microphone Calibration . . . . . . . . . . . . . . . . . . . . . . . . . . . . . . . . . . . . . . . . . . . . . . . . . . . . . . . . . 18
AmpConnect 621 Message Step . . . . . . . . . . . . . . . . . . . . . . . . . . . . . . . . . . . . . . . 21
Inputs . . . . . . . . . . . . . . . . . . . . . . . . . . . . . . . . . . . . . . . . . . . . . . . . . . . . . . . . . . . . . . . . . . . . . . . . 21
Outputs . . . . . . . . . . . . . . . . . . . . . . . . . . . . . . . . . . . . . . . . . . . . . . . . . . . . . . . . . . . . . . . . . . . . . . 22
USB Control Via SoundCheck . . . . . . . . . . . . . . . . . . . . . . . . . . . . . . . . . . . . . . . . . 23
AmpConnect 621 Message Step . . . . . . . . . . . . . . . . . . . . . . . . . . . . . . . . . . . . . . . . . . . . . . . . . . 23
Digital I/O Message Steps . . . . . . . . . . . . . . . . . . . . . . . . . . . . . . . . . . . . . . . . . . . . . . . . . . . . . . . 25
Digital I/O Operation . . . . . . . . . . . . . . . . . . . . . . . . . . . . . . . . . . . . . . . . . . . . . . . . . 27
Connection . . . . . . . . . . . . . . . . . . . . . . . . . . . . . . . . . . . . . . . . . . . . . . . . . . . . . . . . . . . . . . . . . . . 27
Digital I/O Message . . . . . . . . . . . . . . . . . . . . . . . . . . . . . . . . . . . . . . . . . . . . . . . . . . . . . . . . . . . . . 27
Digital I/O Write Example . . . . . . . . . . . . . . . . . . . . . . . . . . . . . . . . . . . . . . . . . . . . . . . . . . . . . . . . 30
Digital I/O Read Examples . . . . . . . . . . . . . . . . . . . . . . . . . . . . . . . . . . . . . . . . . . . . . . . . . . . . . . . 31
Contents

ii Contents AmpConnect 621TM Instruction Manual
Specifications . . . . . . . . . . . . . . . . . . . . . . . . . . . . . . . . . . . . . . . . . . . . . . . . . . . . . . 35
Equipment Ratings and Approvals . . . . . . . . . . . . . . . . . . . . . . . . . . . . . . . . . . . . . 37
CE Declaration of Conformity. . . . . . . . . . . . . . . . . . . . . . . . . . . . . . . . . . . . . . . . . . 40
Important Safety Precautions And Symbol Explanations . . . . . . . . . . . . . . . . . . . 43
Vigtige Sikkerhedsforskrifter Og Symbolforklaringer . . . . . . . . . . . . . . . . . . . . . . 45
Explications Importantes des Symboles et des Précautions de Sécurité . . . . . . 47
Wichtige Sicherheitsvorkehrungen und Symbol-erklärungen . . . . . . . . . . . . . . . 49
Información de Seguridad y Símbolos . . . . . . . . . . . . . . . . . . . . . . . . . . . . . . . . . . 51
Listen Software License Agreement . . . . . . . . . . . . . . . . . . . . . . . . . . . . . . . . . . . . 53
INDEX . . . . . . . . . . . . . . . . . . . . . . . . . . . . . . . . . . . . . . . . . . . . . . . . . . . . . . . . . . . . . 59

AmpConnect 621™ Manual Limited Warranty iii
Limited Warranty
LISTEN, Inc., a Massachusetts Corporation, having its principal place of business at 580 Harrison Ave,
Suite 3W, Boston, MA 02118 (Manufacturer) warrants its AmpConnect 621TM products (the Products) as
follows:
1. Limited Warranty.
Manufacturer warrants that the Products sold hereunder will be free from defects in material and
workmanship for a period of one (1) year from the date of purchase. If the Products do not conform to this
Limited Warranty during the warranty period (as herein above specified), Buyer shall notify Manufacturer in
writing of the claimed defects and demonstrate to Manufacturer satisfaction that said defects are covered
by this Limited Warranty. If the defects are properly reported to Manufacturer within the warranty period,
and the defects are of such type and nature as to be covered by this warranty, Manufacturer shall, at its own
expense, furnish, replacement Products or, at Manufacturer's option, replacement parts for the defective
Products. Shipping of the replacement Products or replacement parts shall be at Buyer's expense.
2. Other Limits.
THE FOREGOING IS IN LIEU OF ALL OTHER WARRANTIES, EXPRESS OR IMPLIED, INCLUDING BUT
NOT LIMITED TO THE IMPLIED WARRANTIES OF MERCHANTABILITY AND FITNESS FOR A
PARTICULAR PURPOSE. Manufacturer does not warrant against damages or defects arising out of
improper or abnormal use of handling of the Products; against defects or damages arising from improper
installation (where installation is by persons other than Manufacturer), against defects in products or
components not manufactured by Manufacturer, or against damages resulting from such non-Manufacturer
made products or components. Manufacturer passes on to Buyer the warranty it received (if any) from the
maker thereof of such non-Manufacturer made products or components. This warranty also does not apply
to Products upon which repairs have been effected or attempted by persons other than pursuant to written
authorization by Manufacturer.
3. Exclusive Obligation.
THIS WARRANTY IS EXCLUSIVE. The sole and exclusive obligation of Manufacturer shall be to repair or
replace the defective Products in the manner and for the period provided above. Manufacturer shall not
have any other obligation with respect to the Products or any part thereof, whether based on contract, tort,
strict liability or otherwise. Under no circumstances, whether based on this Limited Warranty or otherwise,
shall Manufacturer be liable for incidental, special, or consequential damages.
4. Other Statements.
Manufacturer's employees or representatives' ORAL OR OTHER WRITTEN STATEMENTS DO NOT
CONSTITUTE WARRANTIES, shall not be relied upon by Buyer, and are not a part of the contract for sale
or this limited warranty.
5. Entire Obligation.
This Limited Warranty states the entire obligation of Manufacturer with respect to the Products. If any part
of this Limited Warranty is determined to be void or illegal, the remainder shall remain in full force and
effect.

iv Limited Warranty AmpConnect 621™ Manual
page intentionally left blank

AmpConnect 621™ Manual Product Overview 1
Product Overview
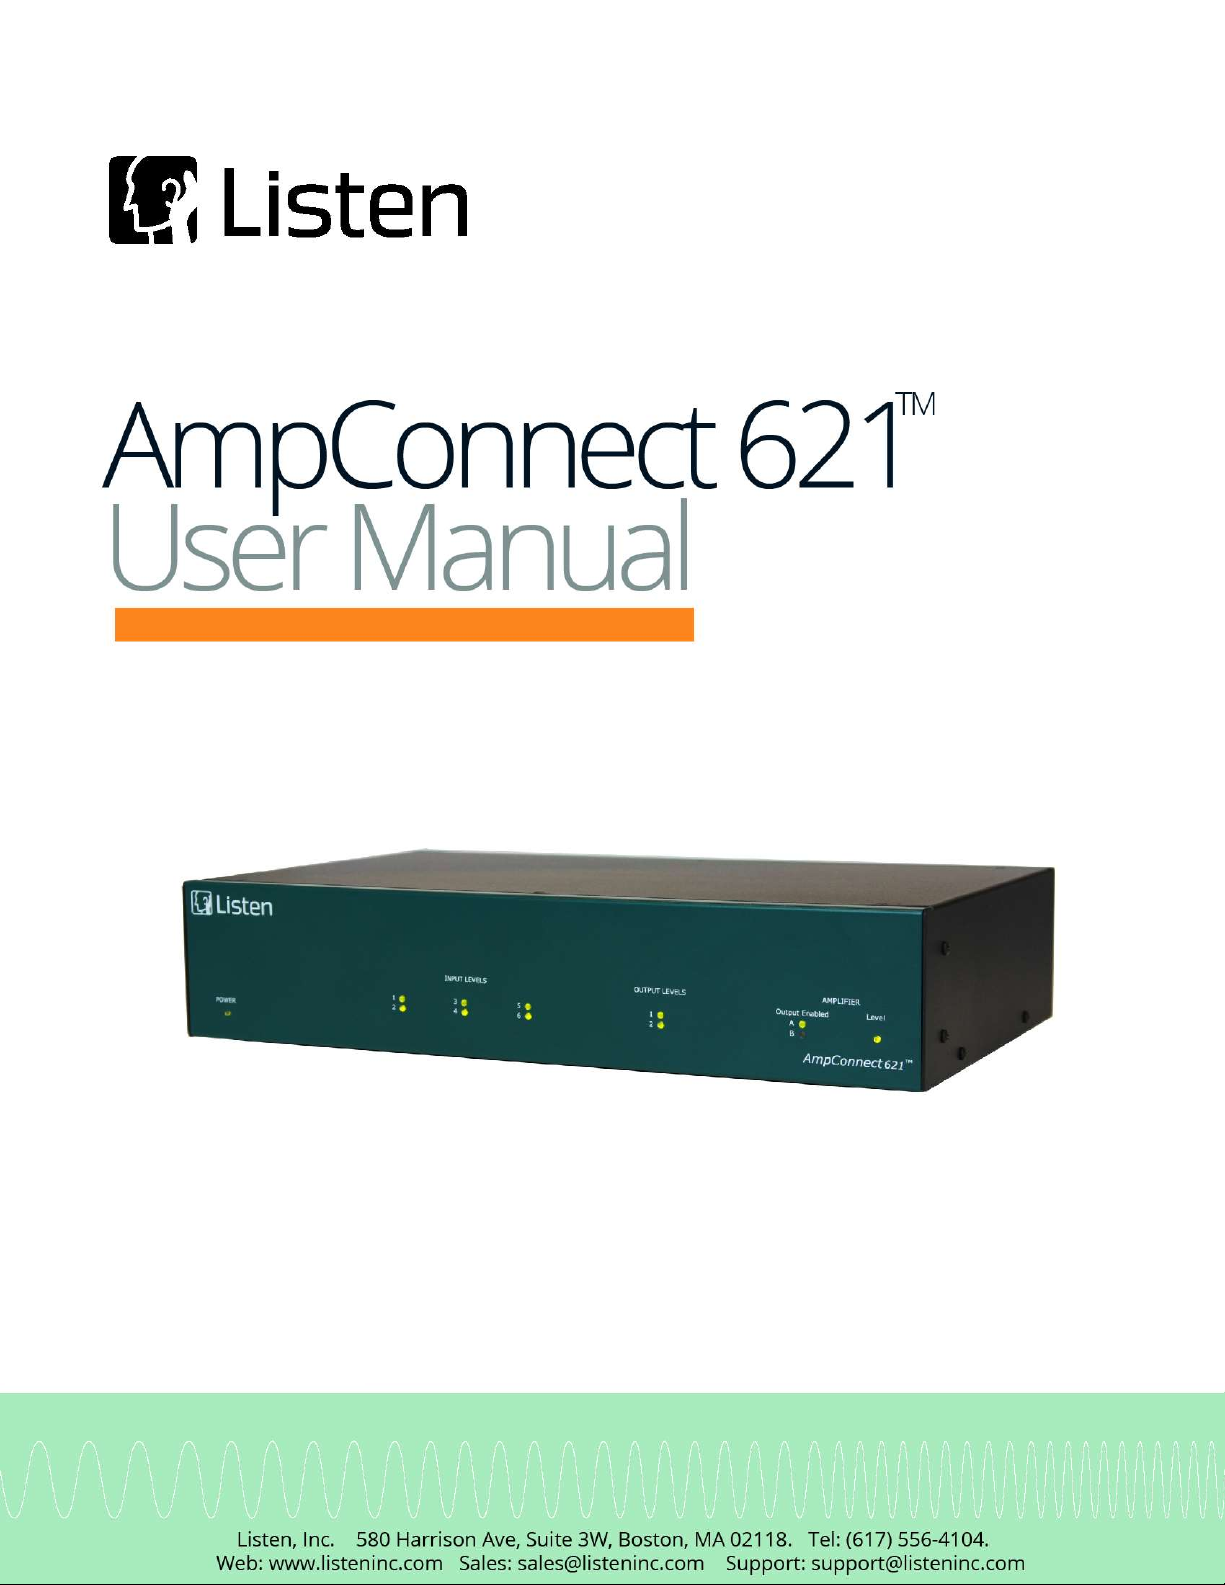
AmpConnect 621™ simplifies your multichannel audio test in a single USB-connected unit. With sample
rates up to 192kHz, it is ideal for the measurement of high resolution audio devices.
6 inputs with independent control of microphone power for each channel
2 Line Outputs
Single amplifier output with switchable binding posts
Unique high accuracy impedance measurement independent of your input channels
Digital I/O
Plug-and-play setup with SoundCheck and TEDS support
Error-free operation with all control via SoundCheck - no buttons!
Clear visual level indications on front panel
Excellent ground loop immunity compared to discrete components
Rugged and rack-mountable for demanding production environments
2 Product Overview AmpConnect 621™ Manual
Front Panel Indicators
AmpConnect 621 must be connected to a computer running SoundCheck as all control and audio interface
functions are made via the USB 2.0 (minimum) connection.
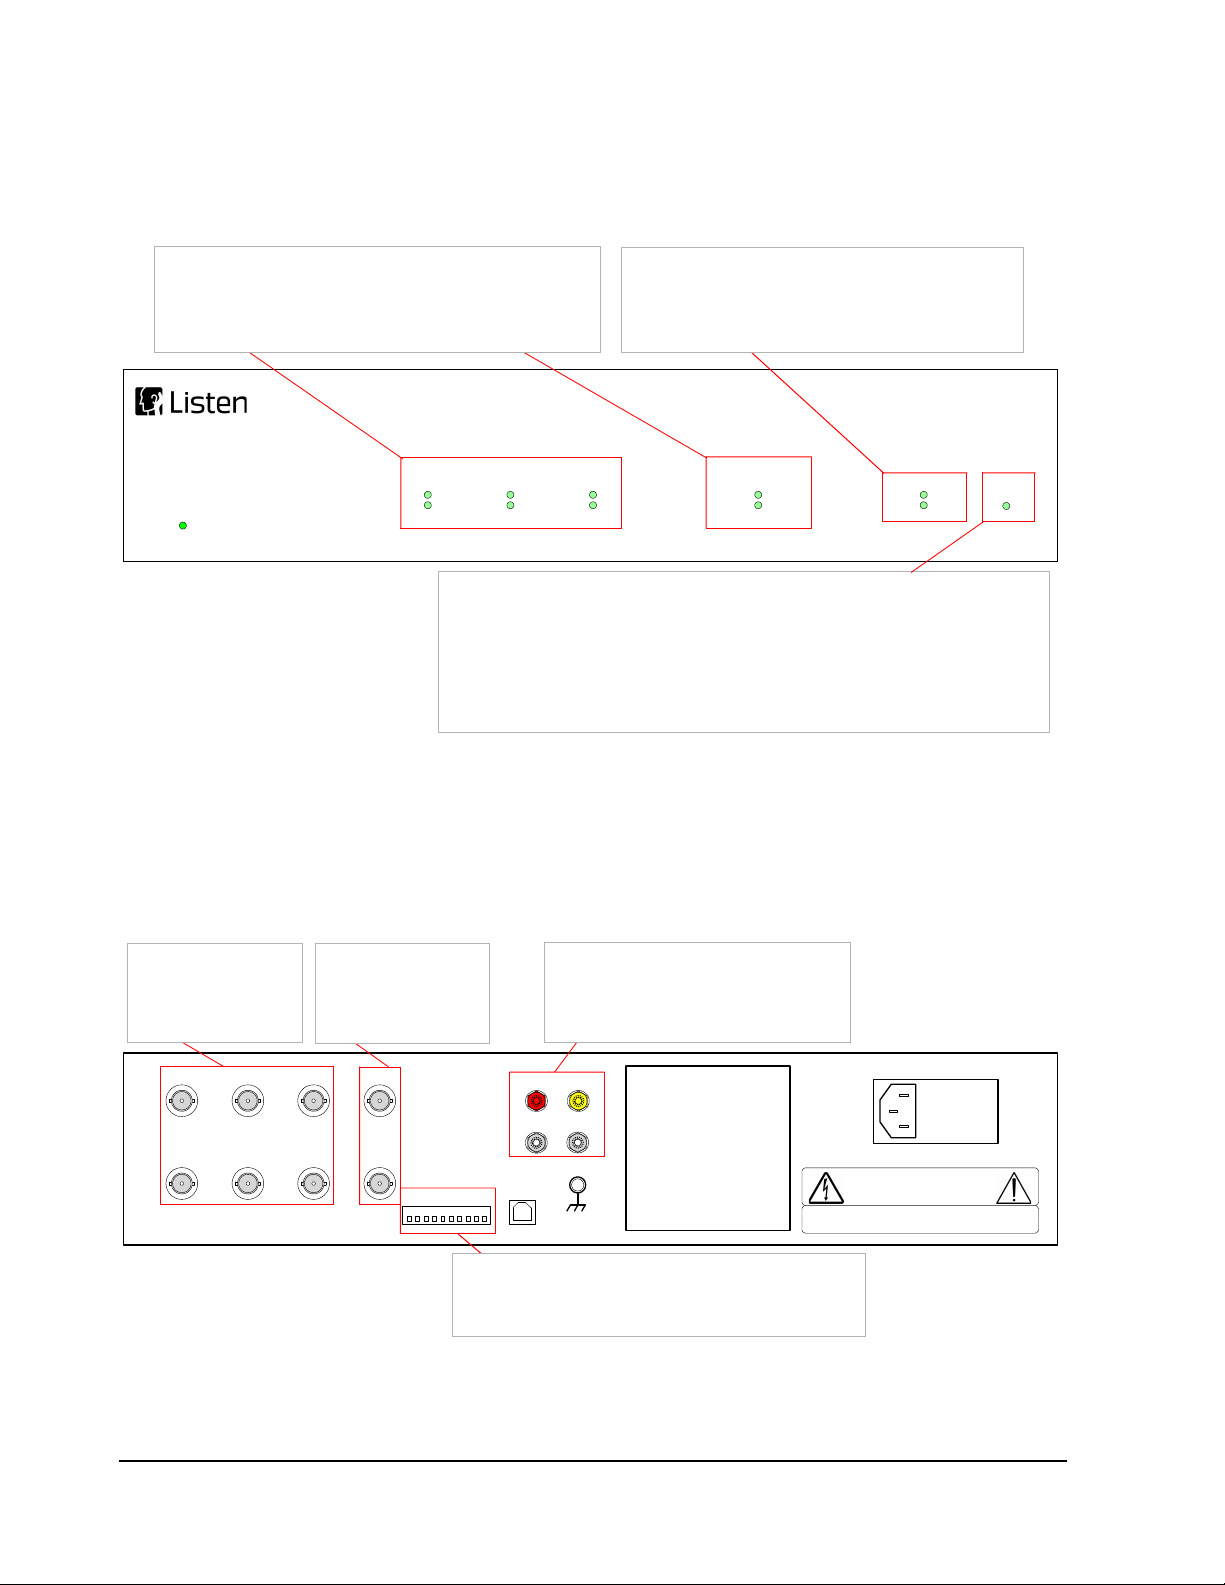
When Inputs 1 through 6 are routed to the internal audio interface channels the front panel level indicators
show the signal state at those inputs. This gives you a visual indication to show if the input is overloaded or
underloaded (low signal level that is too close to the noise floor of the system).
See AmpConnect 621 Message Step on page 21. Also see Max FSD In in the SoundCheck manual.
Back Panel Connections
Saved State: The state of AmpConnect 621 is saved every 30 seconds. This allows the device to power on
in it's last used state. Note that this will be overwritten by Hardware Startup Defaults set in the System
Hardware.
AmpConnect 621™
Power
Input Levels Output Levels Amplifier
Output Enabled Level
1
2
3
4
5
6
1
2
A
B
Figure 1-1: Front Panel Level - Monitors the peak signal level and state of the amplifier output (All
values are nominal)
• Green indicates amplifier output level is >45 mVrms
• Yellow indicates amplifier output level is >13Vrms
Error Indicator - A blinking red Level LED indicates that the amplifier has
shut off due to an over-temperature or over-current event. The unit needs to
be power-cycled to clear the error state.
Input and Output Levels
• Indicator turns Green when level is > -50 dBFS
• Indicator turns Yellow when level is -6 dBFS
• Indicator turns Red when level is -1 dBFS
Output Enabled
• Shows the status of the back panel amp
binding posts
• Green indicates active
A+
A-
B+
B-
CAUTION: TO REDUCE THE RISK OF ELECTRICAL SHOCK, DO NOT REMOVE COVER. NO
USER-SERVICABLE PARTS INSIDE.
REFER SERVICING TO QUALIFIED SERVICE PERSONNEL .
Input 1
Input 2
Digital I/O
Input: 110-240V~
50 /60Hz 200W
Fuse: T2.5A
Bit 0
Bit 1
Bit 2
Bit 3
Bit 4
Bit 5
Bit 6
Bit 7
+3.3V
Ret.
Amplifier Output
Chassis GND
AmpConnect 621™
Listen, Inc. Made in U.S.A.
Serial No.
USB 2.0
Input 3
Input 4
Input 5
Input 6
Output 1
Output 2
CAUTION: RISK OF ELECTRICAL SHOCK – DO NOT OPEN
ATTENTION: RISQUE DE CHOC ÉLECTRIQUE –
NE PAS OUFRIR
Figure 1-2: Back Panel
Inputs
• Six Inputs,
Single Ended
BNC connectors
Outputs
• Two Outputs,
Single Ended
BNC connectors
Amplifier
• Mono power amp can be switched
to either Output A, Output B,
A and B or Toggle Outputs
Digital I/O
• send or receive signals with external devices
• See Digital I/O Operation on page 27
AmpConnect 621™ Manual Installation 3
Installation
Requirements
SoundCheck 18.1 (or later) is required in order to control AmpConnect 621™ via USB
The SoundCheck computer must have an available USB 2.0 connection
Note: It is recommended that AmpConnect 621 be mounted in a ventilated rack mount enclosure for
proper cooling.
USB Connections
AmpConnect 621 should be connected directly to the SoundCheck host computer USB Port. High quality,
powered USB 3 and USB-C hubs may work but should be tested for stability with AmpConnect 621. The
use of USB 2 hubs should be avoided.
Physical Installation
Power Requirements:
100-240 VAC, 50 or 60 Hz, 140W
Fuse: Requires 2: T2.0A, 250V 5x20 mm Time Lag glass fuses. Suggested replacement: Eaton/
Bussman BK/S506-2.0-R
Connecting AmpConnect 621 to the AC mains supply
AmpConnect 621 must be connected to a 50 or 60 Hz AC mains supply, with an operating voltage within
100 to 240 Vrms. The mains supply is connected to your AmpConnect 621 via the power entry module
located on the back panel. A 3-wire grounded power cord is supplied.
Ground the Instrument
Install SoundCheck first!
Before connecting AmpConnect 621 with the provided USB cable to the SoundCheck host computer,
SoundCheck must be installed. The AmpConnect 621 ASIO driver installation is part of the SoundCheck
software install process.
Windows will indicate that new hardware has been found, which shows that the driver has been
successfully installed. This may be displayed as “AmpConnect 621” or as “New HID Device”.
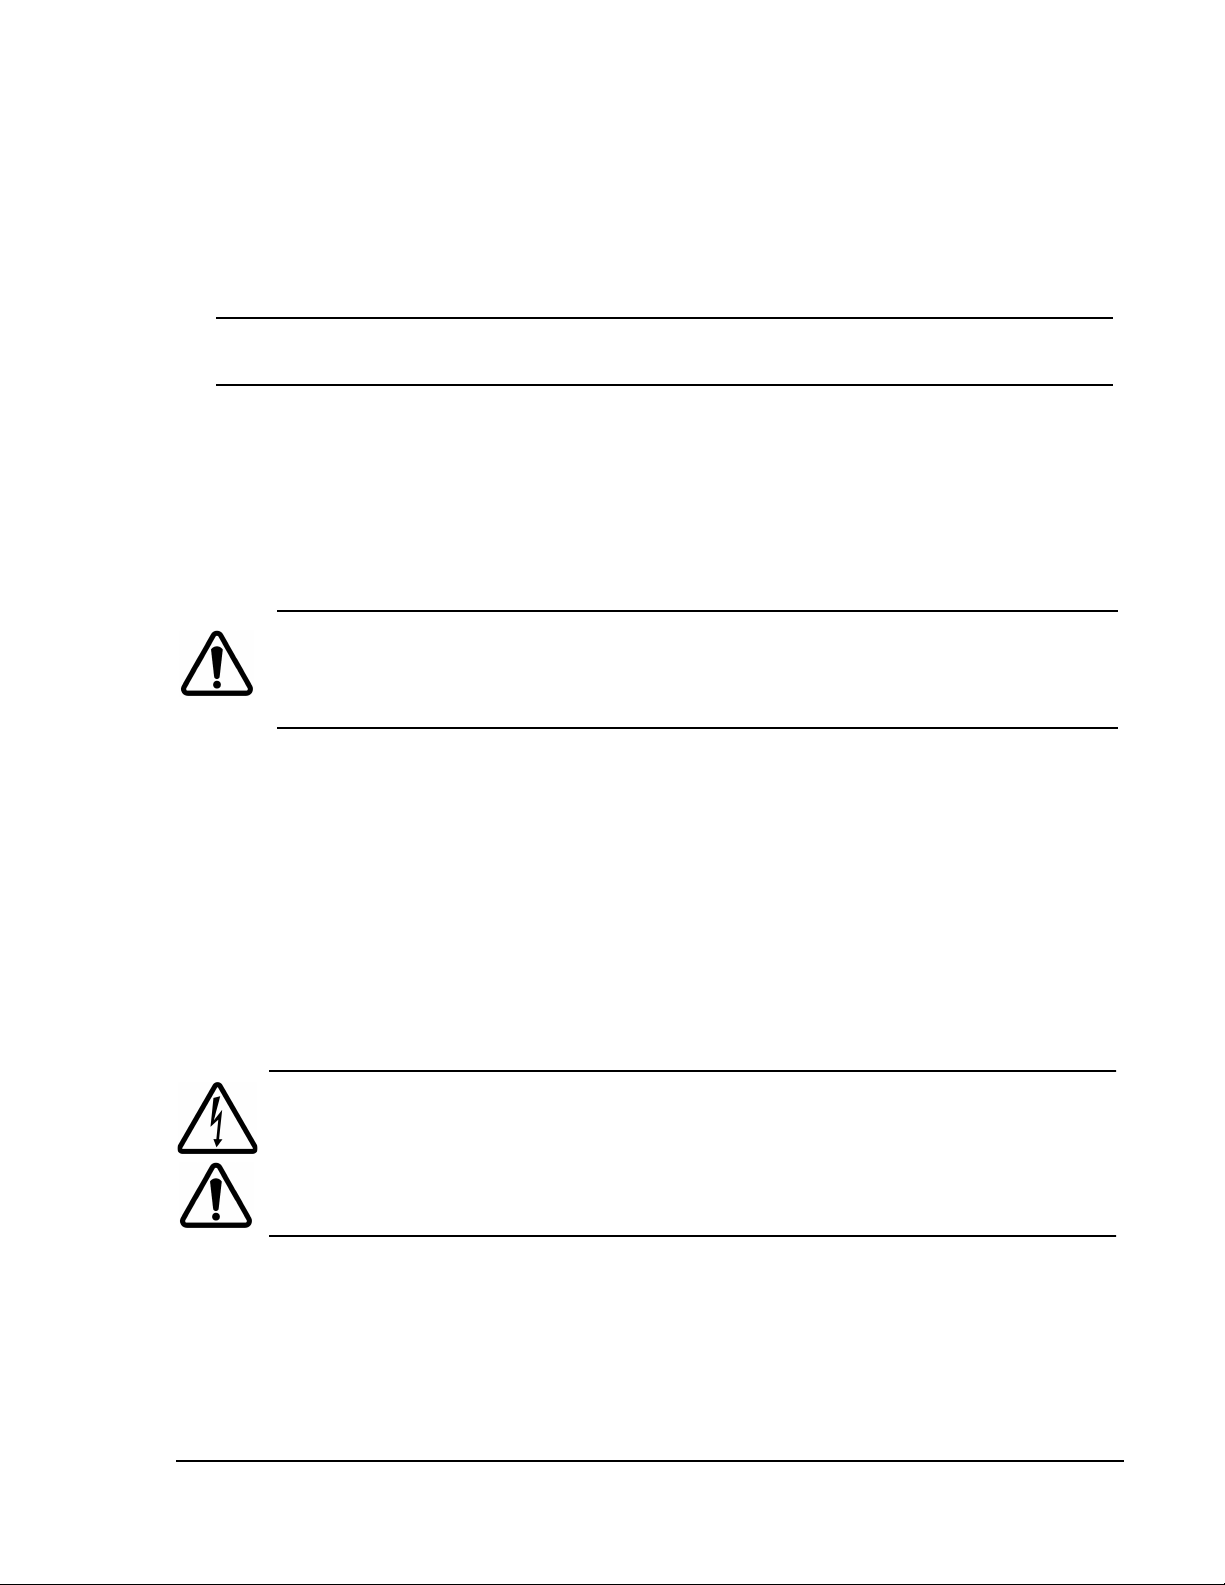
Caution! Airflow around the heat sink must remain unobstructed during use. DO NOT install
AmpConnect 621 inside an enclosure without a ventilation fan. When installed in a
rack, AmpConnect 621 units should not be installed on top of each other. Leave
airspace for cooling.
Warning! A grounding-type power plug is included with AmpConnect 621. The chassis and
cover must be connected to an electrical ground to minimize shock hazard. The
ground pin must be firmly connected to an electrical ground (safety ground) terminal
at the power outlet. Any interruption of the protective (grounding) conductor or
disconnection of the protective earth terminal will cause a potential shock hazard
that could result in personal injury.

4 Installation AmpConnect 621™ Manual
System Settings
The following settings are recommended to prevent Windows system sounds from inadvertently playing
through a device under test or artificial mouth. A transducer could be damaged by loud system sounds.
Windows Audio Devices
Note: For more information on computer system setup please refer to the main
SoundCheck instruction manual.
1. Click Start and type “Manage Audio Devices” in
the search bar and select Manage Audio Devices
3. Select the Recording tab and set the default record-
ing device to the motherboard sound card or any other
device that is not part of the measurement system
2. Click the Sounds tab and set the Sound Scheme to
No Sounds
4. Select the Playback tab and set the default
Windows playback device to the motherboard
audio interface or any other device that is not part
of the measurement system
5. Click OK and close the remaining Control Panel windows
Inhaltsverzeichnis
Andere Listen Prüfgeräte Handbücher

Beliebte Prüfgeräte Handbücher anderer Marken

SMART
SMART KANAAD SBT XTREME 3G Series Bedienungsanleitung

Agilent Technologies
Agilent Technologies BERT Serial Bedienungsanleitung

Agilent Technologies
Agilent Technologies N3280A Bedienungsanleitung

Vernier
Vernier Go Direct Voltage Bedienungsanleitung

Lifeloc
Lifeloc R.A.D.A.R. Bedienungsanleitung

Fluke
Fluke T5-600 Bedienungs- und Montageanleitung


PCB Piezotronics
PCB Piezotronics 8159-0112A Bedienungsanleitung

BW Technologies
BW Technologies MicroDock II Bedienungsanleitung

Sun Nuclear
Sun Nuclear 1027 Bedienungsanleitung

Biomark
Biomark HPR LITE READER Bedienungsanleitung

Hioki
Hioki 3169-20 Bedienungsanleitung

Ashcroft
Ashcroft ATE-100 Bedienungsanleitung