
Majacraft Pioneer Kurzanleitung
1
majacraft
majacraft
all you need to spin your dreams...
Your new
Pioneer
spinning wheel

2
majacraft
Joiner screws - 25mm (1”)
To aach the rubber joiners on the
conrods to the pedals
Crank screws - 38mm (1 1/2”)
To aach the crank assembly to the
drive wheel
Base bolt - JCB 40mm (1 1/4”)
To hold the base and stem assembly
together
Fastener Details
Welcome to the Majacraft family
Congratulaons on purchasing a new Majacra Pioneer.
We are very proud of this wheel and hope that it allows you to express your creavity in new and
excing ways. Take me to read through the instrucons before assembly, it really is worth it.
One of our goals is to make our wheels as easy and simple to use as possible, so they become
almost invisible as you express your creavity through bre.
If you were not already aware, we have designed all of our cra tools and accessories to be
compable with each other. If you have an interest in a specic technique, we are likely to have
specialist accessories that will t straight on to this wheel or tools to make creang easy. Talk to
your dealer, visit our web site or email us directly and we will do what we can to help.
Thank you for choosing Majacra, it is your belief in us that drive our innovaon and creavity in
building capvang tools for you.
From the team at Majacra, good spinning!
3
majacraft
Assembling a Majacraft Pioneer
1. Prepare the components
These instrucons demonstrate how to assemble your Majacra Pioneer spinning wheel.
2. Attach stem to base assembly
We recommend that you nd a clear work area where you
can lay out all the components for working on them.
The following tools are provided by Majacra
- 5mm allen key
- 4mm allen key
- 2mm allen key
You will also need the following tools:
- Posidrive (Philips) screwdriver
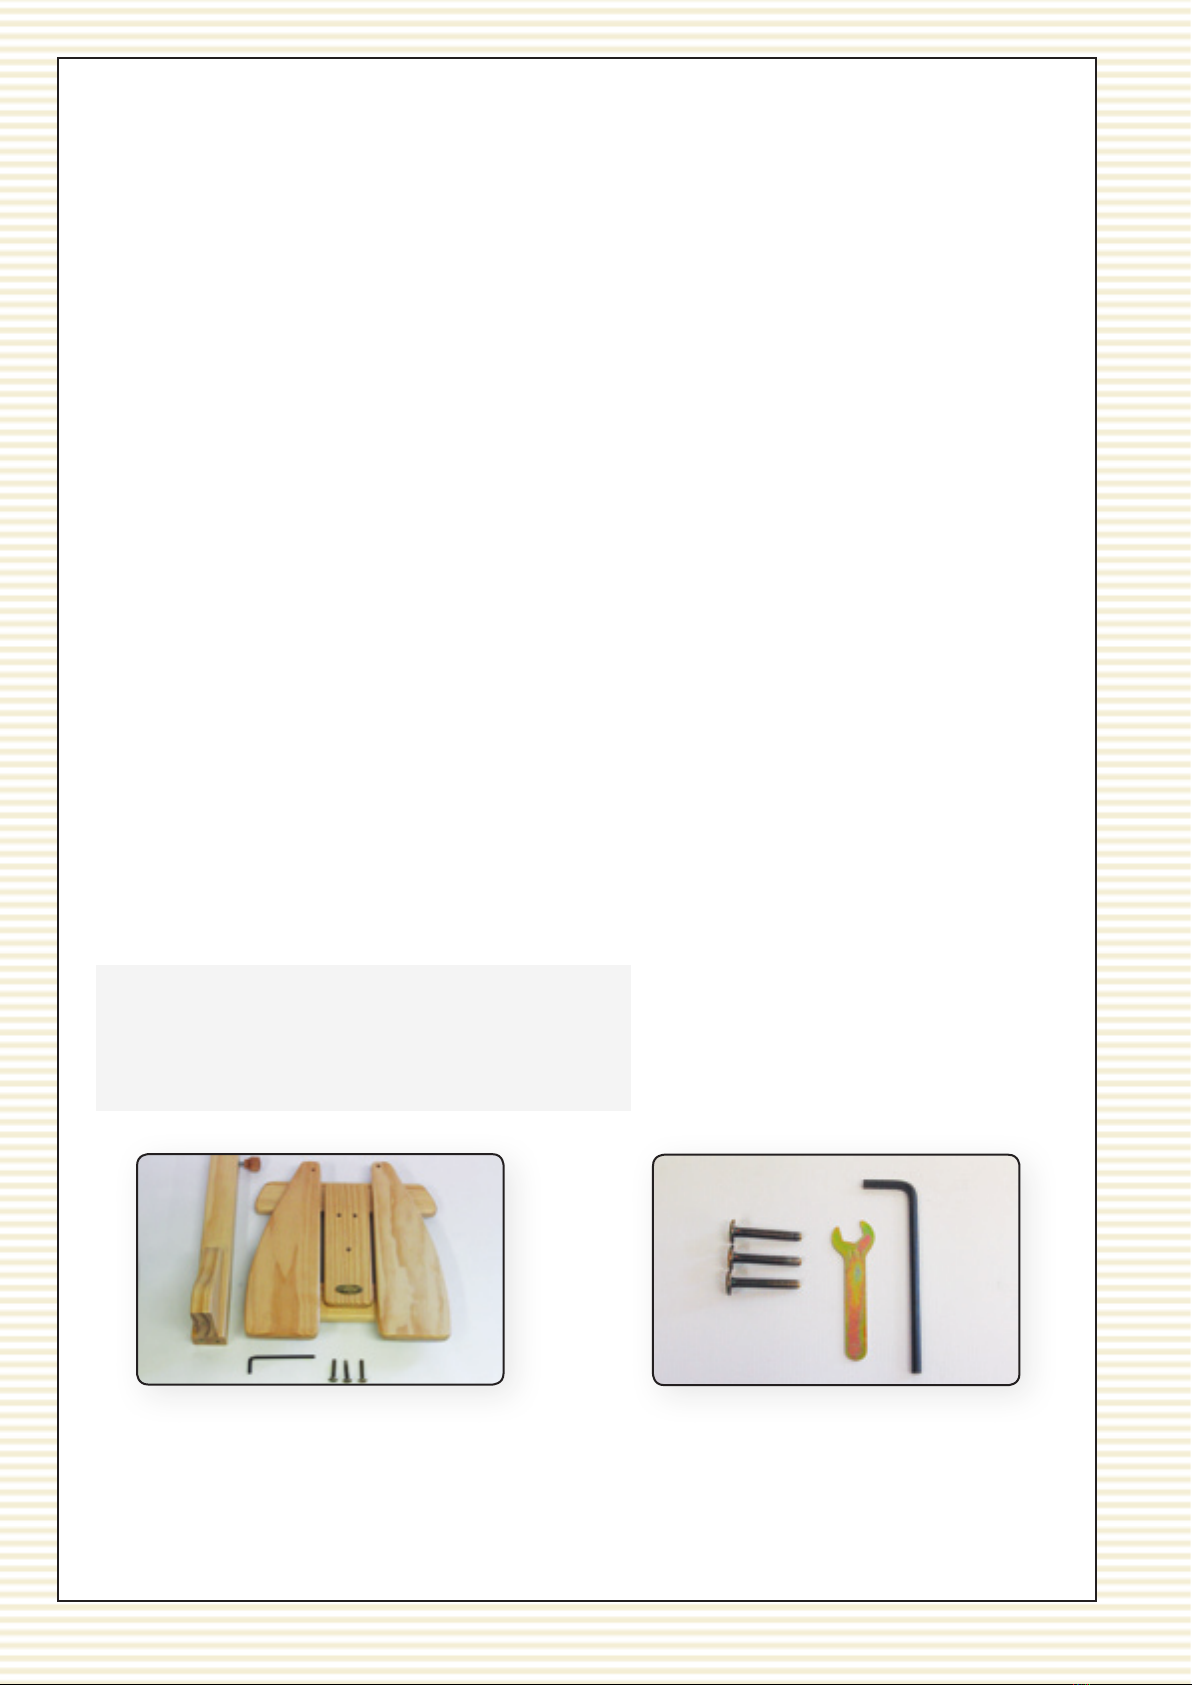
Please unpack with care and retain the packaging. In the box will be:
Required:
3 - M6 40mm JCB (1 1/2”) bolts (in the hardware bag)
4mm allen wrench (in the hardware bag)
Stem assembly
Base assembly
1 Base/Pedal assembly
1 Stem/Brace assembly
1 Head assembly
1 Drive wheel with drive axle
3 Plasc Bobbins
1 Flyer
1 Crank and Conrod assembly
1 Hardware Bag (screws, etc) spare screws are included
2a 2b

4
majacraft
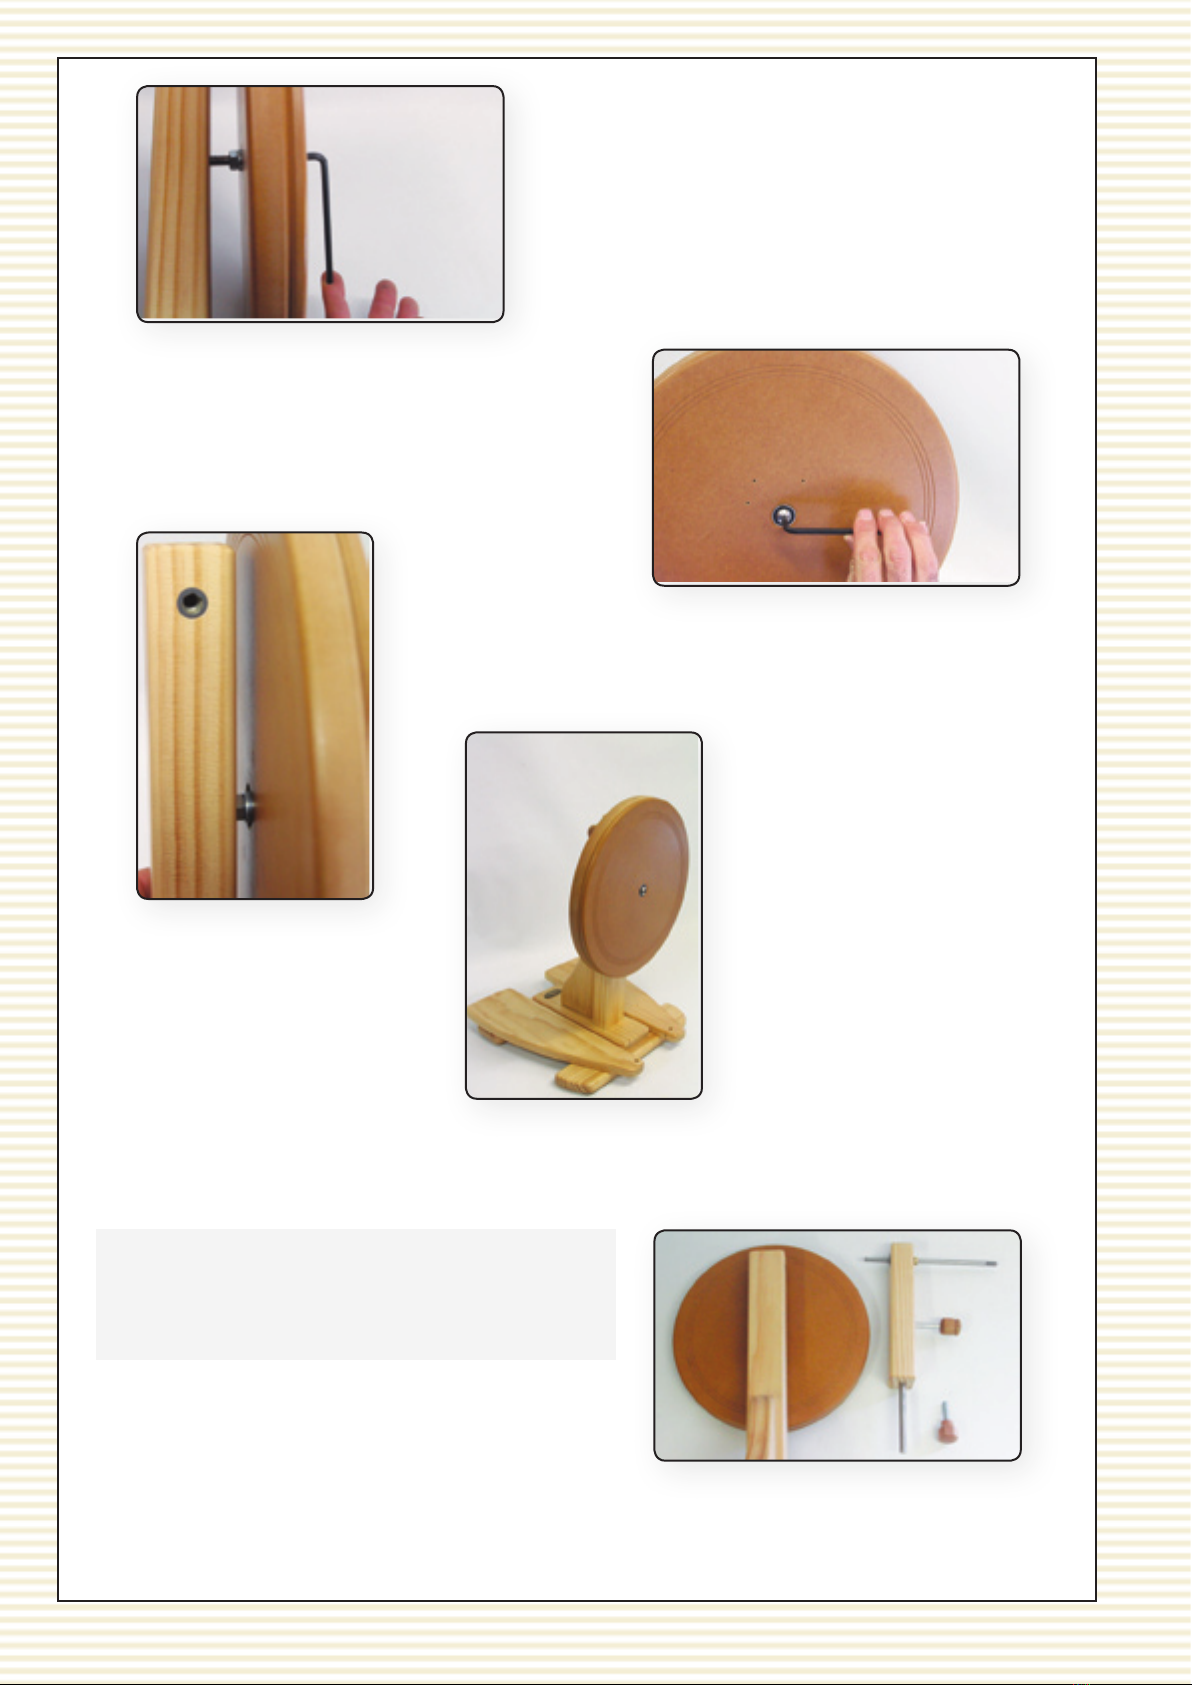
You will require the three 40mm JCB bolts. The 4mm allen key is necessary. Posion the base
assembly on it’s edge and then push the JCB bolts through from underneath. Take care that the
pedals do not swing free and become damaged.
Align the JCB bolts with the threaded holes in the
stem and the brace. Use the 4mm allen key to screw
the JCB bolts into place.
Do not ghten the bolts fully yet. Repeat this with the remaining
two JCB bolts. When they all in place then ghten bolts securing
the stem onto the base assembly.
Required:
5mm allen key (in the hardware bag)
Base/Stem assembly
Drive Wheel
3. Attach drive wheel to stem
2c
2d
2e
3a
5
majacraft
The drive wheel has the axle already in place. Align
the end of the axle with the threaded insert on the
stem.
Required:
Head Assembly
Base/Stem Assembly
Hex Lock Bolt
4. Head assembly on to stem
3b
3c
3d
3e
4a
When located correctly, use the 5mm allen key to
screw the axle bolt into the stem. Tighten it rmly
The drive wheel is now aached
to the base/stem assembly.
6
majacraft
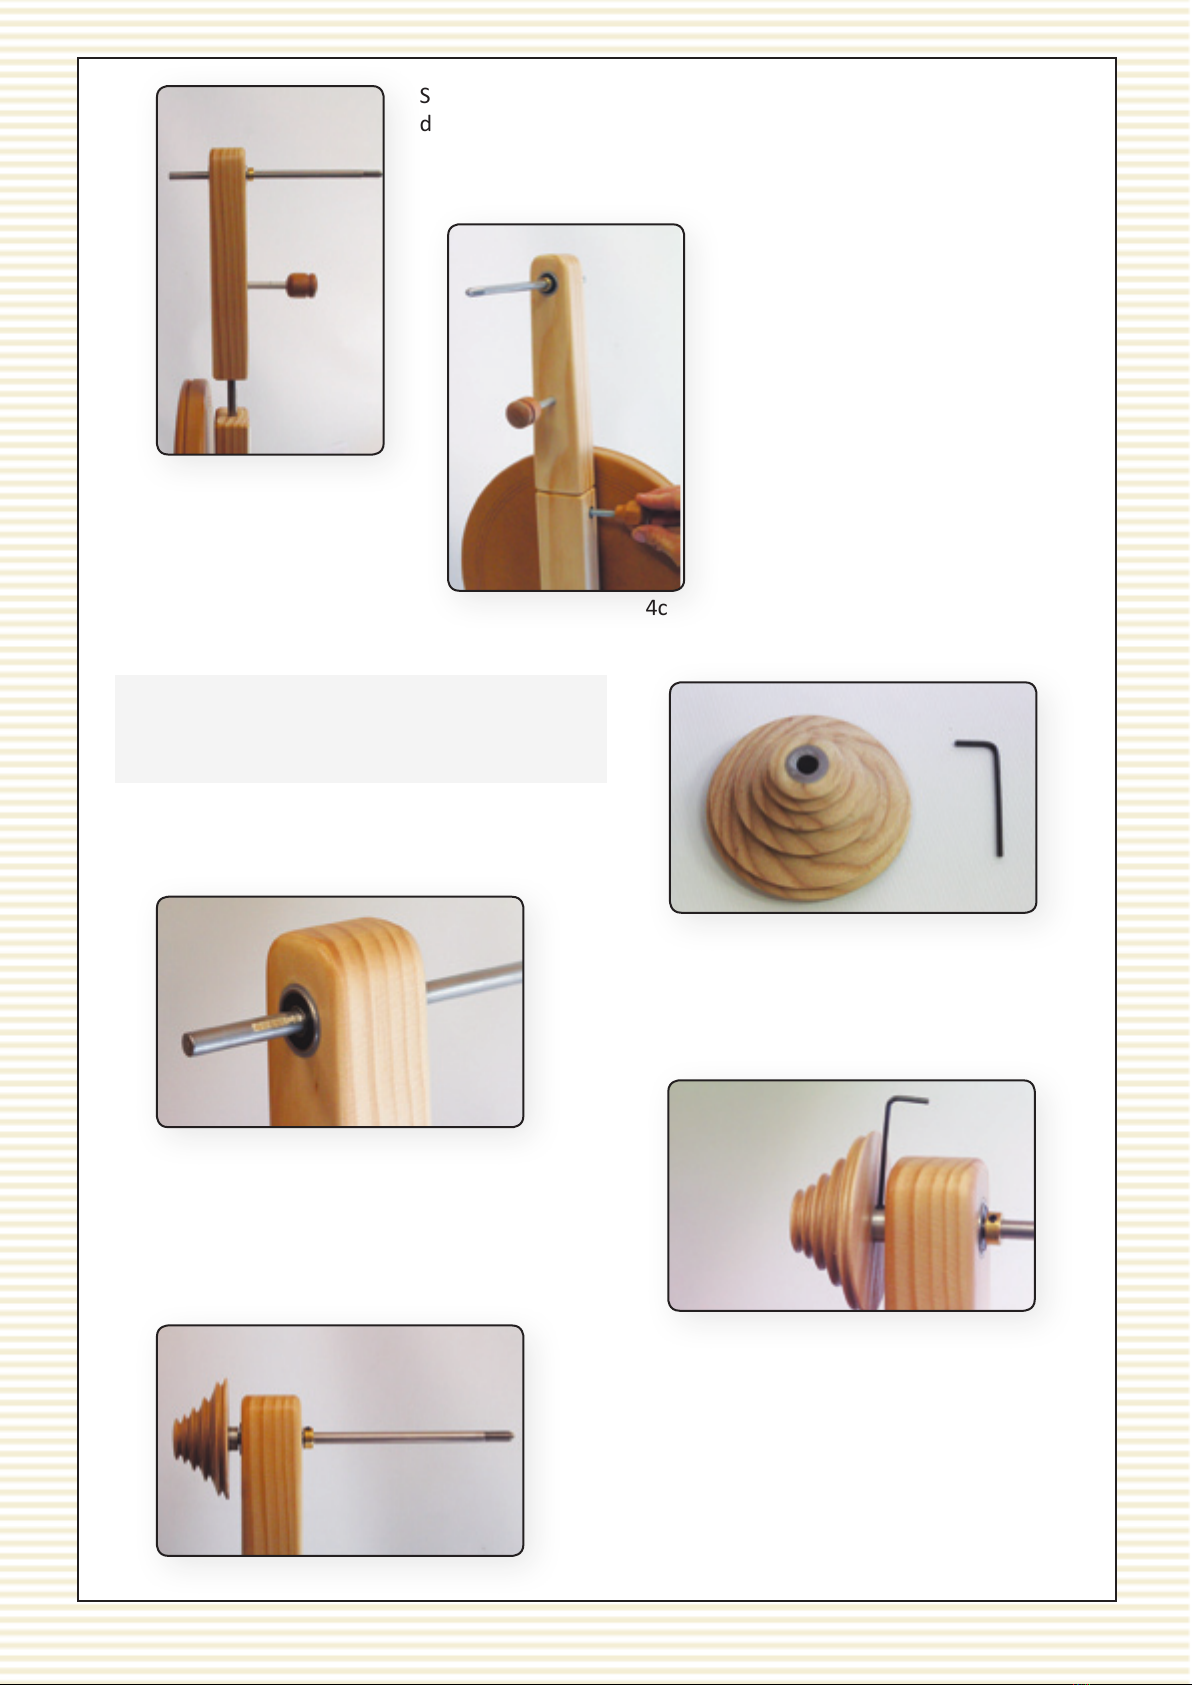
Slide the pulley onto the yer sha. Align the grub
screw over the at on the yer sha. Then use the
2mm allen key to ghten the grub screw and secure
the whorl on to the yer sha.
5. Pulley on to Flyer Shaft
Required:
Pulley
2mm allen key (in the hardware bag)
Slide the 10mm stem pin that is glued into the head assembly
down into the hole at the top of the stem.
4b
4c
5a
5b
5c
5d
Screw the wooden hex lock bolt
into the hole on the side of the
stem to lock the head into place.
Find the small at ground on the yer, it will be near
the bearing on the head. Turn the yer sha so the
at is on top.

7
majacraft
6. Drive Band
Required:
1 - Green drive band (in the hardware bag)
The green drive band goes on the groove on the drive wheel and
then through one of the grooves on the pulley.
Required:
Crank assembly
3 - Silver 38mm (1 1/2”) screws (in the hardware bag)
Posidrive screwdriver
7. Crank Assembly
The drive wheel has been predrilled with the holes for the aluminium crank assembly which line up
with the holes on the crank assembly. Make sure the drive belt is on before starng!
6a
6b
7a
7b
Align the holes on the drive wheel with the holes in
the crank assembly and screw it into place using the
posidrive screwdriver on the silver 38mm screws.
It is recommended that you insert the centre screw
rst. This will reduce your chances of possibly
scratching your drive wheel.
7c
Similar to the base/stem assembly process, do not
fully ghten the centre screw unl you have aligned
and started screwing in the two screws on the sides.
8
majacraft
The green joiners have already been put in place in the black breglass conrods. Place the wheel in
front of you so the crank and drive wheel are facing you.
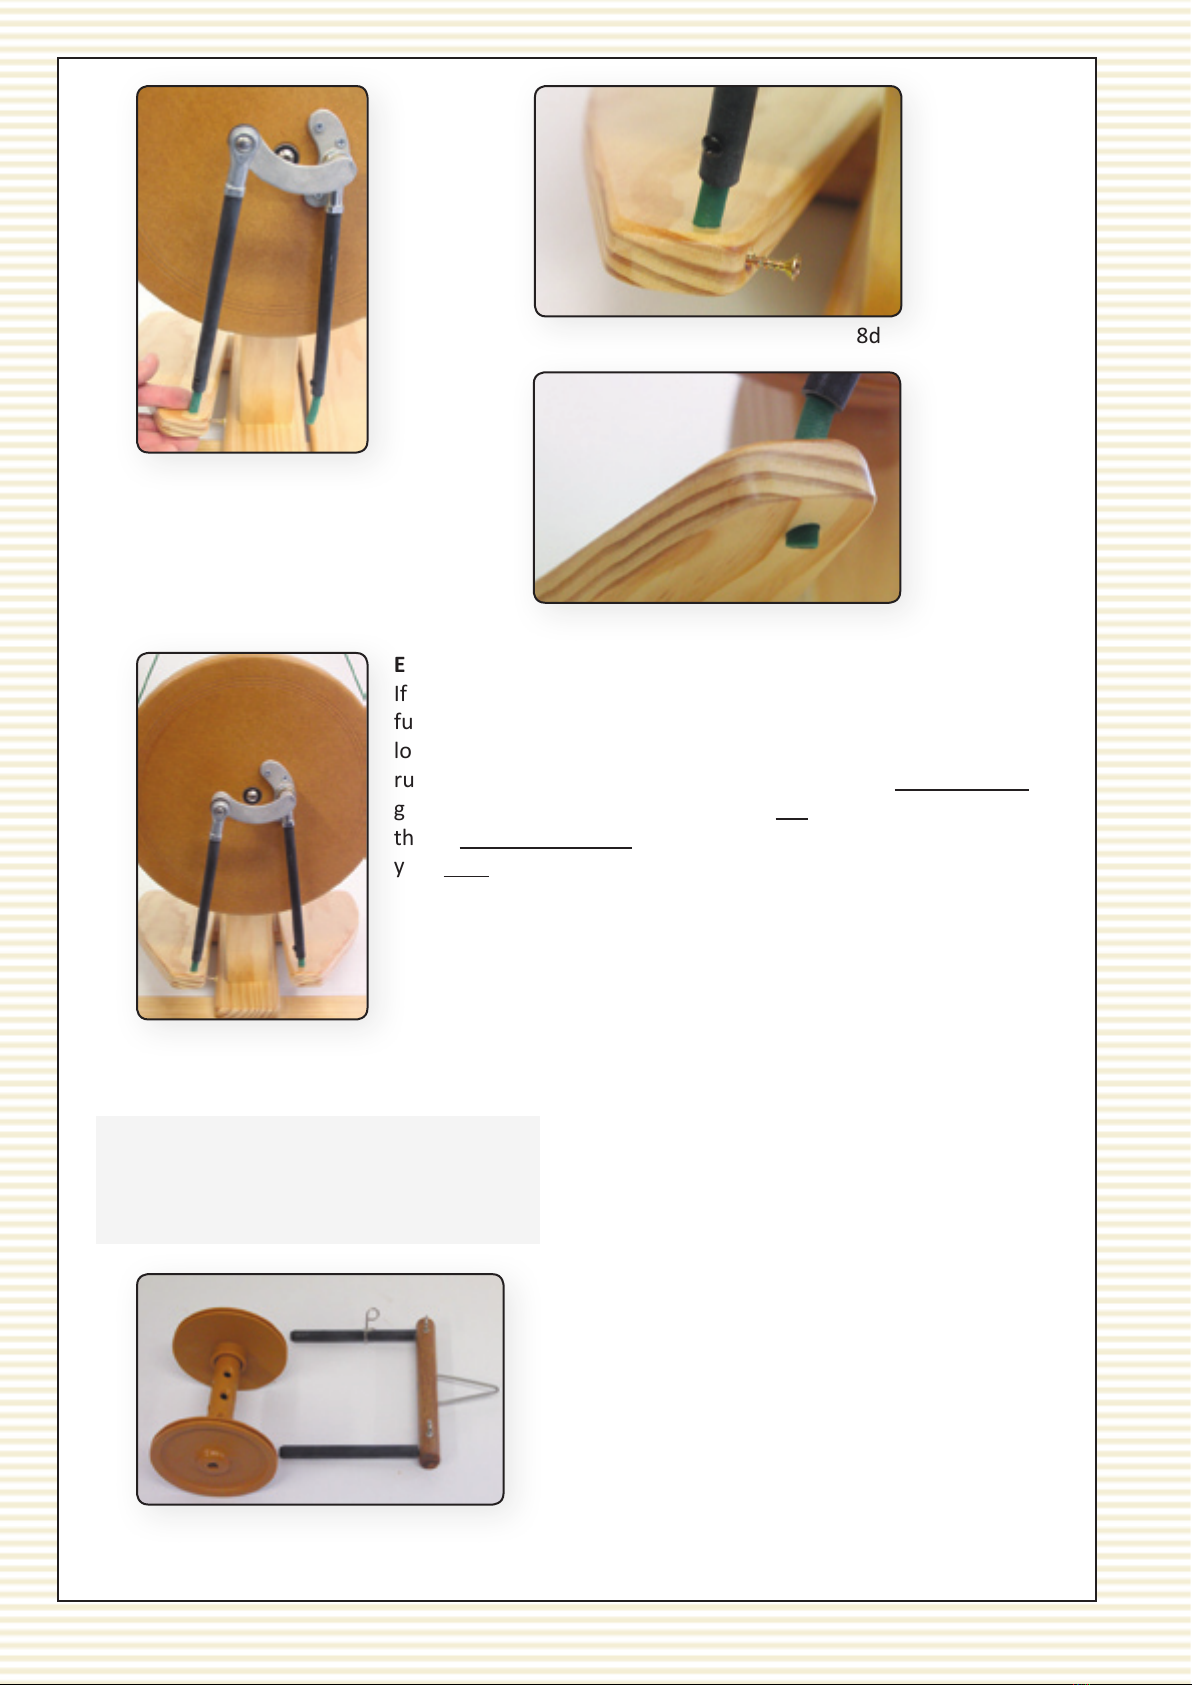
We will start with the pedal on your le hand side. Select the conrod that is CLOSEST to YOU. It is
on the end of the curved arm and is aached to the crank assembly with the special right angle
rod end connector. Push the green joiner into the hole at the end of the pedal unl it protrudes
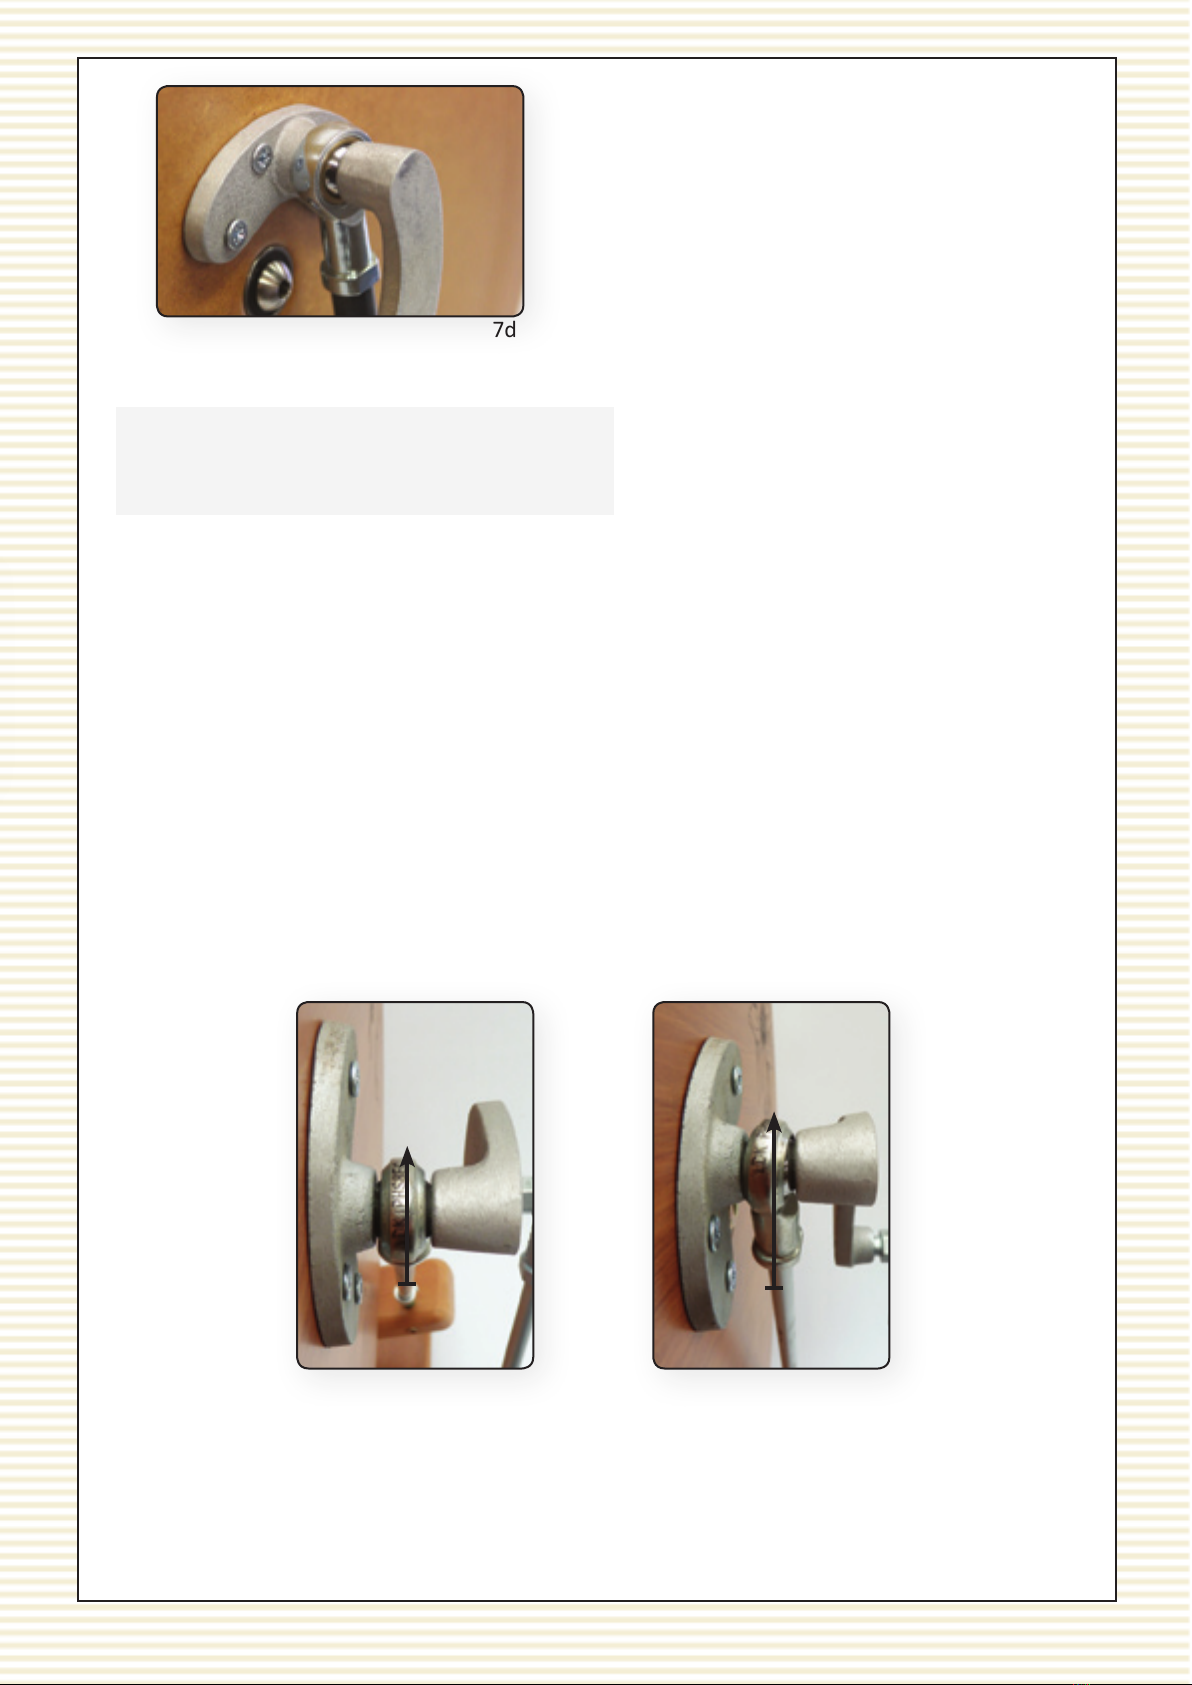
by about 5mm. Check the alignment of the rod end in the crank assembly as shown in the images
below. You may need to twist the green joiner in the pedal to correct the alignment. When the rod
end is aligned correctly, screw the 25mm gold screw in the pedal into place.
Now work on the pedal on your right. Obviously there will only be one available conrod now. The
one that is CLOSEST to the DRIVE WHEEL. Push the green joiner through the hole in the pedal end
into the right hand pedal. It should protrude through the boom of the pedal about 5mm. Check
the alignment of the inner rod end in the crank assembly. When the rod end is aligned correctly -
parallel with the face of the drive wheel - screw the 25mm screw back into place. The screw should
only be ghtened unl the head just touches the side of the pedal. DO NOT OVERTIGHTEN!
INCORRECT
CORRECT
8a 8b
Required:
2 - Gold 25mm (1”) screws (in the hardware bag)
Posidrive screwdriver
8. Conrods to Pedals
7d
When the three screws are all in place, you can nish
ghtening them up.
9
majacraft
Required:
1 - Bobbin
1 - Flyer
1 - Tension knob, spring and string assembly
9. Bobbin, Flyer and Scotch Tension
If you have some petroleum jelly or vaseline, rub a
small smear onto the yer sha. This has already
been done at the factory so is not essenal.
EXTRA
If you are not certain of the connecon arrangement, here is a
full descripon. Place the wheel directly in front of you so you are
looking at the crank assembly aached to the drive wheel. The
rubber joiner that is on the conrod/footman that is closest to you
goes into the hole in the pedal on your le. The joiner on the conrod
that is furthest from you goes into the hole in the pedal that is on
your right.
8c
8d
8e
8f
9a

10
majacraft
Firstly slide the bobbin on to the yer sha.
At this point screw the yer on to the yer sha. It
may help to hold the pulley with your le hand and
ghten the yer with your right (assuming you are
right handed). It may also be treadled on by holding
the yer in one hand and treadling the drive wheel in
an anclockwise direcon.
9d
9e
9b
9c
It is me to put on the tension knob and spring. Start by sliding
the loop on the tension spring onto the tension knob sha. Use
the spring loop that does NOT have the brake band aached.
Now slide the tension knob into the hole on the head.
When looking at the wheel from the front (the pedal side), loop
the brake tension band over the top of the bobbin from the right
hand side over to the le hand side.
Tie the tension band on to the tension knob sha
through the small hole in the sha. We typically
use a reef knot to secure the string. You can now
turn the tension knob to wind the string on to the
sha unl the tension only just takes up. Refer to
the Majacra Spinning Manual for a more thorough
descripon on seng the tension.
9f
Inhaltsverzeichnis
Andere Majacraft Spinnrad Handbücher


