NCR 7156 Sicherheitsleitfaden

NCR 7156 Thermal Receipt and
Impact Slip Printer:
Setup and User’s Guide
BD20-1435-A
Issue B
September 1998

September 1998ii
Disclaimer
Information in this document is subject to change without notice. Therefore, before using
this document, consult your NCR sales representative for information that is applicable and
current. NCR reserves the right to improve products as new technology, components,
software, and firmware become available.
No part of this document may be reproduced or transmitted in any form or by any means,
electronic or mechanical, for any purpose without the express written permission of NCR.
Copyright
Copyright © 1997, 1998 by NCR Corporation
Dayton, Ohio USA
All rights reserved
Printed in USA
Confidential, Unpublished
Property of NCR Corporation
Trademarks
NCR is the registered trademark of NCR Corporation. Other trademarks and registered
trademarks are the property of their respective holders.

September 1998 iii
Important Information to the User
In order to ensure compliance with the Product Safety, FCC and CE marking requirements,
you must use the power supply, power cord, and interface cable which were shipped with
this product or which meet the following parameters:
Power Supply
UL Listed (QQGQ), Class 2 power supply with SELV (Secondary Extra Low Voltage), non-
energy hazard output, limited energy source, input rated 100-240 Vac, 1.5/0.8 A, 50/60 Hz,
output rated 24 Vdc, 2.3 A.
Use of this product with a power supply other than the NCR power supply will require
you to test this power supply and NCR printer for FCC and CE mark certification.
Interface Cable
A shielded (360 degree) interface cable must be used with this product. The shield must be
connected to the frame or earth ground connection or earth ground reference at EACH end
of the cable.
Use of a cable other than described here will require that you test this cable with the NCR
printer and your system for FCC and CE mark certification.
Power Cord
A UL listed, detachable power cord must be used for this product. For applications where
the power supply module may be mounted on the floor, a power cord with Type SJT
marking must be used. For applications outside the US, power cords which meet the
particular country’s certification and application requirements should be used.
Use of a power cord other than described here may result in a violation of safety
certifications which are in force in the country of use.

September 1998iv
Federal Communications Commission (FCC)
Radio Frequency Interference Statement
Warning: Changes or modifications to this unit not expressly approved by the party
responsible for compliance could void the user’s authority to operate the equipment.
Note: This equipment has been tested and found to comply with the limits for a Class A
digital device, pursuant to Part 15 of the FCC Rules. These limits are designed to provide
reasonable protection against harmful interference when the equipment is operated in a
commercial environment. This equipment generates, uses, and can radiate radio frequency
energy and, if not installed and used in accordance with the instruction manual, may cause
harmful interference to radio communications. Operation of this equipment in a residential
area is likely to cause harmful interference in which case the user will be required to correct
the interference at his own expense.
Communication Cables
Shielded communication cables must be used with this unit to ensure compliance with the
Class A FCC limits.
Information to User
This equipment must be installed and used in strict accordance with the manufacturer's
instructions. However, there is no guarantee that interference to radio communications will
not occur in a particular commercial installation. If this equipment does cause interference,
which can be determined by turning the equipment off and on, the user is encouraged to
contact NCR immediately.
The NCR company is not responsible for any radio or television interference caused by
unauthorized modification of this equipment or the substitution or attachment of
connecting cables and equipment other than those specified by NCR. The correction of
interferences caused by such unauthorized modification, substitution or attachment will be
the responsibility of the user.
Industry Canada (IC)
Radio Frequency Interference Statement
This Class A digital apparatus meets all requirements of the Canadian Interference-Causing
Equipment Regulations.
Cet appareil numérique de la classe A respecte toutes les exigences du Règlement sur le matériel
brouilleur du Canada.

7156 Setup and User’s Guide Contents
September 1998 v
Contents
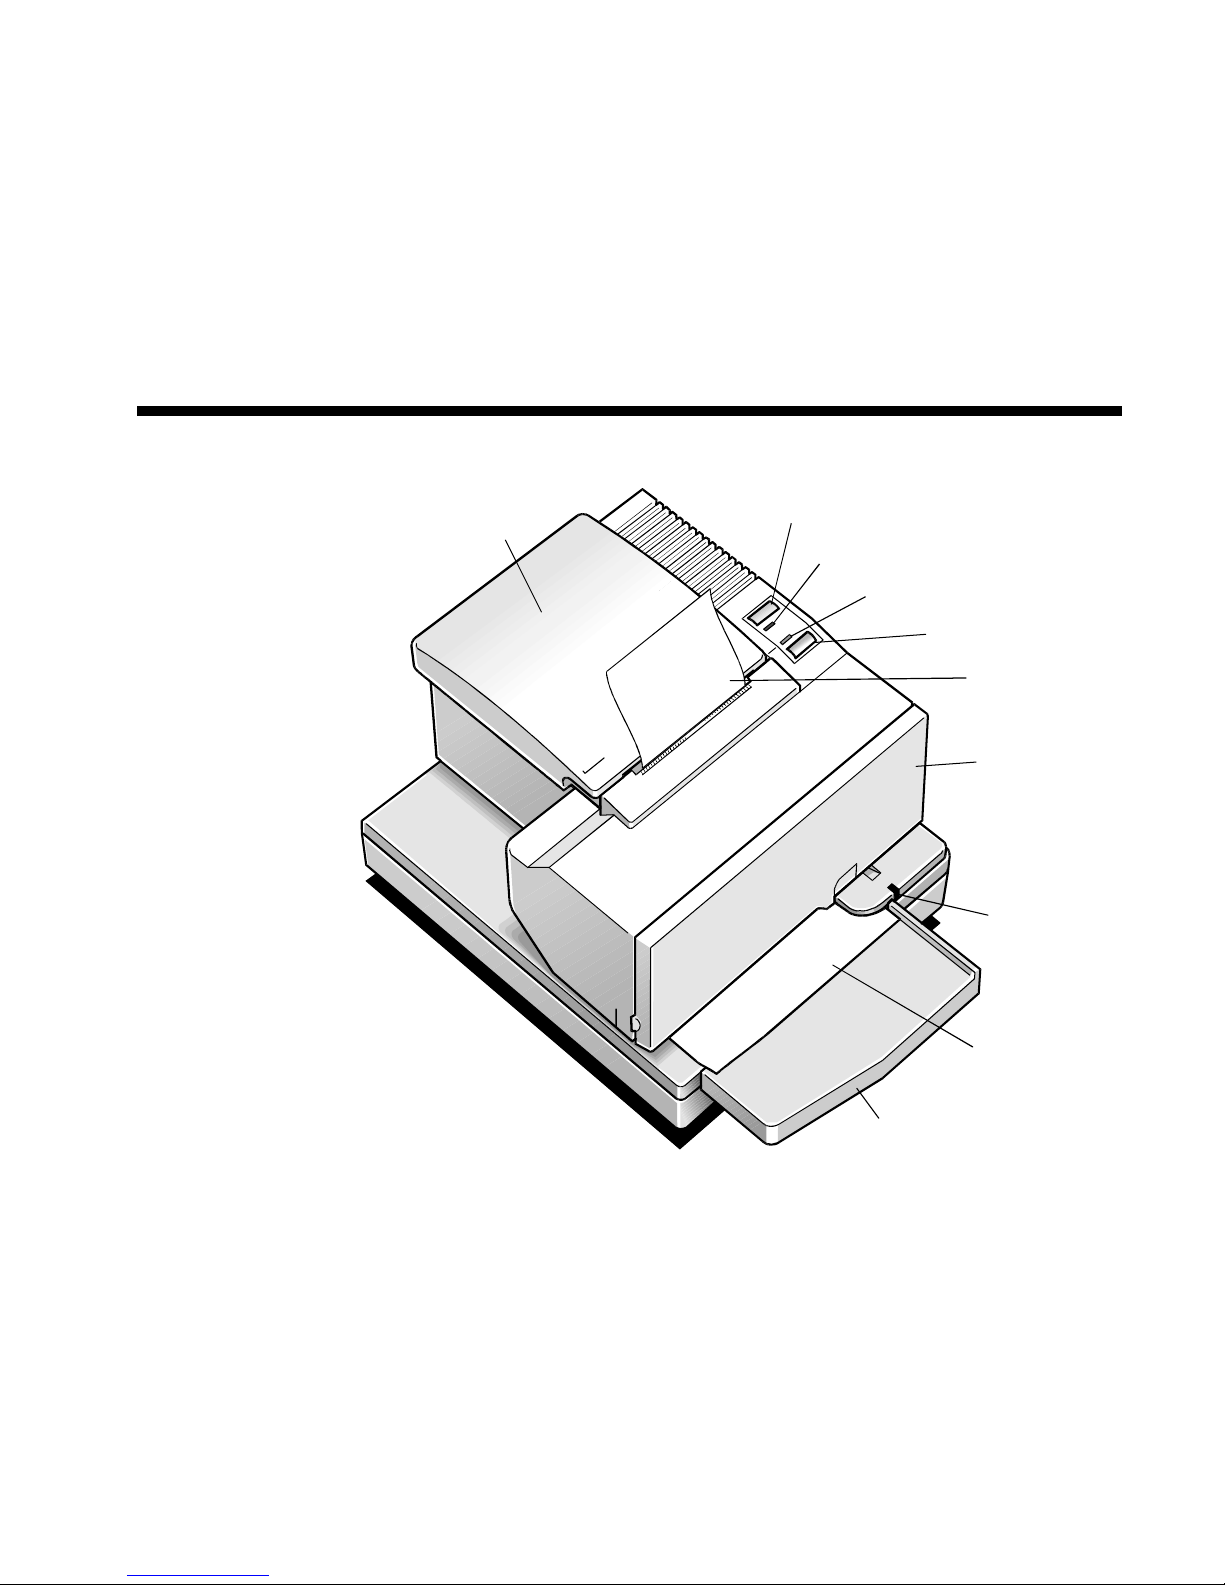
Chapter 1: The 7156 Printer 1
Features and Options..................................................................................................2
Receipt Station......................................................................................................2
Slip Station ............................................................................................................3
Both Stations.........................................................................................................3
General Features...................................................................................................3
Options..................................................................................................................4
Chapter 2: Setting Up and Using the Printer 5
What Is in the Box?......................................................................................................5
Removing the Packing Material.........................................................................6
Repacking the Printer..........................................................................................8
Choosing a Location....................................................................................................9
Connecting the Cables..............................................................................................10
Turning On the Printer.............................................................................................12
Loading and Changing the Receipt Paper .............................................................13
Removing the Paper Roll...................................................................................14
Putting In the Paper Roll...................................................................................15
Putting In and Changing the Ribbon Cassette ......................................................16
Removing the Ribbon Cassette.........................................................................16
Putting In the Ribbon Cassette.........................................................................17
Printing on Forms or Checks ...................................................................................18
Validating and Verifying Checks............................................................................20
Testing the Printer.....................................................................................................22
Running the Print Test by Power Cycling the Printer...................................22
Running the Print Test by Opening and Closing the Cover.........................22
Sample Print Test ...............................................................................................23
Setting Switches.........................................................................................................24
Cleaning the Printer..................................................................................................26

Contents 7156 Setup and User’s Guide
September 1998vi
Chapter 3: Ordering Paper and Supplies 27
Ordering Thermal Receipt Paper ............................................................................27
Ordering Forms .........................................................................................................28
Ordering Ribbon Cassettes.......................................................................................28
Ordering Other Supplies..........................................................................................29
Ordering Documentation.........................................................................................29
Revision Record
Issue Date Remarks
A September 97 First printing
B September 98 Second printing, including
minor revisions

7156 Setup and User’s Guide Chapter 1: The 7156 Printer
September 1998 1
Chapter 1: The 7156 Printer
Receipt
Cover
Receipt
Paper Feed
Button
Front
Cover
LED
Extended
Slip Table
Slip or
Check
On Line Button
Paper Status
Red Led
On Line
Green LED
The 7156 printer is a fast, quiet, and very reliable multiple function printer.
Relatively small, it is easy to setup and use. It prints receipts, validates and prints
checks, and prints on a variety of single- or multiple-part forms. There is no
journal as it is kept electronically by the host computer.

Chapter 1: The 7156 Printer 7156 Setup and User’s Guide
September 19982
The industry-standard RS-232C communication interface allows the 7156 to be
connected to any host computer that uses RS-232C. Control codes are provided for
easy migration of applications written for Epson as well as other NCR printers.
With thermal printing technology on the more frequently used receipt station,
there is no ribbon cassette to change and paper loading is extremely simple.
Printing on single- or multiple-part forms, validating checks, and printing checks
is also easy in the accommodating slip station. An additional option is the
Magnetic Ink Character Recognition (MICR) check reader with parsing which
reads account numbers on checks for easy verification. An extended slip table is
available for handling large forms and is standard with the MICR check reader
option.
Features and Options
The 7156 printer comes with several features and options.
Receipt Station
Thermal printing
Standard pitch (host selectable): 15.2 characters per inch, 44 columns
Compressed pitch (host selectable): 19.0 characters per inch, 56 columns
Resident bar codes
Code 39
Code 128
UPC-A
UPC-E
JAN8 (EAN)
JAN13 (EAN)
Interleaved 2 of 5
Codabar
Drop-in paper loading requiring no spindle or threading paper
Paper low indicator
Paper exhaust

7156 Setup and User’s Guide Chapter 1: The 7156 Printer
September 1998 3
Slip Station
Bi-directional, impact printing
Standard pitch (host selectable): 13.9 characters per inch, 66 columns
Compressed pitch (host selectable): 17.1 characters per inch, 80 columns
Printing of forms up to five plies
Front insertion of forms with forms stop
Side insertion of forms with override of forms stop
Automatic and manual insertion of forms
Form alignment sensors and Slip In LED indicator
Horizontal flat-bed slip table with optional extension (standard with MICR
check reader)
Snap-on ribbon cassette
Both Stations
Variety of print modes: double high (receipt station only), double strike (slip
station only), double wide, upside down, and rotated
Two resident character sets:
PC Code Page 437 (US)
PC Code Page 850 (Multilingual)
16K RAM for downloaded character sets or bit-mapped graphics
(such as logos)
General Features
Cover open sensors
Industry standard RS-232C communication interface
History EEROM for custom settings
Power and communication support for a remote 2x20 pass-through display
Audible tone (controlled by application)
Note: The 7156 does not use a paper journal. The journal is kept electronically by
the host computer.

Chapter 1: The 7156 Printer 7156 Setup and User’s Guide
September 19984
Options
Magnetic Ink Character Recognition (MICR) check reader built into the slip
station for verifying checks (includes custom MICR field parsing)
Extended slip table for handling large forms (standard with MICR
check reader)
Paper cutter (receipt station)
Remote power supply
Two cash drawer drivers
Communication cable
Andere Handbücher für 7156
3
Inhaltsverzeichnis
Andere NCR Drucker Handbücher

NCR
NCR 7197 Bedienungsanleitung

NCR
NCR 7197 II SERIES Bedienungsanleitung

NCR
NCR 7360-K302 Handbuch

NCR
NCR 7167 Bedienungsanleitung

NCR
NCR OPTIC 5 Bedienungsanleitung

NCR
NCR 7158 Bedienungsanleitung

NCR
NCR 7169 Bedienungsanleitung

NCR
NCR OPTIC 12 Bedienungsanleitung

NCR
NCR 7167 Bedienungsanleitung

NCR
NCR 7150 Bedienungsanleitung

NCR
NCR 7193 Bedienungsanleitung

NCR
NCR 7194 Bedienungsanleitung

NCR
NCR 7193 Bedienungsanleitung

NCR
NCR 7197 Bedienungsanleitung

NCR
NCR 7197 Bedienungsanleitung

NCR
NCR 7194 Bedienungsanleitung

NCR
NCR 7197 Bedienungsanleitung

NCR
NCR 7197 Bedienungsanleitung

NCR
NCR SelfServ Checkout 7350 Bedienungsanleitung

NCR
NCR 719 II Series Konfigurationshandbuch


