NETGEAR R8000 Bedienungsanleitung
Do More
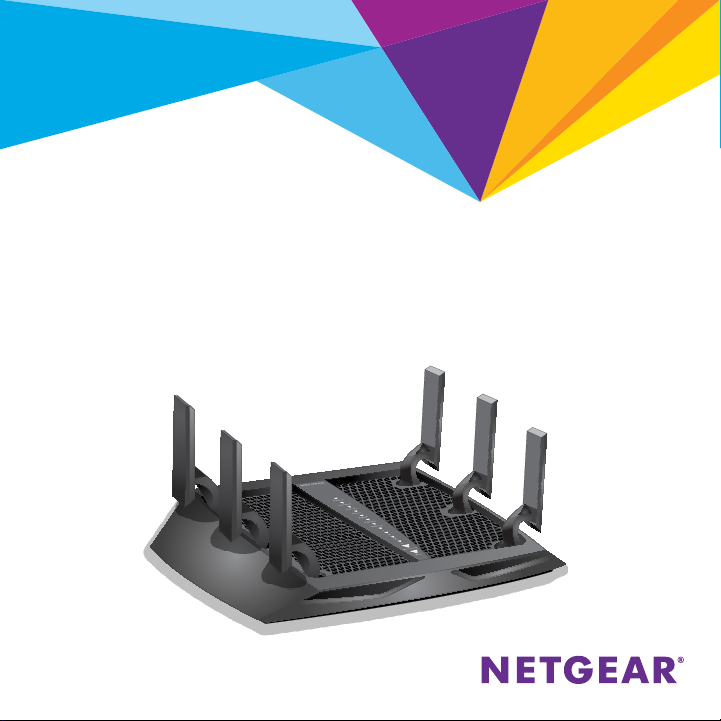
Nighthawk X6
AC3200 Tri-Band WiFi Router
Model R8000
2
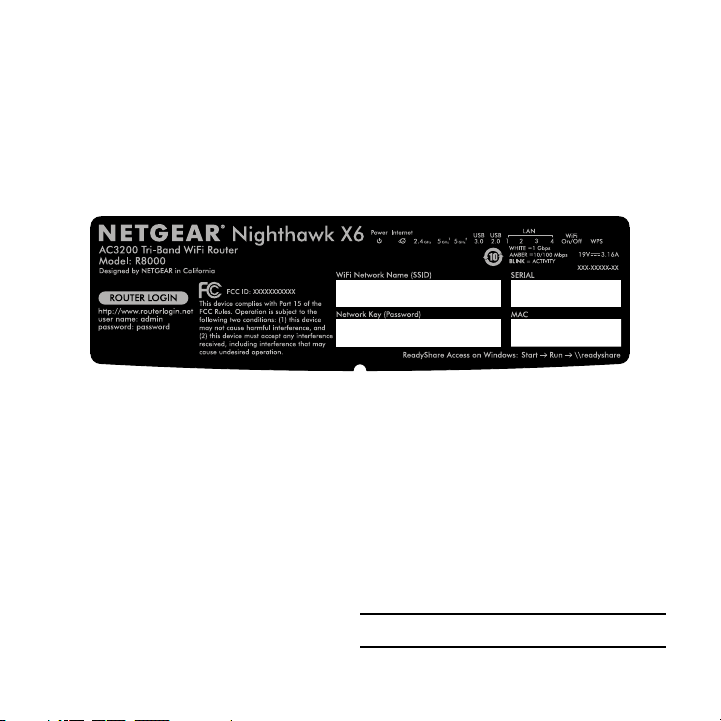
WiFi Network Name and Password
The preassigned WiFi network name (SSID) and password (network
key) are unique to your router, like a serial number. Because the router
automatically uses WiFi security, you don’t need to set it up. The WiFi
settings are on the label on the router.
We recommend that you use the preassigned WiFi settings because you
can check the label if you forget them. You can also log in to the router to
change these settings. If you do so, write down the new WiFi settings and
store them in a safe place.
You can write the WiFi settings from the label on your router in this space
for easy reference. If you change the WiFi settings, write the new settings
here for easy reference and store this booklet in a safe place.
WiFi network name (SSID):
Network key (password):

3
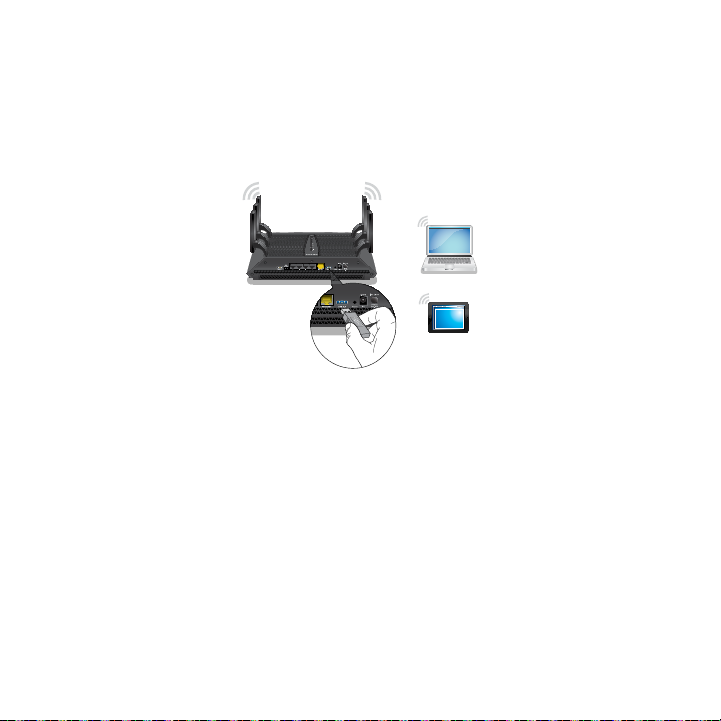
Join the WiFi Network
You can either use Wi-Fi Protected Setup (WPS) or select your router’s
WiFi network and type its password.
Join the WiFi Network Using WPS
For help with the WPS button on your computer or WiFi device, check the
instructions or online help that came with that computer or device. Some
older equipment cannot use WPS.
¾To join the network using WPS:
1. Press the WPS button on the router for three to five seconds.
The WPS LED on the router blinks.
2. Within two minutes, on your computer or other WiFi device, press its
WPS button or click its onscreen WPS button.
The WPS LED on the router lights solid white when the computer or
WiFi device connects to your router.
3. Repeat this process to add other computers or WiFi devices.

4
Join the WiFi Network Using the Router’s WiFi
Settings
Use the router’s WiFi network name and password to connect your
computer or WiFi device to the router’s network through WiFi. If you did
not change the router’s WiFi network name and password, use the router’s
preassigned WiFi network name and password, which are on the label on
the router.
¾To select your network and enter its password:
1. On your computer or other WiFi device, open the WiFi connection
manager that manages your WiFi connections.
The WiFi connection manager scans for WiFi networks in your area.
2. Find and select your router’s WiFi network name (SSID).
The SSID is on the label on the router.
3. Enter the router’s password (or your custom password if you changed
it) and click the Connect button.
The password is on the label on the router.
4. Repeat Step 1 through Step 3 to add other computers or WiFi devices.

5
View or Change the Router Settings
After you use the NETGEAR installation assistant to set up the router, you
can log in to the router to view or change its settings.
Log In to the Router
¾To log in to the router:
1. Connect a computer or WiFi device to the router.
You can connect using a wired connection or a WiFi connection:
• To connect using a wired connection, use an Ethernet cable (not
included) to connect an Ethernet port on your computer to an
Ethernet port on the router.
• To connect using a WiFi connection, find the router’s preassigned
WiFi network name and password on the label on the router.
Open the WiFi connection manager on your computer or WiFi
device, find the router’s WiFi network name, and use the router’s
password to connect.
2. Launch a web browser and visit www.routerlogin.net.
A login window opens.
3. Enter admin for the user name and password for the password.
The BASIC Home page displays.

6
Change the WiFi Network Name and Password
The router’s preset WiFi network name (SSID) and password are on the
label on the router. If you want to change your router’s WiFi network name
and password, log in to the router.
¾To change the router’s WiFi network name and password:
1. Launch a web browser from a computer or WiFi device that is
connected to the network and visit www.routerlogin.net.
A login window opens.
2. Enter the router user name and password.
The user name is admin and the default password is password. Use
the default credentials if you did not change them.
The BASIC Home page displays.
3. Select Wireless.
The Wireless Setup page displays.
4. To change the WiFi network name (SSID), enter a new name in the
Name (SSID) field.
5. To change the WiFi password, enter a new password in the Password
(Network Key) field.
6. Click the Apply button.
Your settings are saved.

7
Change the admin Password
¾To change the admin password:
1. Launch a web browser from a computer or WiFi device that is
connected to the network and visit www.routerlogin.net.
A login window opens.
2. Enter admin for the user name and password for the password.
The BASIC Home page displays.
3. Select ADVANCED > Administration > Set Password.
The Set Password page displays.
4. Type your old password and type the new password twice.
5. To be able to recover the password, select the Enable Password
Recovery check box.
We recommend that you enable password recovery.
6. Select two security questions and provide answers to them.
7. Click the Apply button.
Your settings are saved.

8
Recover a Forgotten admin Password
The default password for the admin user name is password. If you
changed the password and enabled the password recovery feature, you
can retrieve this password.
¾To retrieve a forgotten admin password:
1. Launch a web browser from a computer or WiFi device that is
connected to the network and visit www.routerlogin.net.
A login window opens.
2. Click the Cancel button.
If password recovery is enabled, you are prompted to enter the serial
number of the router. The serial number is on the label on the router.
3. Enter the serial number of the router.
4. Click the Continue button.
A page displays requesting the answers to your security questions.
5. Enter the saved answers to your security questions.
6. Click the Continue button.
A page displays your recovered password.
7. Click the Login again button.
A login window opens.
8. With your recovered password, log in to the router.
9
Access a USB Device on the Network
ReadySHARE lets you access and share a USB storage device connected
to the router’s USB ports. (If your USB device uses special drivers, it is not
compatible.)
¾To access the USB storage device from a Windows
computer:
1. Connect your USB storage device to a USB port on the router.
To get the best USB device access speed, use the blue USB 3.0 port
on the router. It might take up to two minutes before the USB storage
device is ready for sharing.
2. On a Windows computer that is connected to the network, select
Start > Run, enter \\readyshare in the dialog box, and click the OK
button.
A window displays the files and folders on the device.

10
¾To access the USB storage device from a Mac:
1. Connect your USB storage device to a USB port on the router.
To get the best USB device access speed, use the blue USB 3.0 port
on the router. It might take up to two minutes before the USB storage
device is ready for sharing.
2. On a Mac that is connected to the network, launch Finder and select
Go > Connect to Server.
The Connect to server window opens.
3. Enter the smb://readyshare in the Server Address field and click
the Connect button.
4. When prompted, select the Guest radio button.
5. If you set up access control on the router and you allowed your Mac
to access the network, select the Registered User radio button and
enter admin for the name and password for the password.
For more information about access control, see the user manual,
which is available online at downloadcenter.netgear.com or through a
link in the router’s user interface.
6. Click the Connect button.
A window displays the files and folders on the device.
Andere Handbücher für R8000
3
Inhaltsverzeichnis
Andere NETGEAR WLAN-Router Handbücher


