Olive >User Guide
3. Transferring music to the internal hard disk
drive (HDD)
If your ONE has a built-in HDD, you can transfer the music from your Mac or PC. There are two
options:
Option 1: Using the Serial number
1. On your ONE go to ABOUT > YOUR SYSTEM
2. Write down the serial number (for example "1234567890"!)
3. On a PC press the WINDOWS + R keys on your keyboard!.
On a Mac choose GO > CONNECT TO SERVER (from the main menu on
your desktop)
4. Enter "\\ONE" (or "smb://ONE on a Mac) into to the pop-up window, followed
by the last 4 digits of the Olive ONE serial number (for example "\\ONE7890"!)
5. Click OK
Option 2: Using the IP address
1. On your ONE go to CONNECTIVTY > WIRED (or WIFI if you are connected
wirelessly). Or simply tap on the network status icon in the top left corner of
your music library screen.
2. Write down the IP address assigned to the ONE by your network.
3. On a PC press the WINDOWS + R keys on your keyboard!.
On a Mac choose GO > CONNECT TO SERVER (from the main menu on
your desktop)
4. Enter "\\IP Address" (or "smb://IP ADRESS on a Mac) into to the pop-up
window (for example \\192.168.1.100)
5. Click OK (On a Mac please connect as a "Guest")
An import folder named "Olive Music" will appear on your desktop / network environment. Drag and
drop your complete music folder from your Mac/PC into the import folder and the transfer will
begin. A pop-up window on your desktop will indicate the estimated time for the transfer.
As soon as the music transfer has started, the ONE will start importing the transferred
music automatically into its local database. Once the import is complete your music will appear in
the ONE’s local music library.
Recently viewed articles
2. Connecting to your network
1. Setting up your Olive ONE
May 6, 2014: Manufacturing & Shipping
update
May 12, 2014: New software release available
for download.
Related articles
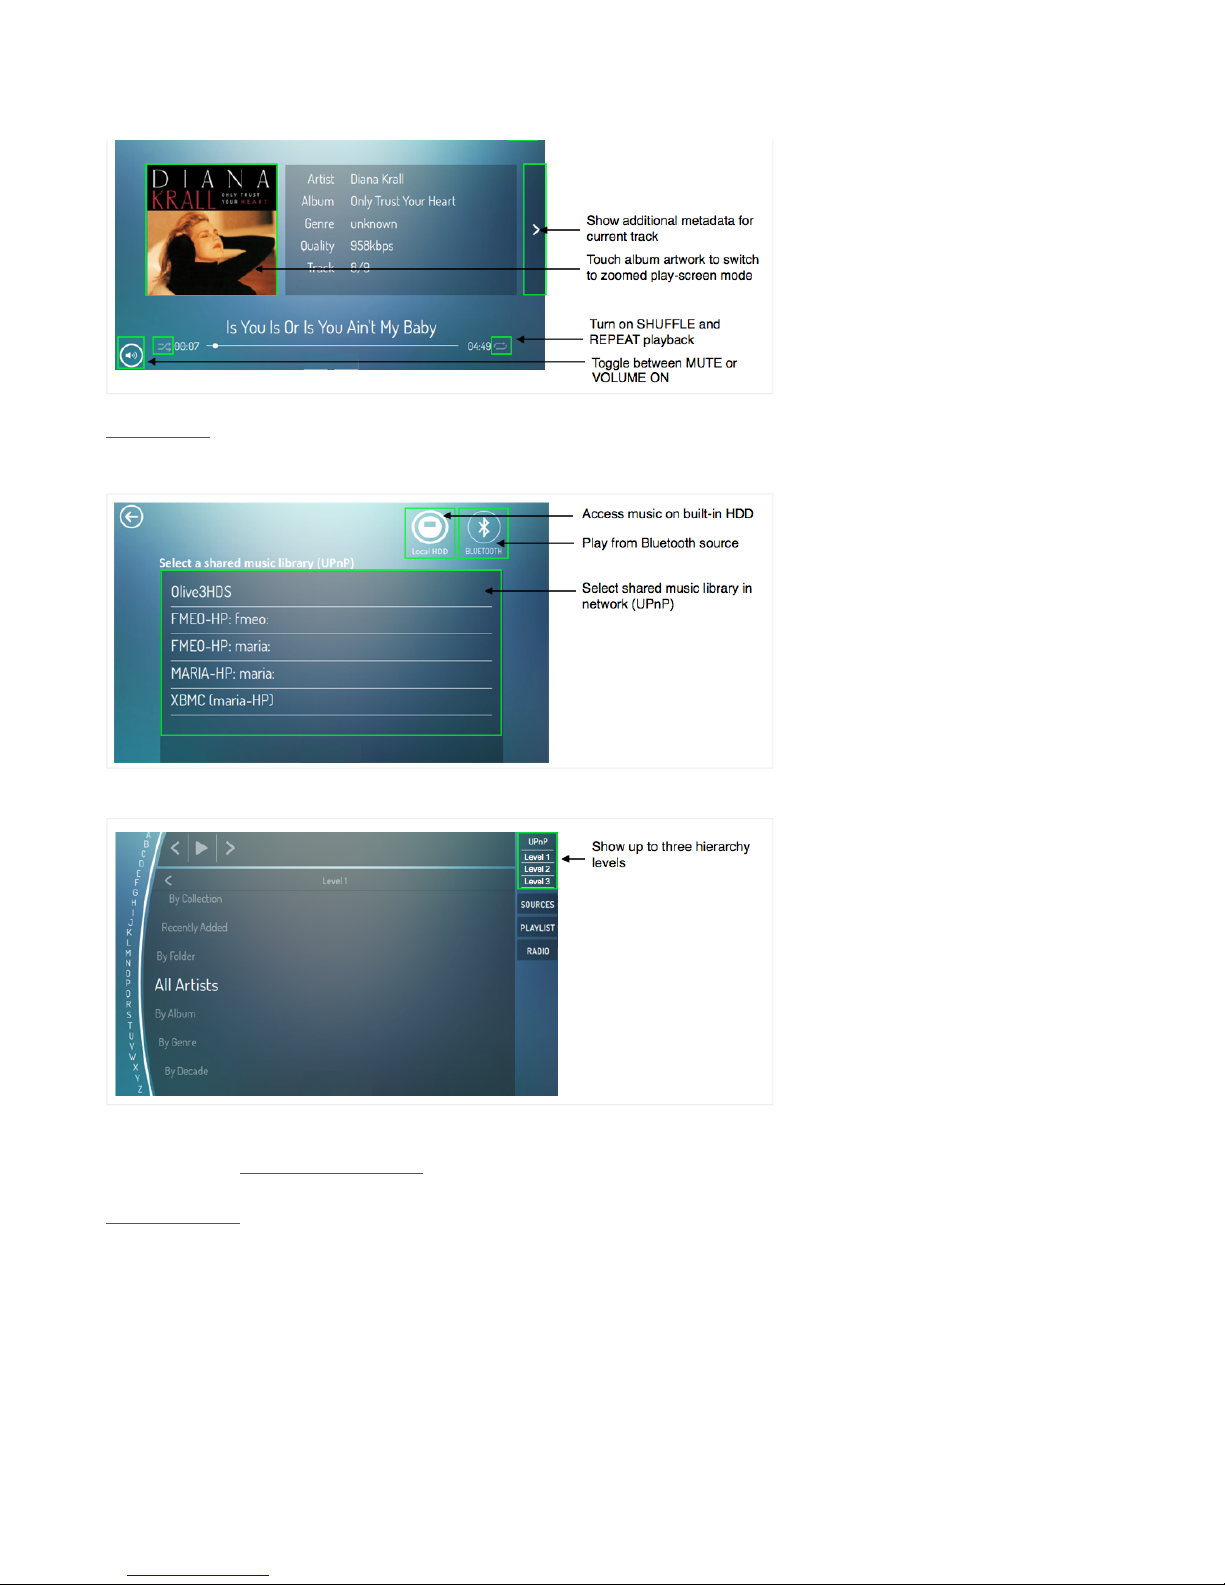
4. Playing music
May 6, 2014: Manufacturing & Shipping
update
Playing & browsing music from the built-in
hard drive
How to configure presentation levels on your
UPnP DMS
Audio playback quality
Olive ONE Support ▾