www.pagergenius.comUser manual 4
T9050/T9050W/P2000
MAKING YOUR TRANSMITTER SILENT
WITH NO BEEPING T9050/T9050W
The Pager Genius transmitter beeps every time you press an input. If you
would like to remove the beeping feature, do the following steps:
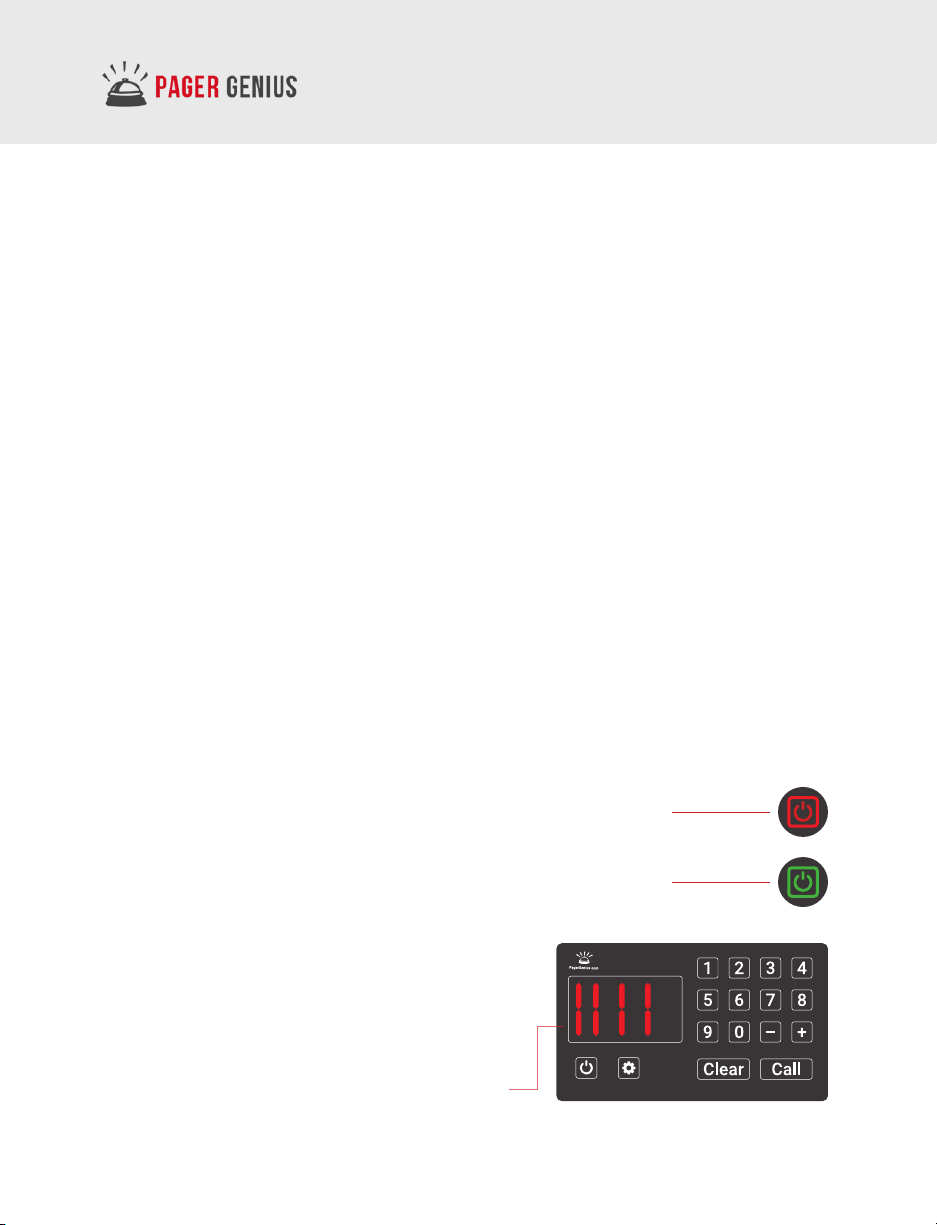
1. Unplug the transmitter and plug it back into power from the rear input.
2. Let the transmitter power up and wait for [- - - -] to
come across the digital screen of the transmitter.
3. Within ve seconds, press the settings button and
the number 2 at the same time.
Note: The Transmitter T9050W will display PASS
on the screen, press the numbers 5008.
4. If you see bep0 come across the digital screen, the transmitter is now
silent. If you see bep1 come across the screen, the transmitter will beep.
5. To add or delete the beeping, press the one key
or the zero key to make your selection.
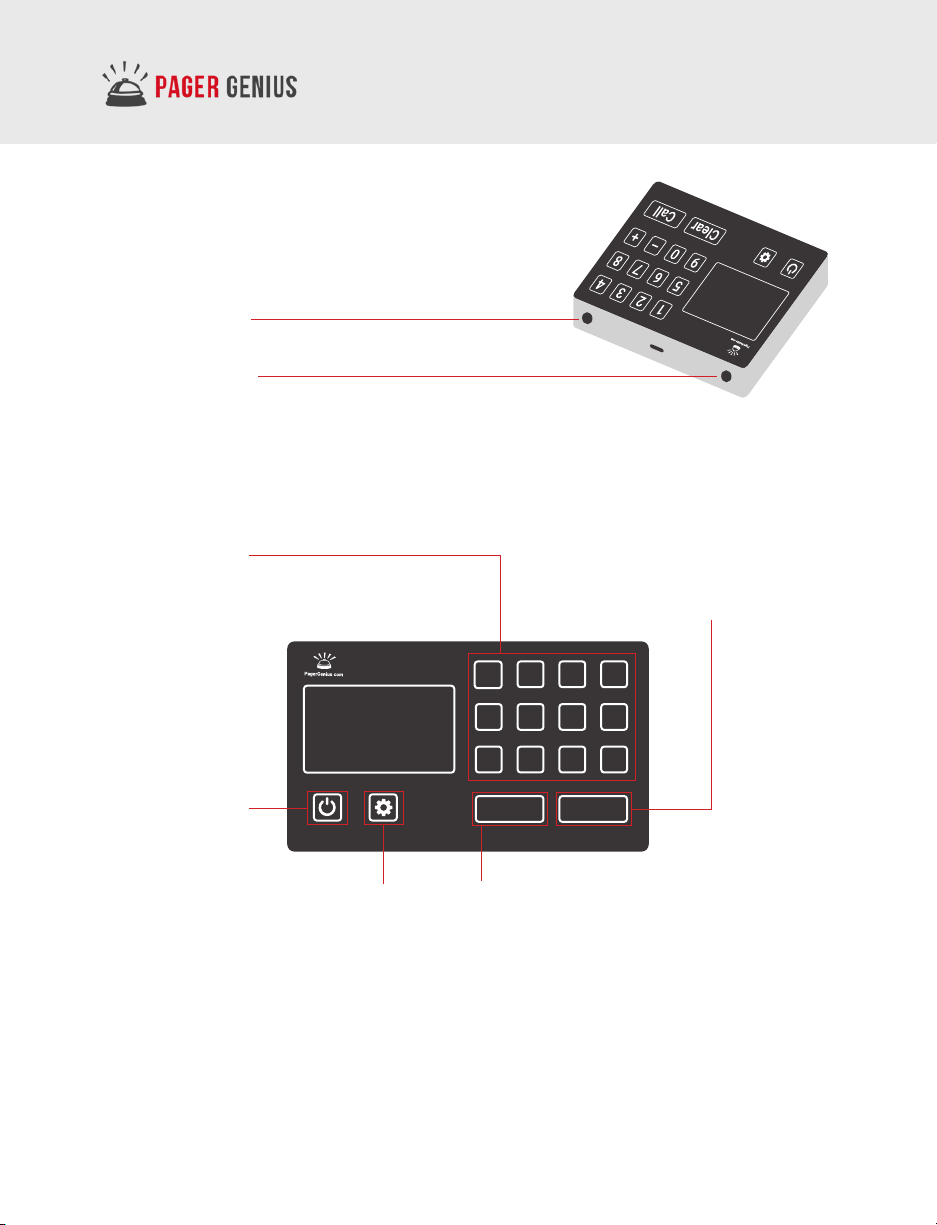
HOW TO PAGE
The Pager Genius Transmitter can page single pagers numbered 0 to 999.
To page a pager, press the number of the pager you wish to page, followed
by the call button. Example: To page pager #7, press the number 7 on the
keypad, followed by the call button.
CANCELLING A PAGE
There are two ways to cancel a page:
1. You can cancel a page by pressing the number of the pager you want
canceled, followed by the clear button on the transmitter.
2. You can place the pager back on it's charging stack and the page will
cancel automatically.