
PowerXL SmartSynx TO67D5-2SP Bedienungsanleitung
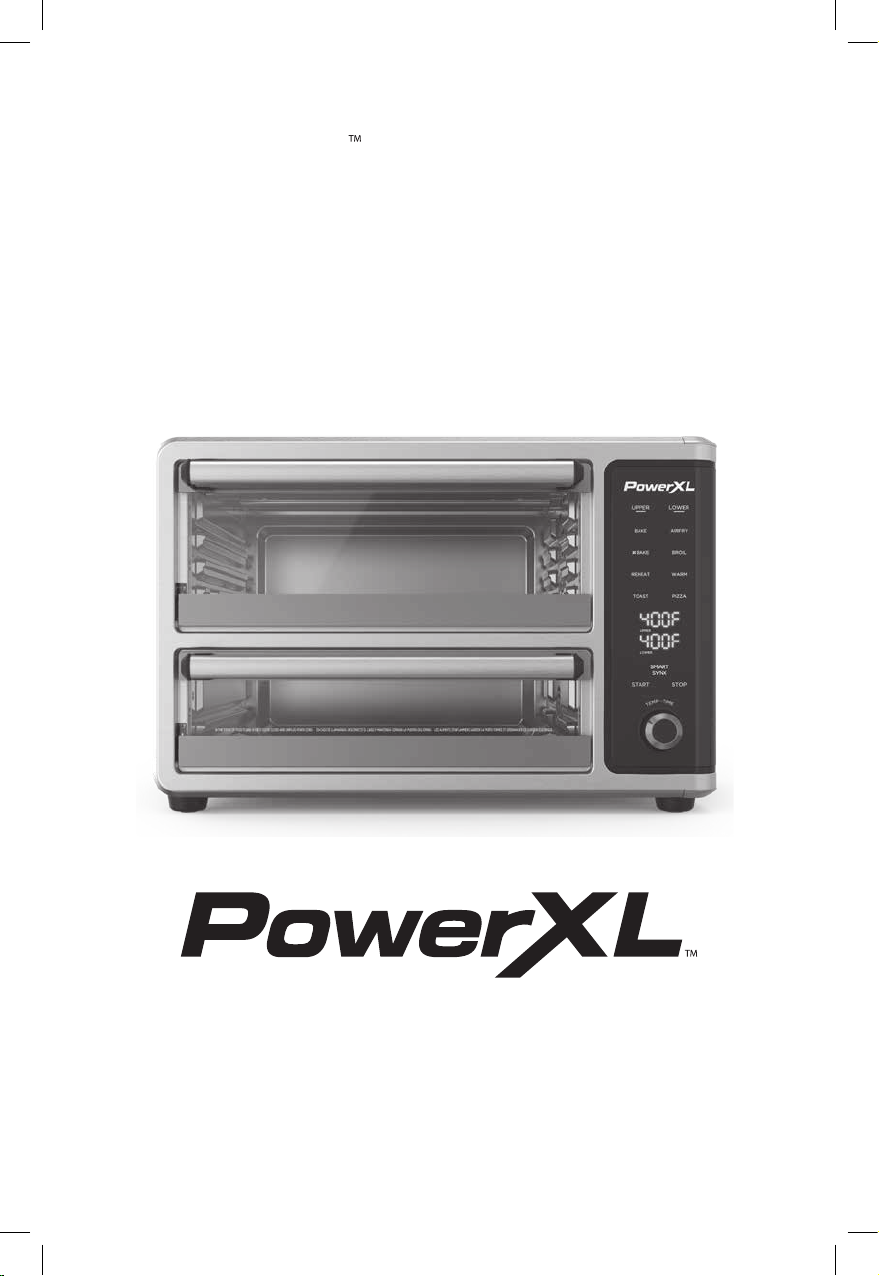
SmartSynx
Dual Door Oven
Horno de Doble Puerta
OWNER’S MANUAL
MANUAL DE USO Y CUIDADO
MODEL/MODELO:
TO67D5-2SP
Product may vary slightly from what is illustrated.
El producto puede variar ligeramente de lo que se ilustra.
TO67D5-2SP_30387_ES_IB_B.indd 1TO67D5-2SP_30387_ES_IB_B.indd 1 12/8/23 5:28 PM12/8/23 5:28 PM

2
Table of Contents
Appliance Specications
Model Numbers TO67D5-2SP
Wattage 1750W
Temperature Range 150° F–450° F
Exterior Dimensions 18.54” (W) x 16.09” (D) x 12.38” (H)
Upper Oven Dimensions 12.7” (W) x 13” (D) x 4.96” (H)
Lower Oven Dimensions 12.7” (W)” x 13” (D) x 3.79” (H)
Power Cord Length 24”
Plug Type 3-prong
IMPORTANT SAFEGUARDS ....................................................3
Quick Start Guide................................................................6
Parts & Accessories............................................................10
Using the Control Panel ....................................................12
Instructions for Use...........................................................14
General Cooking Guidelines..............................................16
Cleaning & Storage...........................................................18
Troubleshooting...............................................................19
Money-Back Guarantee .....................................................20
TO67D5-2SP_30387_ES_IB_B.indd 2TO67D5-2SP_30387_ES_IB_B.indd 2 12/8/23 5:28 PM12/8/23 5:28 PM
3
1. READ ALL INSTRUCTIONS.
2. This appliance is not intended for use by
people (including children) with reduced
physical, sensory, or mental capabilities or lack
of experience and knowledge unless they are
given supervision or instruction concerning
use of the appliance by a person responsible
for their safety.
3. Close supervision is necessary when any
appliance is used by or near children.
4. DO NOT place on or near a hot gas or electric
burner or in a heated oven.
5. DO NOT place your appliance on a
cooktop even if the cooktop is cool
because you could accidentally
turn the cooktop on, causing a
re, damaging the appliance, your
cooktop, and your home.
6. DO NOT place or use this appliance
near water.
7. When cooking, DO NOT place the appliance
against a wall or within 5inches of other
appliances. DO NOT place anything on top of
the appliance.
8. A re may occur if this appliance is covered
by or touching ammable material, including
curtains, draperies, walls, and the like, when
in operation.
9. DO NOT use outdoors.
10. DO NOT place the appliance in any container
or small conned space while the appliance is
heated or in operation.
11. ALWAYS operate the appliance on a
horizontal surface that is level, stable, and
noncombustible with adequate space for
airow.
12. Before using your appliance on any
countertop surface or other fragile surface,
such as a glass tabletop, check with your
countertop manufacturer or installer for
recommendations about using appliances
on your surfaces. Some manufacturers and
installers may recommend protecting your
surface by placing a hot pad or trivet under
the appliance for heat protection.Your
manufacturer or installer may recommend
that hot pans, pots, or electrical appliances
should not be used directly on top of the
countertop. If you are unsure, place a trivet or
hot pad under the appliance before using it.
13. DO NOT operate any appliance if it has a
damaged cord or plug, if it is not working
properly, or if it has been damaged or
dropped. Return the appliance to an
authorized service facility for examination,
repair, or adjustment.
14. This appliance should be serviced only
by qualied service technicians. Contact
Customer Service using the information
located on the back of this manual.
15. NEVER immerse the main unit housing in
water.If the appliance falls or accidentally
becomes immersed in water,unplug
the appliance from the electrical outlet
immediately. Do not reach into liquid if the
appliance is plugged in and immersed.
16. To protect against electrical shock, DO NOT
immerse the cord or plugs or expose the
electrical components to water or other liquid.
17. DO NOT plug in the power cord or operate
the appliance controls with wet hands.
18. To disconnect, press the Stop Button to turn
the appliance off and then remove the plug
from the electrical outlet.
WARNING
When using electrical appliances, basic safety precautions should be followed,
including the following:
PREVENT INJURIES!
CAREFULLY READ ALL INSTRUCTIONS BEFORE USE!
IMPORTANT SAFEGUARDS
TO67D5-2SP_30387_ES_IB_B.indd 3TO67D5-2SP_30387_ES_IB_B.indd 3 12/8/23 5:28 PM12/8/23 5:28 PM

4
19. MAKE SURE the appliance is properly
plugged into a dedicated electrical outlet
without any other appliances on the
same outlet.
20. Keep the appliance and its power cord out of
the reach of children when it is in operation or
in the cooling down process.
21. NEVER connect this appliance to an
external timer switch or separate remote-
control system.
22. NEVER plug the appliance into an outlet below
the surface where the appliance is placed.
23. DO NOT let the power cord hang over
the edge of a table or counter or touch
hot surfaces.
24. DO NOT clean with metal scouring pads.
Pieces can break off the pad and touch
electrical parts, creating risks of electric shock.
25. Should the appliance emit smoke, UNPLUG
IMMEDIATELY and wait for smoking to
stop before handling the appliance.Allow
the appliance to cool and wipe excess oil and
grease from the appliance.
26. Cooking appliances should be positioned
in a stable location with the handles (if any)
positioned to avoid the spillage of hot liquids.
27. NEVER operate the appliance unattended.
28. NEVER rest anything on the appliance’s door
while it is open.
29. DO NOT leave the appliance’s door open for
an extended period.
30. ALWAYS ensure that nothing is protruding
out of the appliance before closing the
appliance’s door.
31. ALWAYS close the appliance’s door gently;
NEVER slam the door closed. ALWAYS use
the handle when opening and closing the
appliance’s door.
32. NEVER operate the appliance with the
door open.The use of accessory attachments
not recommended by the appliance
manufacturer may cause injuries.
33. Avoid touching moving parts.
34. Unplug the appliance from the electrical
outlet when not in use and before cleaning.
Allow 30minutes to cool before handling,
putting on or taking off parts, cleaning,
or storing.
35. DO NOT cover the air vents. Doing so will
prevent even cooking and may overheat or
damage the appliance.
36. When in operation, hot air and steam are
releasedthrough the Hot Air Outlet Vent.
KEEPYOUR HANDS AND FACE at a safe
distance from the Hot Air Outlet Vent and
keepthe Vent clear of obstructions.
37. While cooking, the internal temperature
of theappliance reaches several hundred
degreesFahrenheit. To avoid personal injury,
NEVER place your hands inside the appliance
unless it is thoroughly cooled.
38. The appliance’s outer surfaces and accessories
may become hot during use. WEAR OVEN
MITTS when handling the appliance during
and after use and to protect against hot steam
and air released when opening the appliance.
39. DO NOT touch hot surfaces. Use handles
orknobs.
40. EXTREME CAUTION must be used when
moving an appliance containing hot oil
or other hot liquids or when removing
accessories or disposing of hot grease.
This appliance is not intended for deep-
frying food.
41. Oversized food, metal foil packages, or
utensilsMUST NOT be inserted in the
appliance as they may involve a risk of re or
electric shock. DO NOT overll the appliance.
42. DO NOT store any materials other than
manufacturer-recommended accessories in
this appliance when not in use.
43. EXTREME CAUTION should be exercised
when using containers constructed of
materials other than metal and glass.
44. DO NOT place any of the following materials
in the appliance: paper,cardboard, or plastic.
45. NEVER pour oil into the appliance or
accessories. Fire and personal injury
could result.
46. DO NOT cover the Drip Tray or any part
of the oven with metal foil. This will cause
overheating of the oven.
47. DO NOT use aerosol cooking sprays.These
sprays will build up on cookware and become
difcult to remove while reducing the nonstick
cooking performance.
48. DO NOT expose the appliance to corrosive
chemicals or vapors.
49. DO NOT use sharp utensils with the
appliance.These implements can damage the
appliance’s protective nonstick coating.
TO67D5-2SP_30387_ES_IB_B.indd 4TO67D5-2SP_30387_ES_IB_B.indd 4 12/8/23 5:28 PM12/8/23 5:28 PM

5
SAVE THESE INSTRUCTIONS –
FOR HOUSEHOLD USE ONLY
Extension Cord
1. A short power supply cord is provided to reduce
the risk resulting from becoming entangled in or
tripping over a longer cord.
2. Extension cords are available and may be used if
care is exercised in their use.
3. If an extension cord is used:
a. The marked electrical rating of the extension
cord should be at least as great as the
electrical rating of the appliance;
b. If the appliance is of the grounded type, the
extension cord should be a grounding-type
3-wire cord.
c. The cord should be arranged so that it will
not drape over the countertop or tabletop
where it can be pulled on by children or
tripped over unintentionally.
Electric Power
This appliance should be operated on a dedicated
electrical outlet. If the electrical outlet is overloaded
with other appliances, your new appliance may not
operate properly.
Automatic Shut-Off
The appliance has a built-in shut-off device that
will automatically shut off the appliance when the
cooking time has completed.You can manually
switch off the appliance by pressing the Stop Button.
The fan might continue running for 10–20seconds
to cool down theappliance.
Overheating Protection
Should the inner temperature control system fail,
the overheating protection system will be
activated and the appliance will not function.
Should this happen, unplug the appliance and
contact customer service using the information in
the back of this manual.
50. This appliance is for home use only. If the
appliance is used improperly or for professional
or semi-professional purposes or if it is not
used according to the instructions in the user
manual, the guarantee becomes invalid and
Empower Brands, LLC will not be held liable
for damages. DO NOT use this appliance for
anything other than its intended use.
51. This appliance is not intended for use by
persons (including children) with reduced
physical, sensory or mental capabilities, or lack
of experience and knowledge, unless they
have been given supervision or instructions
concerning use of the appliance by a person
responsible for their safety.
52. Children should be supervised to ensure that
they do not play with the appliance.
53. The appliance is not intended to be operated
by means of an external timer or separate
remote-control system.
TO67D5-2SP_30387_ES_IB_B.indd 5TO67D5-2SP_30387_ES_IB_B.indd 5 12/8/23 5:28 PM12/8/23 5:28 PM
6
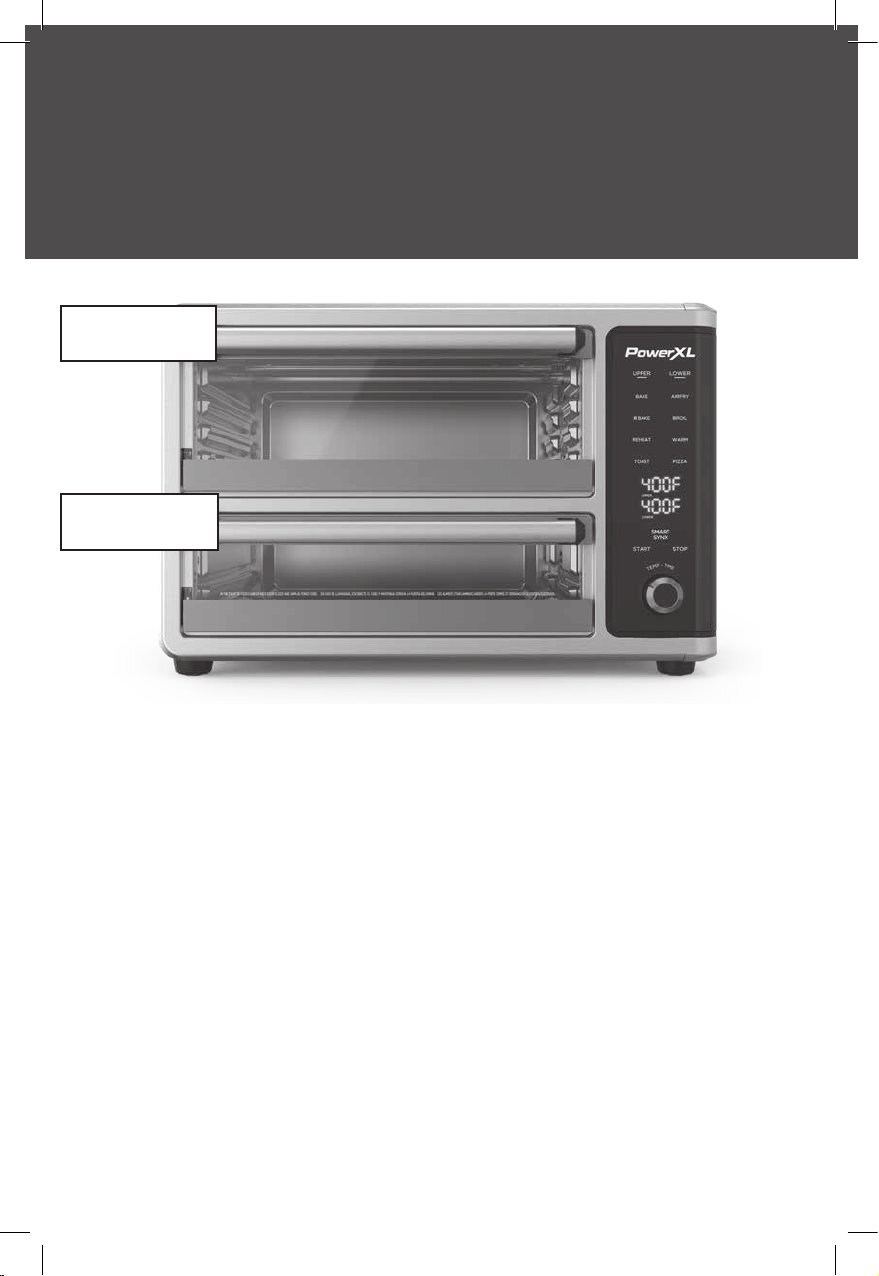
Pick an Oven
QUICK START GUIDE
Upper Oven
Lower Oven
Both!
Three rack locations with eight cooking functions.
If you’re only cooking in one chamber, use this one.
It is also the best oven for baked items like desserts, pastries, and pizza.
Two rack locations with six cooking functions.
This chamber is great for cooking sides while your main course cooks and
is especially good for air frying.
SmartSynxTM: Finish cooking in both ovens at the same time.
You can also cook in both ovens at the same time without using the
SmartSynxTM feature.
Upper
Lower
TO67D5-2SP_30387_ES_IB_B.indd 6TO67D5-2SP_30387_ES_IB_B.indd 6 12/8/23 5:28 PM12/8/23 5:28 PM
7
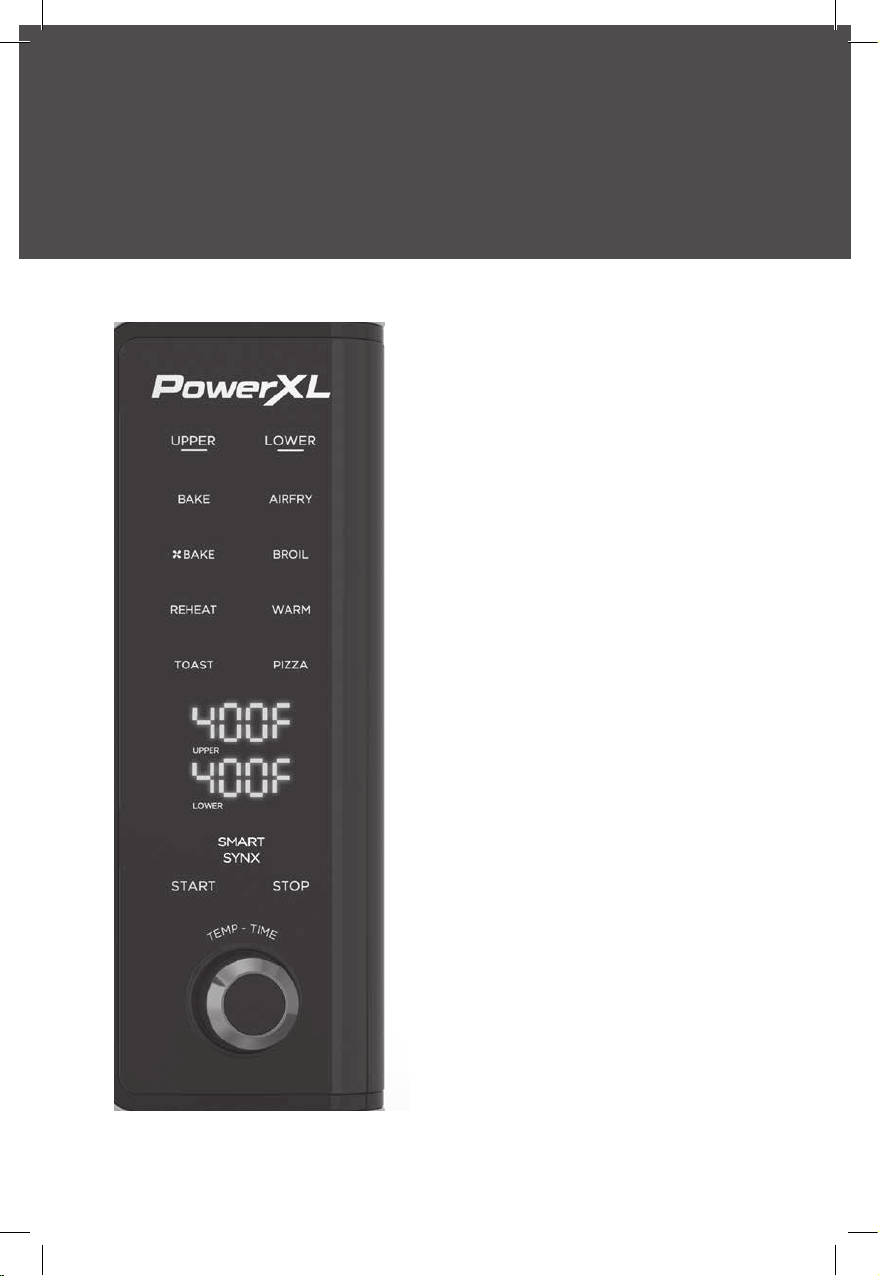
Pick a Function
QUICK START GUIDE
Bake
Great for cooking baked goods, like
cakes and casseroles, without using the
convection fan.
Air Fry
Surrounds food like French fries, chicken
wings, and onion rings with a vortex of
heat to get similar results to deep frying
without using all the oil.
Convection Bake
Bakes food while cycling the fan on and o
– perfect for food like cookies and pastries.
Broil
Especially good for broiling fish and food
with cheese on top, like garlic bread, from
the top at a high heat.
Reheat
Reheats leftovers quickly and evenly.
Warm
Keeps your food warm. When cooking in
both ovens, use the lower oven for WARM
function.
Toast*
Toasts bread, bagels, and more to your
desired level.
Pizza*
Cooks fresh or frozen pizza with gooey
cheese and golden crust.
* The toast and pizza functions are only
available in the Upper Oven.
TO67D5-2SP_30387_ES_IB_B.indd 7TO67D5-2SP_30387_ES_IB_B.indd 7 12/8/23 5:28 PM12/8/23 5:28 PM
8
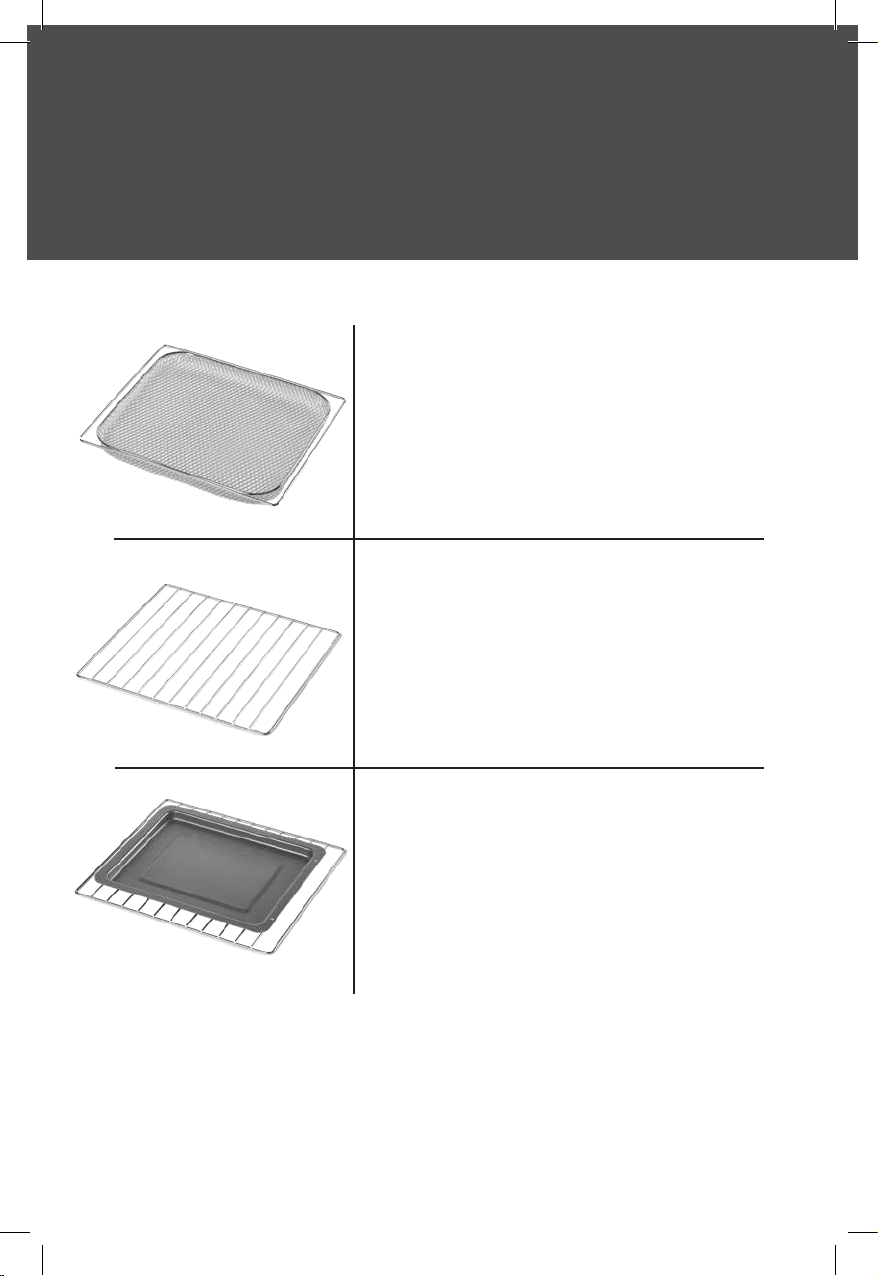
Pick The Best Accessory
QUICK START GUIDE
Crisper Tray
The holes in the mesh Crisper Tray let you
surround your food with hot air.
Best Used with Functions: Air Fry
Optimal Rack Locations:
Upper Oven: Middle
Lower Oven: Top
Baking Pan
Sits on top of the Oven Rack.
Best Used with Functions: Bake, Convection
Bake, Pizza
Optimal Rack Locations:
Upper Oven: Middle
Lower Oven: Bottom
Oven Rack
Traditional oven-style cooking rack.
Best Used with Functions: Warm, Broil, Reheat,
Toast
Optimal Rack Locations:
Upper Oven: Top (Broil Only), Middle, Bottom
Lower Oven: Top (Broil Only), Bottom
TO67D5-2SP_30387_ES_IB_B.indd 8TO67D5-2SP_30387_ES_IB_B.indd 8 12/8/23 5:28 PM12/8/23 5:28 PM
9
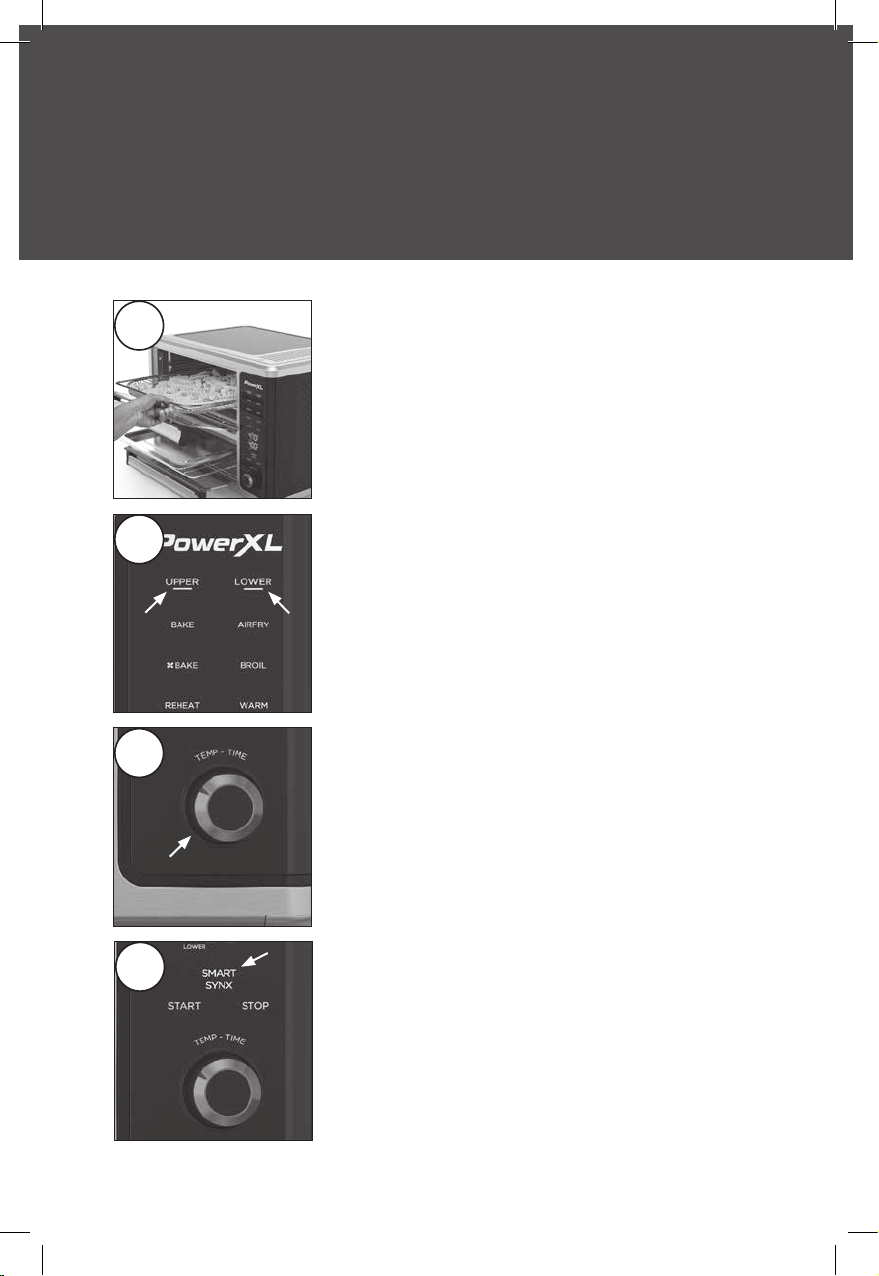
Cook Your First Meal with SmartSynx!
QUICK START GUIDE
Place food on the accessories that best suit your
recipe. Slide the accessories into the optimal rack
locations in each oven.
1
See the “Instructions for Use” section for detailed operating instructions.
If you want to adjust the cooking time or
temperature, turn the Control Knob to adjust.
Press the Control Knob to toggle between the
cooking time and temperature.
TIP: Cooking times can vary slightly when cooking
in both ovens at once. When cooking in both ovens
simultaneously, add a few minutes to the cooking
time and keep an eye on your food while it cooks.
3
Press the Upper Oven Button. Then, press your
desired cooking function for the Upper Oven.
Press the Lower Oven Button. Then, press your
desired cooking function for the Lower Oven.
2
Press the SmartSynxTM Button to start the cooking
process. The oven with the longer cooking time
will start cooking first. When the cooking times of
both chambers are the same, the second oven will
begin cooking. Both ovens will finish cooking at the
same time.
4
TO67D5-2SP_30387_ES_IB_B.indd 9TO67D5-2SP_30387_ES_IB_B.indd 9 12/8/23 5:28 PM12/8/23 5:28 PM
10
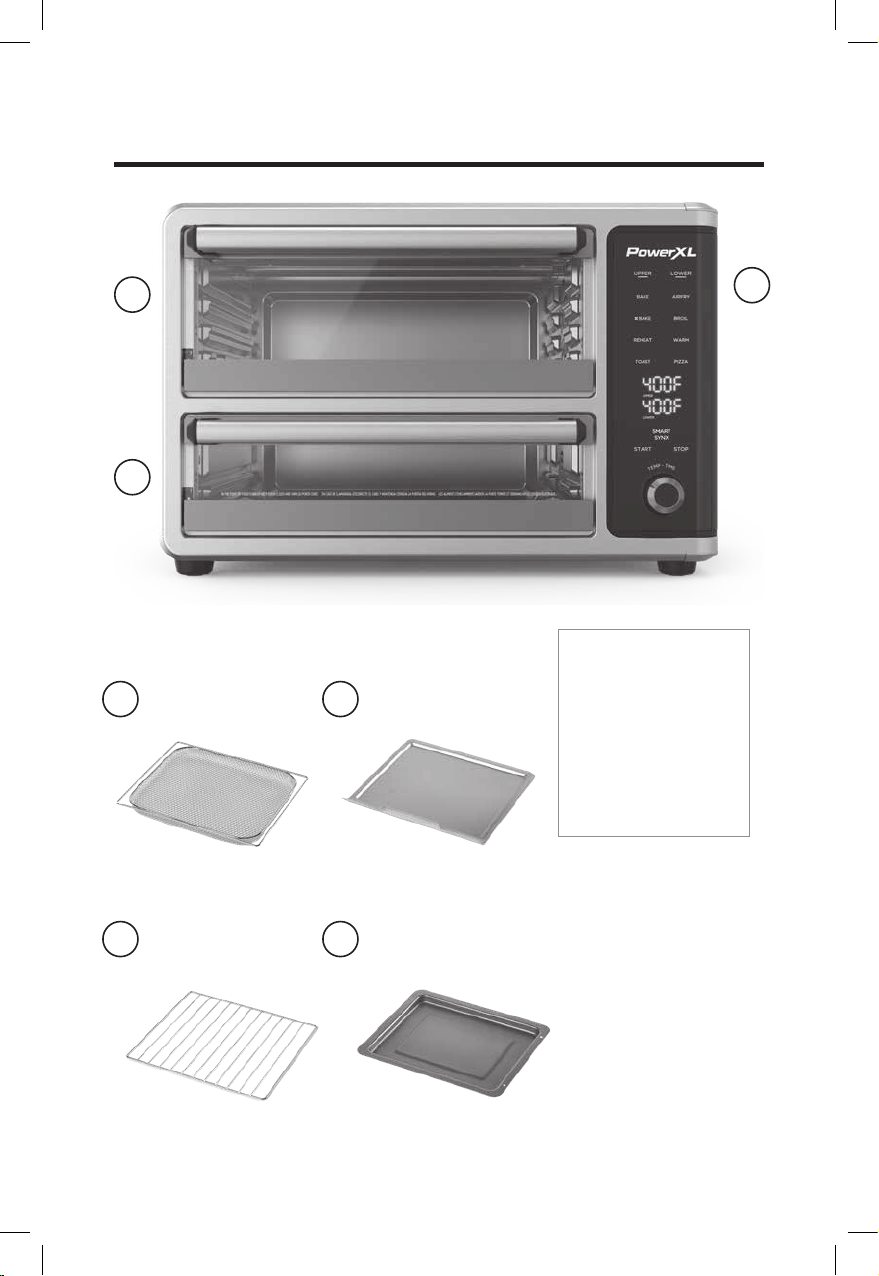
Parts & Accessories
1. UPPER OVEN
2. LOWER OVEN
3. CONTROL PANEL
4. CRISPER TRAY
5. DRIP TRAY
6. OVEN RACK
7. BAKING PAN
1
2
3
7
5
6
4
Accessories
TO67D5-2SP_30387_ES_IB_B.indd 10TO67D5-2SP_30387_ES_IB_B.indd 10 12/8/23 5:28 PM12/8/23 5:28 PM
Inhaltsverzeichnis
Sprachen:
Andere PowerXL Ofen Handbücher


