
sabya Grey bell Bedienungsanleitung

ENG Bell · Instruction Manual
DE Notrufgeräte · Bedienungsanleitung
FR Sonette · Mode d’emploi
ESP Timbre · Manual de instrucciones
CAT Timbre · Manual d’instruccions
Instruction Manual ENG
Read the operating instructions carefully before
using the appliance for the first time and preserve
this booklet for later reference. Pass this booklet on
to whoever might acquire the appliance at a later
date.
Danger of electric shock!
• Connect the appliance only to correctly installed
and properly earthed power sockets. Ensure that
the rating of the local power supply tallies comple-
tely with the details given on the rating plate of the
appliance.
• Always remove the appliance from the wall socket
when you attach accessories, in the case of mal-
functions, before cleaning the appliance and when
it is no longer required for use.
• NEVER submerse the appliance in liquids.
Should liquids nonetheless permeate into the
appliance housing, immediately remove the plug
from the wall socket. Arrange for it to be repaired by
a qualified specialist.
DO NOT use the appliance in the bath, in the vicinity
of water-filled baths, swimming pools or washba-
sins.
• NEVER grasp the appliance with wet hands.
Risk of Fire!
• To avoid a build-up of heat, NEVER cover the
appliance or the ventilation openings when it is in
use. Do not use the appliance under a blanket or at
other poorly ventilated locations.
Risk of personal injuries!
• This appliance is not suitable for children or for
people whose physical, sensorial or intellectual
faculties prevent the safe usage of the appliance
without support or supervision. Children should be
watched-over to ensure that they do not play with
the appliance.
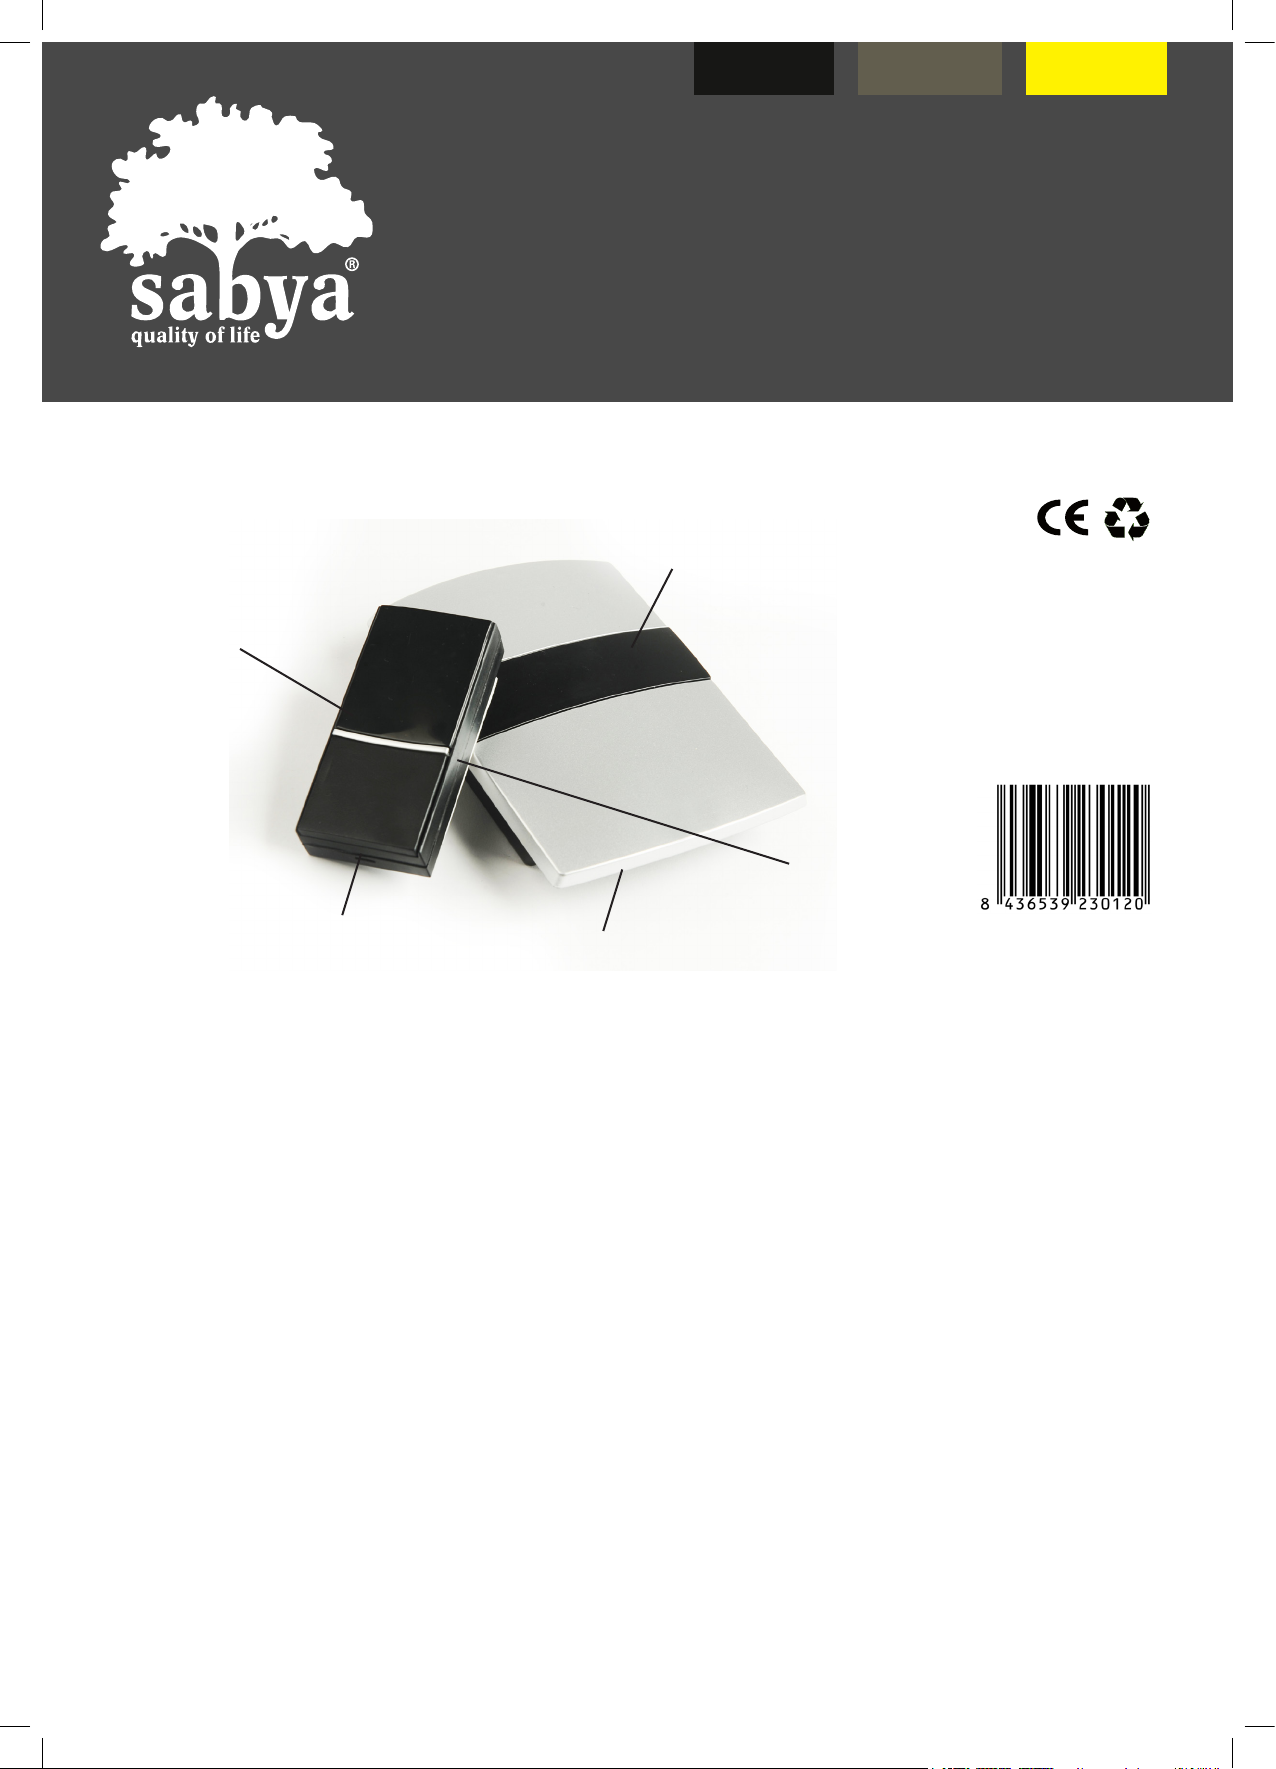
Grey bell ENG
Transmitter
1.To open the transmitter, slide a screwdriver below the Bell Push slot, apply a slight pressure and take
the base of the button.
2. Mount the transmitter in an upright position on a wall or doorframe by using the screws or double-
sided sitcky pad supplied.
3. Insert battery
4. Close the cover and press to lock into position
Receiver
1. Slide open the battery cover at the back of the unit.
2. Insert 2 X 1,5 V AA batteries, ensuring the battery polarity matches the internal marking and lock
the cover.
3.This unit can be carried around the house or garden or can be placed in any convenient location.The
mount the door chime, hand the unit on a screw using keyhole at the back.
Note
1. Use alkaline batteries, they have a longer life time and do not leak easily.
2. Never use rechargeable batteries
3. Remove the battery if you do not use the chime during a long period of time
4. Do not fix on metal surface
5. Replace battery if chime sounds distorsed
6. The wireless doorbell has an operating distance of 100 M in open area. However, local conditions
and the number of walls may affect its performance. Metal door frames and other factors that inter-
fere with the signal will reduce operating distance.
Wireless
Adjustable volume
LED indicator
Operates over 100
Large selection of sounds
Button suitable for outdoors
Portable receiver
Receiver
Transmitter LED Indicator
Button to
select music
Install 2 pcs of 1.5 V AA
alkaline batteries
Open the transmitter
with screewdriver
Bell push
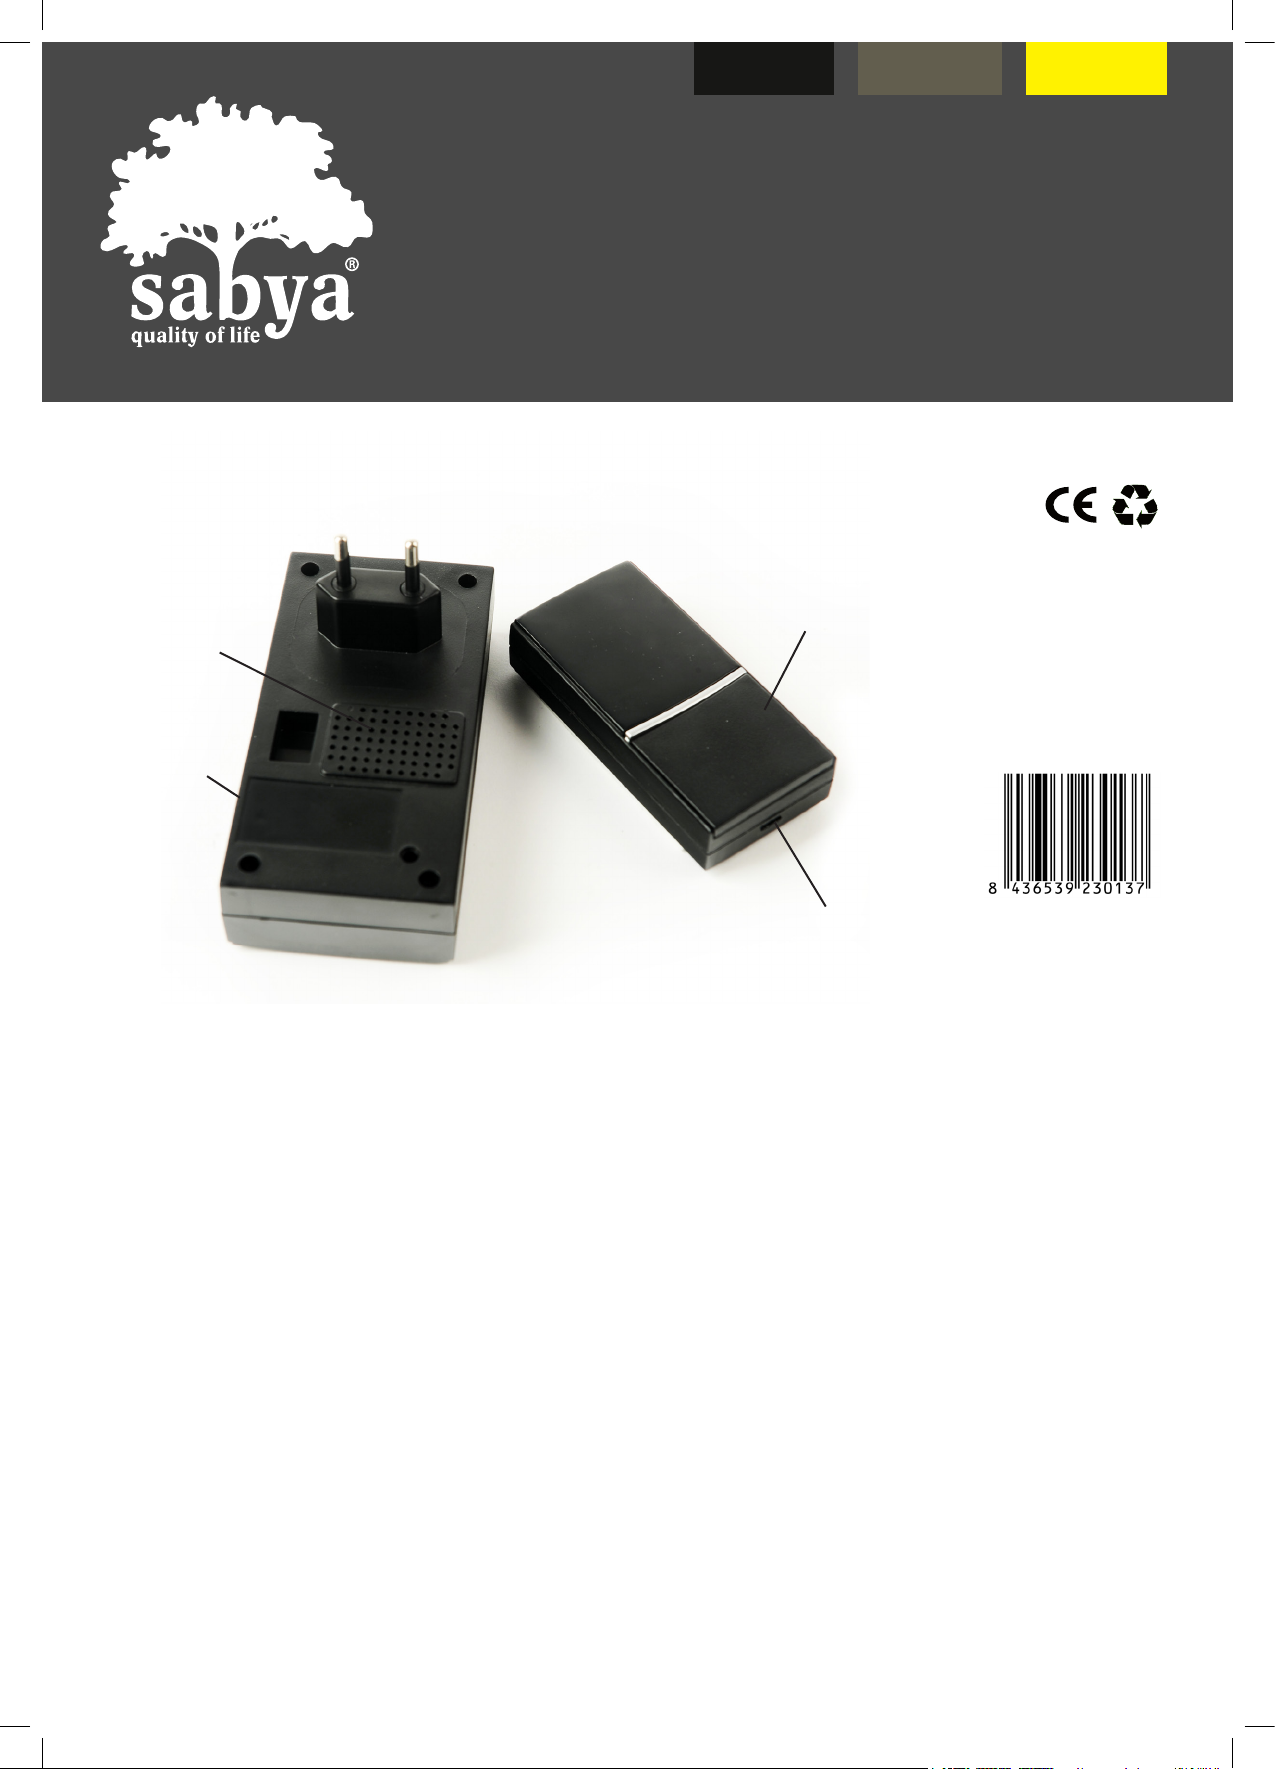
Black bell ENG
Transmitter
Plug the chime into any indoor household 220 V AC mains socket to operate
1.To open the transmitter, slide a screwdriver below the Bell Push slot, apply a slight pressure and take
the base of the button
2. Mount the transmitter in an upright position on a wall or doorframe by using the screws or double-
sided sitcky pad supplied
3. Insert 12 V A23 size battery
4. Close the cover and press to lock into position
Note
Plug the chime into any indoor household 220 V AC mains socket to operate
1. Use alkaline batteries, they have a longer life time and do not leak easily
2. Never use rechargeable batteries
3. Remove the battery if you do not use the chime during a long period of time
4. Do not fix on metal surface
5. Replace battery if chime sounds distorsed
6. The wireless doorbell has an operating distance of 100 M in open area. However, local conditions
and the number of walls may affect its performance. Metal door frames and other factors that interfe-
re with the signal will reduce operating distance
Wireless
Adjustable volume
LED indicator
Operates over 100
Large selection of sounds
Button suitable for outdoors
Easy installation (plug)
Receiver Transmitter
Bell push
Open the transmitter
with screewdriver
Plug
Speaker
Volume
button
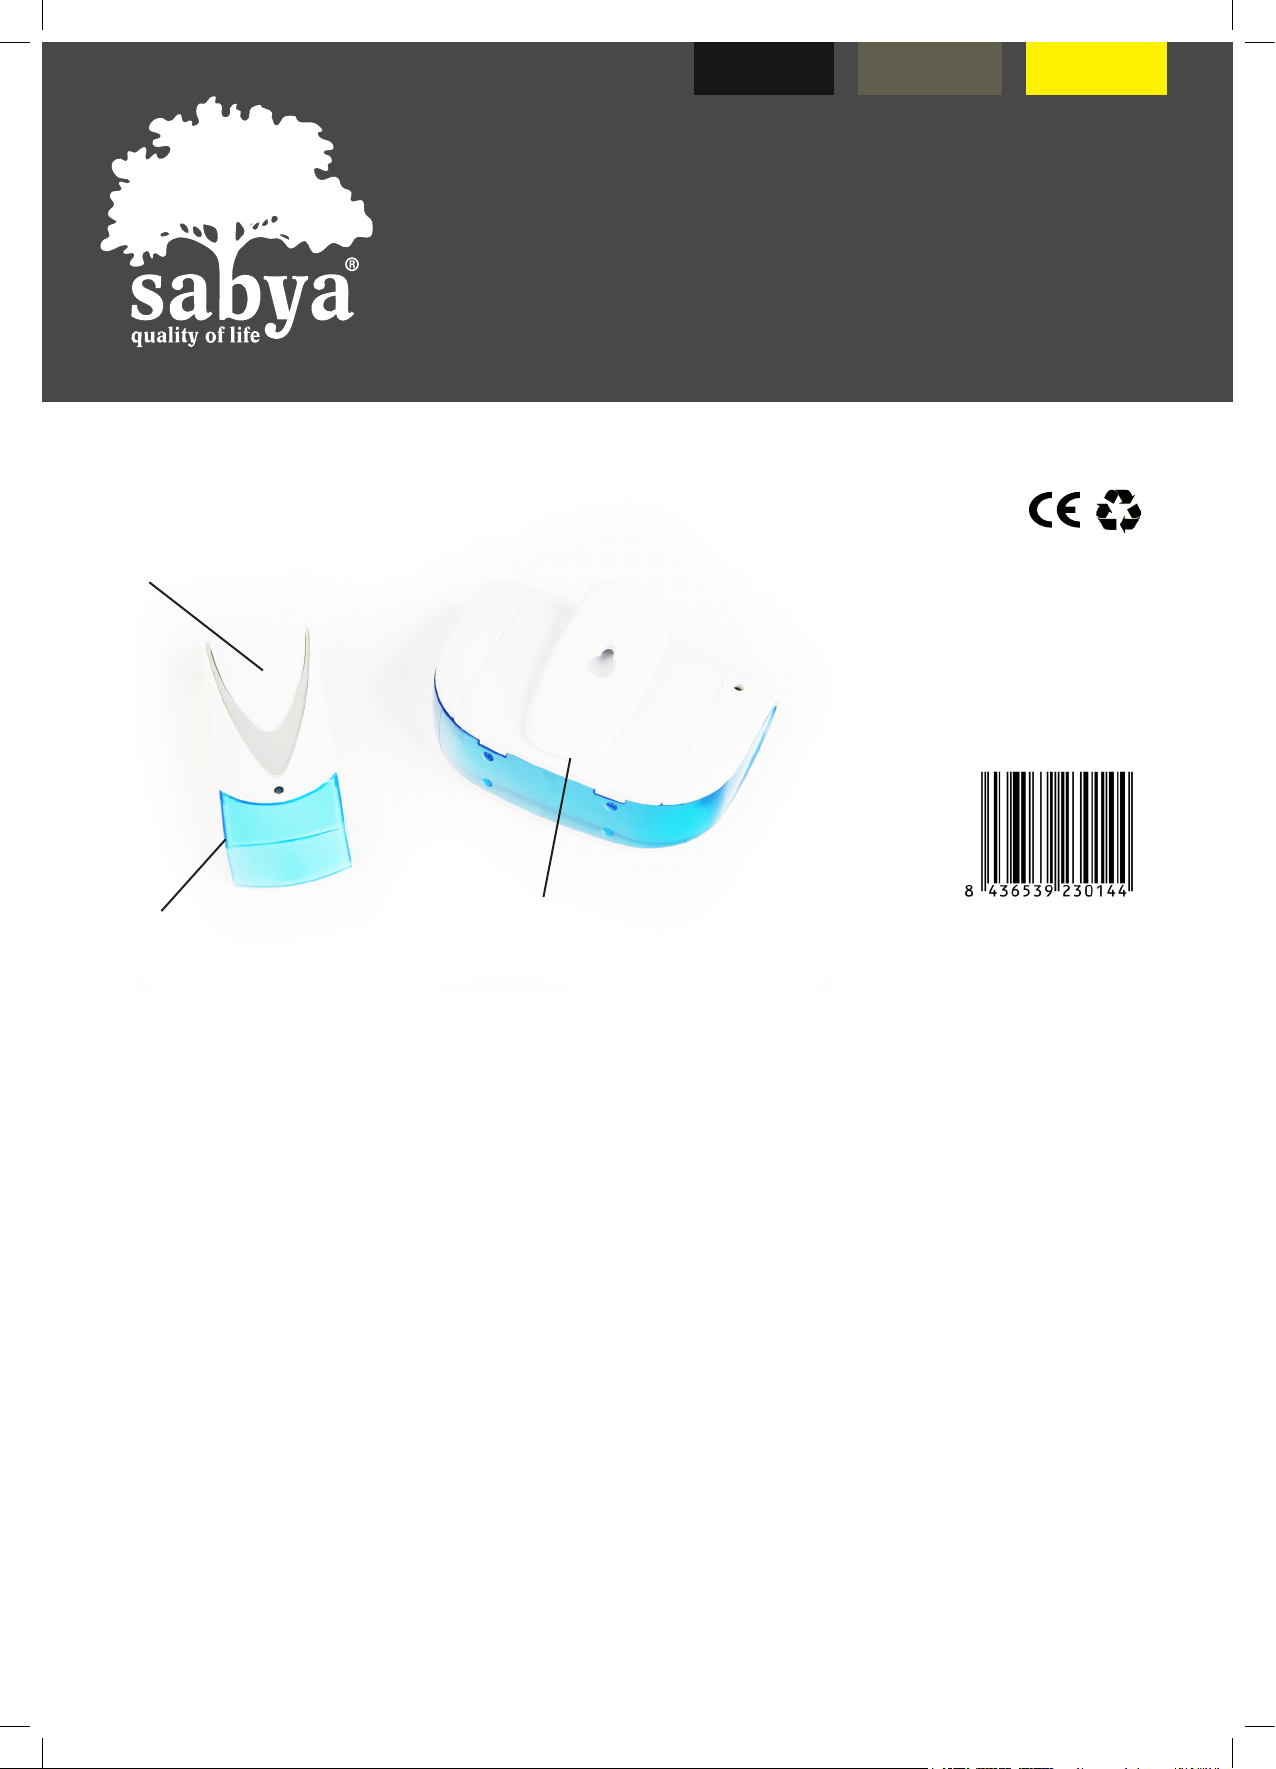
Portable bell ENG
Transmitter
1.To open the transmitter, slide a screwdriver below the Bell Push slot, apply a slight pressure and take
the base of the button.
2. Mount the transmitter in an upright position on a wall or doorframe by using the screws or double-
sided sitcky pad supplied.
3. Insert battery
4. Close the cover and press to lock into position
Receiver
1. Slide open the battery cover at the back of the unit.
2. Insert 2 X 1,5 V AA batteries, ensuring the battery polarity matches the internal marking and lock
the cover.
3.This unit can be carried around the house or garden or can be placed in any convenient location.The
mount the door chime, hand the unit on a screw using keyhole at the back.
Note
1. Use alkaline batteries, they have a longer life time and do not leak easily.
2. Never use rechargeable batteries
3. Remove the battery if you do not use the chime during a long period of time
4. Do not fix on metal surface
5. Replace battery if chime sounds distorsed
6. The wireless doorbell has an operating distance of 100 M in open area. However, local conditions
and the number of walls may affect its performance. Metal door frames and other factors that inter-
fere with the signal will reduce operating distance.
Wireless
Adjustable volume
LED indicator
Operates over 100
Large selection of sounds
Button suitable for outdoors
Portable receiver
ReceiverTransmitter
Install 2 pcs of 1.5 V AA
alkaline batteries
Open the transmitter
with screewdriver
Bell push
Warranty ENG
Warranty and repair terms
Please contact your dealer or the service centre in
case of a claim under the warranty. If you have to re-
turn the unit, please enclose a copy of your receipt
and state what the defect is.
The following warranty terms apply:
1. The warranty period for SABYA products is two
years from date of purchase. In case of a warran-
ty claim, the date of purchase has to be proven by
means of the sales receipt or invoice.
2. Defects in material or workmanship will be remo-
ved free of charge within the warranty period.
3. Repairs under warranty do not extend the warran-
ty period either for the unit or for the replacement
parts.
4. The following is excluded under the warranty:
a. All damage which has arisen due to improper
treatment, e.g. nonobservance of the user instruc-
tions.
b. All damage which is due to repairs or tampering
by the customer or unauthorised third parties.
c. Damage which has arisen during transport from
the manufacturer to the consumer or during trans-
port to the service centre.
d. Accessories which are subject to normal wear
and tear.
5. Liability for direct or indirect consequential losses
caused by the unit are excluded even if the damage
to the unit is accepted as a warranty claim.
SABYA - Quality of Life, SL
www.esabya.com
Tel. 0034 29 03 96
Urb. Hostal Nou, 25 · 17813 La Vall de Bianya
Barcelona · Spain · Europe
Bedienungsanleitung DE
Lesen Sie die Bedienungsanleitung vor der ersten
Verwendung aufmerksam durch und heben Sie die-
se für den späteren Gebrauch auf. Händigen Sie bei
Weitergabe des Gerätes an Dritte auch die Anlei-
tung aus.s.
Sicherheitshinweise
Gefahr durch Stromschlag!
• Schließen Sie das Gerät nur an eine vorschrifts-
mäßig installierte und geerdete Netzsteckdose an.
Die Netzspannung muss mit den Angaben auf dem
Typenschild des Gerätes übereinstimmen.
• Ziehen Sie, wenn Sie Zubehörteile anbringen, bei
Störungen, bevor Sie das Gerät reinigen oder wenn
Sie es nicht gebrauchen, den Netzstecker aus der
Netzsteckdose.
• Tauchen Sie das Gerät nie in Flüssigkeiten. Falls
doch einmal Flüssigkeit in das Gerätegehäuse ge-
langt, ziehen Sie sofort den Netzstecker des Geräts
aus der Netzsteckdose. Lassen Sie es von qualifi-
ziertem Fachpersonal reparieren.
Verwenden Sie das Gerät nicht im Bad, oder in
der Nähe von mit Wasser gefüllten Badewannen,
Schwimmbecken oder Waschbecken.
• Fassen Sie das Gerät nie mit nassen Händen an.
Brandgefahr!
• Lassen Sie das Gerät während des Betriebs nie-
mals unbeaufsichtigt.
• Um einen Hitzestau zu vermeiden, decken Sie das
Gerät und die Belüftungsöffnungen während des
Gebrauchs niemals ab. Benutzen Sie das Gerät ni-
cht unter einer Decke oder anderen schlecht belüf-
teten Orten.
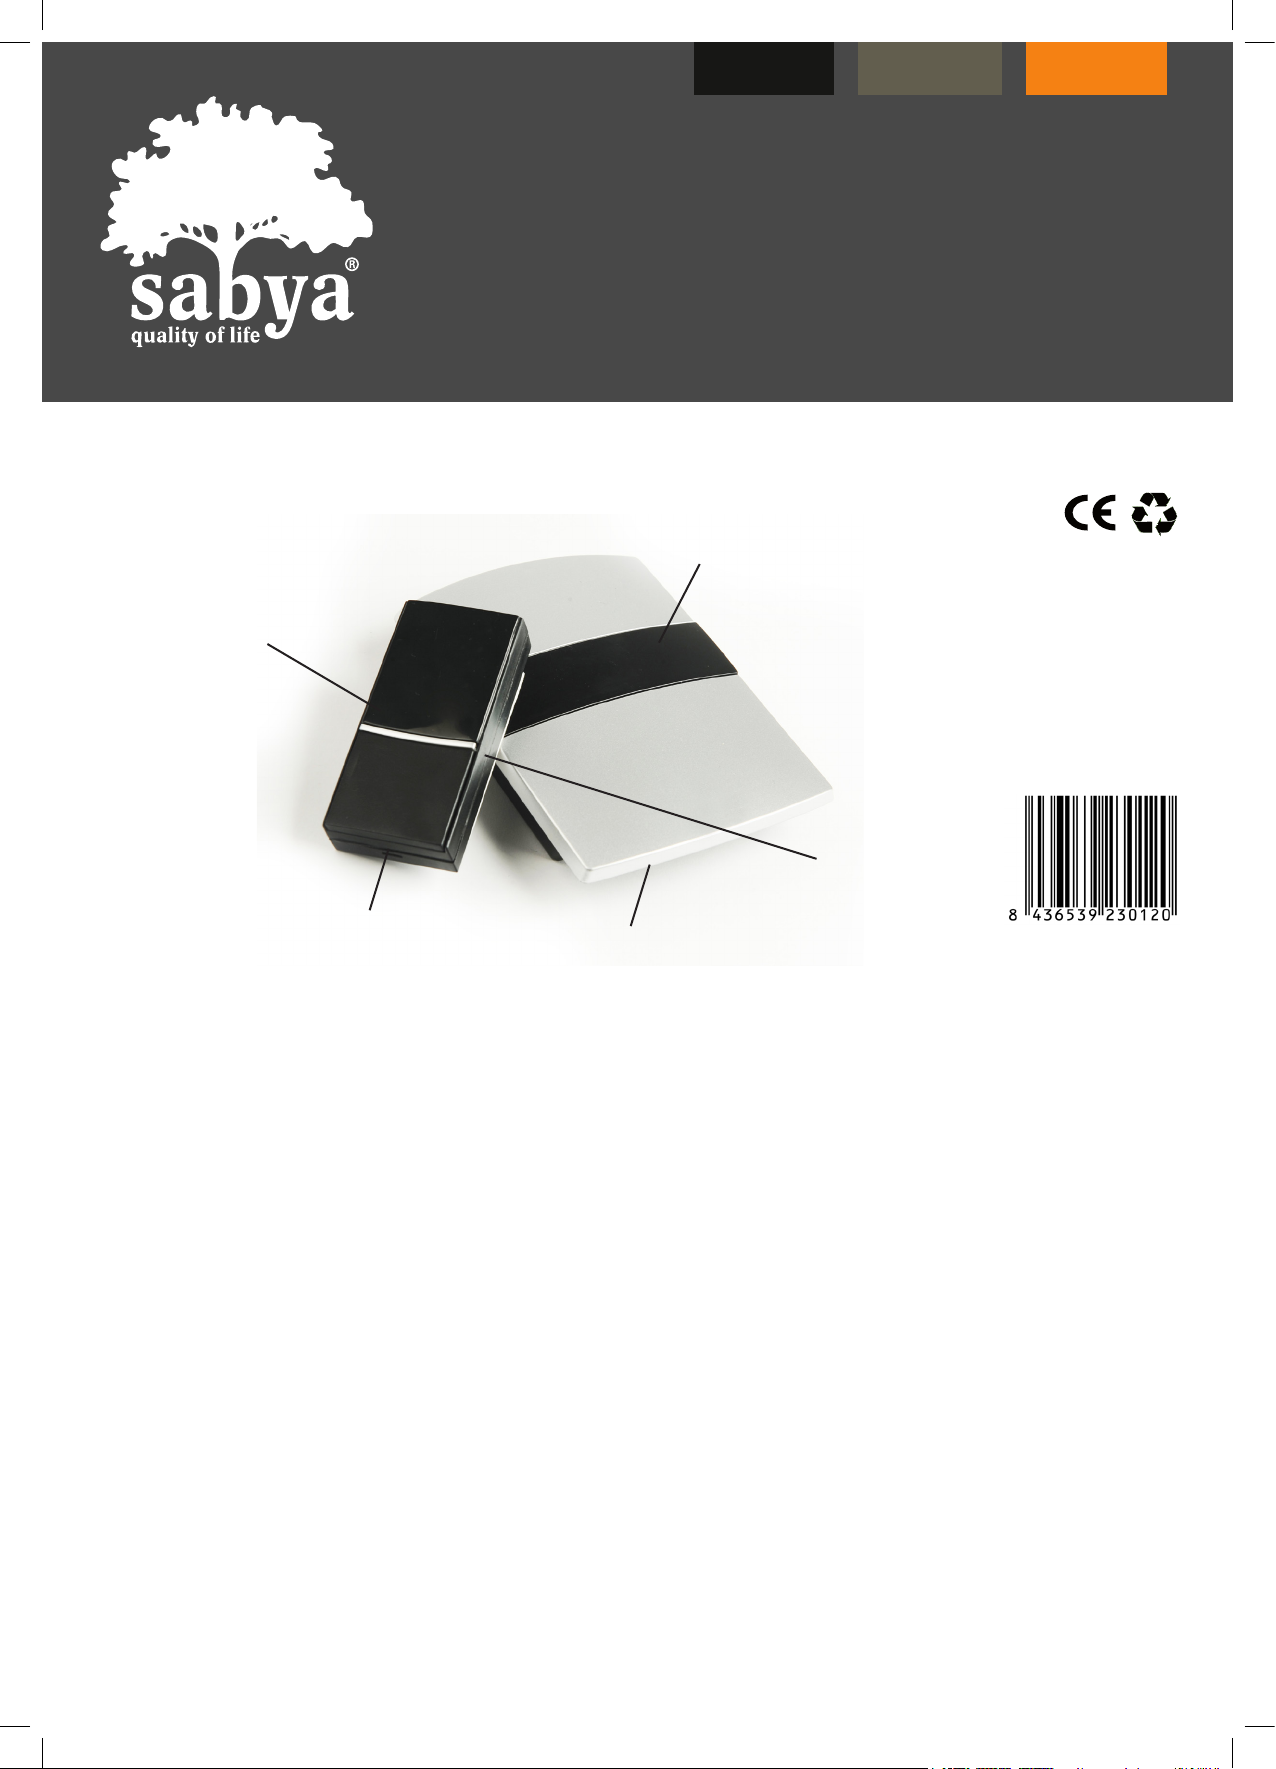
Notrufgerät grau DE
Sender
1. Um den Übersender zu öffnen, lassen Sie einen Schraubenzieher unter dem Klingelknopf-Schlitz
gleiten. Wenden Sie einen geringfügigen Druck an und nehmen Sie die Basis des Knopfes.
2. Den Sender in einer aufrechten Position auf einer Wand befestigen.
3. 12 V A23 Batterie einlegen.
4. Die Decke schließen und drücken.
Empfänger
1. Die Batteriedecke von der Rückseite von der Einheit gleiten lassen.
2. 2 X AA-Batterien legen
3. Diese Einheit kann um das Haus oder Garten getragen werden oder kann in jedem bequemen Ort
gestellt werden.
Anmerkung
1. Alkalische Batterien gebrauchen, sie haben eine längere Lebenszeit.
2. Aufladbaren Batterien nie verwenden
3. Die Batterie entfernen, wenn Sie das Aparat einer langen Zeit nicht benutzen.
4. Auf einer Metalloberfläche nicht befestigen.
5. Batterie umtauschen, wenn der Empfänger verzerrt klingelt.
6. Mit dem kabellos Notrufgerät sind Sie bis 100 M in offenem Gebiet Reichweite flexible. Jedoch kön-
nen lokale Bedingungen und die Zahl von Wänden seine Leistung betreffen. Metallene Tür entwickelt
sich und andere Faktoren, die das Signal stören, wird Betriebsentfernung reduzieren.
Kabellos
Verstellbare Lautstärke
LED-Anzeiger
Reichweite über 100
Große Tonauswahl
Taste tauglich für den
Außenbereich
Batteriebetrieben
Empfänger
Sender LED Anzeige
Tonauswahl
2 St. 1.5 V AA alkalische
Batterien installieren
Den Sender mit
schraubenzieher öffnen
Klingelknopf
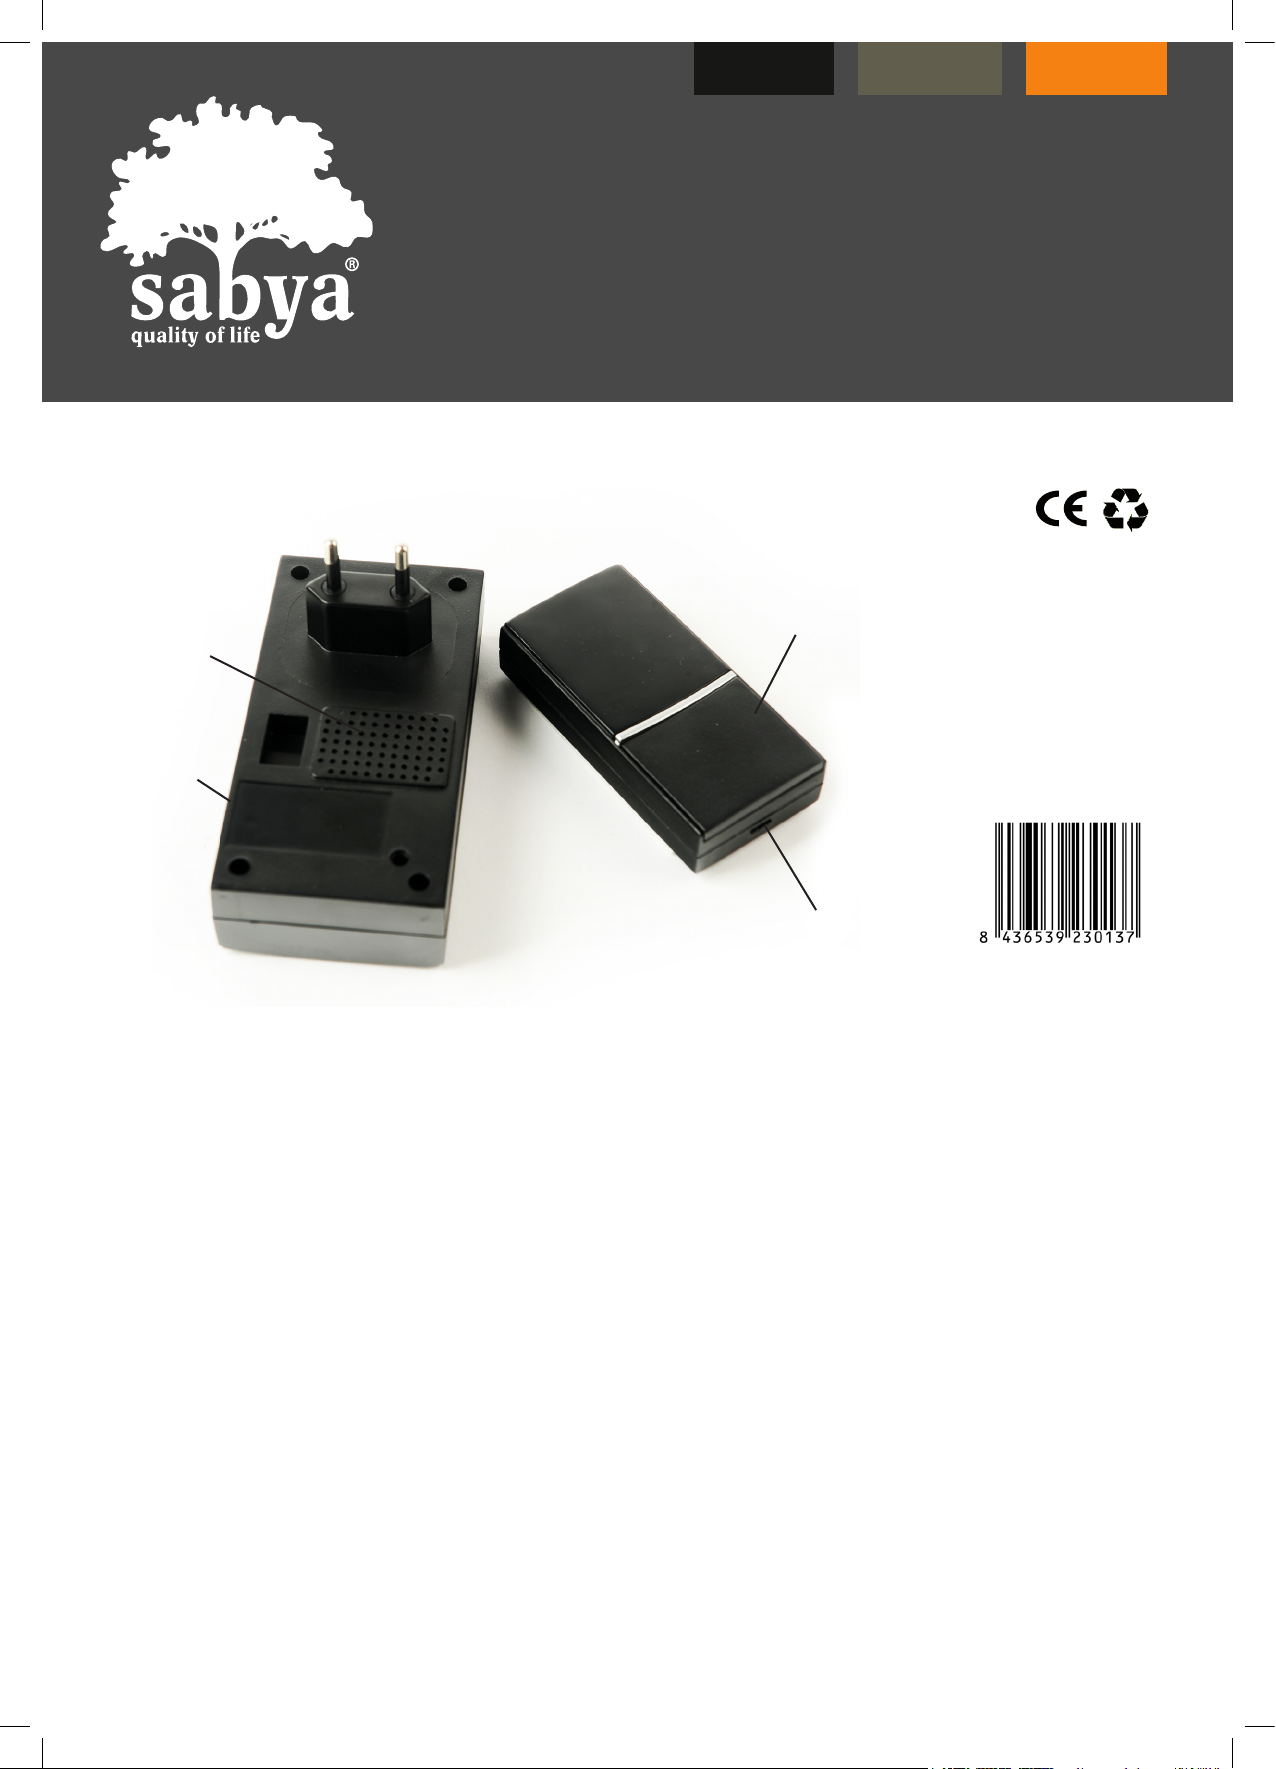
Notrufgerät schwarz DE
Sender
1. Um den Übersender zu öffnen, lassen Sie einen Schraubenzieher unter dem Klingelknopf-Schlitz
gleiten. Wenden Sie einen geringfügigen Druck an und nehmen Sie die Basis des Knopfes.
2. Den Sender in einer aufrechten Position auf einer Wand befestigen.
3. 12 V A23 Batterie einlegen.
4. Die Decke schließen und drücken.
Empfänger
Den Sender in einer 220V Steckdose einstecken.
Anmerkung
1. Alkalische Batterien gebrauchen, sie haben eine längere Lebenszeit.
2. Aufladbaren Batterien nie verwenden
3. Die Batterie entfernen, wenn Sie das Aparat einer langen Zeit nicht benutzen.
4. Auf einer Metalloberfläche nicht befestigen.
5. Batterie umtauschen, wenn der Empfänger verzerrt klingelt.
6. Mit dem kabellos Notrufgerät sind Sie bis 100 M in offenem Gebiet Reichweite flexible. Jedoch kön-
nen lokale Bedingungen und die Zahl von Wänden seine Leistung betreffen. Metallene Tür entwickelt
sich und andere Faktoren, die das Signal stören, wird Betriebsentfernung reduzieren.
Kabellos
Verstellbare Lautstärke
LED-Anzeiger
Reichweite über 100
Große Tonauswahl
Taste tauglich für den
Außenbereich
Einfache Installation
(Steckdose)
Empfänger Sender
Klingelknopf
Den Sender mit
schraubenzieher öffnen
Stecker
Lautsprecher
Lautstärker
Knopf
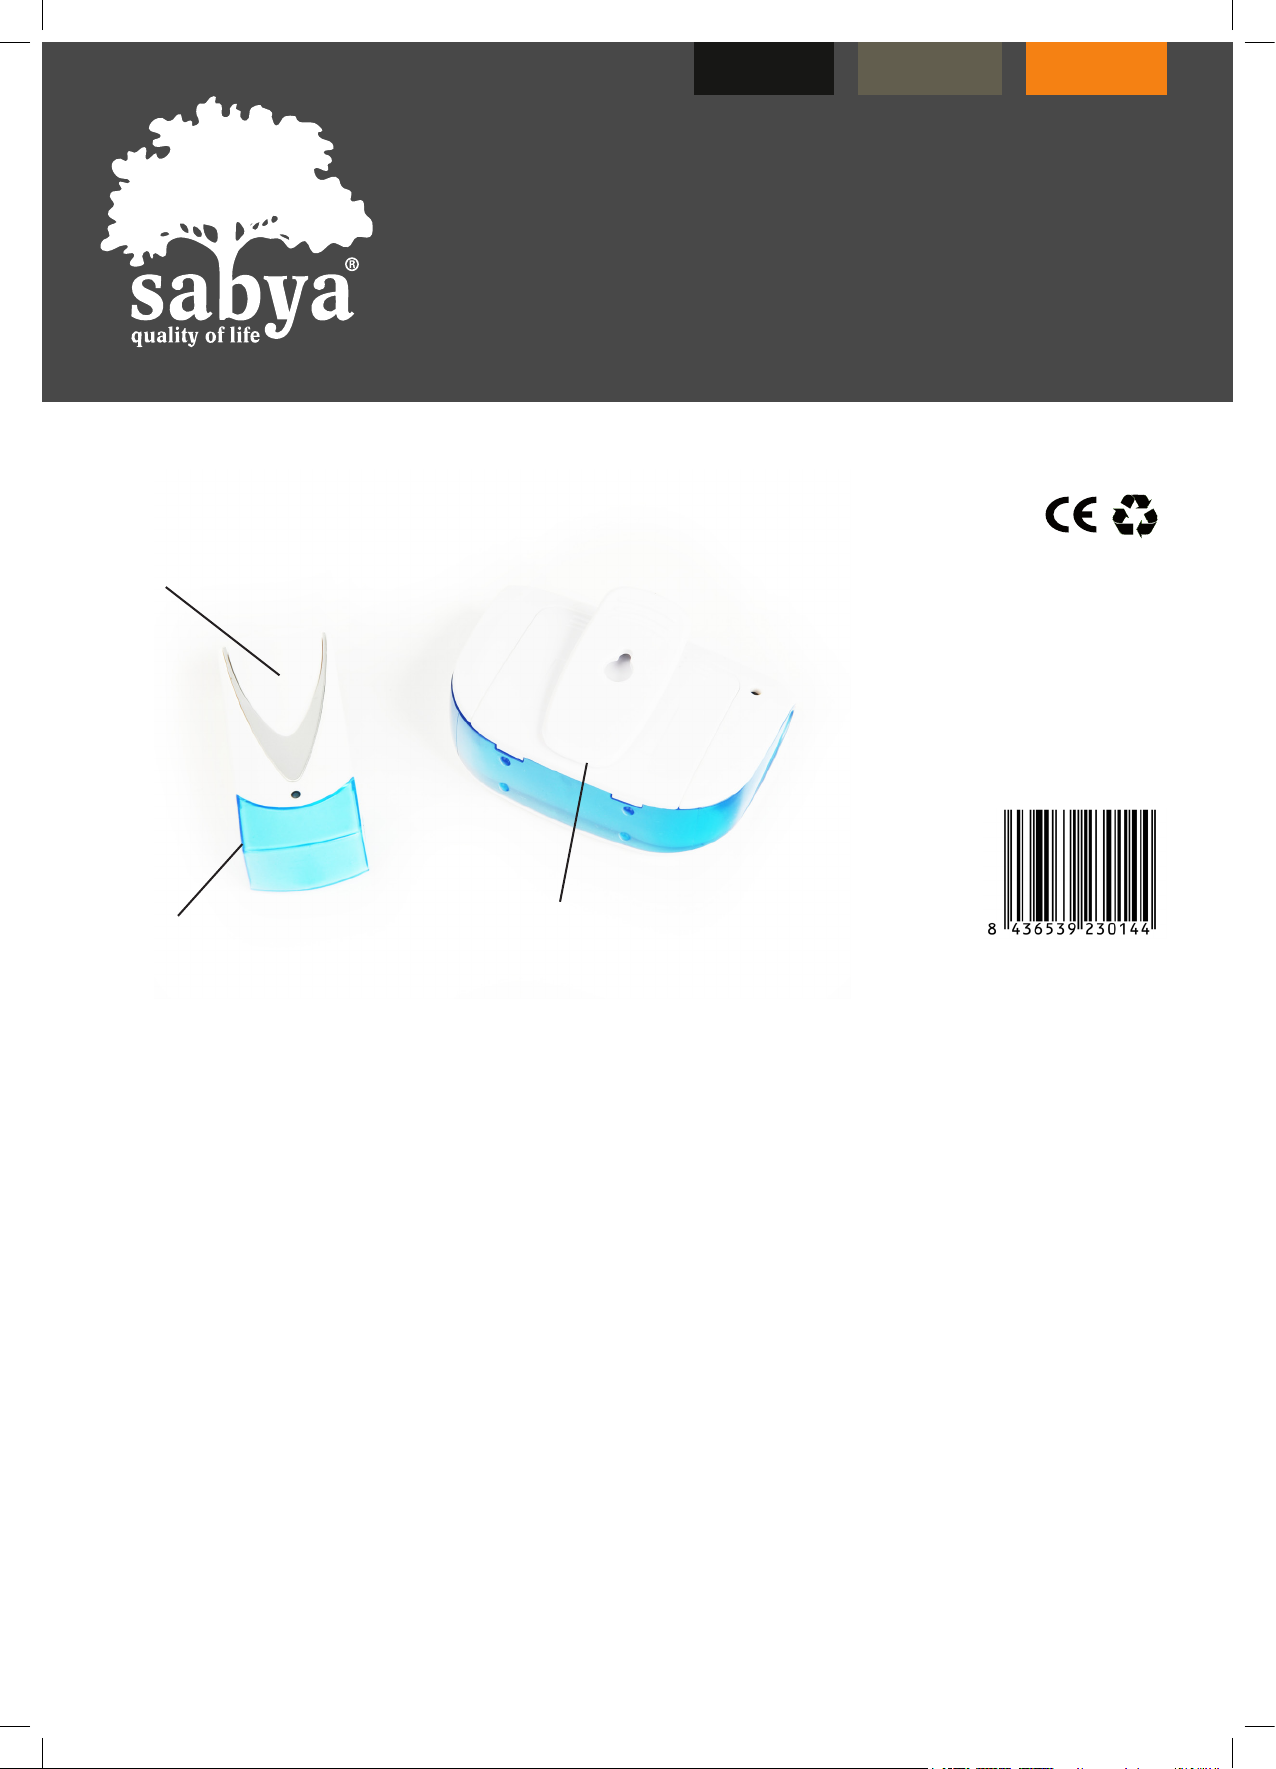
Tragbares Notrufgerät DE
Sender
1. Um den Übersender zu öffnen, lassen Sie einen Schraubenzieher unter dem Klingelknopf-Schlitz
gleiten. Wenden Sie einen geringfügigen Druck an und nehmen Sie die Basis des Knopfes.
2. Den Sender in einer aufrechten Position auf einer Wand befestigen.
3. 12 V A23 Batterie einlegen.
4. Die Decke schließen und drücken.
Empfänger
1. Die Batteriedecke von der Rückseite von der Einheit gleiten lassen.
2. 2 X AA-Batterien legen
3. Diese Einheit kann um das Haus oder Garten getragen werden oder kann in jedem bequemen Ort
gestellt werden.
Anmerkung
1. Alkalische Batterien gebrauchen, sie haben eine längere Lebenszeit.
2. Aufladbaren Batterien nie verwenden
3. Die Batterie entfernen, wenn Sie das Aparat einer langen Zeit nicht benutzen.
4. Auf einer Metalloberfläche nicht befestigen.
5. Batterie umtauschen, wenn der Empfänger verzerrt klingelt.
6. Mit dem kabellos Notrufgerät sind Sie bis 100 M in offenem Gebiet Reichweite flexible. Jedoch kön-
nen lokale Bedingungen und die Zahl von Wänden seine Leistung betreffen. Metallene Tür entwickelt
sich und andere Faktoren, die das Signal stören, wird Betriebsentfernung reduzieren.
Kabellos
Verstellbare Lautstärke
LED-Anzeiger
Reichweite über 100
Große Tonauswahl
Taste tauglich für den
Außenbereich
Tragbarer Empfänger
EmpfängerSender
2 St. 1.5 V AA alkalische
Batterien installieren
Den Sender mit
schraubenzieher öffnen
Klingelknopf
Dieses Handbuch passt für folgende Modelle
2
Inhaltsverzeichnis
Sprachen:
Beliebte Notrufnummer Handbücher anderer Marken


Paso
Paso PA8506-V Bedienungsanleitung

JNY Safetycare
JNY Safetycare FDC Bedienungsanleitung

Rath
Rath 2100-TL9 Bedienungsanleitung

Eldat
Eldat Easywave Fon Alarm Bedienungsanleitung

Merak
Merak MMk-656 Bedienungsanleitung

Assistive Technology Services
Assistive Technology Services TOUCH N TALK FD Montageanleitung