
Safety Basement SB-CC8930 Bedienungsanleitung

ank you for purchasing from SafetyBasement.com! We appreciate
your business.
We made this simple manual to help you enjoy your new product as
quickly and easily as possible.
Be sure to check the TECH SUPPORT tab on your product page at
SafetyBasement.com for the latest available manual.
INSTRUCTION MANUAL
Revised: April 17, 2013
1080P Full HD Mini Clock DVR
SB-CC8930

Page 2
PRODUCT MANUAL 1080P Mini Clock Camera : SB-CC8930
www.SafetyBasement.com Phone: 877-345-2336 Fax: 888-236-2524
PRODUCT REFERENCE
Remote Control
Power On / O
Camera
Status Light
Speak Time /
Snooze
Motion Activated
Recording
Photo
Audio Recording
Standard Video
Recording
Note: You may need to pull out
a small plastic tab before remote
control will operate
PRODUCT MANUAL 1080P Mini Clock Camera : SB-CC8930
Page 3
www.SafetyBasement.com Phone: 877-345-2336 Fax: 888-236-2524
PRODUCT REFERENCE
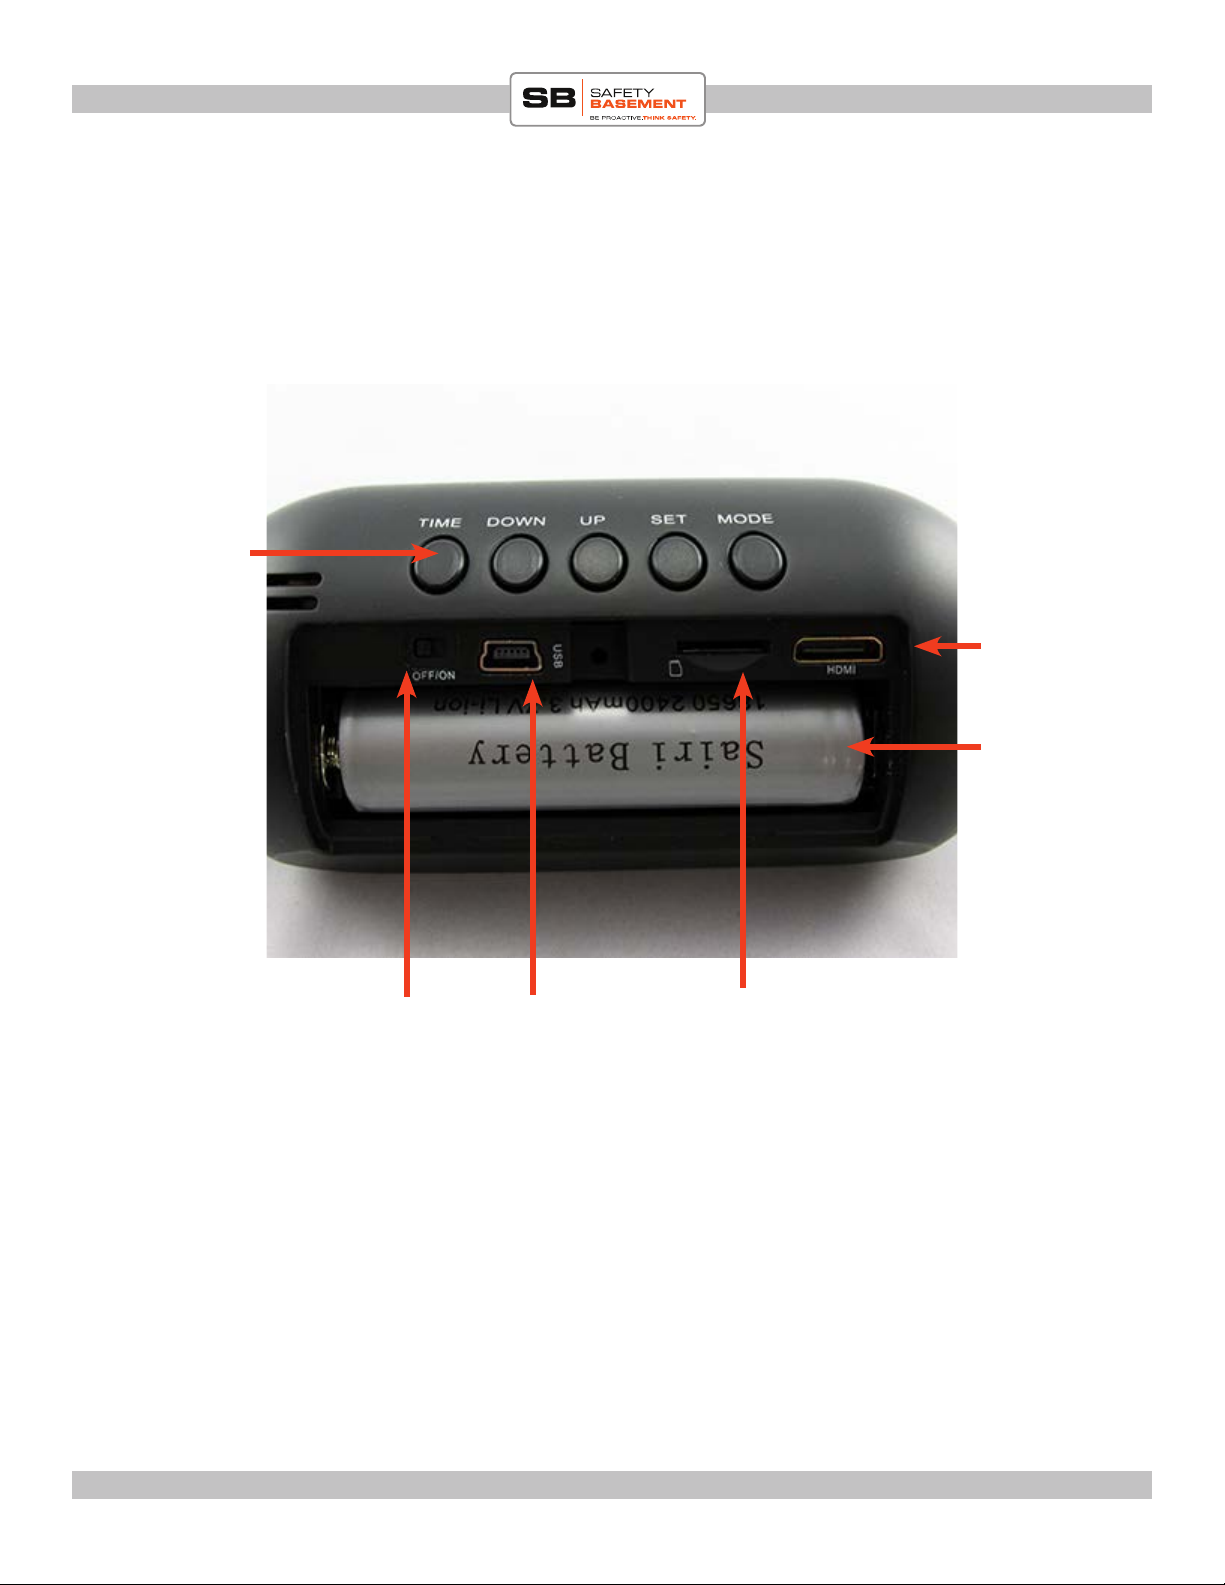
USB Connector SD Memory Card
Power Switch
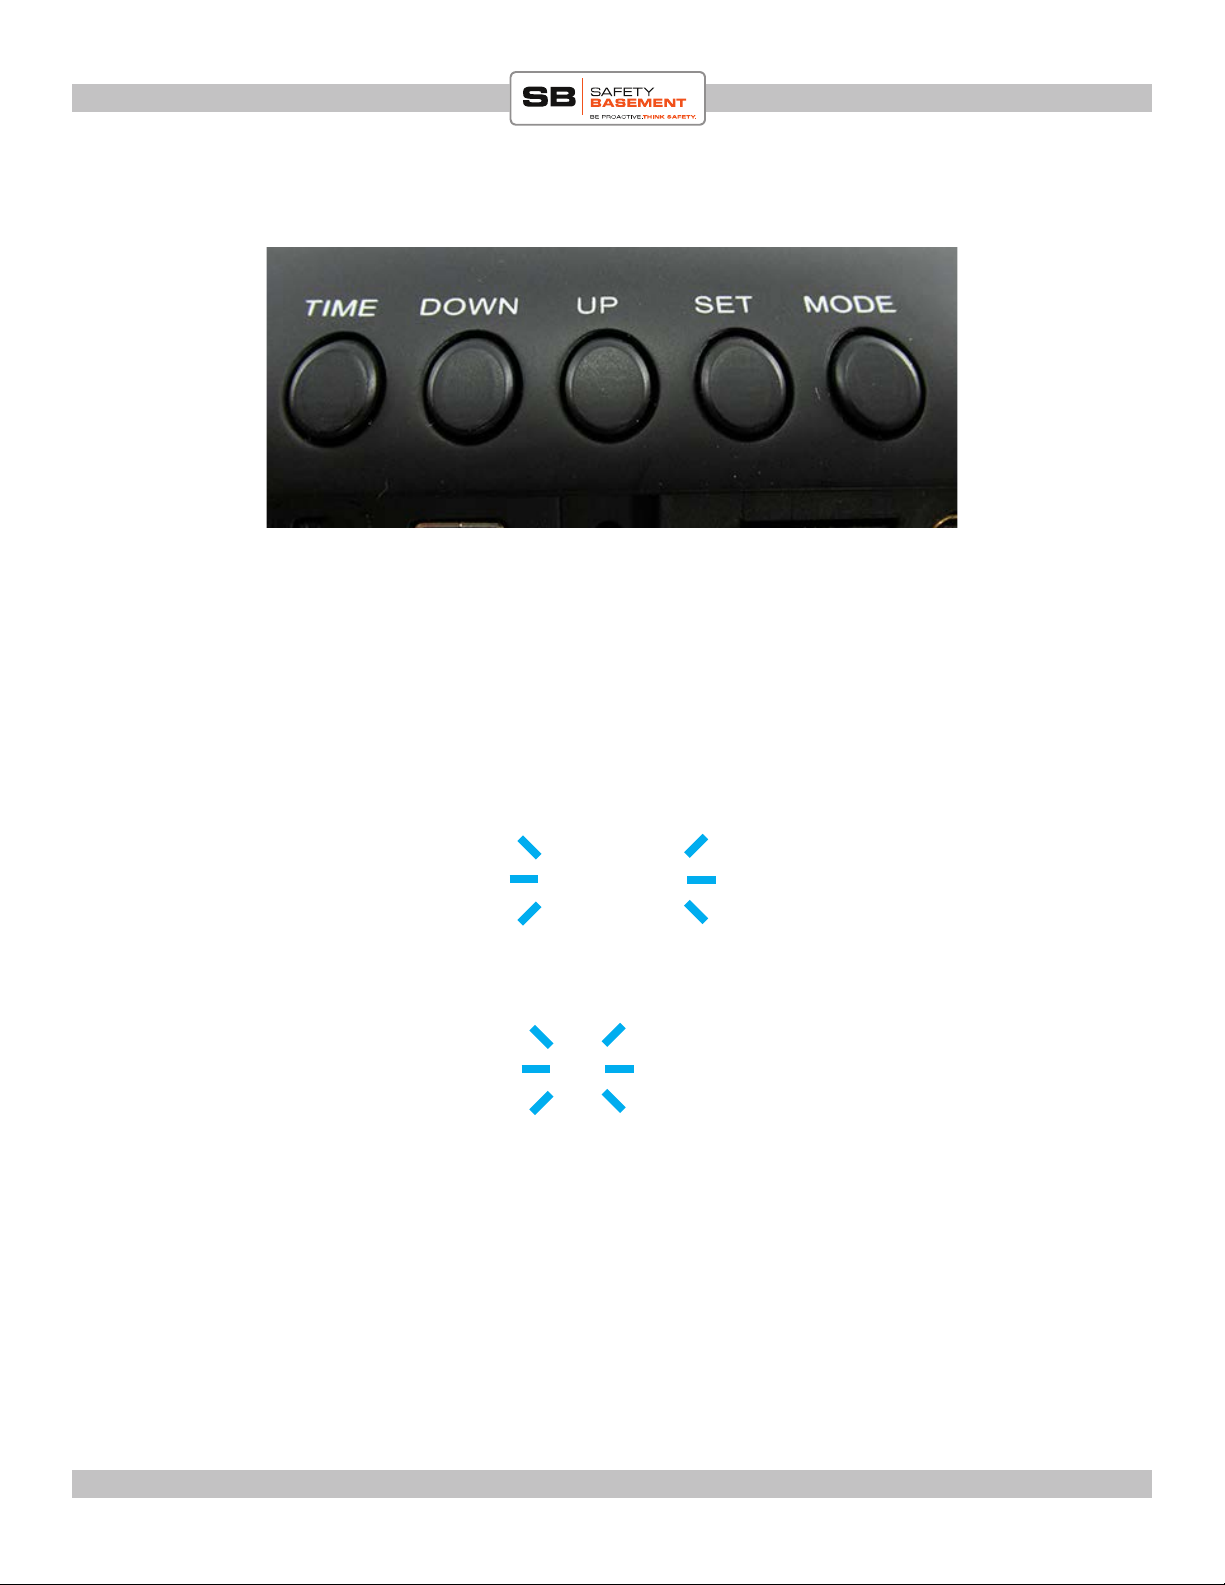
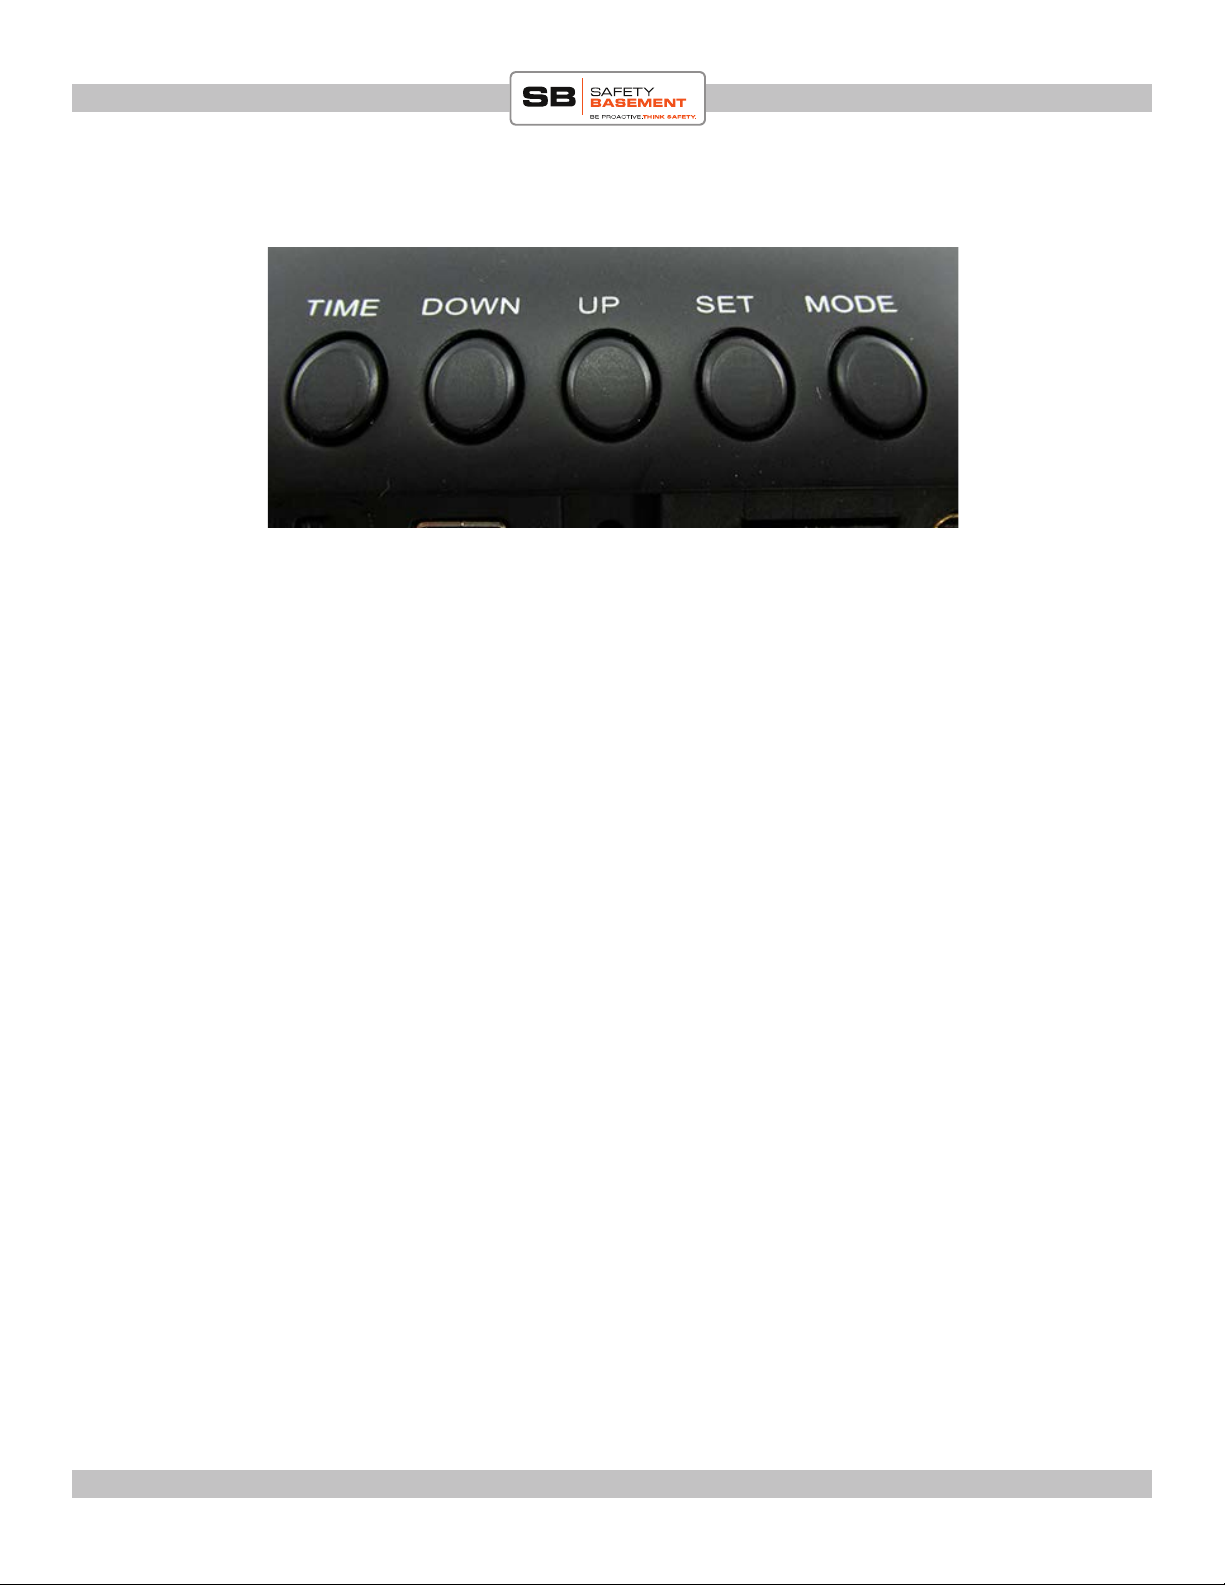
Clock Controls
Rechargeable
Battery
Note: You may
need to remove a
small paper tab for
operation
HDMI Port

Page 4
PRODUCT MANUAL 1080P Mini Clock Camera : SB-CC8930
www.SafetyBasement.com Phone: 877-345-2336 Fax: 888-236-2524
e Clock Camera must have an SD card inserted to work properly. It will accept a Micro SD
card of up to 32 GB in size.
1. e SD card slot is located on the back of the device.
2. Gently place the SD card into the slot as shown, with the gold connections facing DOWN
and the printing facing UP.
3. Gently push the SD card into the slot. It will click into place. DO NOT FORCE the SD card
into place. If there is any resistance, remove the SD card. Check the position of the card, and
try again. An incorrectly inserted card may damage your device and void your warranty.
4. When the SD card is properly inserted, it will look like the bottom picture.
BEFORE FIRST USE - SD CARD
Step 2 - Gold connectors face
UP
Step 3 - Partially inserted
Step 4 - is SD card is
properly inserted.

PRODUCT MANUAL 1080P Mini Clock Camera : SB-CC8930
Page 5
www.SafetyBasement.com Phone: 877-345-2336 Fax: 888-236-2524
BEFORE FIRST USE - FILES
No other les are required for use of your Clock Camera with Windows or Mac PCs. It uses
standard drivers that are already installed on your computer.
Please refer to the last page of this manual for suggested soware for playback of your media
les.
Please fully charge your Clock Camera before rst use. Please use the included wall adapter for
best performance. Do not use any other adapter.
1. Insert one end of the wall adapter into the USB port on the Clock.
2. Be sure the Power switch is set to OFF during charging.
3. Plug in the wall adapter.
4. Please charge for several hours.
BEFORE FIRST USE - CHARGING
Page 6
PRODUCT MANUAL 1080P Mini Clock Camera : SB-CC8930
www.SafetyBasement.com Phone: 877-345-2336 Fax: 888-236-2524
ALARM CLOCK FUNCTIONS
NOTE: e alarm clock functions of this devices are NOT set by the Recording time / date
settings that appear in the DVR settings later in the manual. e alarm clock functions are
controlled separately and are similar to any other standard alarm clock.
2013
SET DATE & TIME
1. Press the SET button. e front display will blink.
2. Use the UP and DOWN buttons to set the YEAR.
3. Press SET again and the MONTH and DATE will appear. e MONTH will be blinking.
228
4. Use the UP and DOWN buttons to set the MONTH.
5. Press SET again and adjust the DAY, HOUR and MINUTES the same way.
6. Aer you set the MINUTES, press SET again and your changes will be saved.

PRODUCT MANUAL 1080P Mini Clock Camera : SB-CC8930
Page 7
www.SafetyBasement.com Phone: 877-345-2336 Fax: 888-236-2524
ALARM CLOCK FUNCTIONS
SET ALARM
1. Press the MODE button. e front display will show 4 lines.
2. Press SET to set the HOUR for your Alarm. It will be blinking.
12:00
3. Use UP and DOWN to choose the Hour for your Alarm.
4. Press SET again and the MINUTES will blink. Use the UP and DOWN buttons to set the
MINUTES.
5. Press SET again. Now choose the amount of time you want to SNOOZE for. You can
SNOOZE for 1 - 60 minutes.
6. Press SET again. Now choose the Alarm Sound that you want. You can choose a Nature
Sound (1, 2, 3, 4, 5) or a standard beeping alarm (6).
7. Press MODE to save your settings.
Page 8
PRODUCT MANUAL 1080P Mini Clock Camera : SB-CC8930
www.SafetyBasement.com Phone: 877-345-2336 Fax: 888-236-2524
ALARM CLOCK FUNCTIONS
24 HOUR CLOCK / TEMP
1. To alternate between a 24 hour and 12 hour clock, press the UP button.
2. To alternate between Celsius and Fehrenheit temperature display, press the DOWN button.
TALKING TIME
1. To hear the time, press the SNOOZE bar.
NATURE SOUNDS
You can fall asleep to the sounds of nature with this option.
1. Press the TIME button to choose how long you want the sounds to play, 10, 20, 30, 40, 50
or 60 minutes.
2. HOLD the SNOOZE button down for 3 seconds, until the sound starts to play. e display
will count down the remaining time.
3. Choose a dierent sound by pressing the SNOOZE button to pause. Press SNOOZE again
and the countdown will restart using the next Nature Sound option.
4. To cancel the sounds and countdown, press the MODE button 2 times to return to the
standard clock display.
PRODUCT MANUAL 1080P Mini Clock Camera : SB-CC8930
Page 9
www.SafetyBasement.com Phone: 877-345-2336 Fax: 888-236-2524
DVR SETUP
To set up the DVR functions of this device, you will need to connect it to an HD TV or
monitor with an HDMI connector, using the HDMI cable included in the box. You may also
purchase a longer HDMI cable if needed.
You will need to connect to your HD TV when setting up, and when you want to playback
your les.
Connecting to your HD TV
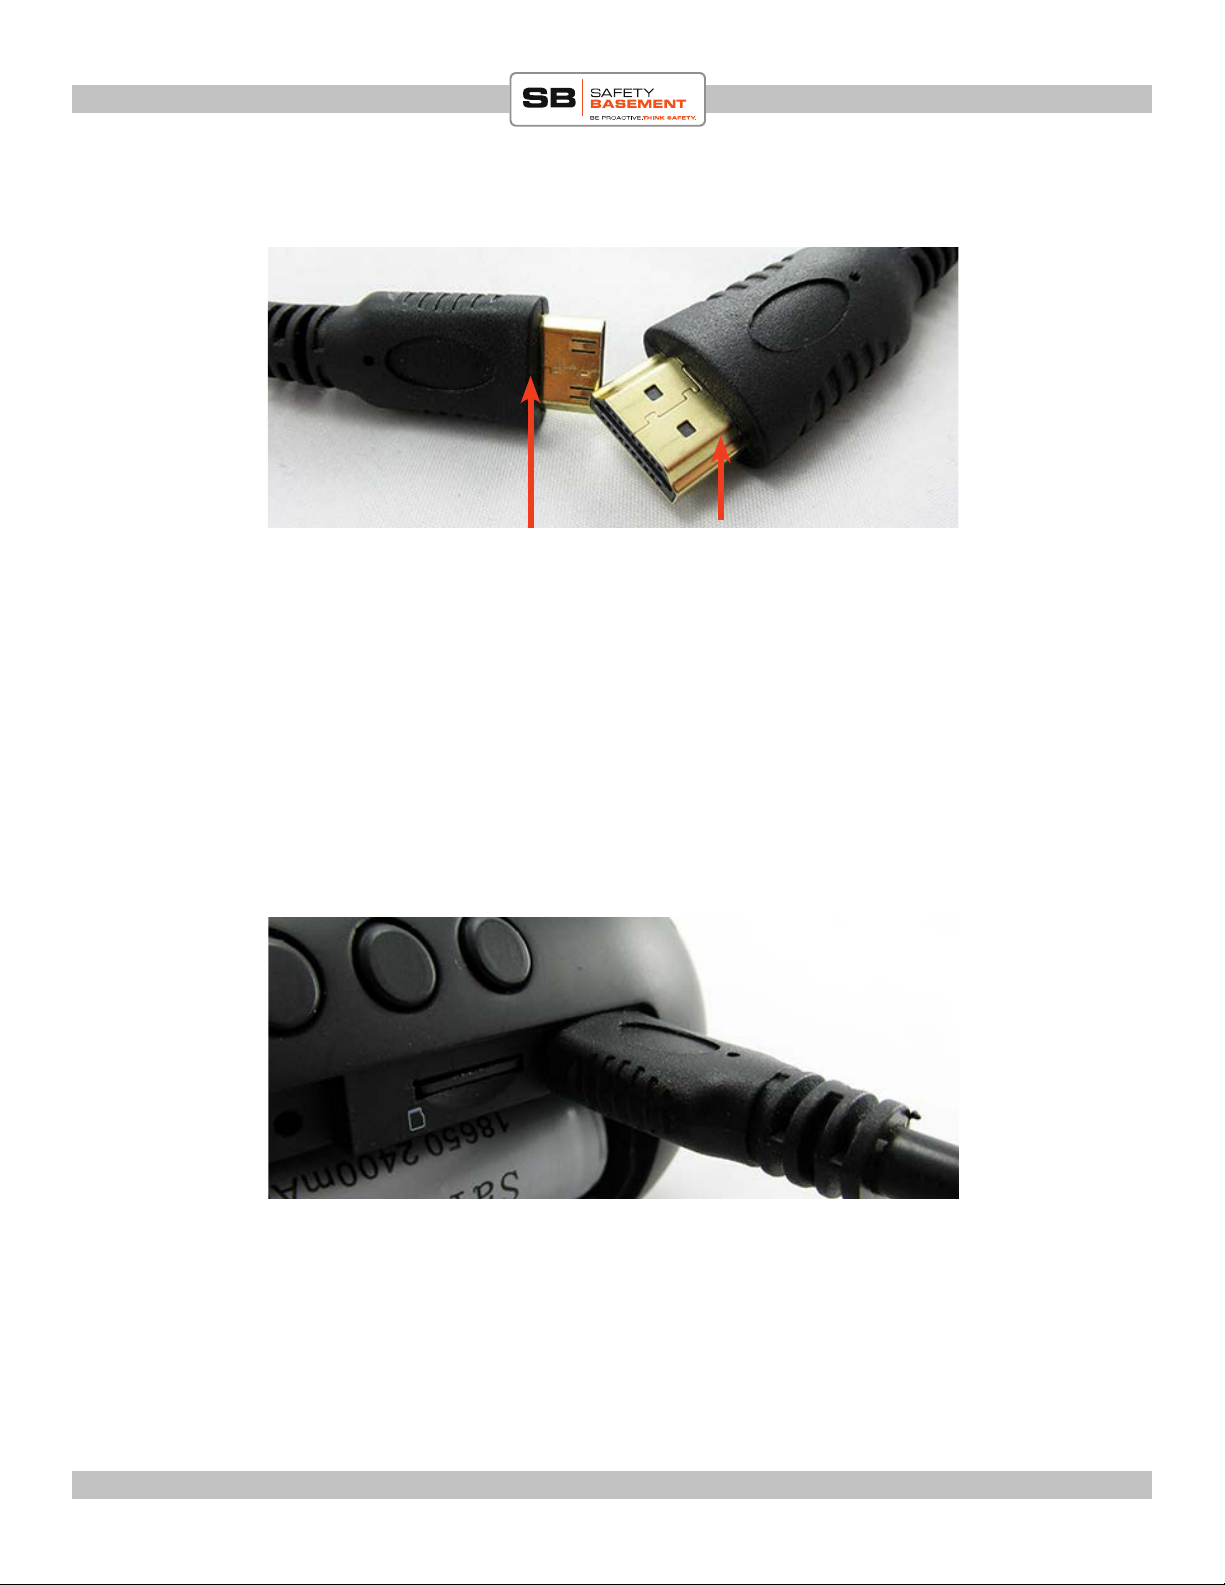
1. With the power switch on your clock set to OFF, plug the small end of your HDMI cable
into the HDMI port on the clock.
2. Plug the other end of your HDMI cable into an available HDMI slot on your TV.
3. Use your TV Remote to select the proper HDMI input you plugged the cable in to.
Smaller end of the cable
conects to your clock
Larger end of the cable
conects to your HD TV
Page 10
PRODUCT MANUAL 1080P Mini Clock Camera : SB-CC8930
www.SafetyBasement.com Phone: 877-345-2336 Fax: 888-236-2524
DVR SETUP MENU
With the HDMI cable properly inserted, and your HD TV on the correct channel input, you
can now access the Menu system of your DVR.
1. Turn ON the power switch to your DVR.
2. Use the DVR Remote Control, and press the Power button.
3. Aer a few seconds, your camera should appear on your TV screen with a “LIVE” picture.
4. Press the MODE button to enter the Menu system of your DVR.
5. At this point, you may see a warning that there is no image or no le. is is normal. If you
do have les on your device, you will see an image of your rst le. Ignore that for now.
6. Press MENU to enter the Menu options.
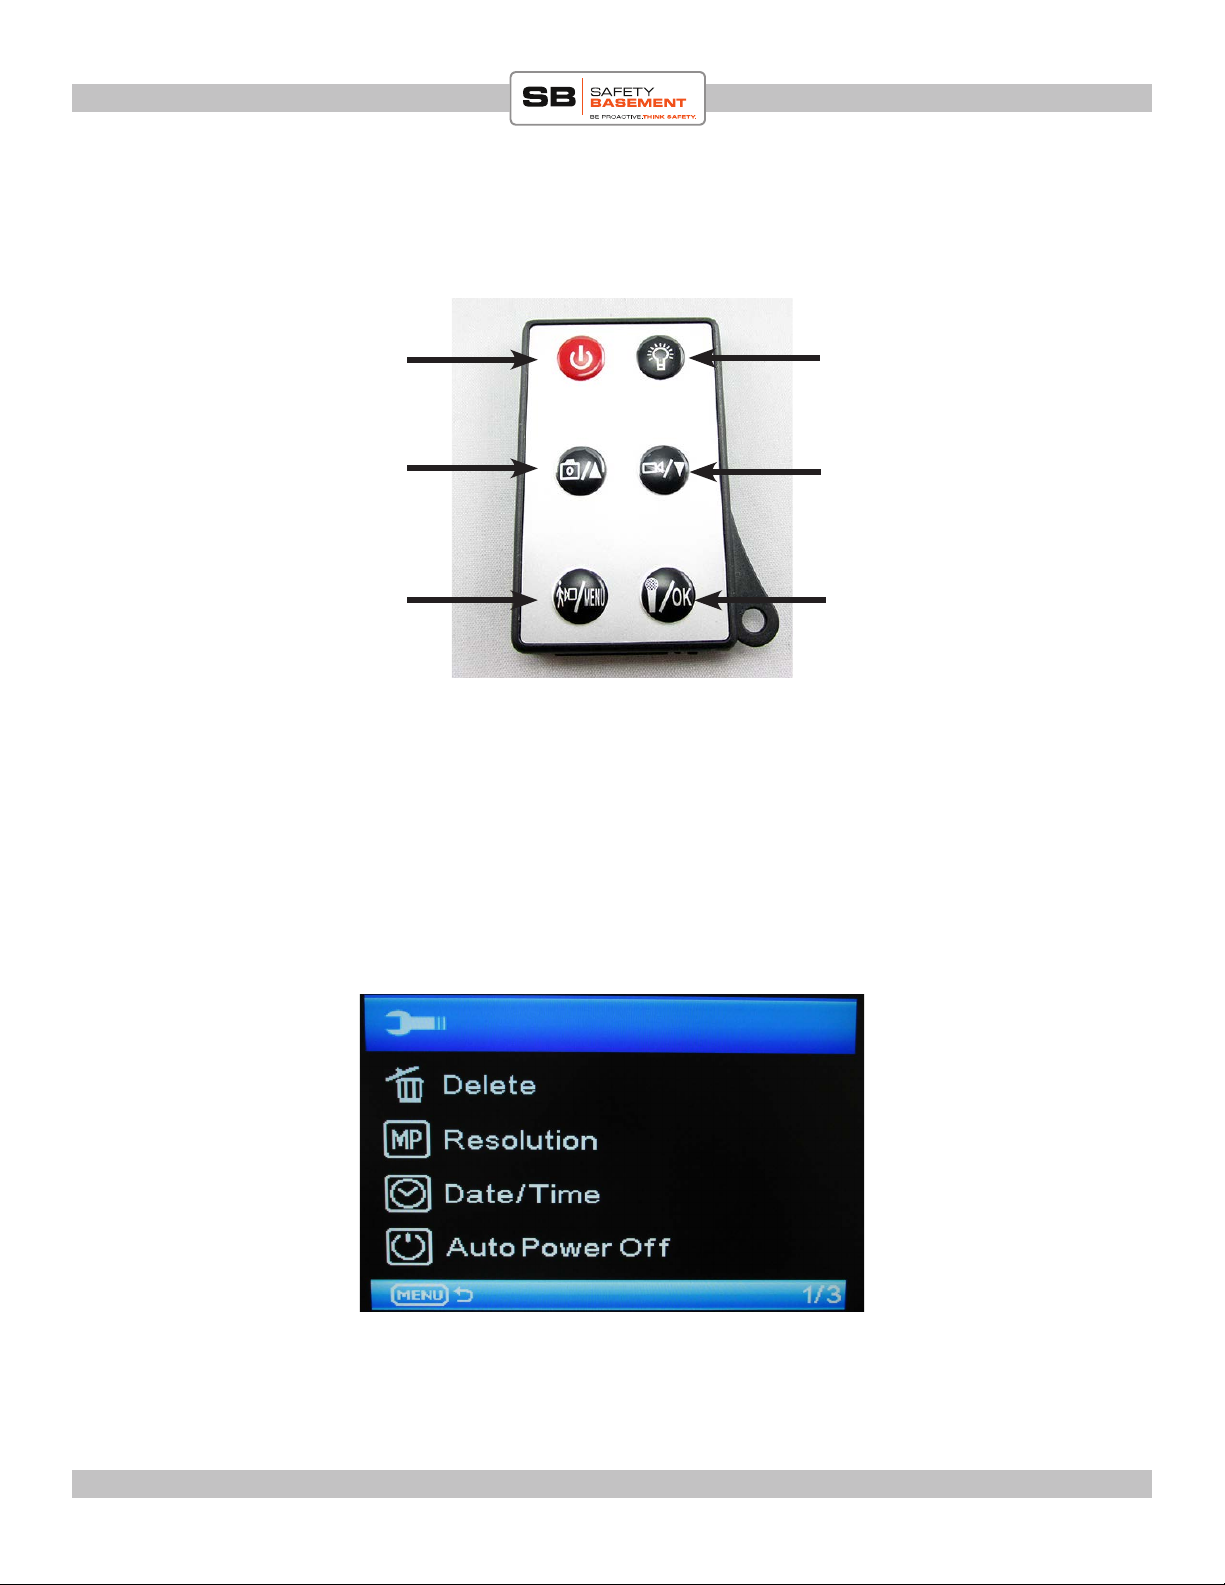
e Menu Options Screen
Power On / O
MENU
UP
OK
DOWN
Remote Control during Menu Use
MODE:
“LIVE” or MENU
Inhaltsverzeichnis


