3
(C) Copyright 2010-2015 SKD System AB
Do not expose the product for excessive cold or heat.
Do not spill liquids onto the product.
The product may not work properly after fall to the floor or after other types of mechanical distress.
Installation
Mounting Mount Rhone2 onto flat surface. For example: into the cabinet, onto backside of desk, underneath workdesk, onto the wall.
Use velcro closing, alternatively metal fixtures.
Velcro closing is included in delivery.
Connect power
cables Connect product to the mains with cable that has Wieland mini, GST15i3, female connector on the product end.
Connect product to equipment with cables that have Wieland mini, GST15i3, male connectors on the product side.
Note: Connecting Wieland cables need to be handled by trained service personnel.
E-meter Not action needed. E-meter starts measuring current and power automatically when power to Rhone2 is turned on.
Presence sensors Connect presence sensor to Rhone2 with patch cable.
Move hand in front of the sensor. Once connected to the product, sensor will turn red at detection of movement.
When suitable position of the sensor is determined, fix sensor to the surface using screws or Velcro closing.
On workplace, sensor will typically be fixed onto the underside of the workdesk, close to the edge.
If sensor is not reacting as intended, move sensor closer to the user or use sensor with wider coverage.
NOTE: At power on, sensor calibrates itself automatically to the evironment. This takes around half minute. For best
performance minimize movement around sensor during selfcalibration..
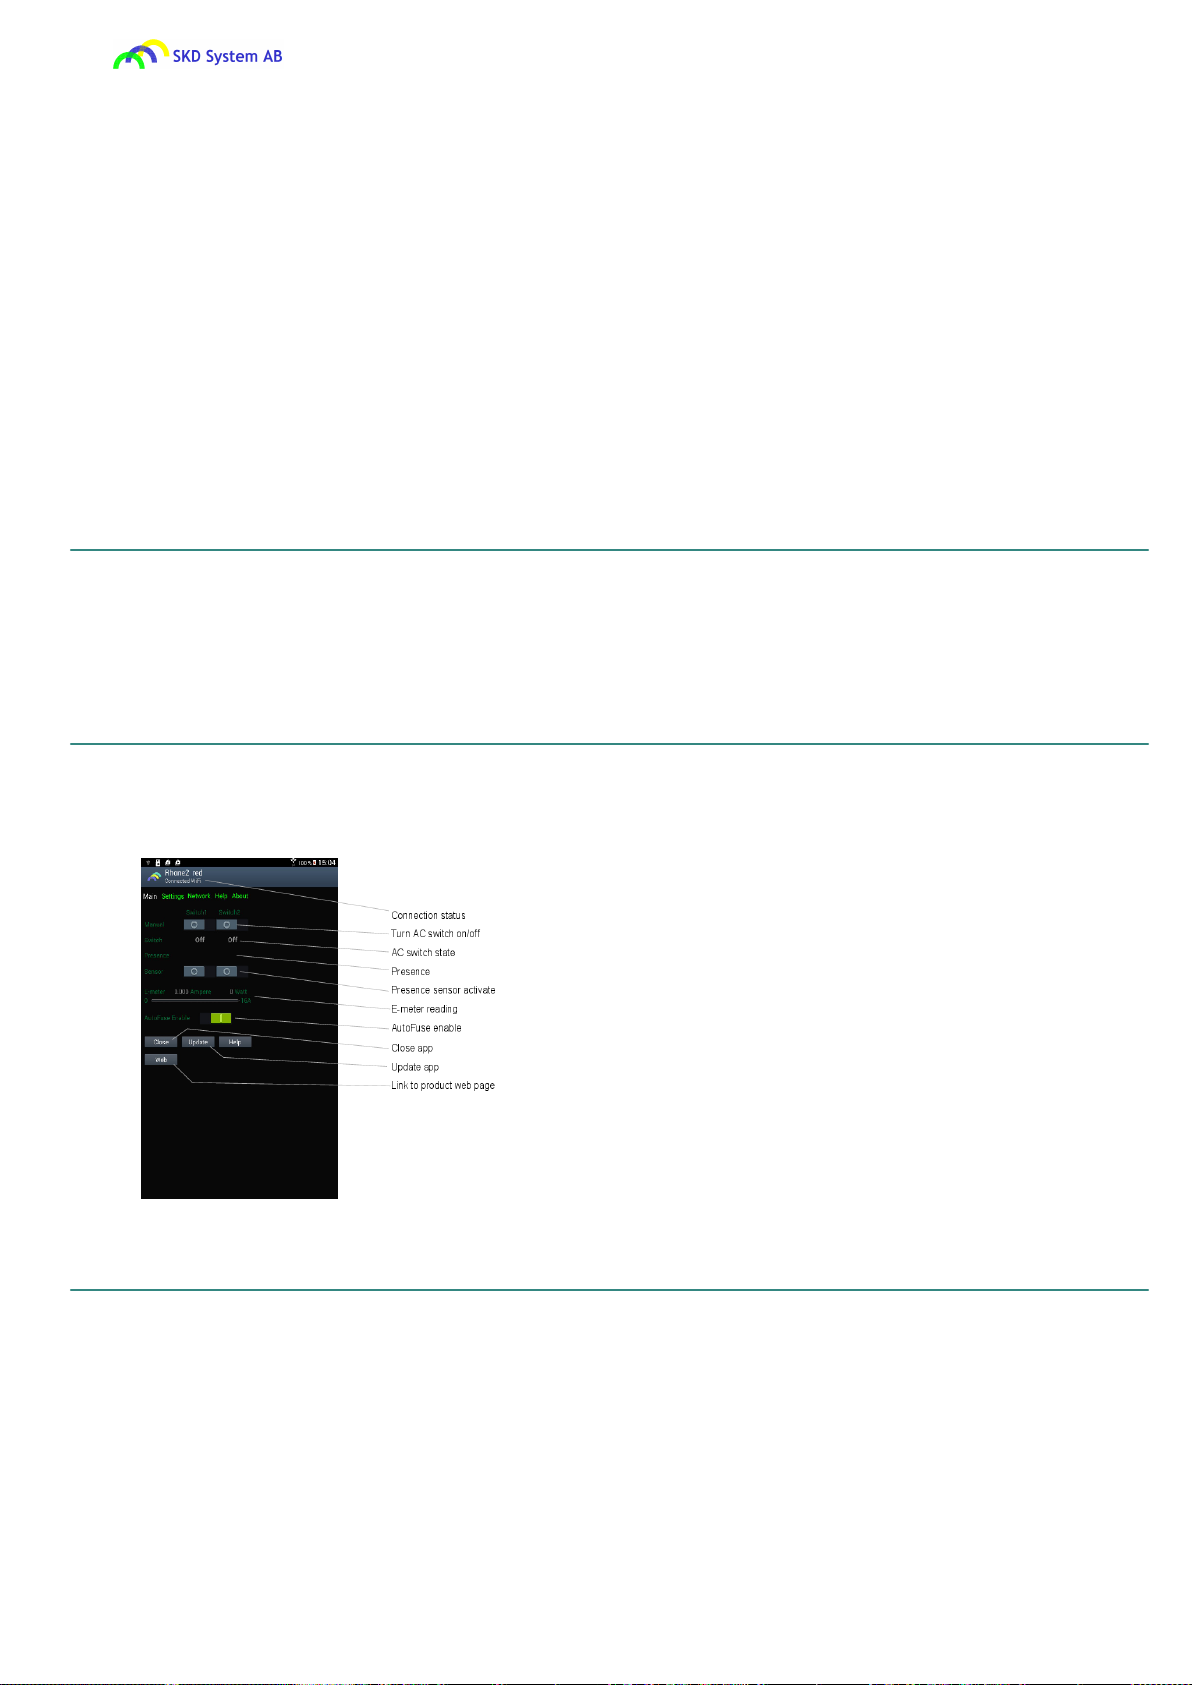
USB control Download app skdRhone2 from Google Play.
Connect Android device to Rhone2 using USB cable.
skdRhone2 starts automatically when USB cable is connected.
skdRhone2 is uppdated from Google Play automatically when new release is published.
Configure LAN
from Android app Setting Rhone2 LAN configuration from Android via USB
Install skdRhone2 app from Google Play.
Connect Android to Rhone2 with USB cable. App starts automatically.
Choose Network page and set New IP, New Gateway and/or New MASK.
Select "Activate" icon to activate new LAN configuration in the Rhone2.
Finally, reset Rhone2 by turning power to the product on/off.
skdRhone2 is designed for Android version 4.0 and later.
Configure LAN
from web page Configure Rhone2 LAN from PC via web
Connect Rhone2 directly to PC with patch cable.
Set gateway address in PC network card configuration to 192.168.1.1.
Start web browser, enter link: http://192.168.1.222.
Select Config page and set new ip, new gateway and/or new mask address.
Then activate the change by selecting "Activate" icon.
Only the ip, gateway and mask values which are not 0.0.0.0 are activated.
Finally, reset Rhone2 by turning power to the product on/off.
Configure LAN by activating DHCP client
Alternative method of configuring LAN parameters is by activating DHCP client in the Rhone2 via product web page.
The assigned IP address can be found from DHCP server or by connecting Android to Rhone2 via USB.