
Young Living WANDERBLISS Bedienungsanleitung
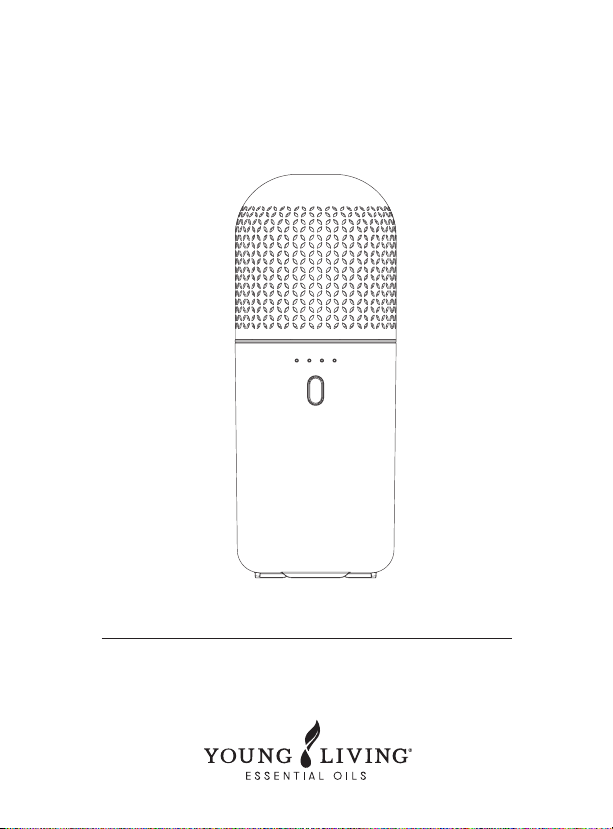
WANDERBLISS™
PORTABLE DIFFUSER
User Manual
Language
English 3


3
Overview
The WanderBliss™Portable Diuser is your stylish sidekick for any winter
wonderland or holiday adventure.
Exclusively designed for Young Living, this little diuser runs for up to 3
hours unplugged or up to 5.5 hours non-stop and 12 hours intermittently
when plugged in. Simply add water and your favorite Young Living®
essential oils to fill any space with the delightful scents of the season.
Contents
• WanderBliss Portable Diuser
• USB charger cable (type C)
• User manual
ENGLISH
4
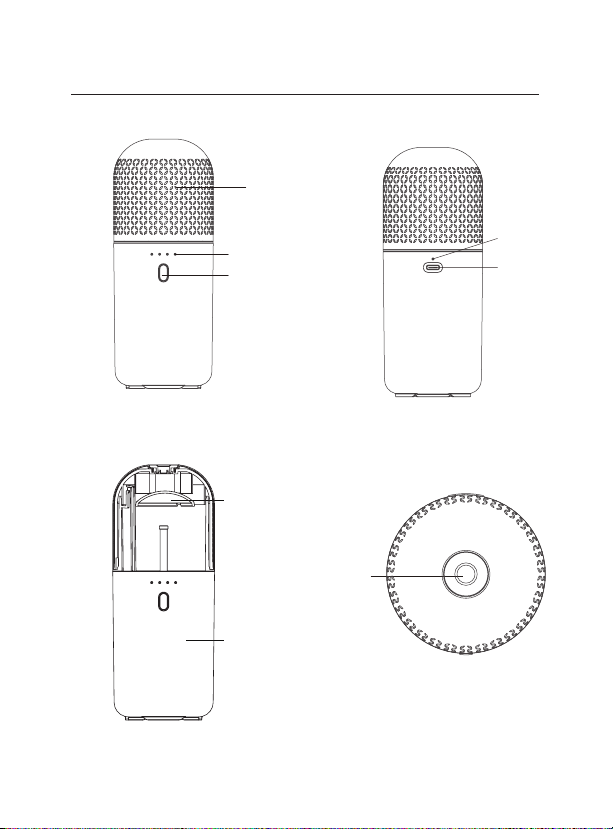
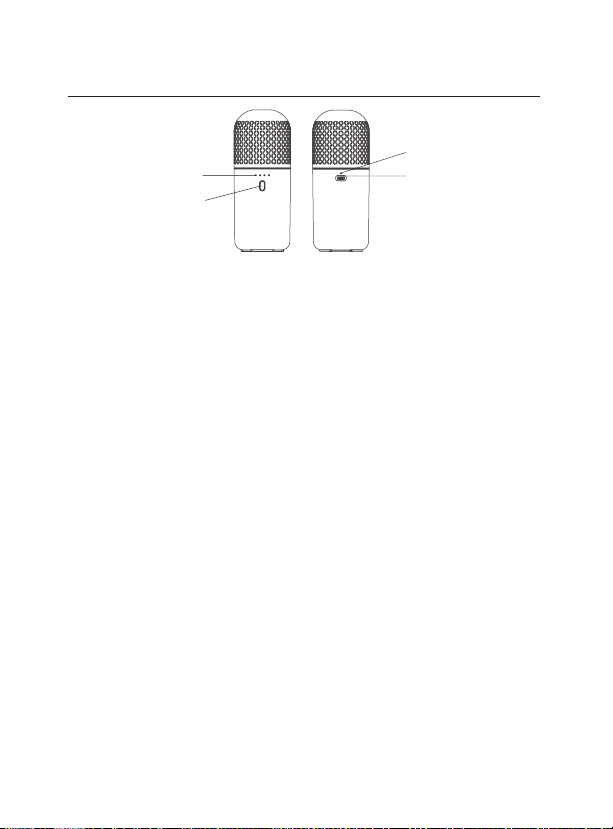
Diagram
Outer lid
Battery
LED indicator
USB port
LED Light
Splash guard
Mist Spout
Diuser base shell
Diuser On/O button
(Light On/O button)
Front
Cutaway
Back
Top View
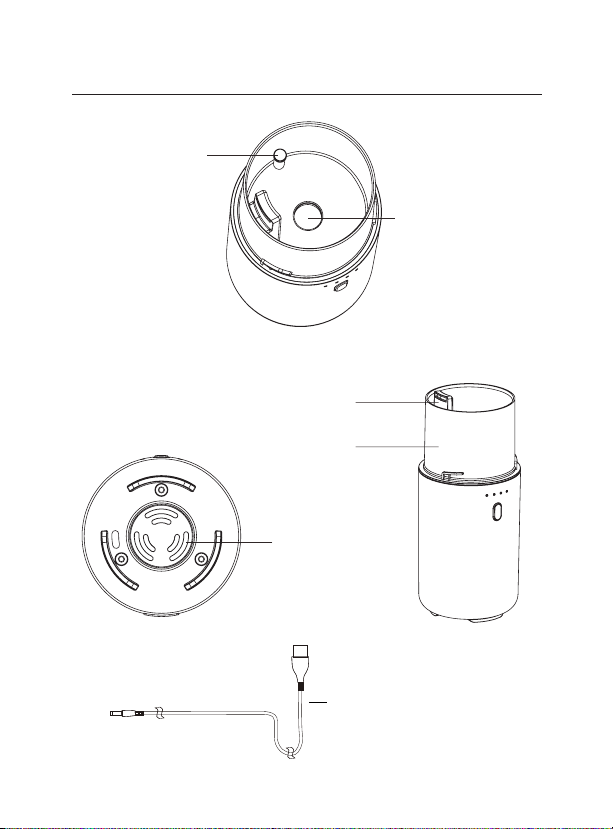
Diagram
5
Red water fill
line marker
Ultrasonic plate
Ventilation hole
Water reservoir
Fan intake
Type-C USB
Diuser Base
Bottom
6
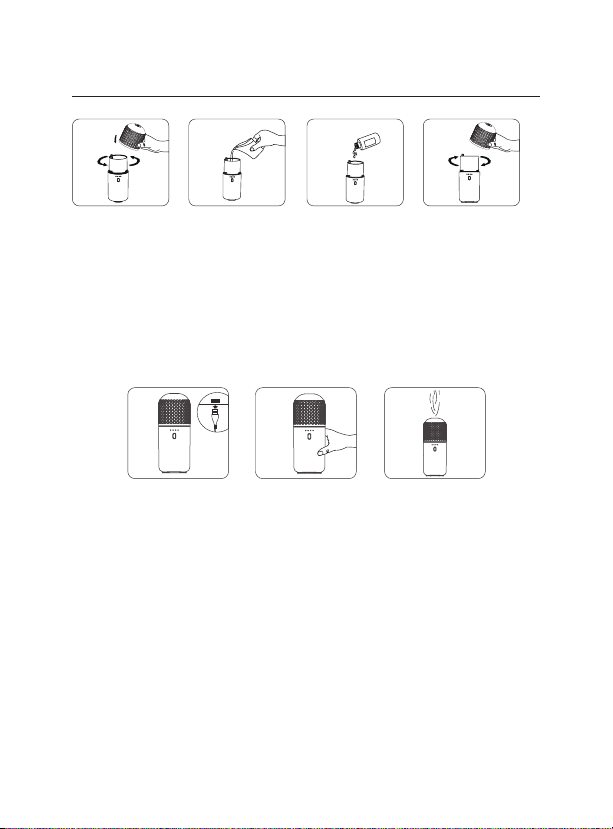
Operating Instructions
1. Twist and then remove outer cover.
2. Add water until level reaches, but does not exceed,
the red water fill line marker
3. Add 3-4 drops of essential oil.
4. Replace outer cover and rotate until it locks into place.
5. Plug the USB cable into a power outlet
(If you haven’t charge the diuser before)
6. Press the On/O button to switch on.
7. The unit should produce mist, and the LED light should be on.
1 2 3 4
567
7
Functionality
Charging function
• To maintain the battery’s health, please charge the device before first use.
• The charging time is about 4.5 hours from 1 to 100 percent charge.
• The battery can power the diuser for up to 3 hours continuously.
• When plugged into USB power, the diuser can operate continuously until
the reservoir is empty.
On/O button settings
• Press once to turn on the diuser. The default white light will be on, and the
diuser will run until the reservoir is empty.
• Press twice to set the diuser to run for 30 minutes and then shut o
automatically.
• Press three times to set the diuser to run for 5-minutes on/5-minutes o
intervals until the reservoir is empty.
• Press four times to set the diuser to run for 30-seconds on/30-seconds o
intervals until the reservoir is empty.
• Press five times to turn o the diuser.
LED light settings
• When the default light is on, hold the button for two seconds to turn o the
LED light.
• Hold the button for another two seconds to turn on the LED light.
• The LED red light will flash three times if the water level is low.
Battery LED indicator
• Charging (candlelight)
• Full battery (white light)
• Low battery (flashing candlelight three times)
Note
• A slight dierence in mist amount produced by dierent units is expected.
• Factors aecting the mist amount include water, humidity, temperature,
and airflow.
• The diuser will shut o automatically when the water reservoir is empty or
when it is tipped over.
LED Light
Battery LED Indicator
USB port
Diuser On/O button
(Light On/O button)

8
Safety and Care Instructions
Please read and follow these safety guidelines closely to ensure safe operation
of the diuser.
• Unplug the diuser immediately and discontinue use in the event of smoke
or a burning smell.
• Use room-temperature tap, spring, or distilled water.
• Never wrap the adapter with cloth, paper, etc. Such actions may result in
damage to the diuser or fire.
• Never touch the adapter with wet hands; electric shock or injury
may occur.
• Do not disassemble or attempt to repair the diuser; this will void the
warranty.
• Do not remove or place objects in the water reservoir during operation.
• Do not place your fingers in the water during operation;
this may result in injury.
• Do not place acidic or alkaline chemicals in the reservoir.
• Use only the included USB power cable provided in the packaging or by
Young Living.
• Any damage caused by the user does not qualify for replacement
by Young Living.
• Do not use metal objects to clean the ultrasonic plate; use only a
cotton swab or cloth dipped in rubbing alcohol, vinegar,
or Thieves®Household Cleaner.
• Never use the diuser for purposes other than those listed in this manual.
• If the diuser will not be used for an extended period or needs to be
relocated, unplug the power adapter, empty the water reservoir, and wipe
the unit clean before storage.

9
• Clean the diuser before switching to dierent essential oils.
• Use only authentic essential oils. Artificial, synthetic, or impure oils and
fragrances can damage the diuser.
• The water reservoir level should not exceed the water fill line.
• When unplugging the power adapter, pull from the adapter plug instead of
pulling the wire.
• Avoid placing the product under direct sunlight, close to a refrigerator or fan,
or in a hot environment. Do not leave in a hot vehicle for a long period of time.
10
Cleaning and Maintenance
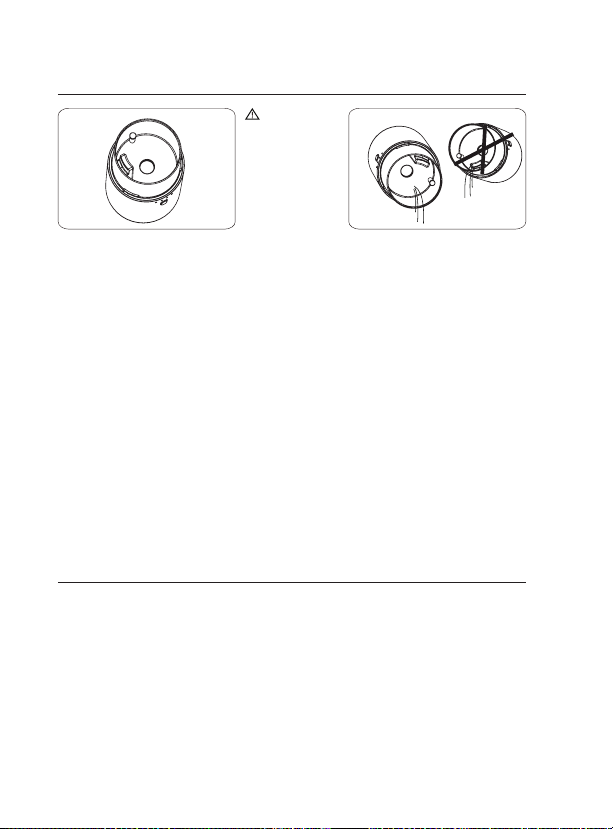
Notice: When emptying the water reservoir, pour water from the opposite side
of the base ventilation hole.
• Always turn o and unplug the diuser prior to cleaning.
• To ensure proper performance, clean the ultrasonic plate and lid after
each use.
• If essential oil begins to build up on the ultrasonic plate, gently wipe it
o using a cotton swab dipped in rubbing alcohol, vinegar, or Thieves®
Household Cleaner.
• If essential oil begins to build up on the lid, gently wipe it o using
mild soap and water only. Never use a corrosive detergent to clean the
ultrasonic plate or damage will occur.
• Periodically check under the diuser to keep the fan intake free of debris.
Debris can be removed by blowing on the fan intake opening or wiping
with a clean, dry cloth. Do not use aerosol sprays, solvents, or abrasives
to clean the plastic housing.
• When the diuser is not in use, clean it and let it dry before storing.
Troubleshooting
When switched on, the diuser does not operate. (Potential issues: low
battery, water above water fill line marker.)
• Charge the diuser for up to 4.5 hours. Check that the adapter is
securely plugged into the wall socket and the rear of the diuser.
• Check that water is in the reservoir and it is not above the red water fill
line marker. If there is too much water, unplug the unit and carefully pour
out the excess water from the opposite side of the base ventilation hole.
When you restart the diuser, the light should come on and the diuser
should mist.
Notice:
When emptying
the water reservoir,
pour water from the
opposite side of the
base ventilation hole
Dieses Handbuch passt für folgende Modelle
1
Inhaltsverzeichnis


