6
2. FOX-18 REASSEMBLY AFTER SHIPPING PROCEDURE
2.1 With the glider in the bag (4 meters long) lay the glider on the ground.
2.2 Unzip the bag. Undo Velcro straps. Remove battens, the speed bar and the rear leading edge tubes #
3 from the bag.
2.3 Unfold the sail along the leading edge to its full length. Attach the rear leading edge tubes # 3 to the
front leading edge tubes # 2 according to the marking (L-left, R-right, marks must be on top).
Working on one wing at a time and working with the appropriate leading edge # 3, fold the outer sprog,
which is attached to the rear leading edge, towards the inboard end of the leading edge tube # 3. Slide
the inboard end of the leading edge tube # 3 into the sail.
Then slide the rear leading edge forward, allowing the sprog end to come outside the sail at the
corresponding hole, and slide the rear leading edge into the front leading edge.
Align the rear leading edge properly so that the sprog is on the inside of the leading edge, and slide the
rear leading edge forward, rotating as necessary, until the slot in the rear leading edge engages securely
into the clevis pin in the front leading edge. When the rear leading edge is fully engaged, you will not be
able to rotate it.
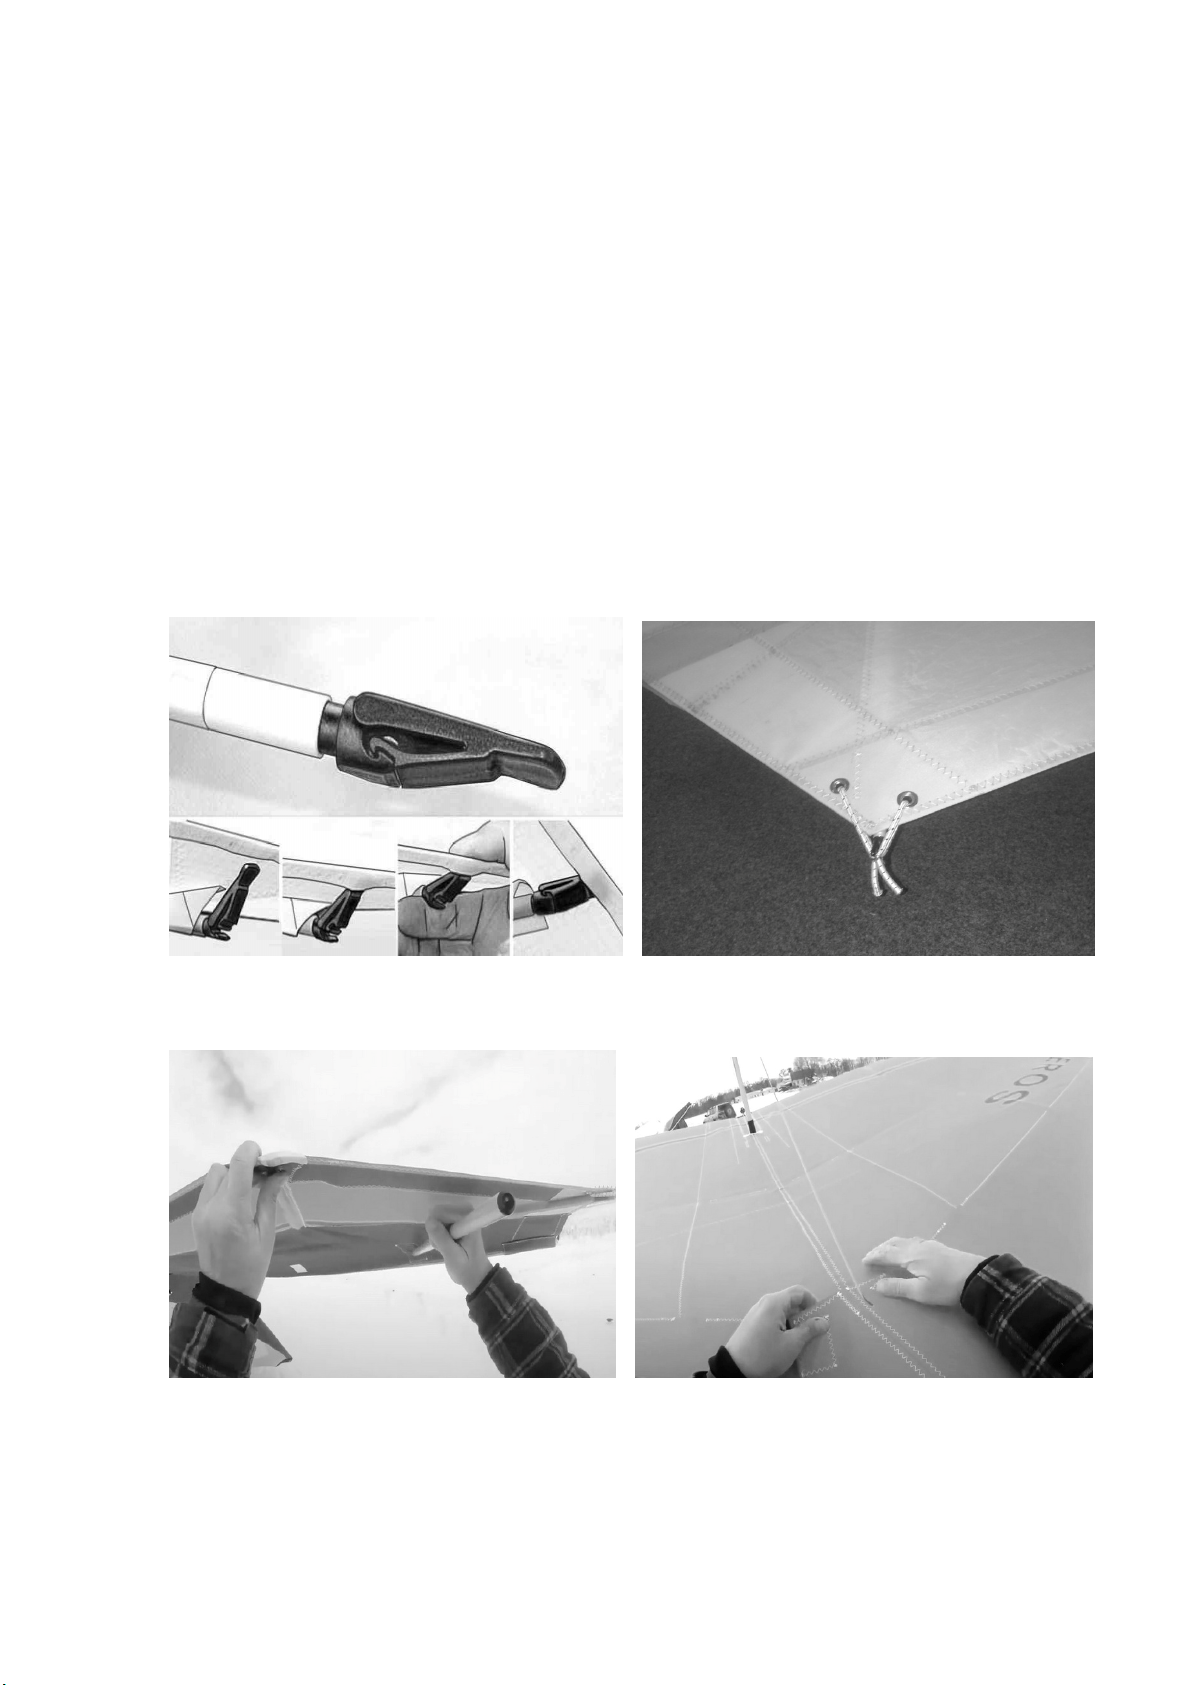
2.4 Tighten the sail along the leading edge by putting the sail mount webbing into the slot in the end cap
of the leading edge # 3.
Figure 1 Figure 2
NOTE
The sail mount screws on the front part of the leading edge tubes # 1 must be unscrewed, otherwise the
excess sail tension will not allow tightening the sail.
The sail mount screws have to be screwed back after you accomplish all steps in section “Fox-18 set-up
procedure” from item 4.1 through item 4.8.
2.5 Secure the sail mount webbing to the leading edge # 3 with the sail mount webbing Velcro (fig. 1).
NOTE
When spreading the wings with the sail mount screws been unscrewed check that the sail mount webbing
is in proper position in the slot of the end cap of the leading edge # 3.
2.6 Install the wing tip protection bags.
Put battens on top of the glider between Mylar pockets in the front part of the glider. Place Velcro ties
around the glider.
Put the speed bar between leading edges in the rear part of the glider. Put the glider bag back on and zip
it up (fig. 2).
3. FOX-18 BREAKDOWN FOR SHIPPING PROCEDURE
This process will basically be the reverse of reassembling after breakdown for shipping. Before beginning,
read through the section above on how to re-install the rear leading edges.