
Canvac Q Air CFK5301V Kurzanleitung
Before using this product, please read the user manual carefully. Save the user manual for future reference.
Läs bruksanvisningen noga innan du använder produkten. Spara bruksanvisningen för framtida bruk.
Les bruksanvisningen nøye før du tar produktet i bruk. Ta vare på bruksanvisningen til fremtidig bruk.
Læs brugsanvisningen grundigt igennem inden du tager produktet i brug. Gem brugsanvisningen til fremtidig brug.
Lue käyttöohje huolellisesti ennen tuotteen käyttöä. Pane käyttöohje talteen vastaisen varalle.
Lestu notkunarleiðbeiningarnar vandlega áður en varan er tekin í notkun. Geymdu notkunarleiðbeiningarnar til uppflettinga síðar.
CFK5301V
Use &
Instructions
3-in-1 Fan
Användning och
anvisningar
3-i-1 Fläkt
Bruk og
anvisninger
3-i-1 Vifte
Brug og
instruktioner
3-i-1 Ventilator
Käyttöopas ja
ohjekirja
3-in-1 Tuuletin
Notkun og
leiðbeiningar
3-í-1 Vifta

Language: en-GB, sv-SE, nb-NO, da-DK, fi-FI, is-IS, Publication date: 2022-09-13
This document and its content, including written material and images, are the property of Elon Group AB. You may not copy, reproduce,
modify, republish or distribute this document or any of its content without express written permission from Elon Group AB. © 2022,
Elon Group AB. All rights reserved.
Thank you
for your trust and the purchase of our product. This quick start quide is supplied to help you get started
using this product.
Make sure you have received an undamaged product. If you do find transport damage, please contact
the seller from which you purchased the product, or the regional warehouse from which it was supplied.
Tack
för ditt förtroende och för köpet av vår produkt. Denna snabbstartsguide medföljer för att hjälpa dig att
börja använda produkten.
Kontrollera att produkten du har tagit emot är oskadad. Om du upptäcker en transportskada, var vänlig
kontakta återförsäljaren som du köpte produkten av, eller den lokala butiken som levererade den.
Takk
for at du valgte ett av våre produkter. Formålet med denne brukerveiledningen er å hjelpe deg å komme i
gang med produktet.
Forsikre deg om at produktet du har mottatt, er uskadet. Hvis du oppdager en transportskade, kontakter
du selgeren du kjøpte produktet av eller lageret som produktet ble levert fra.
Tak
fordi du har valgt at købe denne maskine. Formålet med denne hurtigvejledning er at hjælpe dig i gang
med at bruge maskinen.
Kontrollér, at maskinen ikke er beskadiget ved modtagelsen. Hvis du opdager en transportskade, skal du
kontakte salgsstedet eller det lager, som maskinen er afsendt fra.
Kiitos
luottamuksestasi ja tuotteemme ostamisesta. Tämä pikaopas on tarkoitettu auttamaan laitteen käytössä
alkuun pääsemisessä.
Tarkista, ettei tuotteessa ole vaurioita. Jos havaitset kuljetusvaurioita, ota yhteyttä tuotteen myyjään tai
paikalliseen myymälään, josta se toimitettiin.
Þakka þér fyrir
fyrir traust þitt og kaup á vöru okkar. Þessar flýtileiðbeiningar eru útvegaðar til að hjálpa þér að byrja að
nota tækið.
Gakktu úr skugga um að þú hafir fengið óskemmda vöru. Ef skemmdir vegna flutninga finnast skaltu hafa
samband við söluaðilann sem þú keyptir vöruna af, eða vöruhúsið á svæðinu þaðan sem því var dreift.

Contents/ Innehåll/Innhold/Indhold/
Sisällysluettelo/Innihald
English 4
Svenska 20
Norsk 36
Dansk 52
Suomi 68
Íslenska 84

4
© 2022, Elon Group AB. All rights reserved.
GB CONTENTS
Important safety information ............................................................................................................. 4
Product description................................................................................................................................. 6
Getting started............................................................................................................................................7
Operating instructions............................................................................................................................ 9
Remote control........................................................................................................................................ 12
Cleaning and maintenance................................................................................................................ 15
Wifi operation..........................................................................................................................................18
IMPORTANT SAFETY INFORMATION!
WARNING
To avoid fire, electric shock, and injury, you must follow the safety advice
below.
Otherwise, please follow the respective national and local electricity
regulations.
1. This product is only suitable for indoor use and should not be used
outdoors.
2. Non-professional personnel or unauthorized repair personnel may not
repair or modify this product by themselves.
3. Before plugging into the power supply, please check that the rated voltage
matches the voltage in your home.
4. Keep at least 1.5 meters away from fire source or flammable materials, and
avoid direct sunlight.
5. DO NOT use this product near objects that are flammable, explosive, subject
to heat deformation, discoloration or deterioration. DO NOT use this product
in places with high levels of dust.
6. DO NOT use this product underneath hanging objects that may be prone to
fall down. DO NOT use this product in places that are vulnerable to shocks.
DO NOT place this product on unstable surfaces.
7. DO NOT turn the product on/o by pulling or inserting the plug. Always
turn the product on/o by using the product’s ON/OFF button.
8. DO NOT use this product as temperature control and heating equipment for
animals and plants.
9. DO NOT place any objects on the air inlet or outlet to avoid overheating the
product.

5
© 2022, Elon Group AB. All rights reserved.
10.DO NOT insert metal wire or any other foreign objects into any openings in this
product, to avoid electric shock.
11. DO NOT use this product if it has been dropped or if it shows any sign of
damage.
12. DO NOT immerse this product in water.
13. DO NOT use this product directly facing an electrical outlet or under a power
outlet.
14. DO NOT let this product share a power socket with other high-power
appliances.
15. DO NOT directly pull the power cord to move the body.
16. If this product is covered or incorrectly placed, it can cause a fire hazard.
Therefore, DO NOT use a programmable automatic power-on device, timer,
or any other device with this product.
17. When this product is in use, the power cord should be placed behind the body.
Placing the power cord in front will cause it to overheat and be damaged, or
even cause an accident.
18.Children, elderly people or patients who are unable to take care of themselves
should only use this appliance under the supervision of an adult to prevent
accidents.
19. If this product fails, please turn o the power and unplug the power cord
immediately. This product must only be repaired by the manufacturer’s
maintenance department or a similarly qualified professional.
20.Before use, check that the power cord and the plug are in good condition.
If the power cord is damaged it must not be disassembled or replaced by the
user. The power cord must only be replaced by the manufacturer’s mainte-
nance department or a similarly qualified professional.
21. To avoid burns when using this product, please DO NOT let bare skin come
into direct contact with the surface of the air outlet.
22. This product is only suitable for use in a dry environment. Do not use near a
bathtub, sprinkler or swimming pool.
23. If there is a gap between the plug and the socket, or the plug has become very
hot, it may be necessary to replace the socket. Consult a qualified electrician to
replace the socket.
24.This product must be connected to a fixed (wall) socket that can supply the
specified current and complies with the current industry standards.

6
© 2022, Elon Group AB. All rights reserved.
GB PRODUCT DESCRIPTION
Body
TECHNICAL SPECIFICATION
Model: 3-in-1 Fan CFK5301V
Rated Voltage/Frequency 220–240 V~ / 50–60 Hz
Rated power 35 W (Fan) / 2000 W (Heat)
Product Dimensions (H)700 (W)255 (D)255 mm
Net weight: 4.65 kg
1. Air Duct
2. Air Outlet
3. LED Display
4. Top Cover
5. Air Inlet
6. Base
7. Air Duct
8. Top Cover
9. Air Inlet
10. Body
11. Power Cord
Specifications are subject to change without prior notice.
7
© 2022, Elon Group AB. All rights reserved.
GETTING STARTED
Location
1. Please place this product on a level surface. Avoid putting it on an unstable surface
(such as a sloping or soft surface) to prevent it from falling over. Please do not use
it in hot and humid areas (such as a bathroom or kitchen).
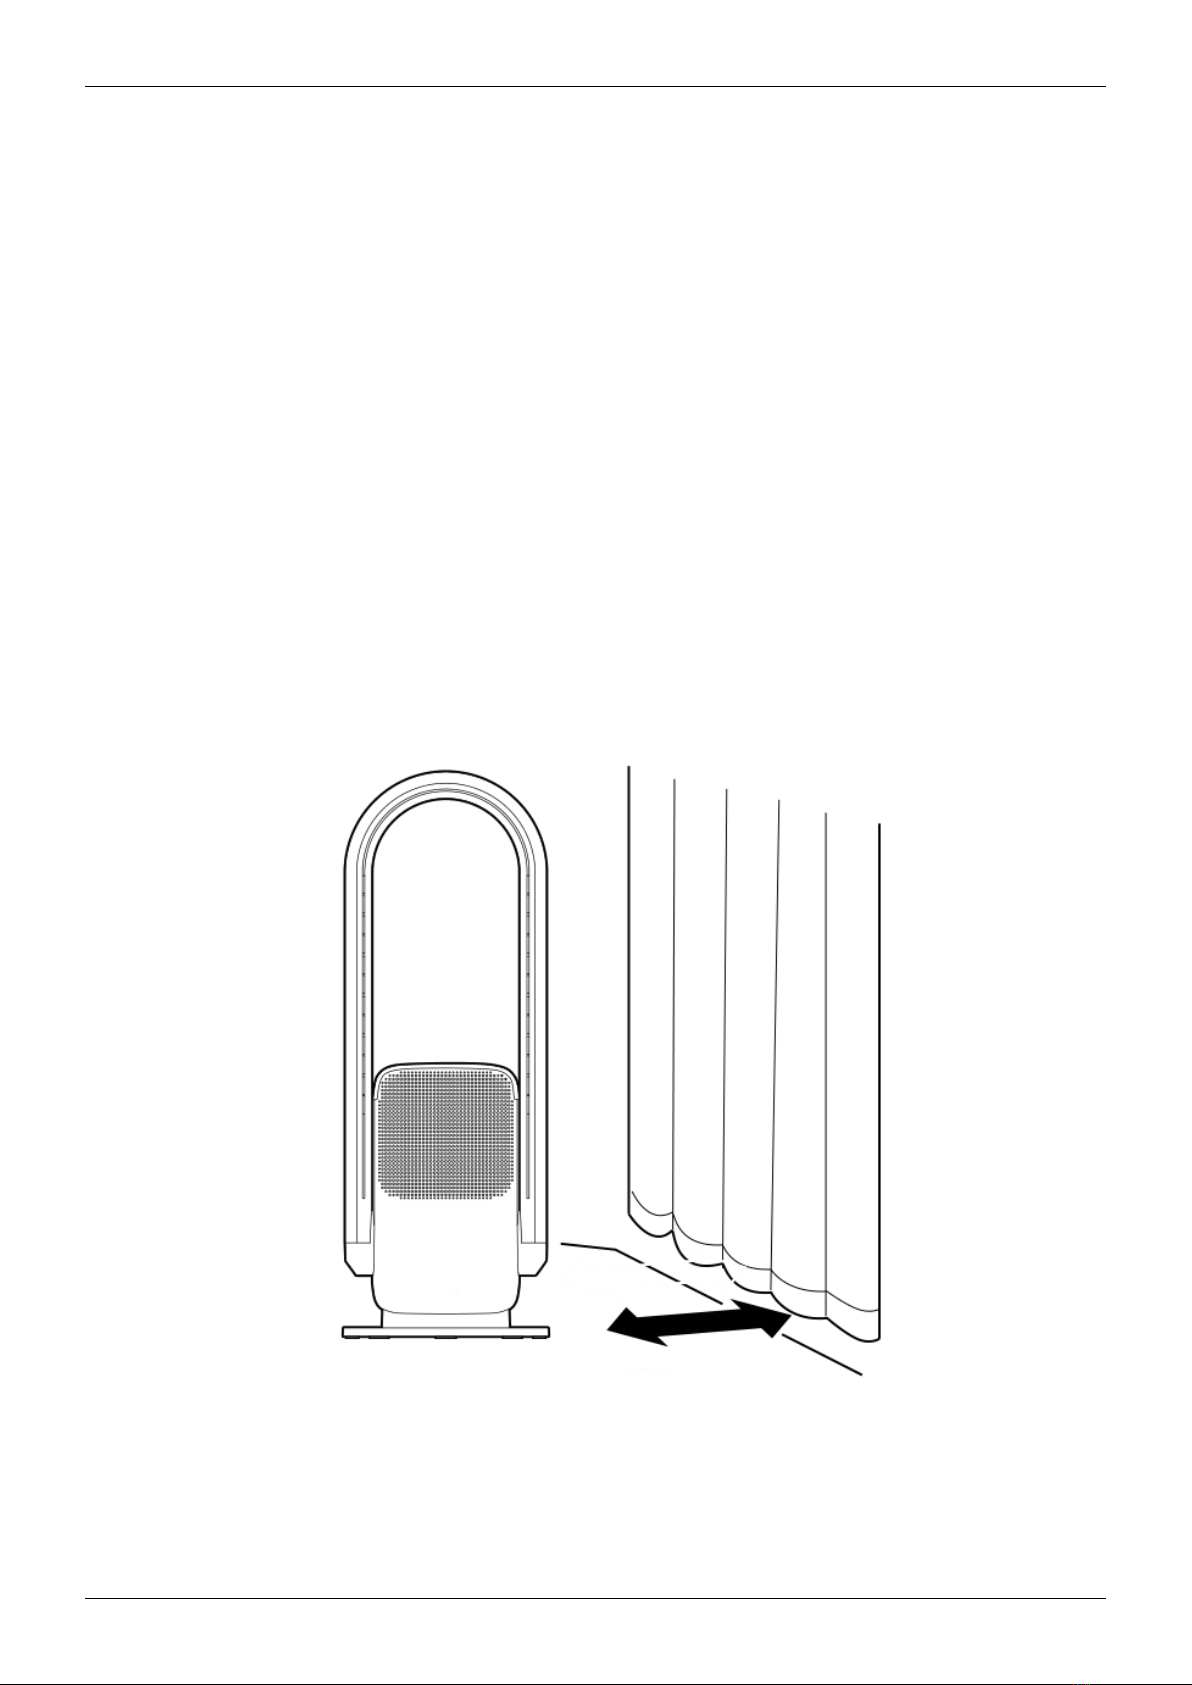
2. Avoid blocking the Air Inlet and Air Outlet when the product is in use. Please keep
the product far away from curtains, so that they cannot block the Inlet/Outlet and
prevent the product from working properly.
3. DO NOT place objects within 1 meter in front of the Air Outlet to ensure that the
airflow will not be reduced.
4. The product must ALWAYS have a filter in place when running; see the section on
filter replacement for installation instructions for the filter.
Place well away from curtains

8
© 2022, Elon Group AB. All rights reserved.
GB Remote
Battery installation
1. Open the remote control battery cover;
2. Load two new AAA dry batteries;
3. Close the battery cover of the remote
control.
Caution:
1. If Remote Control will not be used for a prolonged period of time, please remove
the battery.
2. If using batteries that are not rechargeable. DO NOT recharge the batteries.
3. The Remote Control and battery are not toys. Please keep them out of children’s
reach.
Battery cover
Please insert the battery correctly
Troubleshooting
Problem Check
Fan is plugged in but does not work Is the plug properly inserted into the
socket?
Remote does not work Is the battery dead?
Is the battery installed correctly?
Is the remote control aligned with the
signal receiver?
Noise from fan or low airflow Check air purifying filter; if full of dust,
clean or replace.
If the above steps do not fix the fault, please contact customer service; do not
attempt to dismantle or repair the appliance yourself.

9
© 2022, Elon Group AB. All rights reserved.
OPERATING INSTRUCTIONS
Main Body
Air Duct Angle Setting
Before adjusting the air duct angle, please make sure the product is turned o.
Hold product body with one hand and set the air duct 15° forward or backward.
Turning ON and OFF
1. Connect to power source and press the power button in the base to enter Stand-
by mode.
2. Press On/O , the buzzer will beep once, and product will start to operate.
3. To turn o the product, long-press On/O for 2 seconds, the buzzer will
beep twice, and product will stop operating.
Caution:
1. When operating in Warm mode, the air duct will become hot.
Shortly after the product is turned o, it may still be hot to touch. Please take care.
2. This product has a built-in overheat protection sensor, which provides automatic
fail-proof safety protection that cuts o power automatically when the product
is accidentally tipped over or overheats. If this sensor is triggered and the
product is stopped, unplug the product and let it cool down.

10
© 2022, Elon Group AB. All rights reserved.
GB LED Display
Wi-Fi Indicator Light
UV-C Disinfection
Indicator Light
Filter Replacement Alert
Indicator Light
Temperature Display
Settings & Humidity
Display
On/O
Inhaltsverzeichnis
Sprachen:
Andere Canvac Q Air Lüfter Handbücher

Canvac Q Air
Canvac Q Air CBF1303V Bedienungsanleitung

Canvac Q Air
Canvac Q Air CPF6420S Kurzanleitung

Canvac Q Air
Canvac Q Air CGF1503X Bedienungsanleitung

Canvac Q Air
Canvac Q Air CFK3301V Kurzanleitung

Canvac Q Air
Canvac Q Air CLF5520S Bedienungsanleitung

Canvac Q Air
Canvac Q Air CGF1403V Kurzanleitung


