G-Cube 2.4GHz Ultra Far Wireless Optical Mouse Bedienungsanleitung

User Manual
2.4GHz
Ultra
Far
Wireless Optical Mouse

Contents
Introduction
……………………………………………………………………………
...
3
Know
Y
our
P
roduct
……………………………………………………………
4
Getting Started
……………………………………………………………………
…
5
-
-
6
Hardware Installation
…………………………………………………………………
...5
Software Installation
……………………………………………………………………
..
6
Launching
S
oftware
……………………………………………………………
…
……
.
6
Instructions Of
SmartRight 8
…………………
…
…
……………
.
7
—
10
A.
Illustration of the main menu
…………………………………………………
……
7
B.
How to Pair
ID
……………………………………………………………………………
.
8
C.
Ho
w to Indicate
Battery
Status
……………………………………………………
9
D.
Three Shiftable Report Rate
s
……………………………………………………
..
9
E.
DPI Setting
…………………………
…………………………………………………………
…
10
F.
Set RF Channel to Avoid Wireless Interference
…………………………
…
10
G.
4D Wheel
…………………………
..
…………………………………………
………………
…
11
H.
How to use SmartRight 8
…………………………………………………………
…
10
-
13
Trouble
s
hooting
…………………………………………
…
………………………
.
1
3
Reminder
…
…………………………………………………………………………………
1
4
Your product support
……………………………………
…
………………
1
4

Introduction
A group of young female technicians got tog
ether and decided it was time for ladies to be able to express
themselves with the hardware they used; G
-
Cube is specially designed by women for women. Our products are
not only stylish, but are also functional and meet the needs of women.
The computer pe
ripheral market has traditionally offered products that leave consumers with little choice in
style and color. G
-
Cube has revolutionized the market by offering a refreshing line of computer peripherals that
are sleek, modern and colorful.
G
-
Cube is design
ed with YOU In Mind. G
-
Cube wants you to Express Who You Are at home, at school, at work,
the local coffee shop, the PTA or at your next national sales meeting.
G
-
Cube wants you to Be yourself…and…Inspire Others!

Know
Y
our
P
roduct
1. Double
Function Scroll Wheel
Scroll Wheel
-
A more convenient way to scroll up and down rather than
to
click the scroll bar on the side of the window.
Wheel Button
-
Click
the wheel button in the Microsoft Windows Applications
,
it performs the auto
-
scroll function
by default .
2.
Power
Switch
Button
A.
To turn
ON
the mouse,
press the Power Switch Button for 3 seconds and release.
B
.
To turn
OFF
the mouse,
press the Power Switch Button and release.
3.
Plug
-
and
-
Forget
Nano
-
Receiver
The USB Nano
-
receiver is so small
that
you can plug it into a USB port and forget about it. No worries about broken or lost
receivers

Getting Started
Hardware Installation
Step 1
:
Insert
the 2AAA batteries into the wireless mouse. Make sure that the positive(+) and negative ends o
f the battery match the
polarity indication on the middle cover.
Step 2
:
Pull out the Nano
-
receiver from the
receiver housing.
Step 3
:
Plug
N
ano
-
r
eceiver into USB port of your computer or notebook.
Step
4:
Position the wireless mouse and
Nano
-
R
eceive
r as show in the picture.
Note: Operating distance may vary and depend on the working environments.
Software Installation
Step 1:
Uninstall any previous
ly
mouse software before installing the software.
Step
2:
Insert the enclosed installation CD to sta
rt the CD
-
ROM drive. Select “Install
software
” and then follow the on
-
screen
instruction to install the software to your computer.
Step 3:
When the installation is completed, the icon “
” will appear on the desktop, then you have succe
ssfully installed the driver
.
Launching
S
oftware
A
:
Double click the icon
“
”or go to Start
—
Programs
—
G
-
CUBE
SmartRight 8
---
G
-
CUBE
SmartRight 8
to launch the software.
B:
Now, you can program the mouse button on the mouse properties.
To remove the software:
1. Go to START, then select PROGRAMS >> G
-
CUBE
SmartRight 8
>> Uninstall
G
-
CUBE
SmartRight 8
.
2. Go to START, then select Control Panel >>Add or Remove Programs, look for “
G
-
CUBE
SmartRight 8
”, click on “Remove”.

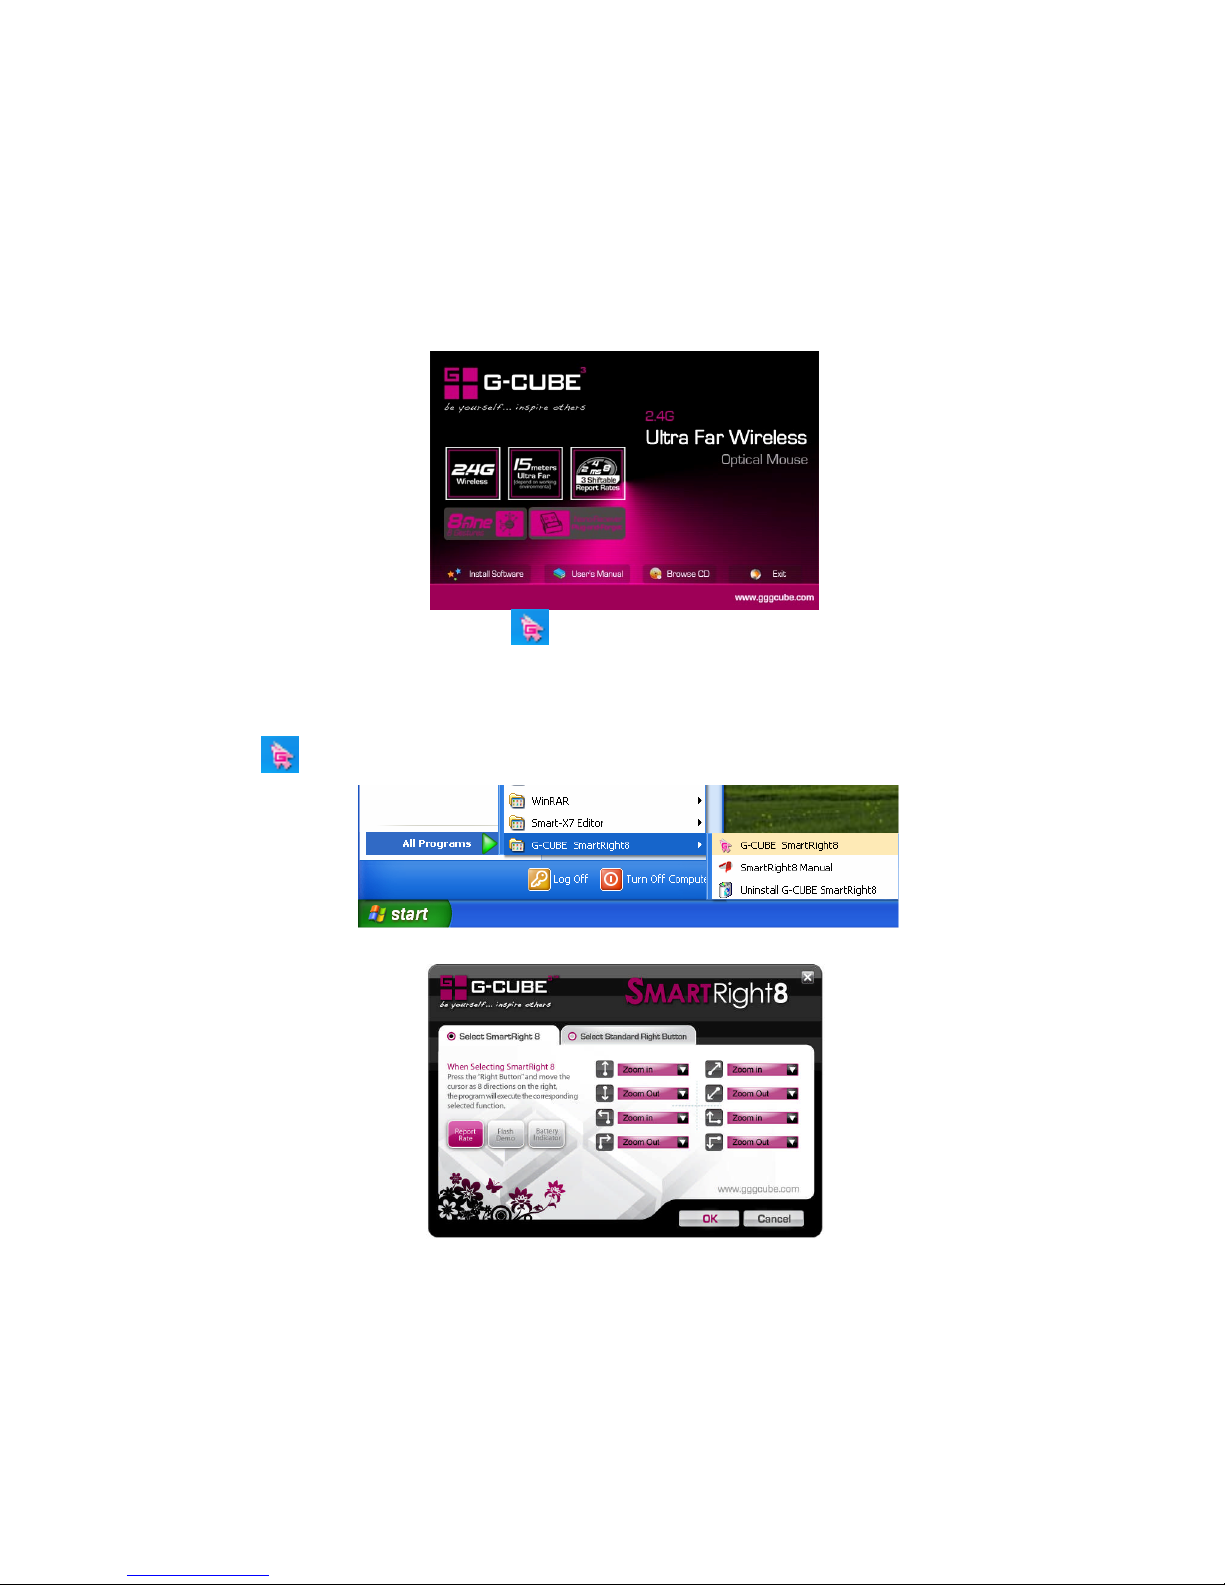
Instructions Of Sma
rt
Right
8
A.
Illustration of the main menu
1.
W
hen selecting
SmartRight 8
,
“
Right
Button
”
will execute
SamrtRight 8
function
.
Behind each
arrow direction, you can select
“keyboard, mouse, office sets, key combinations, multimedia and internet”
6 main func
tion categories and there are more than
30 different functions that are ready for your immediate selection.
2. When selecting
Standard Right Button
,
it performs as normal mouse right button.

B.
How to Pair
ID
The mouse
has
been preset the ID Code i
n the factory. But under the circumstances you lose receiver or want to
use
with the other
receiver in the same product series, you need to refresh the ID Code before using it.
Step 1: Right click on the icon
in the
taskbar
and select “Pair ID Program”
Step 2: Press “Start Pair ID” to refresh ID Code.
Step 3: Remove the mouse batteries and insert again in 15 seconds
,
6 digits of matching code will be displayed on the
menu as shown “Mouse Pair ID OK”.

C.
How to Indicate
Battery
Status
All of G7 series have Battery status Indicator in the software, click “
”in the
main
menu of the software, then the battery power status will be displayed on the
screen. It is convenient that you
can easily be aware when the battery power is
low and change battery in time.
Smart Mouse Battery Low Warning
W
hen the mouse power is low,
Figure. A
will pop up in
the right
corner of your
screen
to remind
you
to replace the batter
y right away
.
Figure. A
D. Three Shiftable Report Rate
s
There are 3 report rates can be preset for high sensitive response time of 2/4/8 milliseconds, it improves cursor
delay and
jumping problems of wireless mouse, saves power in working and increase
s accuracy
when
playing the games.
Mouse Report Rate
Response Time
Suitable Range
500Hz
2ms
Gam
ing
250Hz
4ms
Photo design
125Hz
8ms
Office

E.
DPI Setting
4 DPI levels are provided to satisfy your needs for works and games.
Step 1: Right click
on the icon
in the taskbar
and select “
DPI Set
”
Step 2:
Choose the desired DPI from below popped
window.
F.
Set RF Channel to Avoid Wireless Interference
In case there are many wireless mice working in the a
djacent area, you may set a specific channel so as to avoid wireless interface,
hence ensures better wireless communication quality.
Step
1: Right click on the icon
in the
taskbar
and select “
RF Channel Setting
”
St
ep 2:
Tick
“
Channel Lock
“
and distribute each mouse a
different channel.
Inhaltsverzeichnis


