
Gamepark Holdings GP2X Bedienungsanleitung

GP2X User Guide
For firmware: v2.1.0
Author: Guyfawkes
www.emuholic.com
20th October 2006

Page 2
GP2X User Guide –www.emuholic.com
Contents
Basic Usage
Page 3 - GP2X Information
Page 7 - Setting up your GP2X
Page 9 - Using the GP2X for the first time
Page 12 - Managing files on the GP2X
Page 13 - Installing and loading software
Page 15 - Installing and loading a game
Page 16 - Viewing Images
Page 18 - Playing Music
Page 20 - Viewing Movies
Page 22 - Reading E-Books
Page 24 - Using Explorer
Page 26 - Using the Settings menu
Page 29 - System Settings
Page 32 - Troubleshooting
Page 33 - Useful information
Advanced Usage
Page 34 - Firmware upgrading and Installing Software updates
Page 37 - GP2X Menu Skins
Page 39 - Developing for the GP2X introduction
Page 41 - Breakout Board guide
Page 43 - Credits, Thanks and other stuff

Page 3
GP2X User Guide –www.emuholic.com
GP2X Information
Product name
* GP2X-F100
General* CPU: Dual CPU Cores
* ARM920T: Host processor
* ARM940T: Video Coprocessor
* NAND Flash Memory: 64 Mega Byte
* Dimension: 143.6mm* 82.9mm*34mm
* Weight: 161 Gram (Without Battery)
* RAM: SDRAM 64 Mega Byte
* Storage: SD Card
* Connection Type: 2.0 high speed
* O/S: Linux
* Power supply: 2AA
* Display: * 3.5" TFT LCD (Hardware: 16.7 Million Colors / Software: 260,000 Colors)
Video * Video file: MPEG 4, Dvix 3.11,4x,5x, and Higher, XVID, WMV (7,8,9 Later On) Playback.
* Audio file: MP3, OGG, WMA (Later On)
* Resolution: MAX 720*480 30fps
* Frame Rate: Max 30 fps
* Bit Rate: Video Max: 2500 Kbps
* Audio Max: 384Kbps
* Caption: SMI
* TV-OUT: NTSC, PAL Support
Audio * Channels: Stereo (L+R)
* Frequency Rate: 20Hz~20KHz
* File: MP3, OGG, WMA (Later On)
* Bit rate sampling: 16bit/8~48KHz
* Equalizer: Normal, Classic, Rock, Jazz, Pop
Included Software
* E-Book Reader
* Image Viewer
* Movie Viewer
* Music Player
Controls
* 8 way digital thumb stick
* 4+1 main action buttons (Thumb stick clicks in for use as an action button)
* 2 shoulder buttons
* Start and Select
* Volume +/-

Page 4
GP2X User Guide –www.emuholic.com
I/O Ports
* Headphones
* USB 2.0 (not powered)
* EXT Port
* DC Power - 3 Volts, center negative
* Future SDIO Hardware Support
Continuous playback time
* Video: Approx. 4 hours
* Audio: Approx. 6 hours
GP2X Layout
Front of GP2X:
1 –8 way Joypad
2 –Volume Up/Down
3 –Left Speaker
4 –LCD Screen
5 –A, B, X, Y Buttons
6 –Select button
7 –Start button
8 –Right speaker
9 –Power LED (Green)
10 –Battery LED (Red)
Back of GP2X:
1 –Battery Compartment
2 –Case Screws

Page 5
GP2X User Guide –www.emuholic.com
Top of GP2X:
1 –Right Shoulder Button.
2 –Left Shoulder Button.
3 –Headphone Socket.
4 –Secure Digital Slot.
Bottom of GP2X:
1 –Extension Port.
2 –GP2X Wrist Strap Hole

Page 6
GP2X User Guide –www.emuholic.com
GP2X Accessories
The following official accessories can be purchased separately for your GP2X.
Official Accessories
Power Supply Unit
Hand Strap
Carry Case
Screen Protector
TV-Out Cable
Breakout Board
You can purchase these accessories from stores listed in our Useful Information section.

Page 7
GP2X User Guide –www.emuholic.com
Setting Up Your GP2X
You should have the following inside your GP2X box:
1x GP2X unit
1x USB cable
1x Screen Protector
1x Pack of 2 AA batteries
1x Korean/English Manual
Fitting the Screen Protector
After unpacking the GP2X you should install the screen protector immediately. Carefully remove the shipping
film from the GP2X screen by pulling the Red tag on the top right. Now remove the film from the Screen
Protector and ensuring there is no dust on the underside of the Screen Protector and on the GP2X screen,
carefully place it on the GP2X. The Screen Protector also has a film to protect the screen, using a fingernail or
knife, gently unpeel it from a corner of the screen.
There is also protector film on the Power and Battery display panel which can be removed if you wish to.
Fitting the batteries
The GP2X uses two AA batteries to power the device. To fit these, gently push and slide the marked area on the
battery cover found on the back of the GP2X towards you. Insert the batteries the correct way as shown in the
battery compartment and then replace the battery cover.
Dead batteries can give the impression that your GP2X unit has broke by displaying random patterns on the
screen when you switch it on. Please read the Troubleshooting section for more information.
Fitting the Secure Digital Card
The GP2X uses a Secure Digital Card (not supplied as standard) as its storage. To install this insert the Secure
Digital Card with the back facing you into the Secure Digital Slot found on the top of the GP2X. The notch
should be on the bottom right hand side and when inserted you should hear a click to confirm it is correctly
inserted. Do not try to force the Secure Digital Card into the slot or you may damage the Card or the GP2X!

Page 8
GP2X User Guide –www.emuholic.com
Installing the USB Cable
The GP2X can connect to your PC via a USB cable to transfer your games, utilities, movies, music and E-
Books. To do this you will require a free USB port on your PC, it is recommended you have a USB 2 port for
faster transferring of files but a USB 1 port will work. Locate an unused USB port on your PC and carefully
insert the USB connector into it. To connect the USB cable to your GP2X, remove the rubber protection cover
and insert the USB cable into the GP2X.
You are now ready to switch on and enjoy the GP2X!

Page 9
GP2X User Guide –www.emuholic.com
Using the GP2X for the first time
Switch on the GP2X by pressing the On/Off switch located on the left hand side of the GP2X. The screen should
light up and after a second or two the first of two boot screens should display. This should last for several
seconds then a second boot screen will display. After around 15 seconds in total (for v2.0.0 firmware, otherwise
25 seconds), the boot process will be complete and you will be presented with the Main Menu screen as shown
in Figure 1.
Figure 1
To navigate the menu system you can use the joystick to move between the options. You can press to select
a highlighted option.
Connecting the GP2X to your PC
Remove the rubber flap found on the right hand side of your GP2X then carefully insert the USB cable into the
USB connector on the GP2X. Please also ensure that a Secure Digital card has been inserted into the GP2X
otherwise your PC may not recognise the GP2X. Now navigate to the Settings menu and press to enter the
Settings menu as shown in Figure 2.
Figure 2
Page 10
GP2X User Guide –www.emuholic.com
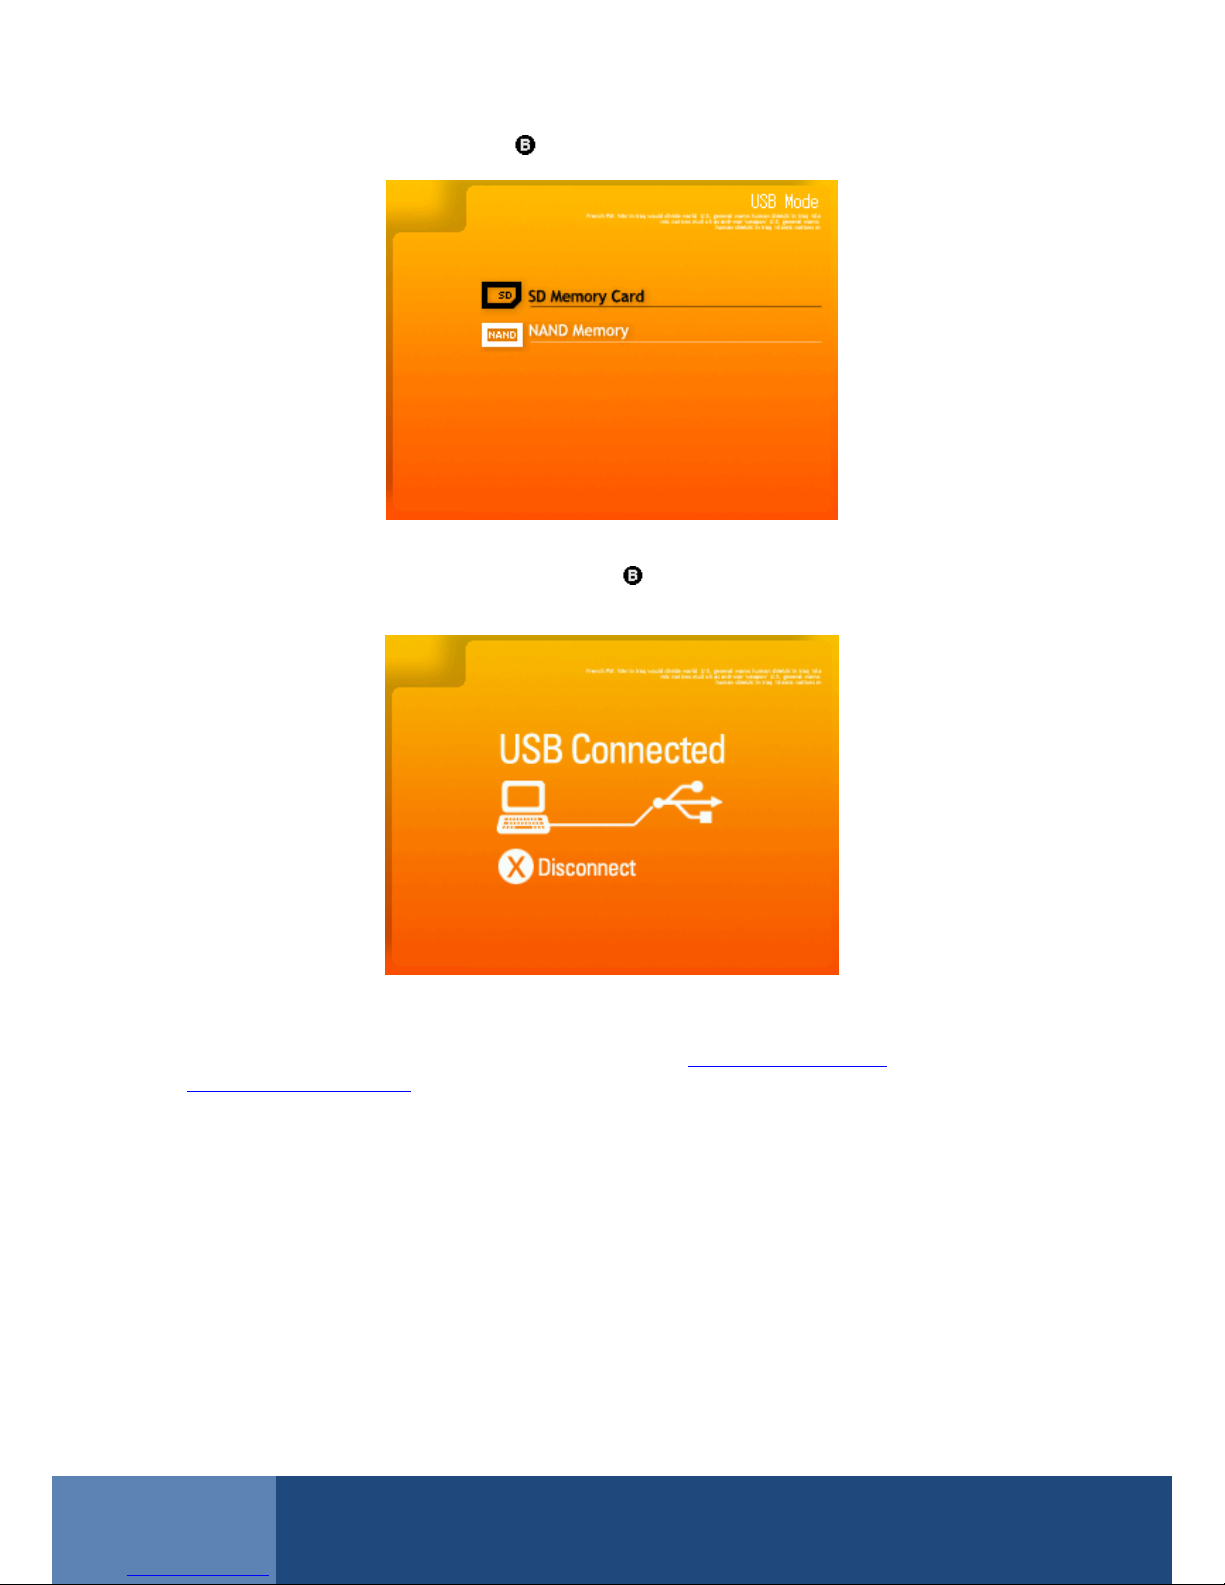
Now navigate to the USB option and press to select it. The USB Mode screen will appear as in Figure 3.
Figure 3
Now navigate to the SD Memory Card option and press to select it. The USB Connection screen will
appear as in Figure 4.
Figure 4
After a few seconds Windows should report that it has found a new USB device and will start to install the
hardware. If you are asked for a driver please download the file at http://archive.gp2x.de/cgi-
bin/cfiles.cgi?0,0,0,0,15,1473, extract the zip file to a temporary folder and point the hardware install wizard to
this file.
Dieses Handbuch passt für folgende Modelle
1
Inhaltsverzeichnis


