iHome iH36 Bedienungsanleitung

Model iH36
under cabinet kitchen system
for your iPod
®

1

Table of Contents
2
Caution Information........................................................................................................................................................................3
A Consumer Guide to Product Safety ....................................................................................................................................... 4-6
Safety Instructions
FCC Information
iH36 Mounting / Installation Instruction......................................................................................................................................7-9
Getting Started ....................................................................................................................................................................... 10-11
Install AC Power
Install iPod Insert
Install/Replace Backup Battery
Batteries information
Install/Replace the Remote Control Battery
To check for iPod compatibility
Controls and Indicators................................................................................................................................................................12
Maintenance ................................................................................................................................................................................ 13
Setting Up..................................................................................................................................................................................... 13
Setting Time and Calendar
Charging your iPod.......................................................................................................................................................................13
Listening to iPod ..........................................................................................................................................................................14
Listening to iPod Shuffle ............................................................................................................................................................ 14
Listening to FM Radio, TV and Weather Band............................................................................................................................ 15
Presetting Your Favorite Station.................................................................................................................................................. 15
Presetting a Station
Tuning into a Preset Station
Operating the Cooking Timer.......................................................................................................................................................16
Trouble Shooting .................................................................................................................................................................... 16-19
Warranty Information....................................................................................................................................................................20

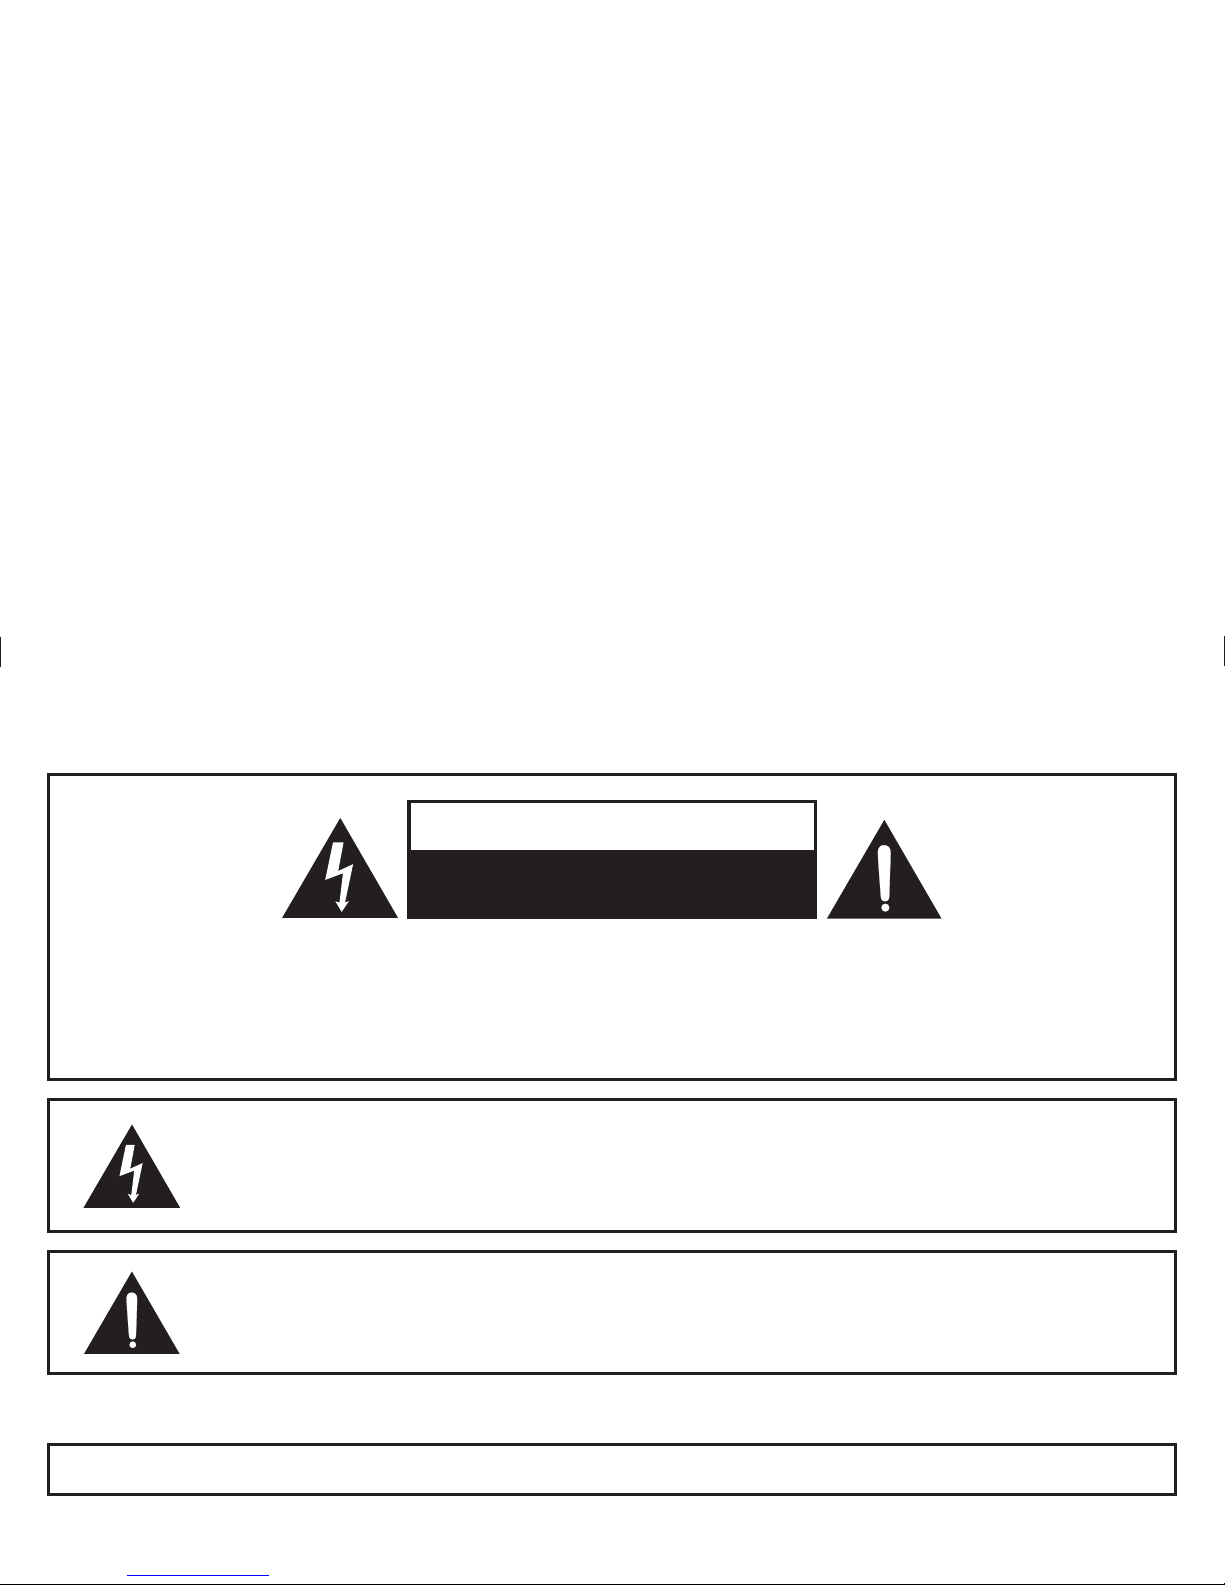
CAUTION: TO REDUCE THE RISK OF ELECTRIC SHOCK, DO NOT REMOVE COVER (OR BACK).
NO USER-SERVICEABLE PARTS INSIDE. REFER SERVICING TO QUALIFIED SERVICE PERSONNEL.
WARNING: TO REDUCE THE RISK OF FIRE OR ELECTRIC SHOCK, DO NOT EXPOSE THIS
APPLIANCE TO RAIN OR MOISTURE.
The lightning flash with arrowhead symbol, within an equilateral triangle, is intended
to alert the user of the presence of uninsulated “dangerous voltage” within the product’s
enclosure that may be of sufficient magnitude to constitute a risk electric shock to
persons.
3
The exclamation point within an equilateral triangle is intended to alert the user of the
presence of important operating and maintenance (servicing) instructions in the
literature accompanying the appliance.
The symbols above are located on the top of the cabinet.
CAUTION: To prevent electric shock, match wide blade of plug to wide slot. Fully insert.
CAUTION: To reduce the risk of fire, do not place any heating or cooking product beneath this unit
CAUTION
RISK OF ELECTRIC SHOCK
DO NOT OPEN

4
A Consumer Guide to Product Safety
When used in the directed manner, this unit has been designed and manufactured to ensure your personal
safety. However, improper use can result in potential electrical shock or fire hazards. Please read all safety and
operating instructions carefully before installation and use, and keep these instructions handy for future reference.
Take special note of all warnings listed in these instructions and on the unit.
1. Water and Moisture – The unit should not be used near water. For example: near a bathtub, washbowl,
kitchen sink, laundry tub, swimming pool or in a wet basement.
2. Ventilation – The unit should be situated so that its location or position does not interfere with its proper
ventilation. For example, it should not be situated on a bed, sofa, rug or similar surface that may block
ventilation openings. Also, it should not be placed in a built-in installation, such as a bookcase or cabinet,
that may impede the flow of air through the ventilation openings.
3. Heat – The unit should be situated away from heat sources such as radiators, heat registers, stoves or other
appliances (including amplifiers) that produce heat.
4. Power Sources – The unit should be connected to a power supply only of the type described in the operating
instructions or as marked on the appliance.
5. Grounding or Polarization – This product is equipped with a polarized alternating current line plug.
(a plug having one blade wider than the other) As a safety feature this plug will fit into the power outlet only
one way. If you are unable to fit the plug fully into the outlet, try reversing the plug. If the plug still fails to fit,
contact your electrician to replace your obsolete outlet. Do not defeat the safety purpose of the polarized
plug by forcing the plug into the outlet
6. Power-Cord Protection – Power supply cords should be routed so that they are not likely to be walked on
or pinched by items placed upon or against them. It is always best to have a clear area from where the cord
exits the unit to where it is plugged into an AC outlet.
7. Cleaning – The unit should be cleaned only as recommended. See the Maintenance section of this manual
for cleaning instructions.

5
8. Objects and Liquid Entry – Care should be taken so that objects do not fall and liquids are not spilled into
any openings or vents located on the product.
9. Attachments – Do not use attachments not recommended by the product manufacturer.
10. Lightning and Power Surge Protection – Unplug the unit from the wall outlet and disconnect the antenna
or cable system during a lightning storm or when it is left unattended and unused for long periods of time.
This will prevent damage to the product due to lightning and power-line surges.
11. Overloading – Do not overload wall outlets, extension cords, or integral convenience receptacles as this
can result in a risk of fire or electric shock.
12. Damage Requiring Service – The unit should be serviced by qualified service personnel when:
A. the power supply cord or plug has been damaged.
B. objects have fallen into or liquid has been spilled into the enclosure.
C. the unit has been exposed to rain.
D. the unit has been dropped or the enclosure damaged.
E. the unit exhibits a marked change in performance or does not operate normally.
13. Antenna – Do not connect an external antenna to the unit (other than that provided).
14. Periods of Nonuse – If the unit is to be left unused for an extended period of time, such as a month or longer,
the power cord should be unplugged from the unit to prevent damage or corrosion.
15. Servicing – The user should not attempt to service the unit beyond those methods described in the user’s
operating instructions. Service methods not covered in the operating instructions should be referred to
qualified service personnel.
Questions? Visit www.ihomeaudio.com
For operating instructions: 1-877-ihome01(1-877-446-6301) Toll Free
For any other questions: 1-800-288-2792 Toll Free
A Consumer Guide to Product Safety

6
Questions? Visit www.ihomeaudio.com
For operating instructions: 1-877-ihome01(1-877-446-6301) Toll Free
For any other questions: 1-800-288-2792 Toll Free
A Consumer Guide to Product Safety
FCC Information
This device complies with Part 15 of the FCC Rules. Operation is subject to the following two conditions:
(1) this device may not cause harmful interference, and (2) this device must accept any interference received,
including interference that may cause undesired operation.
Warning: Changes or modifications to this unit not expressly approved by the party responsible for compli-
ance could void the user’s authority to operate the equipment.
NOTE: This equipment has been tested and found to comply with the limits for a Class B digital device,
pursuant to Part 15 of the FCC Rules. These limits are designed to provide reasonable protection against
harmful interference in a residential installation. This equipment generates, uses and can radiate radio
frequency energy and, if not installed and used in accordance with the instructions, may cause harmful
interference to radio communications.
However, there is no guarantee that interference will not occur in a particular installation. If this equipment
does cause harmful interference to radio or television reception, which can be determined by turning the
equipment off and on, the user is encouraged to try to correct the interference by one or more of the following
measures:
Reorient or relocate the receiving antenna.
Increase the separation between the equipment and receiver.
Connect the equipment into an outlet on a circuit different from that to which the receiver is needed.
Consult the dealer or an experienced radio/TV technician for help.
SDI TECHNOLOGIES INC.
1299 Main Street, Rahway, NJ 07065
Tel. No. (732) 574-9000

iH36 Mounting/Installation Instructions
Parts Supplied
• 4 Small (1/2") Spacers
• 8 Large (1") Spacers
• 4 3 " Phillips head screws/bolts
• 4 4 1/2 " Phillps head screws/bolts
• Mounting Template A (for mounting template from inside cabinet)
• Mounting Template B (for mounting template from below cabinet)
BEFORE MOUNTING
Select a convenient kitchen cabinet with adequate clearance near a working 120 volt electrical outlet. Make sure the power
cord reaches the outlet easily, with some extra. Empty the cabinet completely before attempting to install the iH36,
and thoroughly clean (remove any grease, etc. from) the cabinet.
Caution: To reduce the risk of fire, do not place or mount any heating or cooking appliance near this unit. Make sure it is far
enough away from heat-producing products such as halogen lamps, etc.
7
Tools Required
• Drill and 1/4" Drill Bit
• Masking Tape
• Scissors
• Nail or Awl
• Phillips head Screwdriver
• Tape Measure or Ruler
• Safety Goggles
Front of
cabinet
Bottom Shelf
Side view of unit

iH36 Mounting/Installation Instructions
Examples:
If your cabinet has no overhang, just use 4 of the 3 inch screws with no spacers
If your cabinet has a 1 inch overhang, use 4 of the 1/2" spacers, 4 of the 1" spacers and four 4 1/2" screws.
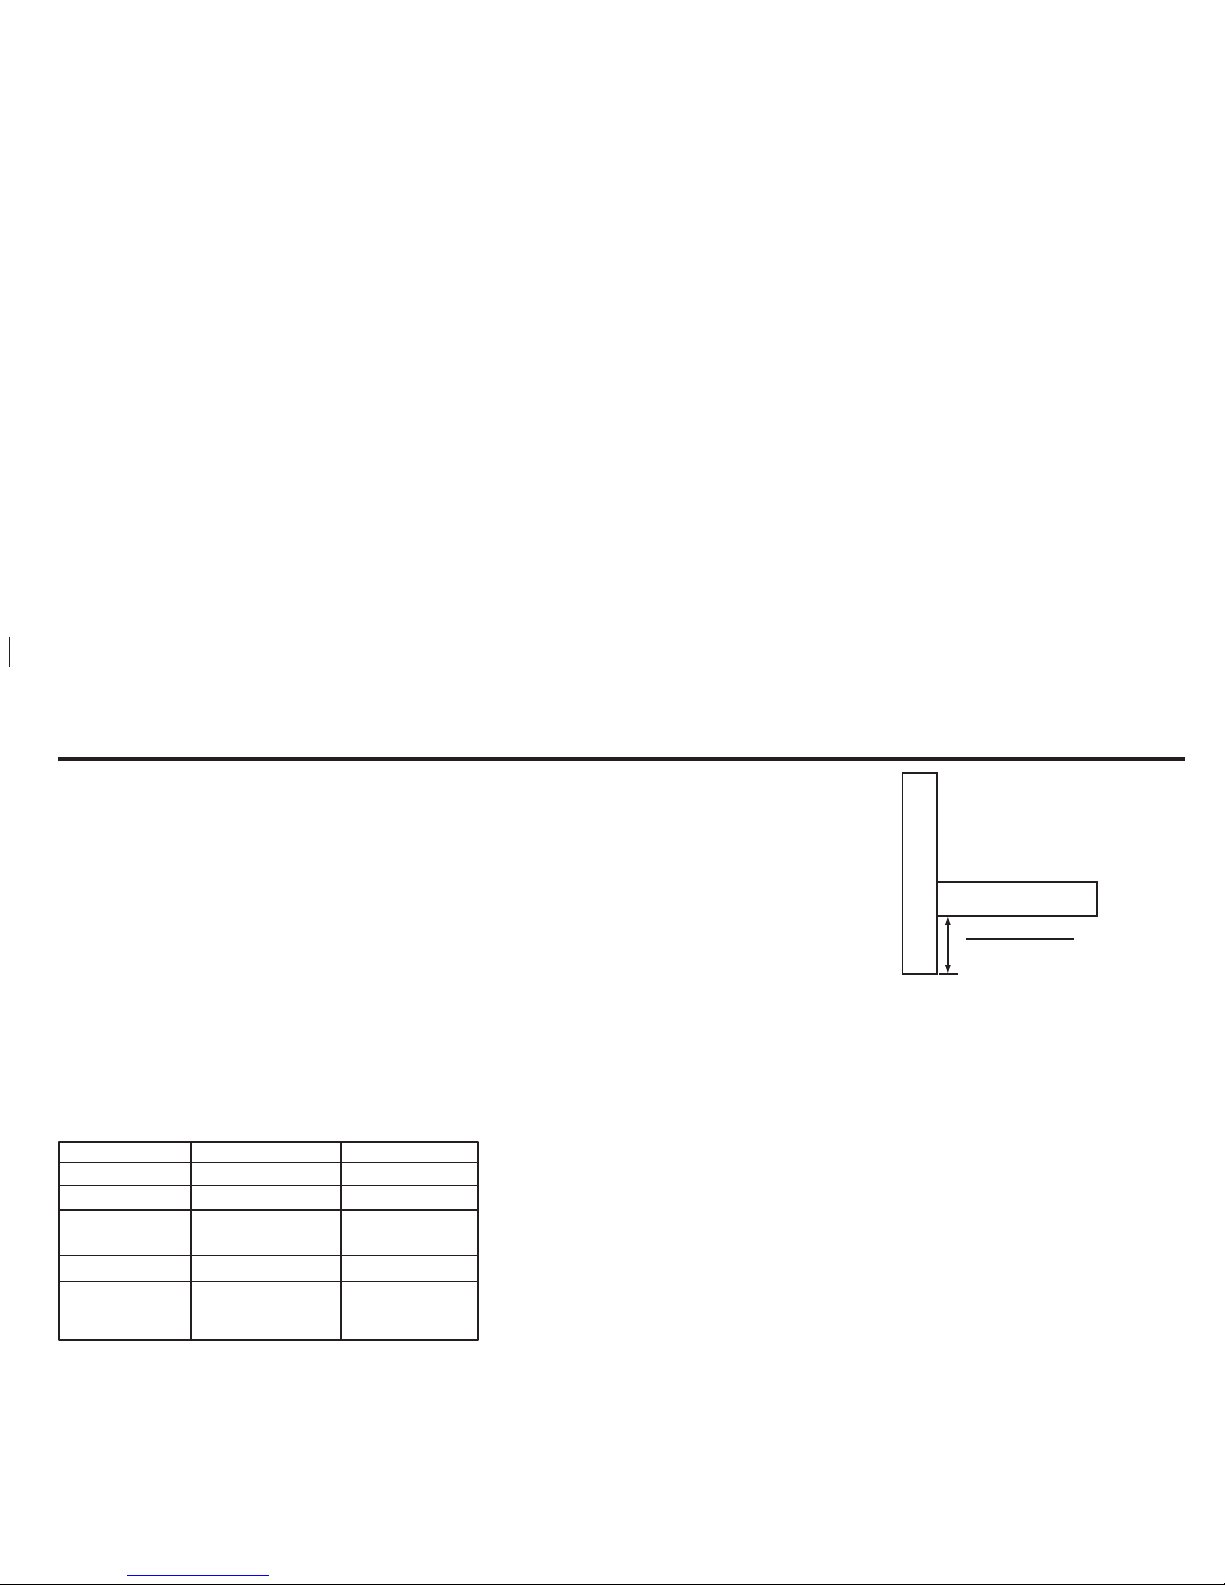
Table 1: SPACER/SCREW SELECTION CHART
Note: This unit is designed for cabinets with an overhang of 2 1/4" or less. If your cabinet has an overhang longer than 2 1/4",
please call a customer service representative at 1-800-228-2792.
8
Step 1. Measure the overhang height
Use a ruler or tape measure to determine the exact amount of overhang, if any.
Measure from the front inside bottom edge of the cabinet bottom straight down to
the end of the overhang (see figure 1) to determine the height of the overhang.
Step 2. Determine which spacers and screws to use
Once you have your overhang measurement, look at Table 1 and find the nearest
measurement in the Overhang column, then determine the combination of spacers
and screw size you need. Set them apart.
OVERHANG
Measure this distance to
select screw and spacer
combination (see chart)
Front of
Cabinet
(Figure 1)
Bottom Shelf
OVERHANG
0 - 3/8’’
1/2 - 3/4’’
7/8 - 1 3/8’’
1 1/2 - 1 3/4’’
1 7/8 - 2 1/4’’
None
1’’ spacer x 4
1/2’’ spacer x 4 +
1’’ spacer x 4
1/2’’ spacer x 4+
1’’ spacer x 8
3’’ x 4
3’’ x 4
4 1/2’’ x 4
4 1/2’’ x 4
4 1/2’’ x 4
SPACERS SCREW
1’’ spacer x 8

iH36 Mounting/Installation Instructions
MOUNTING THE iH36
We recommend the unit be mounted flush to the front edge of the cabinet.
1. Select and Set Template and Drill holes
a. Using a Template First, decide which mounting method/template you prefer, the inside the cabinet template (Mounting
Template A) or the under the cabinet template (Mounting Template B). Next, cut out the selected template on the line
indicated depending on whether your cabinet has an overhang or not. Position the chosen Mounting Template either
inside or under the cabinet with the arrow facing the front of the cabinet. Secure in place with tape.
b.Drilling There are 4 guide holes on the mounting template. We recommend that you start each hole before drilling by first
marking the center point of the guide hole then pressing an awl or nail into the mark. Always wear safety goggles when
operating a drill. For ease and accuracy of drilling, it's a good idea to drill pilot holes next using a 1/16" bit. Finally, use a
sharp 1/4" drill bit to carefully drill 4 holes through the cabinet. Make sure all holes are drilled straight, and not at an angle.
Remove any debris.
c. Remove the template
DRILLING TIPS: You may first wish to place masking tape over the opposite side you are drilling to avoid splintering. Hold drill
firmly to avoid the bit "walking".
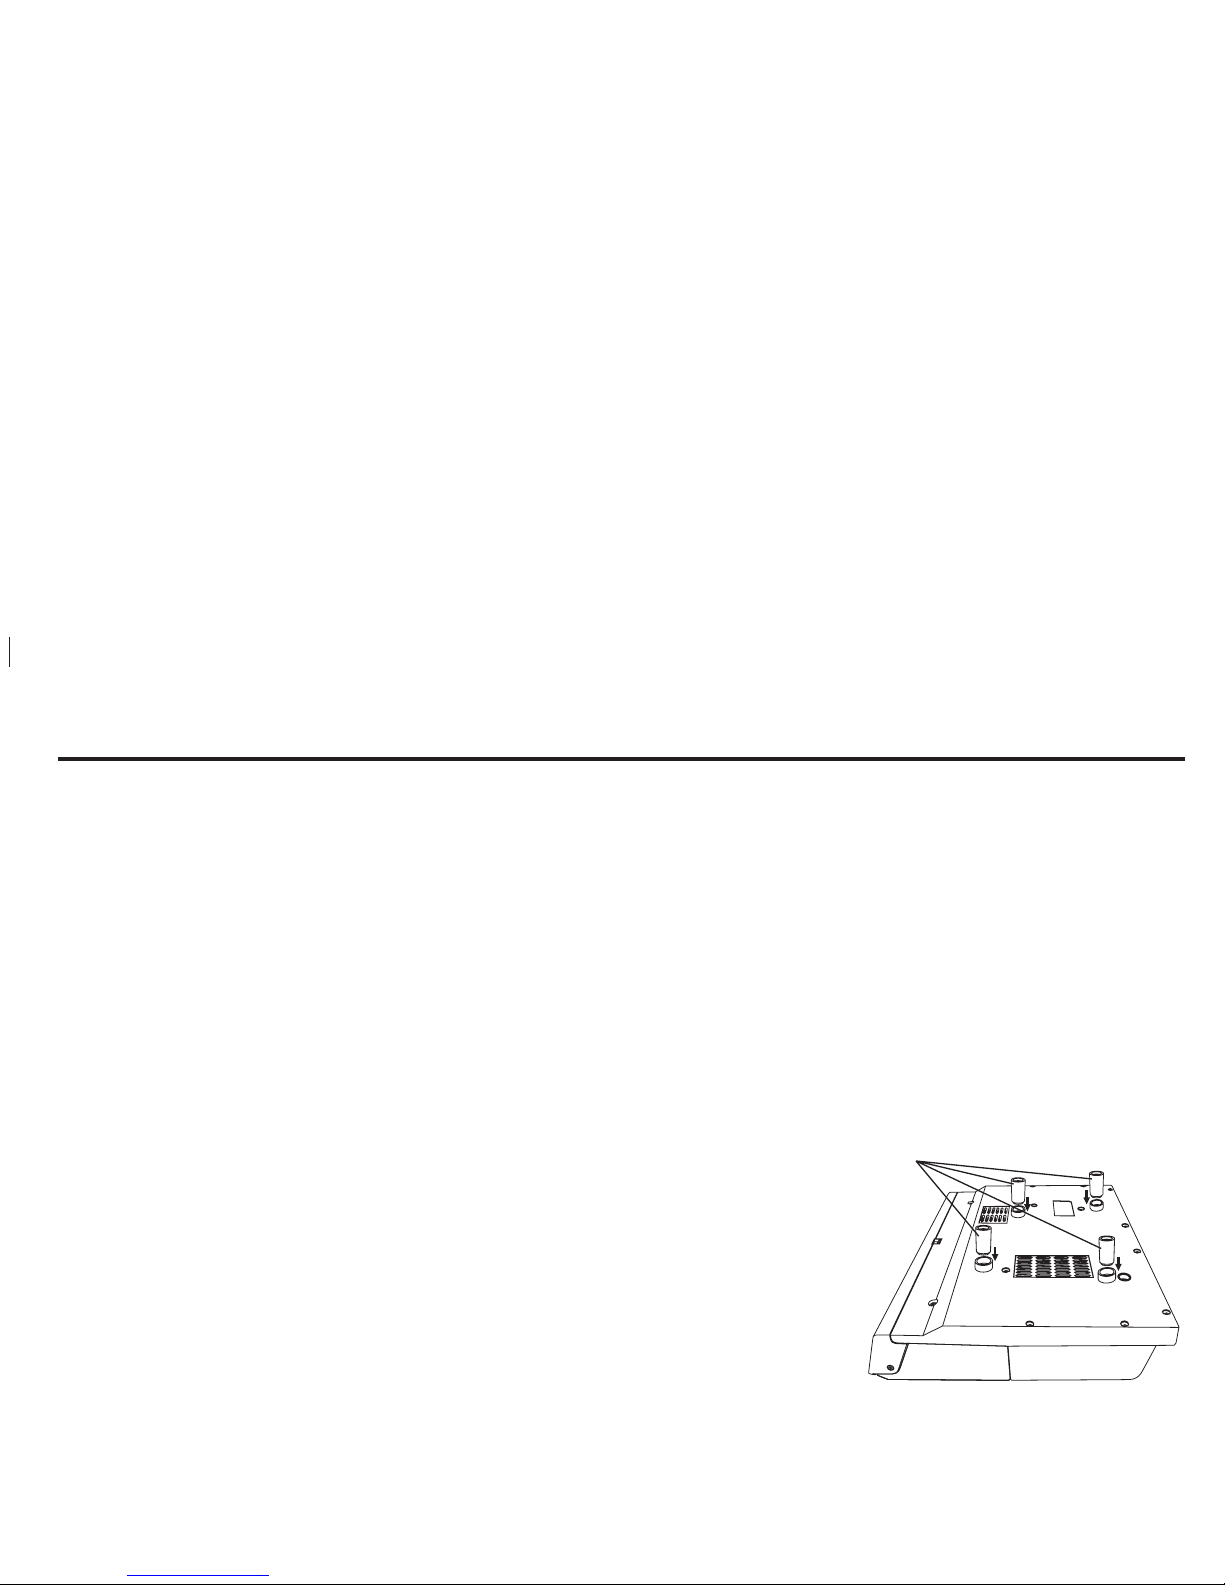
2. Insert Spacers
a. Place the needed spacers into the mounting posts on top of the unit.
3. Mount unit to cabinet
a. From inside the cabinet, place a finishing washer above each hole and screw the
4 screws through any spacers into the mounting holes on the unit. Make sure the
unit is supported until the screws are tightened.
NOTE: For secure mounting, the screws must go into the iH36 at least 3/8".
OPTION: You may prefer to countersink the drilled holes from inside the cabinet if
you have the correct countersink attachment for your drill. This will make the screw
heads flush with the cabinet surface.
b. Tighten the screws using a Phillips head screwdriver.
CAUTION: DO NOT USE POWER TOOLS TO TIGHTEN SCREWS
Once the unit its securely mounted, plug into a nearby 120Volt outlet. Note that there is a built-in cord wrap on the back of
the unit to wrap up any excess wire.
9
Spacers
Andere Handbücher für iH36
1
Inhaltsverzeichnis
Andere iHome Medienkonverter Handbücher