
Q-See QSE7F4 Bedienungsanleitung

TRADEMARKS
All brand names and products are Registered
Trademarks of their respective Companies.
LEGAL DISCLAIMER
See warning on rear cover.
DISCLAIMER
The information in the document is subject to change
without notice. The manufacturer makes no representa-
tions or warranties with respect to the contents hereof
and specifically disclaims any implied warranties of
selling or functionality for any particular purpose.
Digital Peripheral SolutionsInc.
S015 E Crystaldrive,
Anaheim, CA92807,
1-877-998-3440.
Q-See tech supportin U.S.A.
Mon-Fri:9 am -6pm PST.
TEL:1-877-998-3440
E-mail:[email protected]
Website:<www.q-see.com>
Fingerprint
Keypad & Deadbolt
Lock
QSE7F4
USER MANUAL
MODEL NO.:
PLUS

1
1
1
1
2
2
3
3
4
4
5
5
6
7
7
7
8
8
9
9
10
12
13
1. Introduction
1.1 Features
1.1.1 Model number
1.1.2 Main features
1.2 Size &Weight
1.2.1 Lock size
1.2.2 Mortise size
1.2.3 Weight
1.3 Technical Parameters
1.3.1 Technical Parameters
1.3.2 Operating Environment
1.4 Components
1.5 Structure View
2. Operation Instruction
2.1 Left handedand Right handed
2.2 Status ofthe lock
2.3 Instruction forindicators
2.4 Function ofbuttons
2.5 Master fingerprint& Emergency PIN
2.5.1 How toset Master fingerprint?
2.5.2 How toset Emergency PIN?
2.6 Enroll &erase group member'sfingerprint(s)
2.6.1 Enroll groupmember's fingerprint(s)
CONTENTS
1
1.1.1Model number
1.1.2 Main features
Color polished gold edge+ pearl chrome
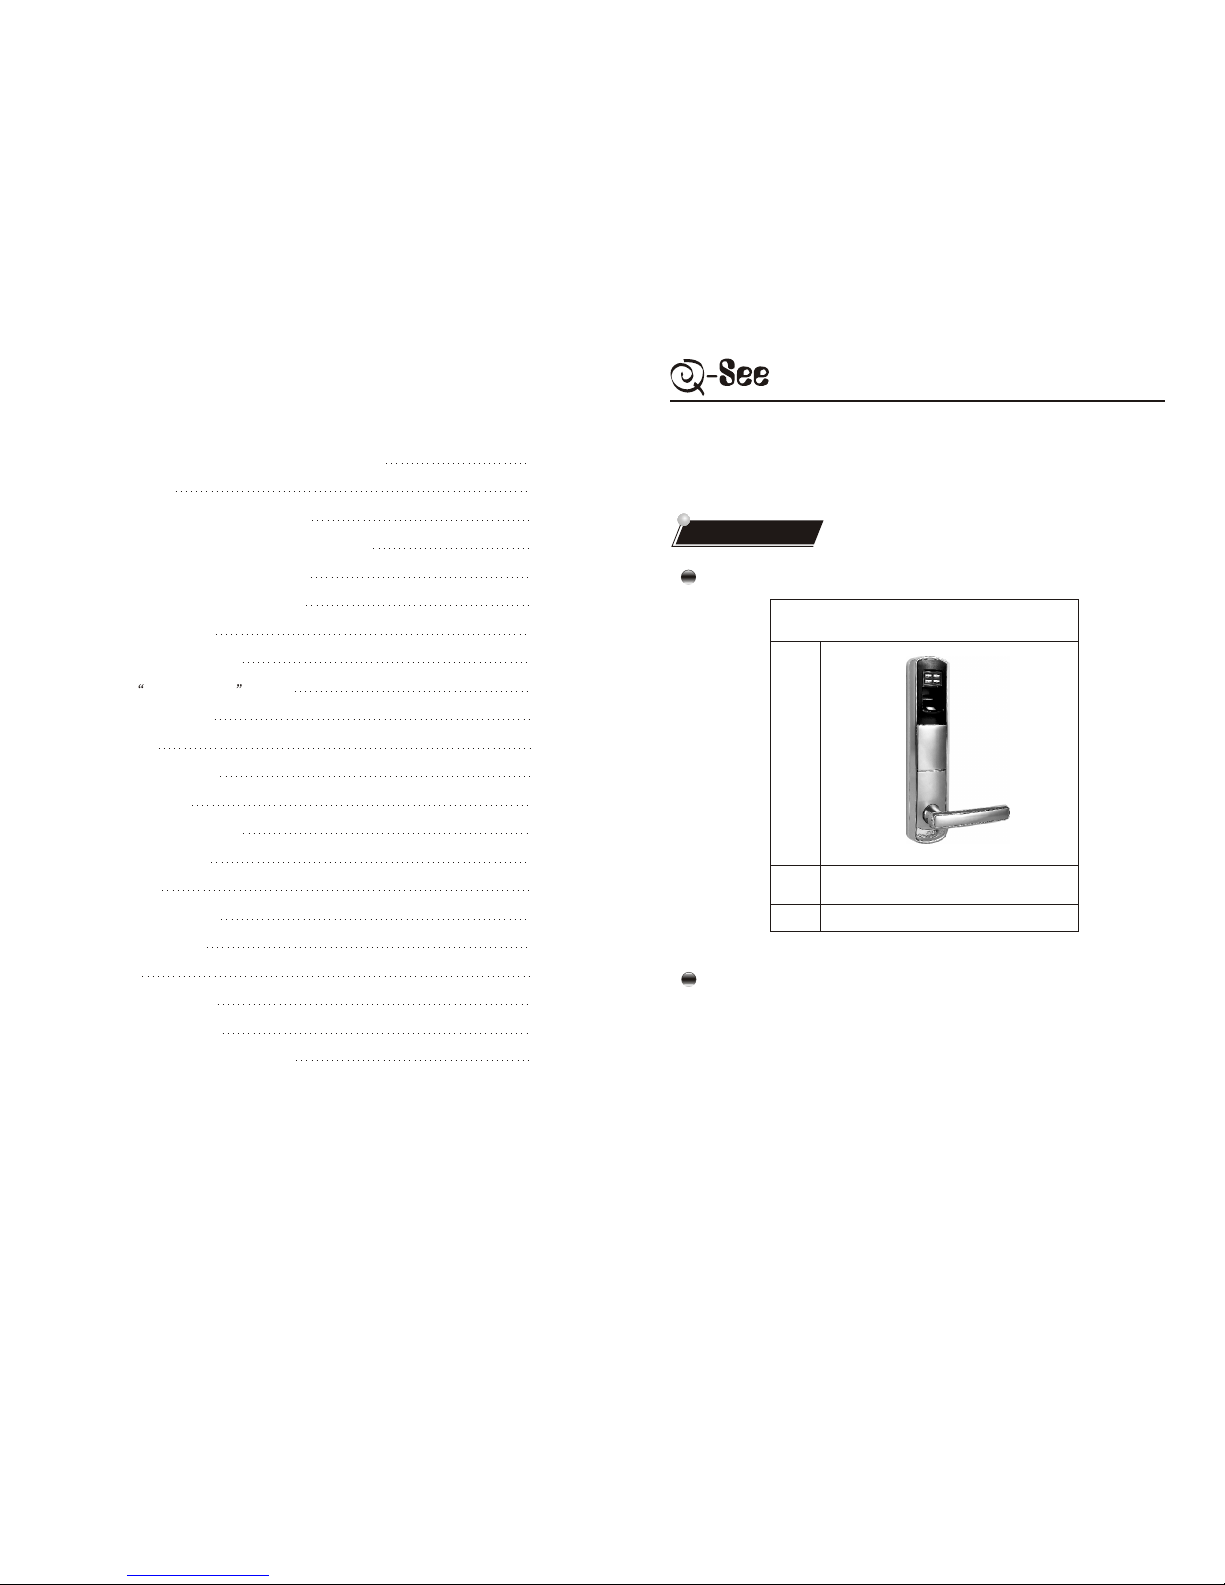
QSE7F4
1. Introduction
1.1 Features
Model
Image
1. Optical sensorwith high resolution (500 dpi)
2. 5 latches,higher security
3. 3 waysto open: Fingerprint, PIN and mechanical keys
4. Capacity: maximum120 fingerprints in 4 groups.
5. Allowto erase singlefingerprint or group fingerprints.
6.Fingerprint can be enrolled and erased on the lock directly, no PC
connection required.
7. Deadbolt canbe locked by rotating outside/inside lever.
2.6.2 How toerase group memberfingerprint?
2.7 Unlocking
2.7.1 Unlock withEmergency PIN
2.7.2 Unlock withgroup member fingerprint
2.7.3 Unlock withmechanical key
2.8 How toset the statusof the lock?
2.8.1 Lock status
2.8.2 Lock-out status
2.8.3 Normally open status
2.9 Change batteries
3. Installation
3.1 Door requirement
3.2 Tools required
3.3 Installation template
3.4 Installation steps
4. Maintenance
4.1 Daily maintenance
4.2 Troubleshooting
5. Appendix
5.1 Package Contents
5.2 Handle Orientation
5.3 Fingerprint number& name list
15
15
15
16
17
17
17
17
18
19
20
20
20
21
22
24
24
24
25
25
26
27
QSE7F4 USER MANUAL
Fingerprint Plus Keypad & Deadbolt Lock

3
2
1.2.3 Weight
Net Weight
2.58 lb
3.44 lb
2.12 lb
8.14 lb
1.2.2 Mortise size
1.2.1 Lock size
68
278
46
144 68.7
68
46
278
69.2
144
01
23
8. Blue backgroundlight, convenient for night use.
9. “Normally open”status can be set for meetings or events.
10. Operates on4 AAalkaline batteries ora 9V battery, with low voltagealert.
11.Auto alarm function: If the door is not locked properly, the latches draw
out , 3 seconds later the lock will alarm automatically. While alarming,
the door can’t be opened with fingerprint or Emergency PIN, but can be
opened with mechanical key, after 1 minute’s alarming, the alarm stops,
the lock goback into normal status.
12.Antistrike function:when the door is closed ,the antistrike latch is pressed
against the door frame,which prevents the door from being opened simply
by inserting somethinglike credit card.
13. Standalone, suitablefor office, meeting room, residence, etc.
1.2 Size & Weight
QSE7F4 USER MANUAL
Parts
Front plate
Back plate
Mortise
Total
Unit mm
Unit mm
QSE7F4 USER MANUAL
235
20
85
70

5
4
1.3.2 Operating Environment
1.3.1 Technical Parameters
1.3 Technical Parameters
1.4 Components
Item
Fingerprint sensor
Sensor resolution
Authentication speed
Authentication methods
Angle for putting finger
Fingerprint scanning
Fingerprint template
saved
User capacity
Light jam
FRR
FAR
Antistrike ability of
sensor surface
Sensor surface
Operating voltage
Battery life
Temperature for storage
Static current
Dynamic current
Technical parameters
Optical sensor,CMOS 0.3 Mega Pixel
500 dpi
1 second
1:N
Twice to get one fingerprint template
All enrolled fingerprint template will be saved
while replacing the batteries
120 max
Sunlight resistable
Remain good condition after being jabbed
with a 4H pencil at a 20cm's distance.
Optical glass with PVD coated
4 AA alkaline batteries,DC 4.5~6.0v
or a 9V stand-by battery
Approx 12 months
-10 -50
40 A
180mA
1%
0.0001%
360
No:
Outdoor Temperature
Indoor Temperature
Humidity
Battery
cover
Deadbolt
Buttons
Antistrike
latch
Front
Indicator
Battery
cover
button
Latches
Sensor
Inside lever
Cylinder
cover
Cylinder cover
button
Outside lever
QSE7F4 USER MANUALQSE7F4 USER MANUAL
-8 -50
-5 -50
45%RH-85%RH
Back plate Front plate
Socket for stand-bypower
(concealed by cylindercover )
Rear
indicator
Side View
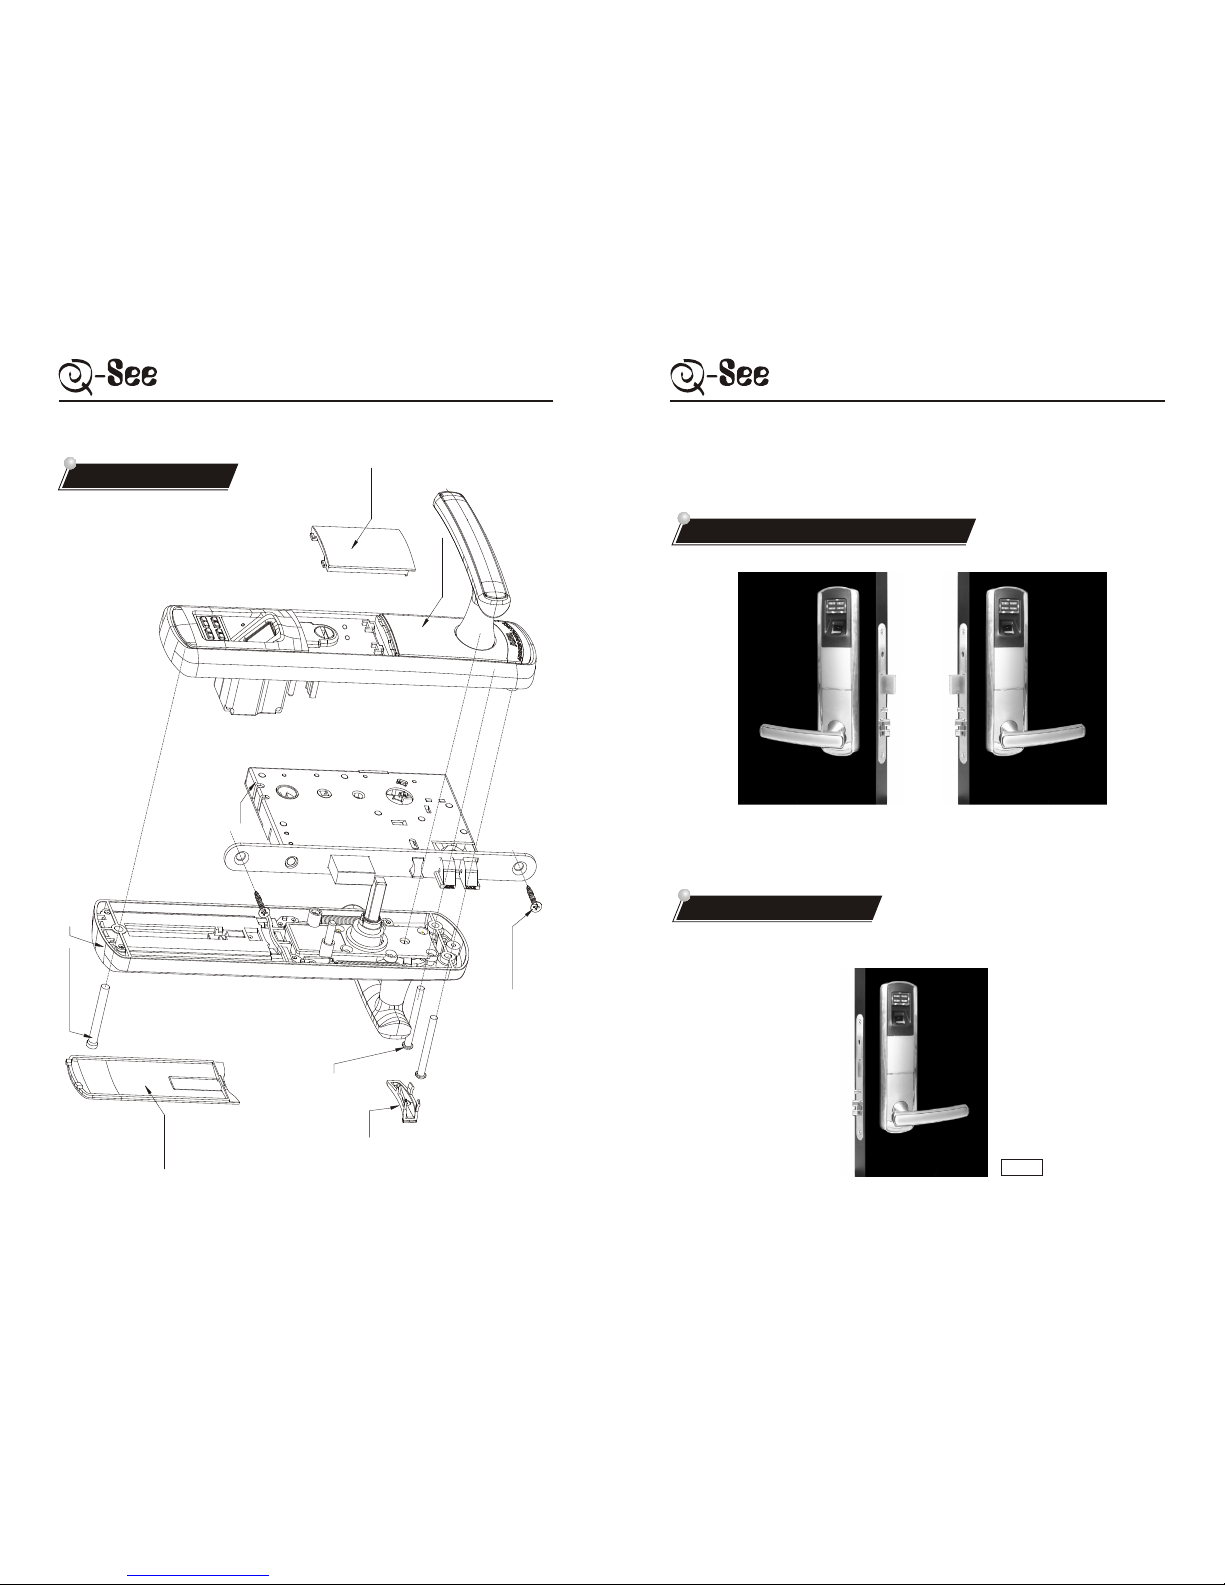
1.5 Structure view
6 7
QSE7F4 USER MANUALQSE7F4 USER MANUAL
1.Standing out of the door, if the hinge is on the left, it is left handed lock.
2. Standing out of the door, if the hinge is on the right, it is right handed lock .
2-1
2.1 Left handed and Right handed
2.2 Status of the lock
1. Operation Instruction
1.Lock status,locked with latches(not by deadbolt) , (Figure 2-1)
Left handed Right handed
Hexagon screw
M6 X L
Fixing screw
M5 X L
Front plate
Cylinder
cover
Mortise
Back plate
Tapping screw
M4 X 25
Plastic
screw cover
Battery
cover

2-2
2.3 Instruction for indicators
2.4 Function of buttons
98
2.Lock-out status, locked with latchesand deadbolt,(Figure 2-2)
3.“Normally open”status, the lockwill always be unlocked by rotatingoutside
lever.
1.Green light flashes once, followed by a long beep, it means successful
operation.
2.Red light flashes once, followed by 2 short beeps, it means failed
operation.
3.Red lightflashes from thesensor, it means the sensoris working.
4.Red and green light flash, the buzzer alert 3 times, it means low voltage,
please change thebatteries.
5.Red light flashes once, the buzzer alert once, it means the fingerprint
number is alreadyused, use adifferent number.
6.Green lightflashes once a second, it means the lock isin “normally open”
status.
7.Red lightflashes once asecond, it means the lock isin lock-out status.
8.“Activate the lock” in the manual, it means to make the buttons or sensor
begin to work.
Button “0” -TO ACTIVATETHE LOCK
QSE7F4 USER MANUALQSE7F4 USER MANUAL
2.5.1 How to set Master fingerprint?
2-3
2-4
2.5 Master fingerprint & Emergency PIN
Button “1” -TO ENROLLGROUP MEMBER'S FINGERPRINT(S)
Button “2” -TO ERASEGROUP MEMBER'S FINGERPRINT(S)
Button “3”- TO SET THE LOCK INTO NORMALLY OPEN STATUS
1.Press andhold the cylindercover button, slide down the cylindercover with
another hand. (Figure2-3)
2.Insert mechanical key into the keyhole, turn the key (anticlockwise if left
handed lock, clockwise if right handed lock) till a long beef is heard, stop
turning and hold the key. Red and green light flash, red light on sensor
flashes as well,which means thelock, is ready for setup. (Figure 2-4)
3.Place the fingerprint which you wish to be the Master fingerprint on the
sensor, red light goes out, green indicator lights all the time. When the red
light on sensor goes out, remove your finger and a long beep will
follow.(Figure2-5)
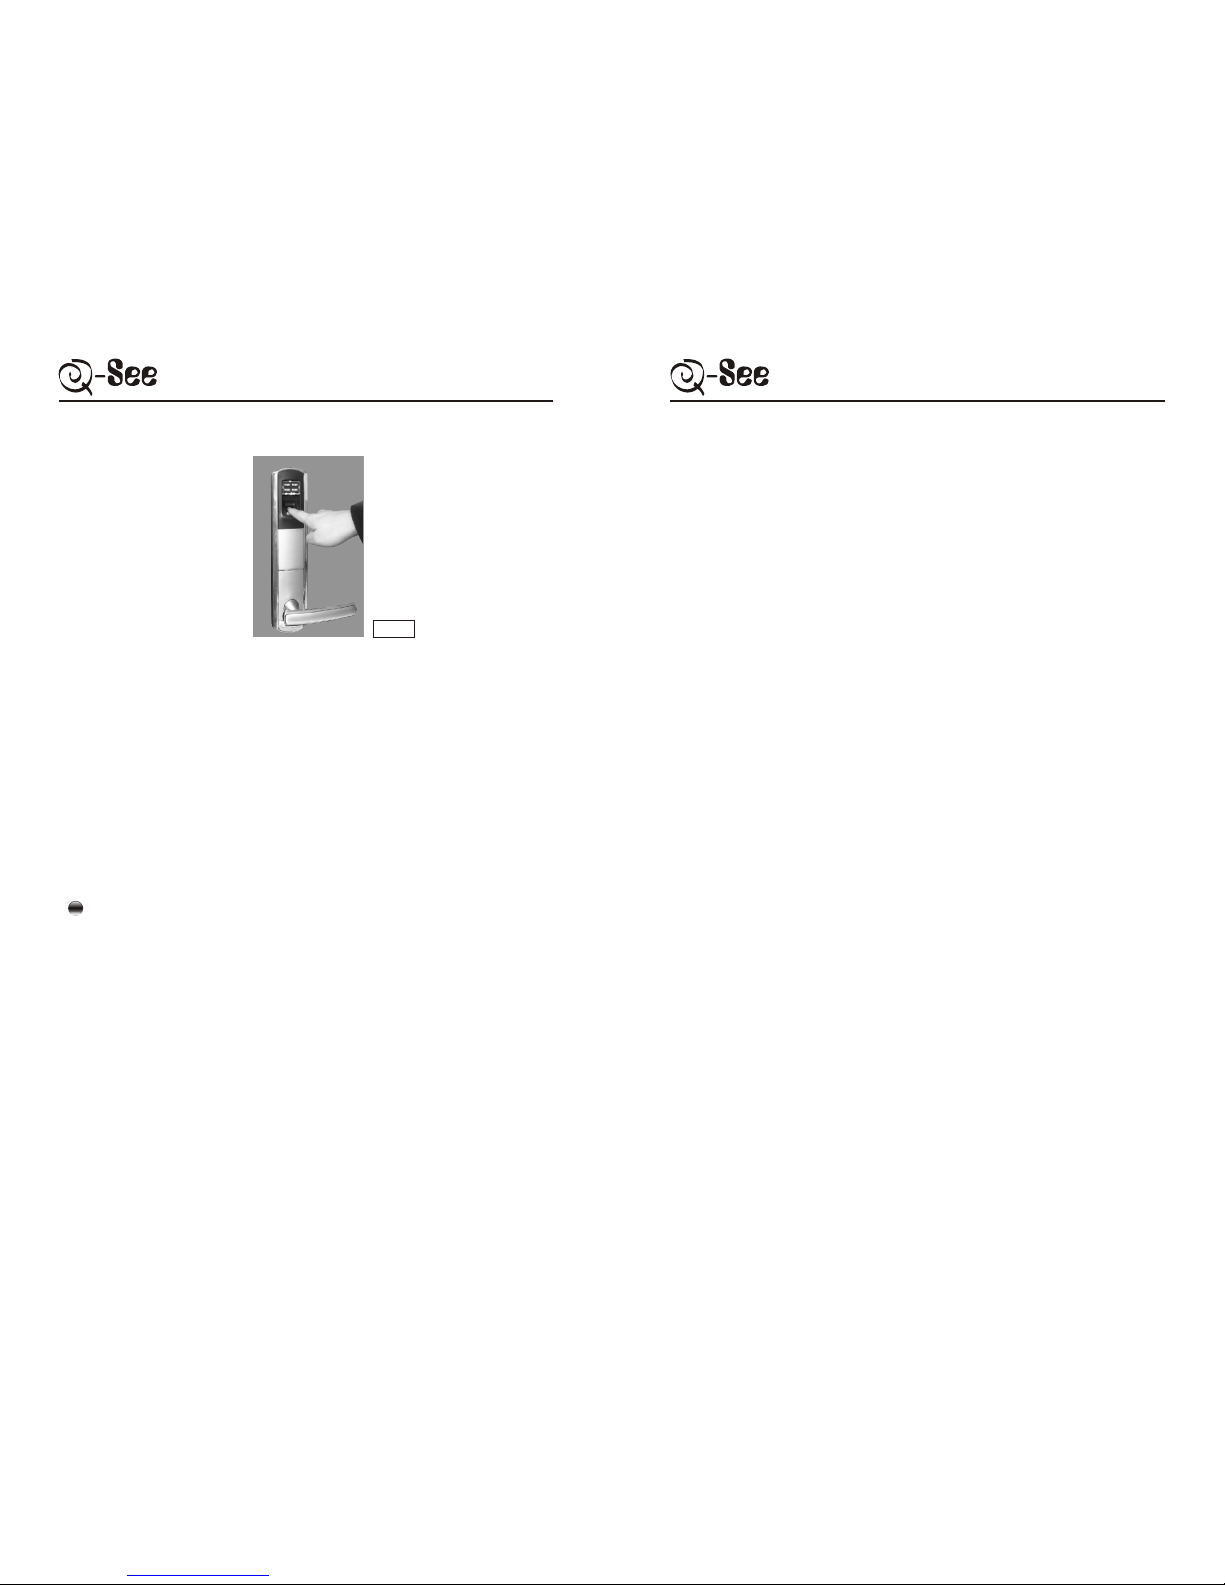
2.5.2 How to set Emergency PIN?
2-5
11
10
3.(Continued) NOTE: When the red light on sensor goes out, you must remove
your finger otherwise the red indicator flashes, followed by 2 short beeps to
indicate the failedsetup.
4.When the red light on sensor flashes again, place the same fingertip on the sensor
immediately, the green indicator goes out, followed by another long beep, which
indicates the successfulsetup.
NOTE: The red light on sensor will flash for about 4 seconds, the finger MUST be
placed on the sensor within the 4 seconds. Otherwise, the red indicator flashes,
followed by 2short beeps toindicate the failed setup.
5. After setting up the Master fingerprint successfully, turn the mechanical key to
the original positionand draw out,put the cylinder cover back.
IMPORTANT NOTE:Master fingerprint cannot be set as group member fingerprint,
to open thelock.
1.Press and hold the cylinder cover button, slide down the cylinder cover with
another hand (Figure2-3)
2.Insert mechanicalkey into the keyhole, turn the key (anticlockwise ifleft handed
lock, clockwise ifright handed lock) till a longbeep is heard, stop turning. Red and
green light flash, red light on sensor flashes as well, which means the lock is ready
for setup. (Figure2-4)
3.Input a 8 digit PIN whose first digit should not be “0”, followed by a long beep,
which indicates thefirst time successfulinput for Emergency PIN.
NOTE: After entering the first digit, all red indicators change to green indicator
lights.
4.Repeat entering the same 8 digit PIN, green indicator goes out, followed by a
QSE7F4 USER MANUALQSE7F4 USER MANUAL
long beep, whichindicates the successfulsetup for Emergency PIN.
5.After setting the Emergency PIN successfully, turn the mechanical key to the
original position anddraw out, putthe cylinder cover back.
NOTE:
1.While thelock is waiting for setup, if you don't put the finger or input Emergency
PIN, the redlight on sensorwill go out after 5 seconds'flashing.
2.Master fingerprintand Emergency PIN have to be set separately.
3.While setting the Emergency PIN, the pause between 2 presses should not be
longer than 4seconds, meanwhile the pause between first and second enteringthe 8
digit PIN should not be longer than 4 seconds either, otherwise the red indicator
flashes, followed by2 short beepsto indicate the failed setup.
4.Emergency PIN must be 8 digits, and the first digit should not be “0”, other digits
could be anyof the 4buttons on the keypad.
5.Each lockhas only ONEMaster fingerprint / Emergency PIN.
6.To change Master fingerprint or Emergency PIN, just set a new Master
fingerprint or input a new Emergency PIN. After the new Master fingerprint is
setup successfully, the fingerprints authorized by old Master fingerprint become
invalid automatically.
7.Master fingerprint can only be used to authorize to enroll group member's
fingerprints but cannotbe used toopen the lock.
8.Emergency PIN is theonly PIN to open the lock.

2.6 Enroll & erase group member's fingerprint(s)
13
12
Fingerprint number &name list
Group A
1
2
3
4
5
6
7
8
9
10
11
12
13
14
15
16
17
18
19
20
21
22
23
24
25
26
27
28
29
30
0001
0002
0003
0010
0011
0012
0013
0020
0021
0022
0023
0030
0031
0032
0033
0100
0101
0102
0103
0110
0111
0112
0113
0120
0121
0122
0123
0130
0131
0132
3001
3002
3003
3010
3011
3012
3013
3020
3021
3022
3023
3030
3031
3032
3033
3100
3101
3102
3103
3110
3111
3112
3113
3120
3121
3122
3123
3130
3131
3132
1001
1002
1003
1010
1011
1012
1013
1020
1021
1022
1023
1030
1031
1032
1033
1100
1101
1102
1103
1110
1111
1112
1113
1120
1121
1122
1123
1130
1131
1132
2001
2002
2003
2010
2011
2012
2013
2020
2021
2022
2023
2030
2031
2032
2033
2100
2101
2102
2103
2110
2111
2112
2113
2120
2121
2122
2123
2130
2131
2132
Fingerprint
No.
Name Fingerprint
Name Fingerprint
Name Fingerprint
Name
Group B Group C Group D
ID For deleting Group A:
0000
ID For deleting Group B:
1000
ID For deleting Group C:
2000
ID For deleting Group D:
3000
QSE7F4 USER MANUALQSE7F4 USER MANUAL
2.6.1 Enroll group member's fingerprint(s)
2-6
Referring to thelist, let's takethe member in Group A,Fingerprint No. 0001
for example.
1.Place Master finger on the sensor, the lock will be activated once the infrared
detector detects the finger. The blue background lights, green indicator light
and red light on sensor flashes; Or press “0”, the blue background green
indicator light and red light on sensor flashes, place the Master finger on the
sensor .(Figure2-6)
NOTE: A. If the infrared detector doesn't work, you can press “0” to activate
the lock.
B. After the red light on sensor flashes, you must put the Master finger on the
sensor within 5 seconds. Otherwise, the red indicator flashes, followed by 2
short beeps toindicate the failedoperation.
2.All indicators go out, a long beep is heard, move away the Master finger, the
green and redindicators flash (NOTE: the flash will last about 6seconds, step 3
must be donewithin 6 seconds)
3.Press “1”, a long beep is heard, red indicator goes out, green indicator lights.
(Figure2-7)

2-7
14 15
(NOTE: the green indicator will light for about 4 seconds, step 4 must be done
within 4 seconds.)
4.Input fingerprint number “0001”, a long beep is heard, which indicates the
successful first inputof this fingerprintnumber.
5.Input fingerprint number “0001” the second time, another long beep is heard,
the red indicator in the sensor flashes, which means the lock is ready for
enrolling group member's fingerprints. (NOTE: If the fingerprint number is
already used, thered indicator flashesonce and the buzzer beeps once.)
6.Place amember finger on the sensor, when the red light in the sensor goes out,
move away thefinger, a long beep is heard;
7.When the red light on the sensor flashes again, place the same member finger
on the sensor second time, till a long beep is heard, which indicates the
successful enrollment ofthis member fingerprint.
NOTE: A. In the Fingerprint number & Name list, up to 120 group member
fingerprints can be enrolled. But since Fingerprint number 3132 is for Master
fingerprint, therefore, actually 119 group member fingerprints can be enrolled
in each lock.
B. Master fingerprintand the groupmember fingerprint cannot be the same.
C. Afingerprint number willonly allow toenroll one fingerprint.
D. Group memberfingerprint can openthe lock.
QSE7F4 USER MANUALQSE7F4 USER MANUAL
2.7.1 Unlock with Emergency PIN
2.7 Unlocking
3.Input the fingerprint number you wish to erase, here we take “0001” for
example. Input “0001” , a long beep is heard, which means the successful first
input.
4.Input “0001” again, a long beep is heard, and followed by another long beep,
green indicator goes out, which means the successful erasing of fingerprint
“0001”.
NOTE: By following above steps, if you input ID for deleting group for step 3
and 4, all fingerprints in the indicated group will be deleted. ( Refer to
Fingerprint number &name list)
B. To change/ cover Master fingerprint can erase ALLenrolled fingerprints.
1.Input correct8 digits Emergency PIN:
NOTE: A. Every time you input a number, blue background will light up. The
pause between 2presses should not be longer than4 seconds;
B. If invalid PIN was entered 3 times continuously, the button “1”,”2”,”3” will
2.6.2 How to erase group member fingerprint?
2-8
1. The same operation withthe steps 1 and 2 in 2.6.1
2. Press button “2”, a long beep is heard, red indicator goes out, green indicator
lights .(Figure2-8)
Dieses Handbuch passt für folgende Modelle
1
Inhaltsverzeichnis
Andere Q-See Sperren Handbücher


