RedBack Laser ol28x Bedienungsanleitung


CONTENTS
Introduction and OL28X™ 3
OL28X™Diagram 4
Operating Instructions 6
Getting Started 6
Levelling 7
Vertical Alignment 7
Distance Estimation 8
Angle Estimation 9
Calibration Self Check & Technical Specications 10
Care & Maintenance, Trouble Shooting 11
Warranty 12
2
Copyright © CMI LasersTM RedBack lasersTM and Level1LasersTM . All rights reserved CMI Industries Pty Ltd 2010
No artwork or photographs produced by CMI Industries Pty Ltd may be used copied or reproduced without the written consent
from CMI Industries Pty Ltd

3
OL28XTM INTRODUCTION
Congratulations on purchasing the OL28X™ an auto levelling optical dumpy
level ideal for general site levelling, alignment and surveying.
The OL28X™ features superior optics and lenses making the image crisp
and clear and the generous 28x magnication is ideal for accurately reading
staffs without making the eld of view too narrow.
The OL28X™ is built tough with a cast metal body which offers protection
from dust and water.
The OL28X™ is simple to use. Use the rough levelling bullseye vial to get the
unit into self levelling range and the magnetically dampened compensator
does the rest.
The OL28X™ features a rubber anti-glare sun screen for the eyepiece
making use during tricky sun positions much more comfortable.
The OL28X™ is a truly professional tool, designed to be used day in and day
out and built with quality materials, its tough and comes with a Two Year
Redback Warranty. (See page 12)
www.redbacklasers.com.au
OL28X™ Included Accessories
• OL28X™ Dumpy Level
• Protective Carry Case
• Protective Lens Cap
• Plumb Bob
• Lens Cleaning Cloth
• Instruction Manual

4
OL28XTM DIAGRAMS
OL28XTM Optical Dumpy Unit
1. Lens Cover
2. Focus
3. Rubber Eypeice Sheild
4. Eyepiece/Cross Hair Focus
5. Angle Estimator
6. Levelling Feet
7. Fine rotation Adjustment
www.redbacklasers.com.au
Rough Levelling Vial
OL28X
Back
Red
Lasers
TM
12
3
4
5
6
7

5
Cross & Stadia Lines
www.redbacklasers.com.au
Rough Levelling Vial
Cross Hair
Telexcopic Staff
(optional extra)
Top Stadia Line
View through OL28X
Bottom Stadia Line
Bubble Vial is roughly levelled
using adjustment feet. The
bubble ONLY NEEDS TO BE
SOMEWHERE IN THE CIRCLE
for the dumpy level to self
level. Getting the bubble exactly
central does not affect accuracy
as the self levelling compensator
is in control of this.

6www.redbacklasers.com.au
OL28XTM OPERATING INSTRUCTIONS
Getting Started
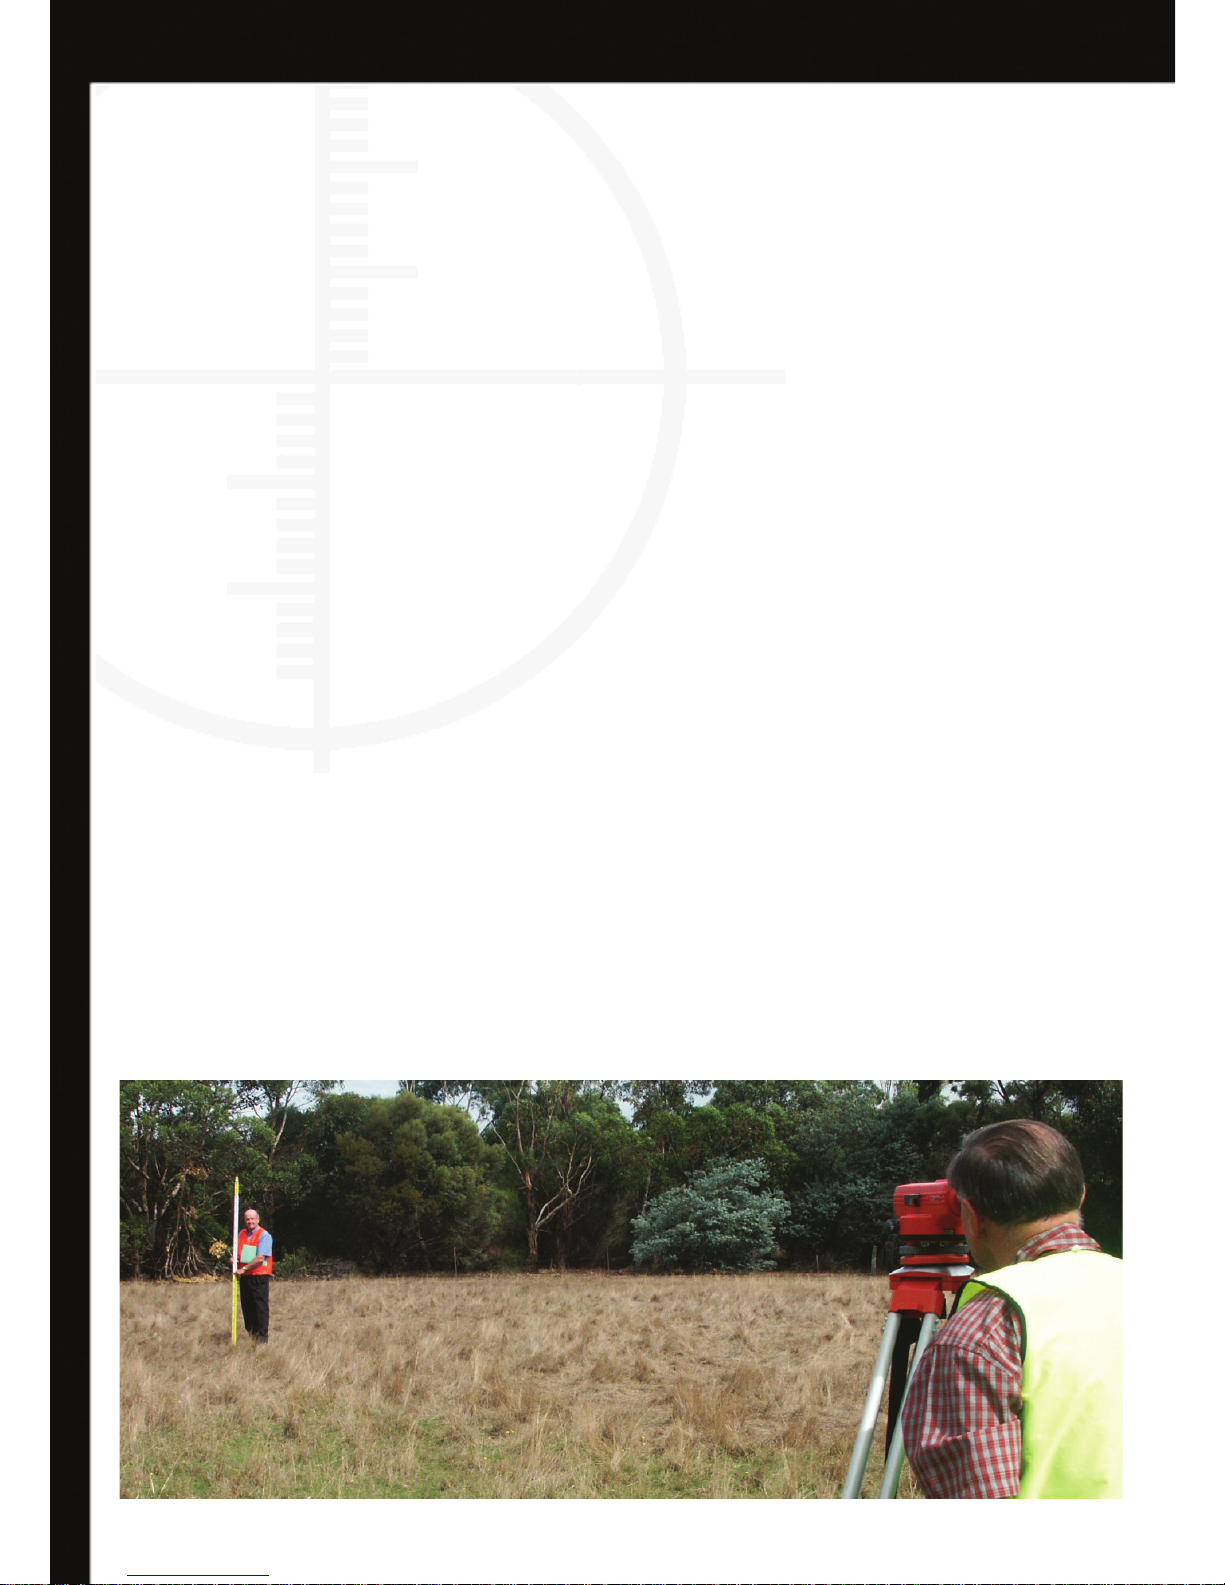
The OL28X is best operated on a heavy duty domed top tripod (Redbacl
model HDD51). Place the Dumpy Level on the tripod and locate the locking
screw into the base of the unit. Before tightening the screw completely
roughly level the OL28X on the dome of the tripod, using the bubble vial as
a guide. The locking screw can now be tightened and the three adjustment
feet used to bring the bubble in the vial into the circle. Note: The bubble
vial is used only to get the dumpy into self levelling range (anywhere within
the circle) once in range the automatic compensator takes over and levels
the view through the dumpy to a high level of accuracy.
Next, the front of the dumpy level needs to be pointed at the required
target/staff. This is achieved with the help of the sight built into the top
housing. Rotate the complete level on its base to be roughly aimed then
whilst looking through the eyepiece of the unit use one of the ne rotation
adjustment knobs (either on the right or left of the unit - see diagram
page4) to get on target.
The OL28X will require focussing depending on the distance the target/staff
is away from the unit. Focus the dumpy by looking through the eyepiece
and turning the large focus knob on the right hand side of the unit.
The Cross Hair may also need focussing this is done by rotating the eyepeice
itself whilst looking through it untill you see a clear and sharp vertical
and horizontal cross hair lines. Note it is possible to make the cross hair
completely disapear with this adjustment.

7
www.redbacklasers.com.au
Levelling with the OL28X
Levelling with a dumpy level is a two person operation, one to hold the staff
and one to look through the unit and read the height on the staff.
To level simply look through the eyepiece at the staff and make a mental
note of the height indicated by the central horizontal line of the cross hair,
now by moving the staff to various points on site you can set the same height
and so have a level site.
Vertical Alignment with the OL28X
The OL28X can be used for vertical alignment, such as fence post alignment.
This is simply acheived by placing the dumpy level over the alignment line,
this can be done accuratly by using the plumb bob attached to the hanging
point on the bottom of the tripod locking screw.
Next the OL28X is rotated until it is lined up with the other end of the
alignment line. Using the vertical line on the eyepiece cross hair the operator
can indicate to the post marker were each post needs to go along the
alignment line.

8
OL28XTM OPERATING INSTRUCTIONS cont.
www.redbacklasers.com.au
Distance Estimation with the OL28X
The OL28X can be used to estimate distances between the unit and the staff
with the use of the “Stadia” lines whilst looking through the eyepiece.
By using the plumb bob hanging from under the locking screw of the tripod
the exact position of the dumpy level can be marked on the ground. Next
set the staff up at the point that you want to estimate the distance to and
look through the eyepiece. Note the number of centimeters on the staff
between the top and bottom stadia lines (short lines see page5), multiply
this measurement by 100 and you have the distance between dumpy and
staff in centimeters. e.g. 5cm x 100 = 500cm which is 5m In other words
whatever you read in centermetrs is the distance in meters.
5cm
5m

9
OL28XTM OPERATING INSTRUCTIONS cont.
www.redbacklasers.com.au
Angle Estimation with the OL28X
The OL28X can be used to estimate angles with the use of the angle nder
scale.
Simply aim the dumpy level at the target point using the cross hair and zero
off the angle nder scale by rotating the adjustment ring under the nder
scale. Then rotate the dumpy level noting the angle on the nder.

10
OL28XTM TECHNICAL SPECIFICATIONS
Magnication 28x
Object Aperture ≥42mm
Min Focus Distance 0.3m
Compensator Working Range ±15′
Compensator Error ≤±0.3″/1′
Setting Accuracy ≤±0.5″
Temperature Range -25oC - 50oC
IP Dust Water Resistance IP66
Technical Specications
Calibration & Self Check
All Redback Lasers and Levels have been checked for calibration and certied
by one of our technicians here in Australia prior to despatch and should
under normal conditions not go out of calibration. A calibration certied
sticker with the date and name of technician is located on the laser/level
itself. It is worth checking calibration from time to time particularly after
any known knocks or drops. An easy way to continually check calibration is
to always double check you work with the laser/level located in a different
position. Various other methods for checking calibration can be found at
www.redbacklasers.com.au/downloads or the laser/level can be
returned to our service department for checking and re-calibration. We at
Redback Lasers provide a once off free calibration and check within the
duration of the warranty period see page 12 for details.
www.redbacklasers.com.au
Inhaltsverzeichnis
Andere RedBack Laser Laser-Nivelliergerät Handbücher
Beliebte Laser-Nivelliergerät Handbücher anderer Marken

Nedo
Nedo ET-5 Bedienungsanleitung

geo-FENNEL
geo-FENNEL Maxi-Liner FL 65 HP Bedienungsanleitung

LaserLiner
LaserLiner X2-Laser Bedienungsanleitung

Spectra
Spectra LL300N Bedienungsanleitung

geo-FENNEL
geo-FENNEL Selection PRO FLG 40-PowerCross GREEN SP Bedienungsanleitung

Nedo
Nedo Crossliner 4 Bedienungsanleitung


