Sabre 1842GV Bedienungsanleitung

John Deere
Worldwide Commercial And
Consumer Equipment Division
OMM138147 J8
English
J8 Sabre Yard Tractors
1842GV and 1842HV
1848GV and 1848HV
Serial No. (020,001-)
OPERATOR’S MANUAL
North American Version
Litho in U.S.A.

Introduction
INTRODUCTION
THANK YOU for purchasing a John Deere
product.
Read this manual and your attachment manual
thoroughly. Failure to do so could result in personal
injury or equipment damage.
This manual should be considered a permanent part of
your machine and should remain with the machine when
you sell it.
Product warranty is provided as part of John Deere’s
support program for customers who operate and
maintain their equipment as described in this manual.
The product warranty is explained on the warranty
certificate you received from your dealer.
Measurements in this manual are metric units and their
U.S. customary equivalents. RIGHT-HAND and LEFT-
HAND sides are determined by facing in the direction
the machine will travel when going forward. When you
see a broken line arrow (------>), it indicates the part it is
pointing to is hidden.
Record identification numbers below. Be sure to record
all the numbers to help in tracing the machine if it is
stolen. You also need to give these numbers to your
dealer when you order parts.
DATE OF PURCHASE: _______________________________
DEALER NAME: ____________________________________
DEALER PHONE: ___________________________________
Sabre® is a registered trademark of Deere & Company
cWARNING: The Engine Exhaust from this
product contains chemicals known to the
State of California to cause cancer, birth
defects or other reproductive harm.
CALIFORNIA Proposition 65 Warning

Introduction
INTRODUCTION
Briggs & Stratton Engine Information
Located on Rear of Tractor
Located on Engine
Code
Type
Model
M88555
Vehicle Serial Number:
M88589

Table of Contents
TABLE OF CONTENTS
OMM138147 J8
All information, illustrations and
specifications in this manual are based
on the latest information at the time of
publication. The right is reserved to
make changes at any time without
notice.
COPYRIGHT© 1998
Deere & Co.
John Deere Worldwide Commercial and
Consumer Equipment Division
Horicon, WI
All rights reserved
Previous Editions
COPYRIGHT© 1997
Assembly............................................................................................................................................... 1
Safety Signs........................................................................................................................................... 8
Controls ............................................................................................................................................... 11
Operating the Machine ........................................................................................................................13
Operating the Mower ...........................................................................................................................30
Replacement Parts.............................................................................................................................. 37
Service Machine Safely....................................................................................................................... 39
Service Interval Chart.......................................................................................................................... 41
Service Engine .................................................................................................................................... 43
Service Transmission........................................................................................................................... 48
Service Mower.....................................................................................................................................49
Service Electrical................................................................................................................................. 56
Service Miscellaneous......................................................................................................................... 61
Removing Mower.................................................................................................................................69
Installing Mower................................................................................................................................... 71
Troubleshooting ..................................................................................................................................72
Storing Machine................................................................................................................................... 77
Specifications....................................................................................................................................... 80
Warranty .............................................................................................................................................. 83
Index.................................................................................................................................................... 89
Service Literature ................................................................................................................................93

Assembly - Page 1
ASSEMBLY
1842GV and 1842HV Only - Box of Parts
NOTE: If you are missing any parts see the
Replacement Parts section for additional service
part numbers.
A Sabre Operator’s Manual
Safety Video M135884
M134321
B Steering Wheel AM121918
C Bag of Hardware
• 1 - Shoulder bolt-Steering Wheel
• 1 - Nut- Steering Wheel
• 1 - Washer- Steering Wheel
• 2 - M8x16 Bolts- Battery
• 2 - M8x16 Nut- Battery
• 2 - Keys
H63686
M87404
M63662
24H1721
19M7775
14M7303
M127340
C
B
A
M88598

Assembly - Page 2
ASSEMBLY
1848GV and 1848HV Only - Box of Parts
NOTE: If you are missing any parts see the
Replacement Parts section for additional service
part numbers.
A Sabre Operator’s Manual
Safety Video M135884
M134321
B Mower Gage Wheels (2) M111489
C Mower Drive Belt M110312
D Mower Discharge Chute with:
Chute Pin
Chute Spring
Chute Hinge
M123859
M112899
M83410
M83411
E Front Lift Rod Assembly:
Rod
Welded Pivot
Clevis (2)
Spacers (2)
Lock Nuts (2)
Jam Nuts (2)
M132735
AM119811
M113014
M110875
M85540
14M7275
F Steering Wheel AM121918
G Bag of Hardware
• 2 - Bolts
• 2 - Nuts
• 2 - Bushings
• 2 - Washers
• 1 - Shoulder Bolt-Steering Wheel
• 1 - Nut-Steering Wheel
• 1 - Washer-Steering Wheel
• 2 - M8x16 Bolts-Battery
• 2 - M8x16 Nut-Battery
• 2 - M8x20 Bolts-Chute
• 2 - M8x20 Nuts-Chute
• 2 - Keys
H63686
19M7274
14M7396
M111491
M110698
M87404
M63662
24H1721
19M7775
14M7303
03M7184
14M7464
M127340
C
B
D
E
A
F
G
M88598A

Assembly - Page 3
ASSEMBLY
Remove Packaging
Remove plastic and paper.
Remove wire bands (A) from front and rear tires.
1848GV and 1848HV Only - Remove Mower
Deck from Side of Crate
1. Remove two bolts (A) from crate.
2. Using a hoist or a safe lifting device, remove mower
deck from crate.
Install Steering Wheel
1. Put front wheels in the straight forward position.
2. Lubricate the steering shaft.
3. Install steering wheel with Sabre logo in the upright
position.
4. Install shoulder bolt (A). Drive bolt in until head of bolt
contacts steering wheel.
5. Install washer and nut (B).
6. Tighten lock nut until it is snug. Do not tighten lock nut
to pull washer or head of bolt into steering wheel.
Remove Tractor from Crate
1. GEAR MODEL: Put transmission shift lever in
N (Neutral).
AUTOMATIC MODEL: Pull out free-wheeling lever (A).
2. Carefully push tractor off crate.
3. Lock park brake.
4. AUTOMATIC MODEL: Push free-wheeling lever (A)
IN before operating tractor.
cCAUTION: Avoid eye injury. Wear eye
protection when removing wire bands. Wire
bands are under tension and could snap
when removed.
cCAUTION: •Mower Deck is heavy. To avoid
injury, use a hoist or safe lifting device when
removing mower deck from crate.
•Mower Blades are sharp. Always wear gloves
when handling mower deck.
A
M88599
A
A
M92883
M88566
A
B
M88560
A
Assembly - Page 4
ASSEMBLY
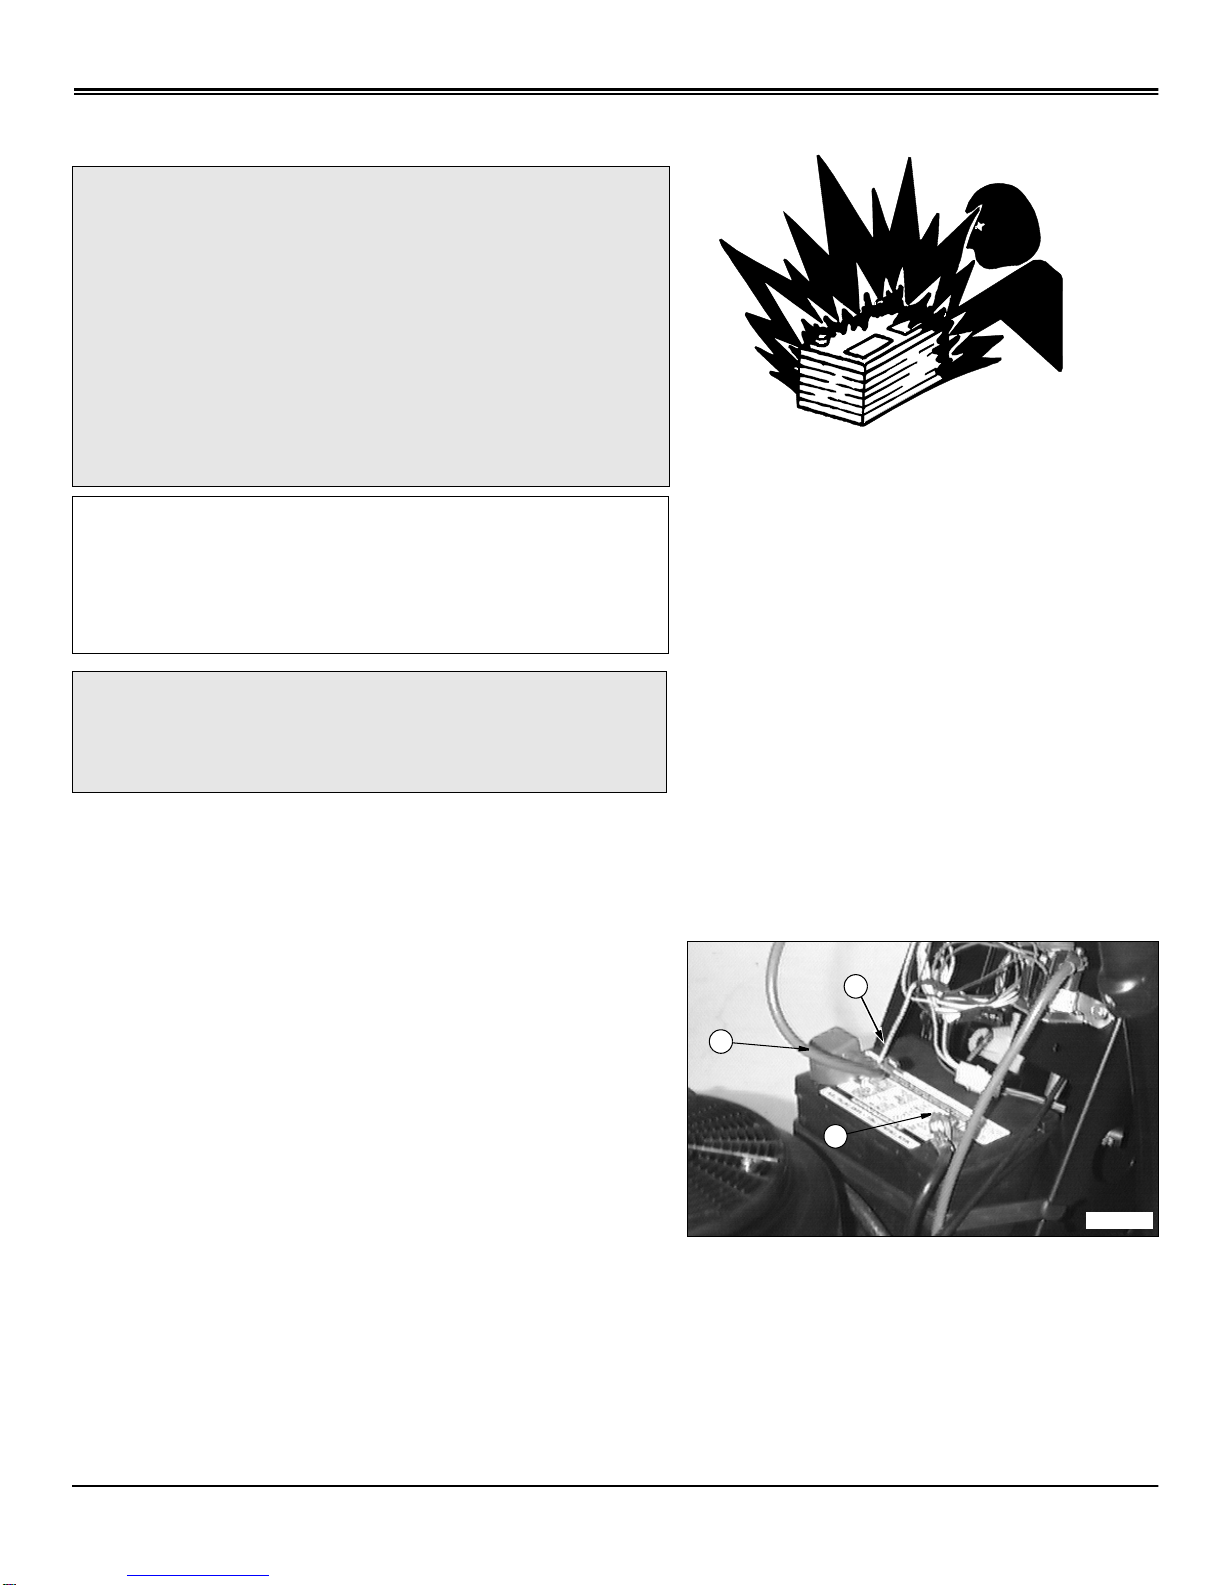
Connect and Check Battery
NOTE: Do not remove the BLACK negative (–)
protective cap at this time.
1. Remove and discard the RED positive (+) protective
cap from the positive (+) battery terminal.
2. Connect blue harness wire (B) and RED positive (+)
cable (A) to battery. Apply petroleum jelly or silicone
spray to terminal to prevent corrosion. Make sure
connection is tight. Install the red terminal cover.
3. Remove and discard the BLACK (–) protective cap
from the negative battery terminal.
4. Connect black negative (–) cable (C) to battery. Apply
petroleum jelly or silicone spray to terminal to prevent
corrosion. Make sure connection is tight.
cCAUTION: Prevent Battery Explosions:
- Keep sparks, lighted matches, and open
flame away from the top of battery. Battery
gas can explode.
- Never check battery charge by placing a
metal object across the posts. Use a volt-
meter or hydrometer.
- Do not charge a frozen battery; it may
explode. Warm battery to 16° C (60°F)
IMPORTANT: This battery comes fully charged. If
the mower is not used by the Service Expiration
Date indicated on the battery, charge the battery.
(See Charging the Battery in the Service -
Electrical section.)
cCAUTION: DO NOT attempt to open, add fluid
or service battery. Any attempt to do so will
void warranty and lead to possible injury.
A
C
B
M88558
Assembly - Page 5
ASSEMBLY
1848GV and 1848HV Only - Assemble and
Install Mower Deck
Install Rear Gage Wheels
1. Install rear gage wheels, one on each side, using bolt
(A), bushing (B), washer (C), and tighten with nut (D).
2. Adjust gage wheels after mower deck is installed.
(See Adjust Mower Gage Wheels in Operating the
Mower section.)
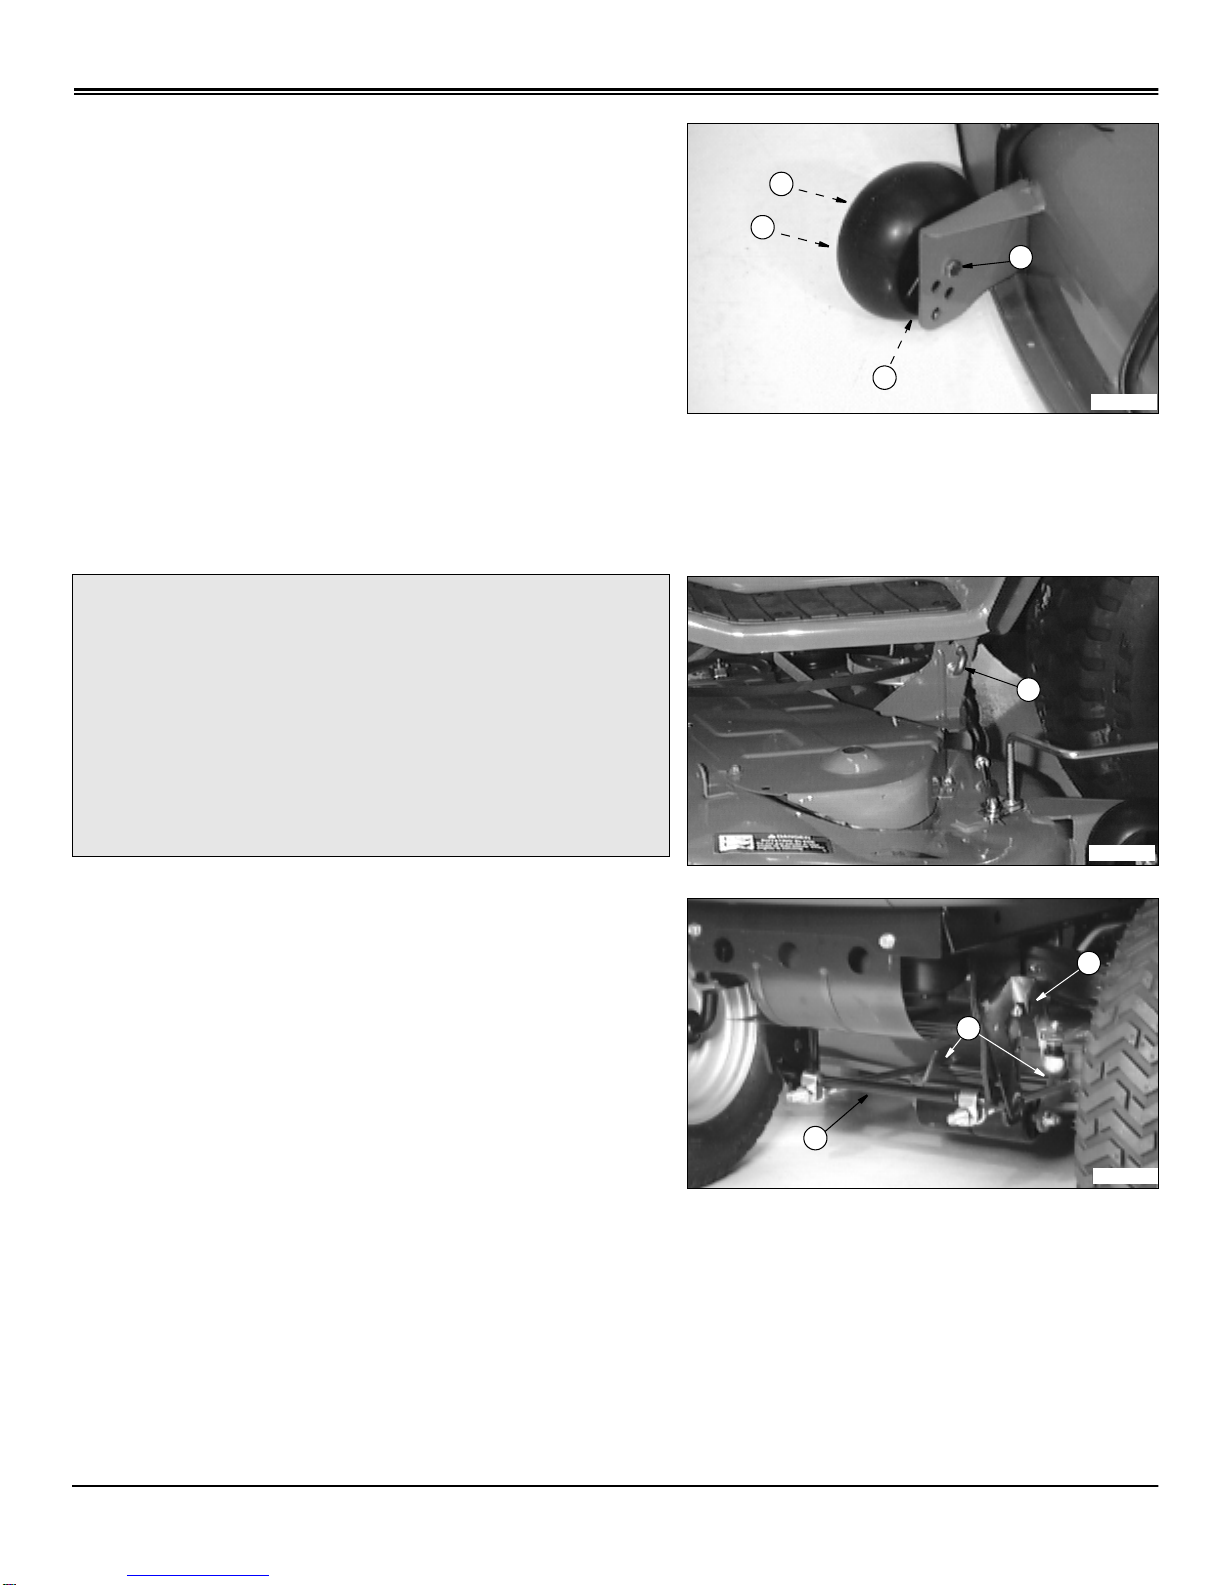
Install Mower Deck
1. STOP engine, LOCK park brake, push PTO switch
down to DISENGAGE, turn key to the OFF position, and
remove key.
2. Raise mower lift lever to TRANSPORT (upper)
position.
3. Slide mower under the tractor.
4. Put wood blocks under each side of mower.
5. Put mower lift lever in the MOWING (lower) position.
6. Install rear draft arms, one on each side of tractor, to
mower lift brackets with spring loaded J-pins (A).
7. Put front lift rod assembly (B) in slotted brackets (C)
on mower deck and install the front lift rod assembly to
the front of the tractor frame.
8. Push up on lever (D) and lock into tractor frame.
cCAUTION: Avoid injury, before installing
mower on machine: STOP engine. Remove
key. Wait for all moving parts to STOP.
Avoid injury from loaded spring: LOCK lift
lever before installing mower.
Avoid injury from spring loaded rod: Make
sure you have a tight grip on drive belt
tension rod when installing.
M88571
D
A
B
C
M88577
A
M88578
D
C
B

Assembly - Page 6
ASSEMBLY
9. Put mower drive belt (E) on engine drive sheave.
10.Push drive belt tension rod (F) into bracket (G).
11.Raise mower lift lever to TRANSPORT (upper)
position.
12.Remove wood blocks from both sides of mower.
13.Level mower. (See Leveling Mower in Operating the
Mower section.)
Install Mower Discharge Chute
1. Install mower discharge chute to mower deck with two
M8 x 20 bolts (A) and lock nuts (B).
2. Tighten nuts to 20 N•m (15 ft-lb).
Break-In Electric PTO Clutch
1. Start engine and push throttle lever (A) up to full
throttle (
r) position.
2. With no load on mower, ENGAGE PTO (B) and allow
mower to run for 10 seconds.
3. DISENGAGE PTO and wait 10 seconds.
4. Repeat Step 2 for 12-15 cycles.
5. PTO clutch is now properly burnished.
cCAUTION: To avoid injury:-NEVER operate
mower without chute in place.
-Hold chute firmly on mower deck when
installing, mower discharge chute is spring
loaded.
-After installing chute on deck check to make
sure hinge on chute is working properly by
opening chute and releasing it. Chute MUST
spring back to the LOWERED position.
M88579
EF
G
M47397
A
B
M88557
B
A
Dieses Handbuch passt für folgende Modelle
3
Inhaltsverzeichnis
Andere Sabre Rasenmäher Handbücher


Beliebte Rasenmäher Handbücher anderer Marken


TALEN TOOLS
TALEN TOOLS AVR HGM30 Bedienungsanleitung

DEWEZE
DEWEZE ATM-725 Bedienungsanleitung

Weed Eater
Weed Eater 180083 Bedienungsanleitung

Husqvarna
Husqvarna Poulan Pro PP185A42 Bedienungsanleitung

Better Outdoor Products
Better Outdoor Products Quick Series Bedienungsanleitung

Cub Cadet
Cub Cadet 23HP Z-Force 60 Betriebsanleitung


