Sunwebcam Solar 4G Camera Bedienungsanleitung

Sunwebcam Solar 4G Camera
User Manual

TABLE OF CONTENTS
1. Package List................................................................................................................................................................. 1
2. The introduction of camera's whole structure...........................................................................................................2
2.1 The structure of the Camera.............................................................................................................................2
3. Notice.......................................................................................................................................................................... 3
4. User Guide for Smart Phone App................................................................................................................................4
4.1. Download and register.....................................................................................................................................4
4.1.1. Download the app................................................................................................................................ 4
4.1.2. register.................................................................................................................................................. 4
4.1.3. Add and manage...................................................................................................................................4
4.2. Wi-Fi camera.................................................................................................................................................... 4
4.2.1. Connect the Wi-Fi of cameras.............................................................................................................. 4
4.2.2. Local Camera.........................................................................................................................................5
4.2.3. Set the camera to connect to the router..............................................................................................5
4.2.4. Add camera to account.........................................................................................................................6
4.3. 4G camera........................................................................................................................................................ 7
4.3.1. 3G/4G Parameters setting.................................................................................................................... 7
4.4. Ethernet camera.............................................................................................................................................. 8
4.5. List of cameras and Operation.........................................................................................................................8
4.5.1. Interface................................................................................................................................................8
4.5.2. RTMP push flow Settings...................................................................................................................... 9
4.5.3. Add RF devices....................................................................................................................................10
4.5.4. SD / Cloud Record............................................................................................................................... 10
4.5.5. Locate Camera.................................................................................................................................... 11
5. User Guide for PC Client............................................................................................................................................11
5.1. Preparations required before installation..................................................................................................... 11
5.2. Detailed introductions for installation process............................................................................................. 11
5.2.1. Installation process preview...............................................................................................................11
5.2.2. Detailed introductions for basic installation process.........................................................................11
5.3. Installation of RFID accessories (optional).................................................................................................... 16
5.4. Camera advanced parameter setting............................................................................................................ 16
5.4.1. The parameter settings for 3G, 4G version........................................................................................ 16
5.4.2. Audio and video parameters settings.................................................................................................17
5.4.3. Video recording parameters settings................................................................................................. 18
5.4.4. Motion Zone....................................................................................................................................... 19
5.4.5. FTP recording (support TI program)................................................................................................... 19
5.4.6. Cloud Storage Settings........................................................................................................................21
5.4.7. Other important settings, including RS485 baud rate and IR lighting control mode........................ 21
5.4.8. System Information.............................................................................................................................22
6. Advanced function introduction of 51 See PC clients.............................................................................................. 23
6.1. Advanced setting............................................................................................................................................23
6.2. Browsing cloud video.....................................................................................................................................23
6.3. Alarming PUSH Notification and remote SD card video recording linkage...................................................25
7. How to set up the product........................................................................................................................................25
7.1. Assembly of solar panel.................................................................................................................................25

TABLE OF CONTENTS
7.2. How to assemble camera...............................................................................................................................27
7.3. Mount the solar panel or camera on the pole.............................................................................................. 28
7.4. Mount the solar panel or camera on the wall...............................................................................................30

1
1. Package List
Solar Panel x1
4G Camera x1
Bracket x2
Holder for Pole x2
Holder for angle x2
Stainless Ribbon x6
U Ring (89mm) x2
U Ring (140mm) x2
Accessories (screws, washers, nuts...)

2
Battery set is built inside. Protective foam is for transportation, please remove it before use.
2. The introduction of camera's whole structure
2.1 The structure of the Camera
Front
cam
IR light
Light

3
Back
install the antenna as the picture shown, the wifi antenna is on the left, the 4G antenna is on the right, they are
made of different material, please don't replace each other! you mast install them in a right way!
3. Notice
1) The internal structure
The Micro SD Card is inside, the SIM Card is outside.
2) The SIM Card's short side must be upwards, otherwise you will destroy the card slot. Direction is as the picture
shown:
Wi-Fi antenna
4G antenna
Micro SD
SIM Card

4
3) The TF card's long side must be upwards, otherwise you will destroy the card slot. Direction is as the picture
shown:
4. User Guide for Smart Phone App
4.1.Download and register
4.1.1. Download the app
You can search 4GCMS on Google Play to download the app!
You can search 4GCMS on App Store to download the app!
4.1.2. register
When you login successfully, you can click the button named ‘register’, you should put your account number and
password in the blank, after that you should click the button named ‘register’, if you register successfully, the app
will show you login!
4.1.3. Add and manage
4GCMS have many ways to add the camera. 4GCMS camera can use the Wi-Fi, 4G and Ethernet to connect the
internet. Here are three ways to add the camera to the account.
4.2.Wi-Fi camera
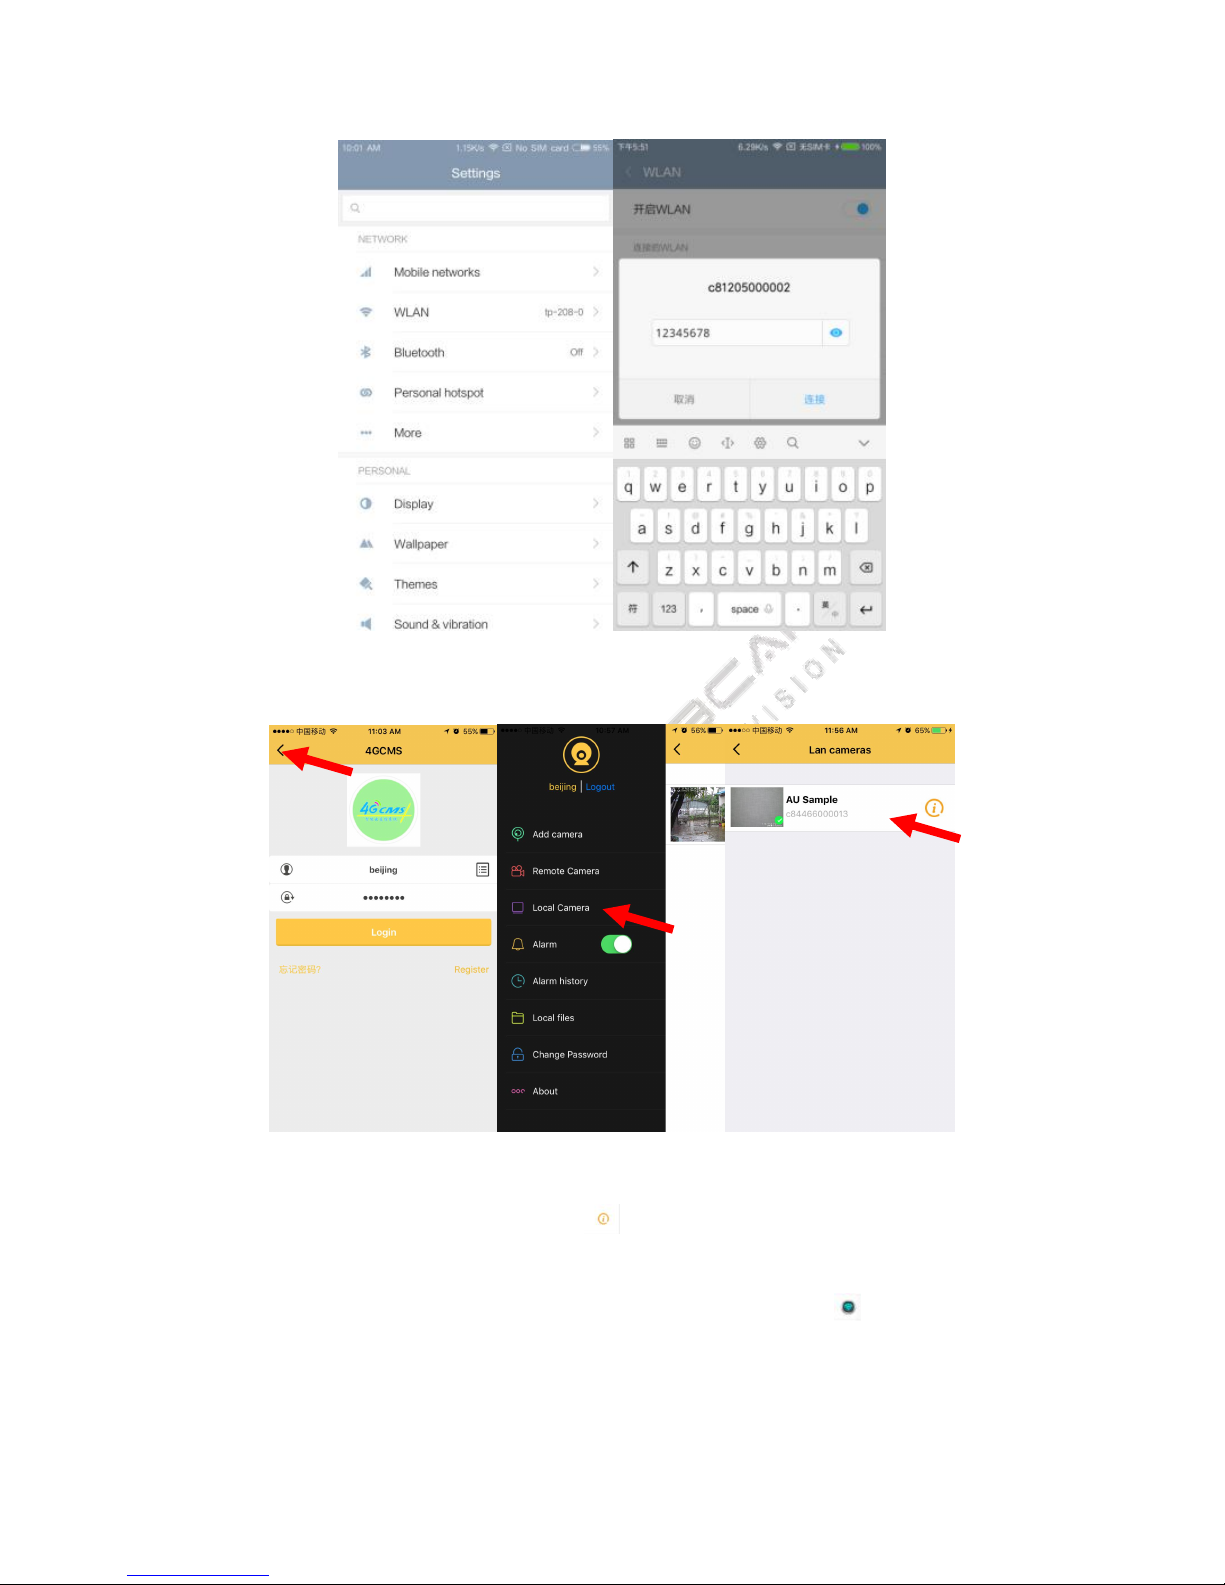
4.2.1. Connect the Wi-Fi of cameras
When the camera start, it will launch a Wi-Fi, named by c8 starting. You should connect this Wi-Fi, password is
12345678.
5
4.2.2. Local Camera
Open the 4GCMS app, click the local device, you will see the camera after you drop down to refresh the list.
4.2.3. Set the camera to connect to the router
Set the camera connect the Wi-Fi. Click the button , you can see the device information, click the setting
button, choose the wireless Network Parameters, open the Wi-Fi client. SSID is the Wi-Fi name which one you
want to connect, then you should input the password, click the save button(click you will see the Wi-Fi list,
choose the Wi-Fi you want to connect).

6
4.2.4. Add camera to account
When you set Wi-Fi successfully, the Wi-Fi of camera will disappear, you should exit the app, open the Wi-Fi
setting interface, connect the Wi-Fi which the camera connect, then you open the app, login to your account,
choose ‘add devices by ID’, select the camera you want to bind, click button next (need about two or three
minutes camera can be seen in the list, please be patient), Do not operate cell phone at this moment, until the
camera add successfully.back to sliding menu, click “Remote device”, refresh the list, you can see the camera you
add.If the camera has not appear in the list, the Wi-Fi setting is failed, you should long press the reset button
which behind the camera,5 second, then you should set again.
7
4.3.4G camera
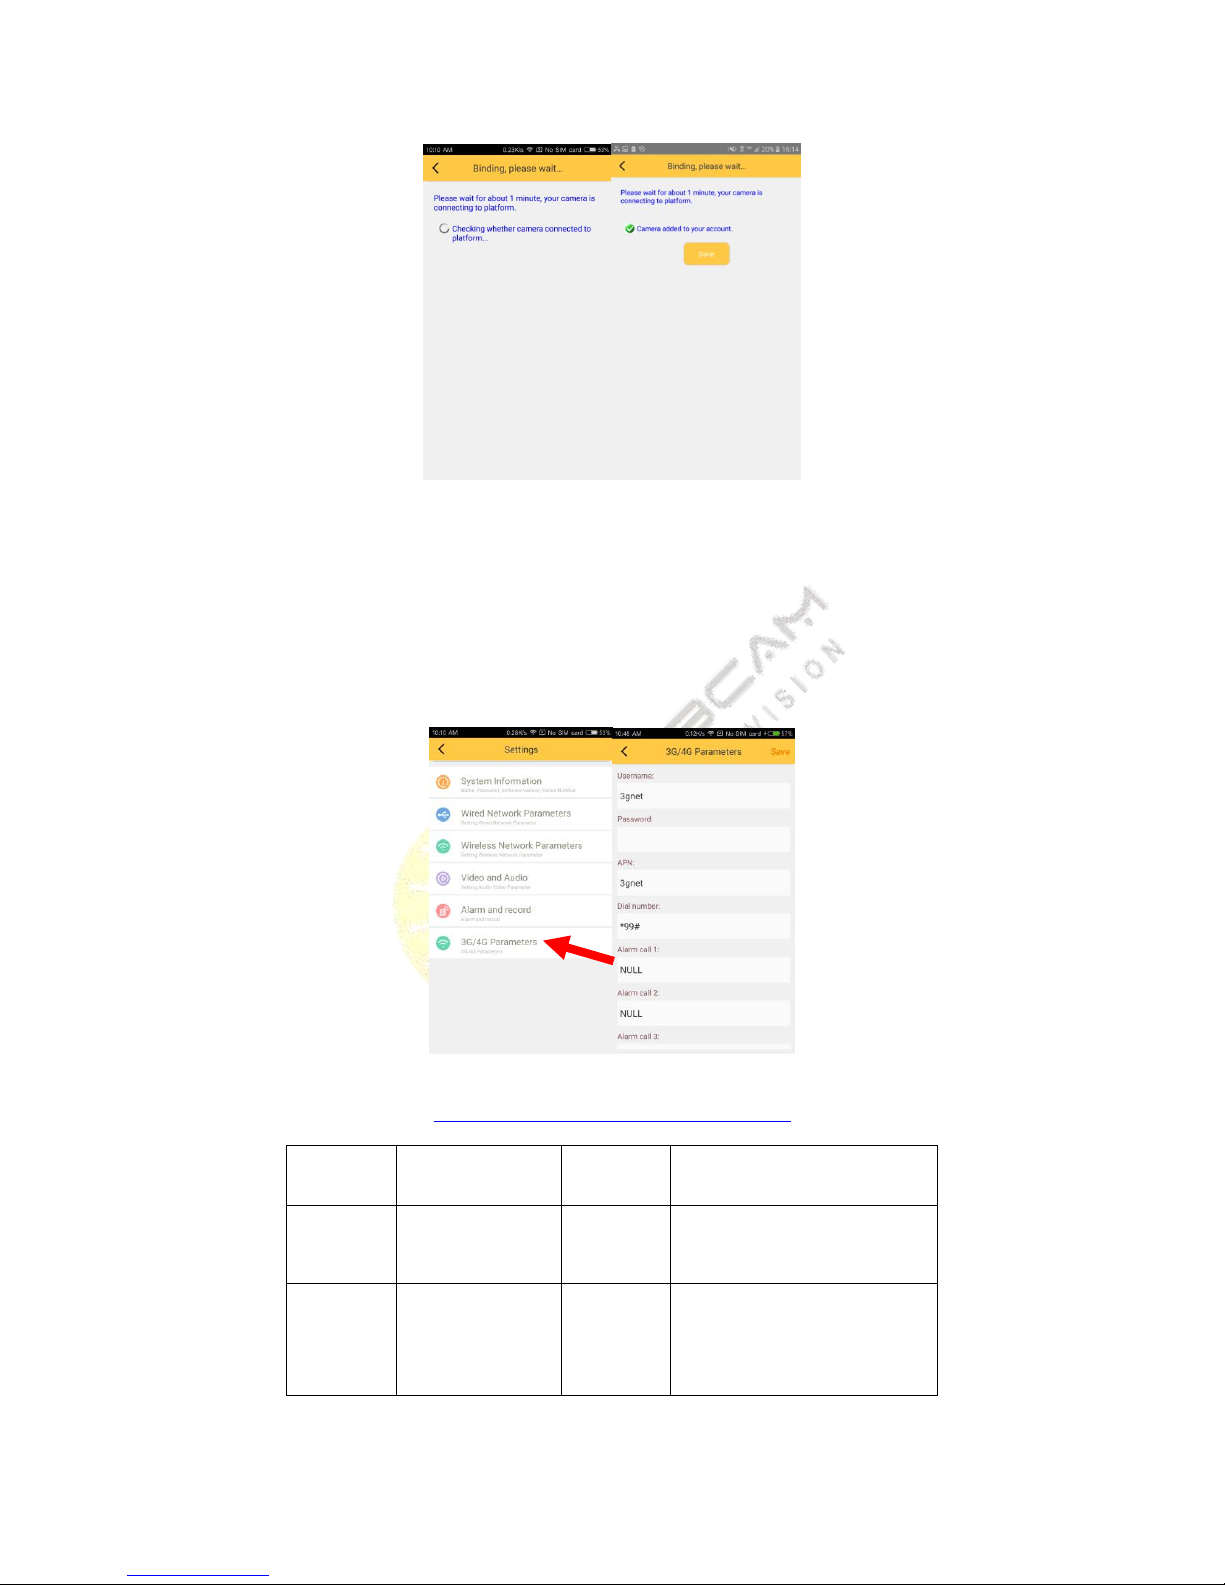
Insert the card correctly, power on the camera, (about 3 minute, please wait), then click ‘add camera’, choose
‘add devices by ID’, input the camera’s ID, click button next, Do not operate cell phone at this moment, until the
camera add successfully. Back to sliding menu, click ‘Remote device’, refresh the list, you can see the camera you
add.
4.3.1. 3G/4G Parameters setting
http://wiki.apnchanger.org/Main_Page
ISP
APN
Dial
Number
account
password
Germany
vodafone
web.vodafone.de
*99#
vodafone
vodafone
Bulgaria
VIVACOM
internet.vivacom.
bg
*99#
VIVACOM
VIVACOM
Inhaltsverzeichnis


