
Warm Audio WA-MBA Bedienungsanleitung
WA -MBA
PROFESSIONAL BROADCAST BOOM ARM
QUICK START GUIDE
The WA-MBA is a professional broadcast boom arm, with an internal spring,
three adjustment points and a built-in cable management channel for a clean
on-camera look for your stream. Whether you’re performing voiceovers, game
streaming or podcasting, the WA-MBA gives professional results every time.
2
GETTING STARTED
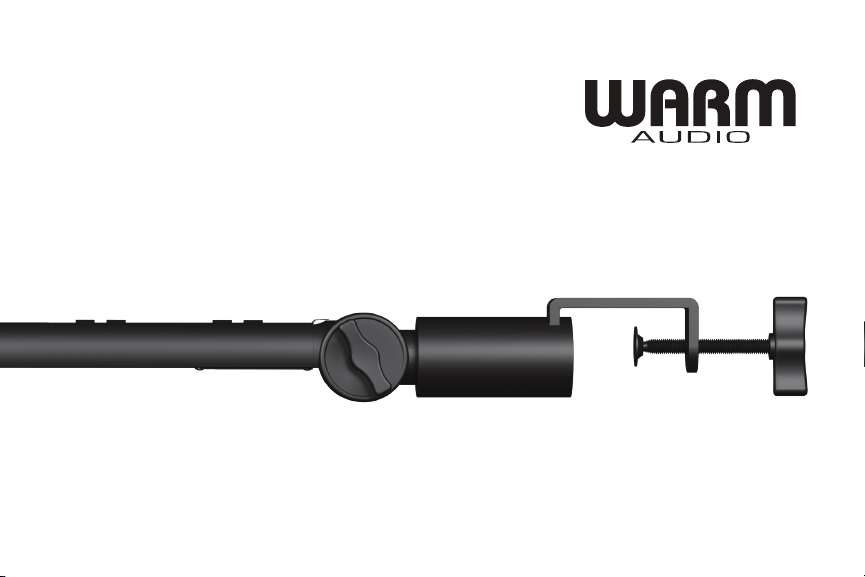
The MBA is intended to be mounted on a desktop or similar flat
surface, using the removable C-clamp assembly at the base of
the boom arm.
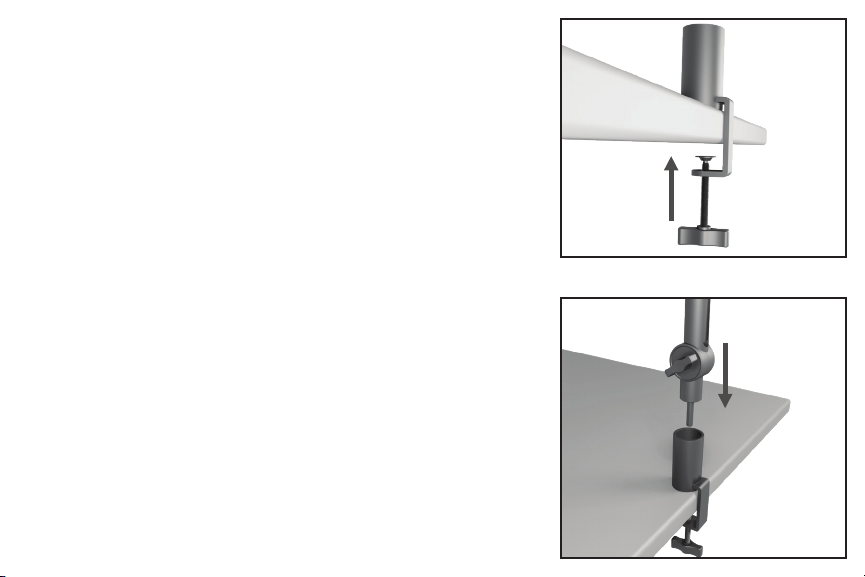
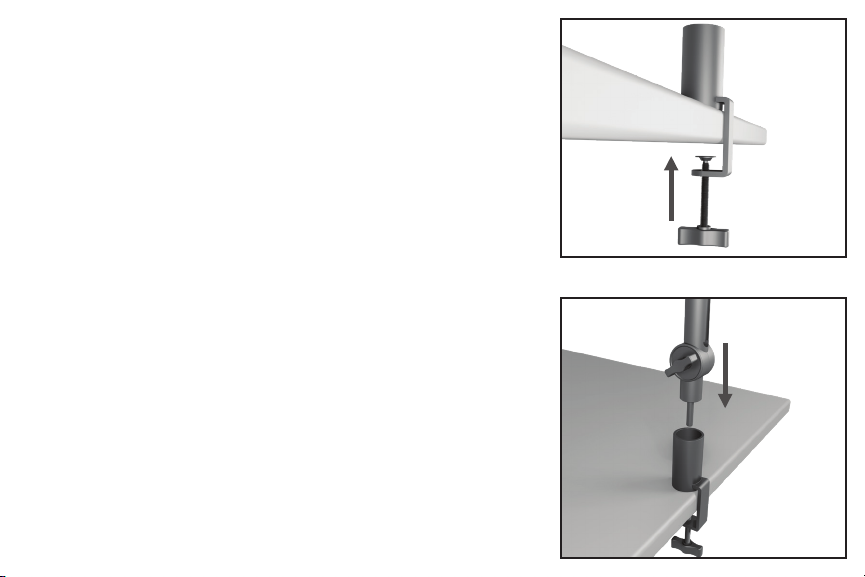
1. Begin by removing the C-clamp from the base of the
WA‑MBA, and then open the clamp enough to accommodate
the depth of your desktop by unscrewing the clamping bolt. The
clamp is seated properly when both of its surfaces are making
solid contact with the flat surfaces on the top and underside of
the desk (see Image A).
2. Tighten the bolt until the clamp assembly is secure and won’t
move unintentionally.
3. Lower the WA‑MBA boom arm assembly and fit it into the
clamp on the desktop - it should move easily and freely once
they are properly connected together.
Image A

3
SETTING UP YOUR MICROPHONE
The WA‑MBA is a professional boom arm, and there are a number of different ways to mount a microphone to it.
Microphones can attach to the MBA via hard or shock mount, or even directly to the microphone itself if desired.
The MBA can attach mounts or clips using either 3/8” or 5/8” threading (using the included adapter), and the
microphone can hang from underneath the arm (the traditional mount in broadcast situations), or be mounted face up
above it if desired.
1. Once it’s properly assembled on the C-clamp base, attach your microphone’s mount onto the WA‑MBA and make
sure it is secure (do not over-tighten, or you risk damaging the mounting threads).
2. Connect your microphone to the mount according to the manufacturer’s directions.
3. There are tightening bolts at the three bends in the boom arm assembly, each of which secures a different portion of
the arm’s movement. While holding the microphone firmly to prevent it from dropping or falling, slightly loosen the
clamps and move the mic into a rough approximation of where you would like it positioned long-term (don’t worry
about getting it perfect at this stage, as you will tweak the final position afterwards). Once the mic’s position is close
to where you would like it to be, re-tighten the clamps.

4
REFINE YOUR SETUP
Now that you have the MBA fully set up and your microphone is roughly in the right place, you can take the
time to get things looking and sounding perfect for your stream.
1. Sit down at your desk, and get your body into the position it will normally be in when you’re streaming.
2. Determine the best place for the microphone to be placed for both sound quality concerns and on-camera
look (if you’re using a camera). This will be different depending on the type of microphone you have and the
position of the camera and any lighting you’re using, and may require some experimentation to get right.
3. Once you’ve determined the proper angle and orientation for the microphone, hold the mic again for safety,
and manipulate the three tightening bolts again to move it into the proper position. Make sure that the mic sits
properly, and that the adjustment bolts are secure so that the arm will not droop over time.
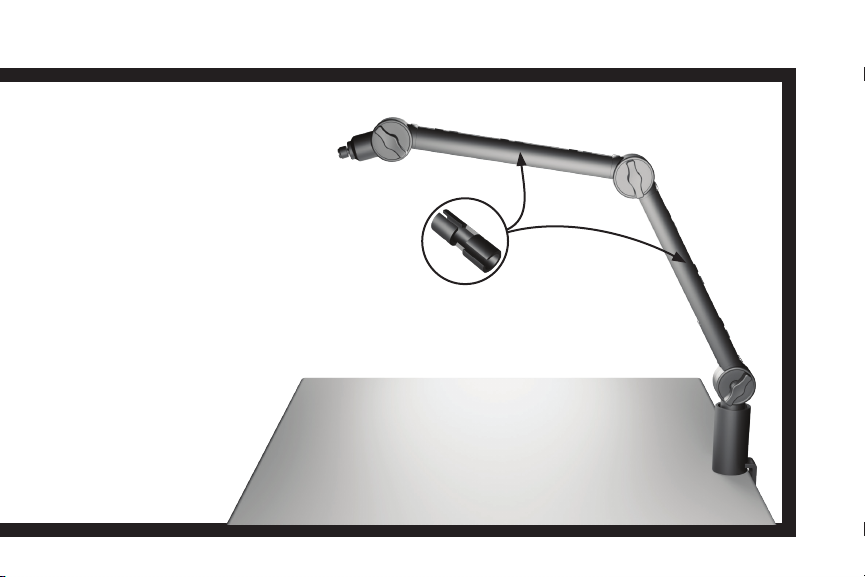
4. Now that your microphone is properly situated, you can clean up the final look by connecting the mic to its
cable and using the boom arm’s internal channel to tuck the cable out of sight. The WA‑MBA ships with a
set of six plastic clips that are designed to securely hold the cable into the hidden channel, but before you go
any further it’s a good idea to perform a “rough fit”, tucking the cable into the channel all the way down to the
C-Clamp to see where you will want to place the clips. We suggest using three clips on the cable that will be
inserted into the channel on the lower boom arm section, and three clips for the cable to be inserted into the
upper section’s channel.
5
5. Remove the cable from the channel, and
push three of the clips onto the cable length
that will be in the upper section, and push
the other three clips onto the cable length
that will be hidden in the lower section’s
channel. Slide the clips so that they are
roughly equidistant to each other, and tuck
the cable into the channel. Instant pro look! x3

6
TECHNICAL SPECIFICATIONS
Maximum Bearing Weight: 5 pounds (includes
both mic and shock-mount)
Threading Compatibility both 3/8” and 5/8”
threads are supported, using the included adapter
Top Arm Length: 36.5 cm
Bottom Arm Length: 36.5 cm
Cable Management: hidden channel for hiding
cable, using included retaining clips
BOX CONTENTS
WA-MBA Broadcast Boom Arm
Desktop C-Clamp mount
3/8” to 5/8” adapter
Cable Channel Clips

7
WARRANTY STATEMENT
Warm Audio warranties this product to be free from defect in materials and workmanship for one year from the date
of purchase, for the original purchaser to whom this equipment is registered. This warranty is non-transferrable.
This warranty is void in the event of damage incurred from unauthorized service to this unit, or from electrical or
mechanical modification. This warranty does not cover damage resulting from abuse, accidental damage, misuse,
improper electrical conditions such as mis-wiring, incorrect voltage or frequency, unstable power, disconnection from
earth ground (for products requiring a 3 pin, grounded power cable), or from exposure to hostile environmental
conditions such as moisture, humidity, smoke, fire, sand or other debris, and extreme temperatures.
Warm Audio will, at its sole discretion, repair or replace this product in a timely manner. This limited warranty extends
only to products determined to be defective and does not cover incidental costs such as equipment rental, loss of
revenue, etc. Please visit us at www.warmaudio.com for more information on your warranty, or to request
warranty service.
This warranty applies to products sold in the United States of America. For warranty information in any other country,
please refer to your local Warm Audio distributor. This warranty provides specific legal rights, which may vary from
state to state. Depending on the state in which you live, you may have rights in addition to those covered in this
statement. Please refer to your state laws or see your local Warm Audio retailer for more information.
8
9
WA -MBA
PROFESSIONELLER MIKROFONAUSLEGERARM
KURZANLEITUNG
Der WA-MBA ist ein professioneller Mikrofonauslegerarm mit einer internen Feder,
drei Einstellpunkten und einem integrierten Kabelverlegungskanal für ein klares
Aussehen Ihres Streams auf der Kamera. Egal, ob Sie Voiceover, Game-Streaming
oder Podcasting durchführen, der WA-MBA liefert stets professionelle Ergebnisse.
10
ERSTE SCHRITTE
Der MBA ist für die Montage auf einem Schreibtisch oder
einer ähnlichen flachen Oberfläche vorgesehen, wobei eine
abnehmbare C-Klammer an der Basis des Auslegerarms
verwendet wird.
1 Beginnen Sie damit, die C-Klammer von der Basis des WA-
MBA zu entfernen, und öffnen Sie dann die Klammer durch
Lösen der Klemmschraube so weit, dass sie sich der Tiefe Ihres
Schreibtisches anpasst. Die Klammer sitzt richtig, wenn ihre
beiden Flächen festen Kontakt mit den ebenen Flächen auf der
Ober- und Unterseite des Tisches haben (siehe Abbildung A).
2 Ziehen Sie die Schraube an, bis die Klammer gesichtert ist und
sich nicht unbeabsichtigt bewegen kann.
3 Senken Sie den Auslegerarm des WA-MBA ab und stecken Sie
diesen in die Klammer auf dem Schreibtisch – der Auslegerarm
sollte sich leicht und frei bewegen lassen, sobald sie richtig
miteinander verbunden sind.
Abbildung A
Inhaltsverzeichnis
Sprachen:
Beliebte Rack & Stand Handbücher anderer Marken

Salamander
Salamander Acadia AC/W/L400/WH Bedienungsanleitung

Fohhn
Fohhn VAT-09 Benutzerhandbuch

ricoo
ricoo FS0522 Bedienungsanleitung

AMSOIL
AMSOIL BMK-22 Kurzanleitung

Kargo Master
Kargo Master 48220 Bedienungsanleitung

Milestone AV Technologies
Milestone AV Technologies SIMPLICITY SLF2 Bedienungsanleitung


