
a2b MyM-3T mictro master Bedienungsanleitung
11
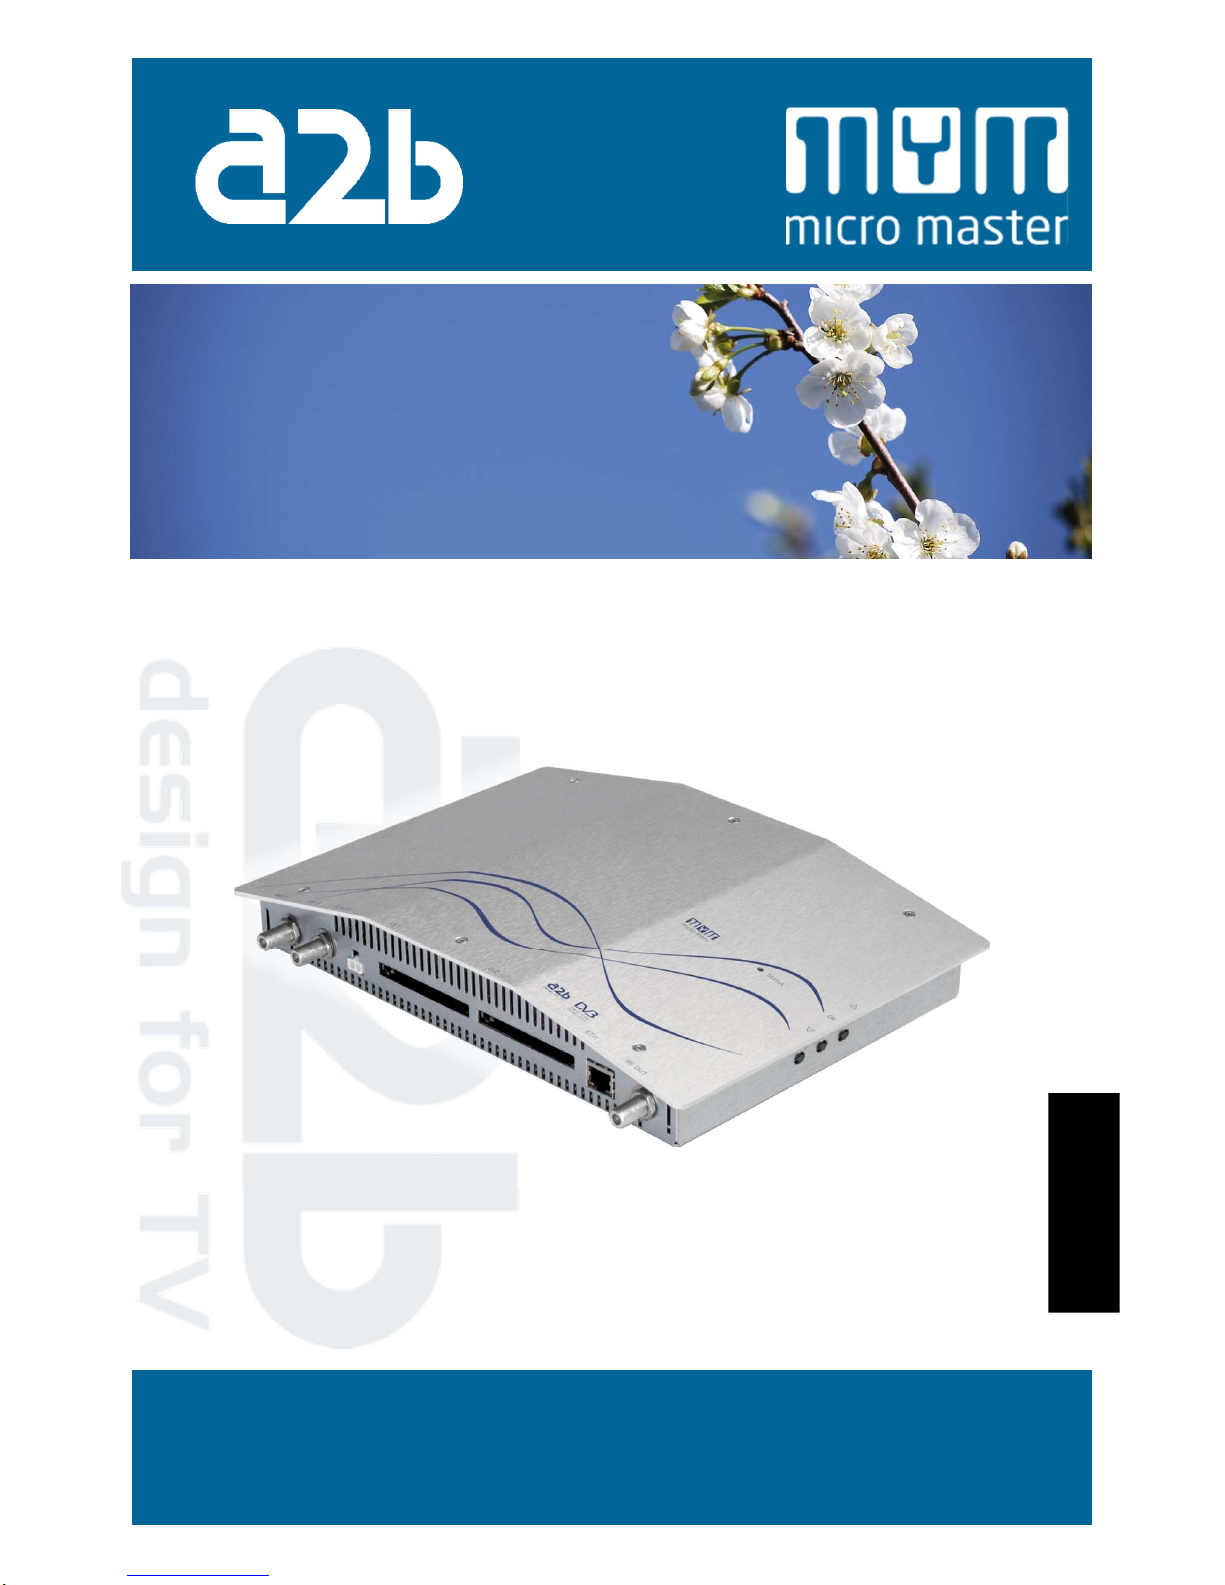
MyM-3T Micro Master
Installation Guide
design for TV
English

22
1. Introduction
2. Unpacking the unit
3. Connections and indications
4. IP settings
5. Menus and settings web ui
5.1 Overview menu
5.2 Input settings
5.3 Output settings
5.4 Service management
5.5 CI menu
5.6 System options
6. Menus and settings with buttons
7. Installation and Configuration examples
8. Technical specification MyM-3T
9. Declaration of conformity
10.Abbreviations
English
CONTENT

33
Thank you for purchasing an A2B Electronics product. The MyM-3T is a
revolutionary solution for reception and modulation of satellite transmitted
TV-content into an analogue format suited for small SMATV networks where
cost efficiency and high quality is required.
The MyM-3T receives DVB-T transmissions.
The MyM-3T unit is delivered with hardware and software that supports
DVB-T reception, MPEG2/MPEG4 decoding, DSB RF modulation with NICAM
or A2 audio, IP control and management.
The MyM-3T can be upgraded for enhanced functionality by software
upgrades.
Software upgrades are available from A2B Electronics web site.
A2B Electronics AB
Phone: +46 (0)141 229115
E-mail: [email protected]
Visit our web site www.a2b.se for more information.
English
1 Introduction

44
The following items are included in the package:
Amount Description
1 MyM-3T Micro Master
1 Installation guide
1 Power supply 12 VDC
Every unit is quality controlled by us before delivery. Should any items be missing
when unpacking, please contact our support service (see page 3 for contact info).
English
Important information about power
supply to MyM-3T unit
To avoid problems with the MyM-3T its is
important to use the supplied power
supply. Operation with other types of
power supplies will void the warranty.
(See picture to the right).
NOTE! Never connect two MyM-3T
units to one power supply. This may
cause damage to your MyM-3T.
2 Unpacking the unit
44

55
English
1. Antenna input Connect the terrestrial signal to this connector
2. Aerial loop through You can connect this connector to next MyM-T for
input signal.
3. Power connector Connect the supplied power supply to this
connector
4. Common Interface 1 Insert a Common Interface module into this slot
(Supports decryption for Channel 1 and 2)
5. Common Interface 2 Insert a Common Interface module into this slot
(Supports decryption for Channel 3)
6. Ethernet port RJ-45 port for 10/100 baseT Ethernet. Connect
your PC to this port for management and upgrades.
7. RF-output Combined 3 channel RF-output for connection to
your SMATV network.
8. Indicator LED Status indicator
1 2 34567
8
3 Connections and indications

6
The MyM-3T has an embedded
web server allowing standard web
browsers (Internet Explorer,
Firefox, Opera etc.) to connect to
the unit for settings and
management.
No controller software is needed.
The MyM-3T has by default a static
IP address for connecting your PC
to the unit.
The MyM-3T is delivered with the
default IP address: 192.168.0.20.
First time installation requires that
you set a static IP address on your
computer. For example set your PC
to IP address: 192.168.0.19 and
Net mask: 255.255.255.0
NOTE! MyM-3T can either be
controlled by the three buttons
on the right side or by web ui
(See Chapter 5.1).
English
4 IP settings
TCP/IP settings for Windows XP (setting your PC to 192.168.0.19)
Select ”Start”, ”Control panel” and ”Network connections”. Next select
“Network and Internet settings”. ”Right click” on [Settings for local network]
and select [Properties].
In Properties select [Internet protocol
(TCP/IP)] and [Properties].

77
English
Select [Use this IP adress] and write:
192.168.0.19 and select [Net mask]
255.255.255.0. Click [OK] and then
click [Close].
NOTE! For PC with other Operating
Systems (OS) than Windows, please
consult the Owners manual for your
PC for [IP/Network settings].
Connecting your PC to the MyM-3T
Connect the MyM-3T to the supplied DC
power supply.
See section 6 for installation.
Next connect your PC to the MyM-3T with
a network cable.
Start your web browser (Internet
Explorer, Firefox, Opera etc.) and write
the IP address 192.168.0.20 in the
address field of your browser.
Settings of IP address
Click the [System options]
menu and then press [IP
Settings] to set a new IP
address, Netmask and
Gateway for the MyM-3T.
4 IP settings (continued)
8
English
5.1 Overview menu
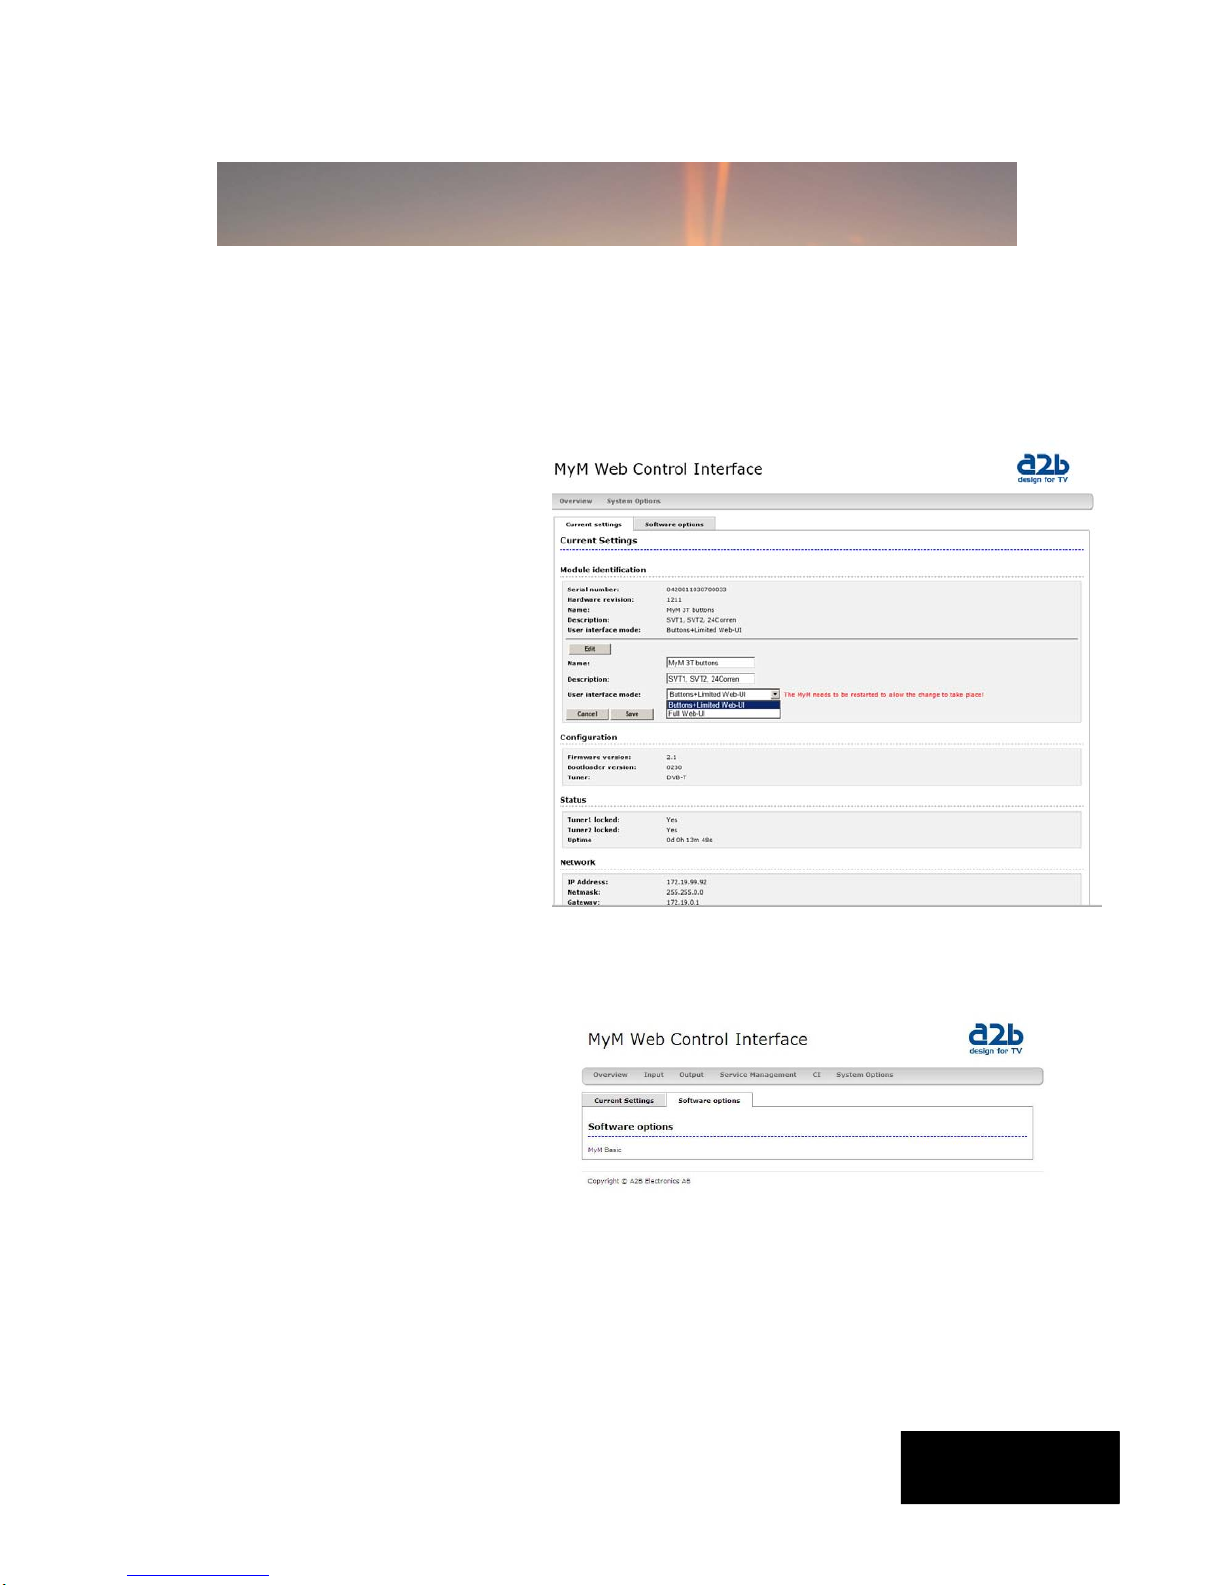
[Current settings]
Contains information of
current input and output
signals, if the tuners are
locked to a signal, firmware
version, bootloader version,
hardware revision, serial
number and current IP
Network settings. By a click
on [Edit] radio button you
get a choice that you have to
make if you shall use the
unit with ”Full web ui” or
”Buttons + limited web ui”.
Here you can also give the
unit a [Name] and a
[Description].
After choosing, click on
[Save] and restart the unit
to store this setting.
All necessary settings can be made in the web GUI via a web browser.
When first connection is made with the MyM-3T following overview menu
will appear.
5 Menus and settings
[Software options]
In this menu you can see
which software options that
are activated.
To continue with settings click the [Input] name in the banner.
99
English
5.2 Input settings
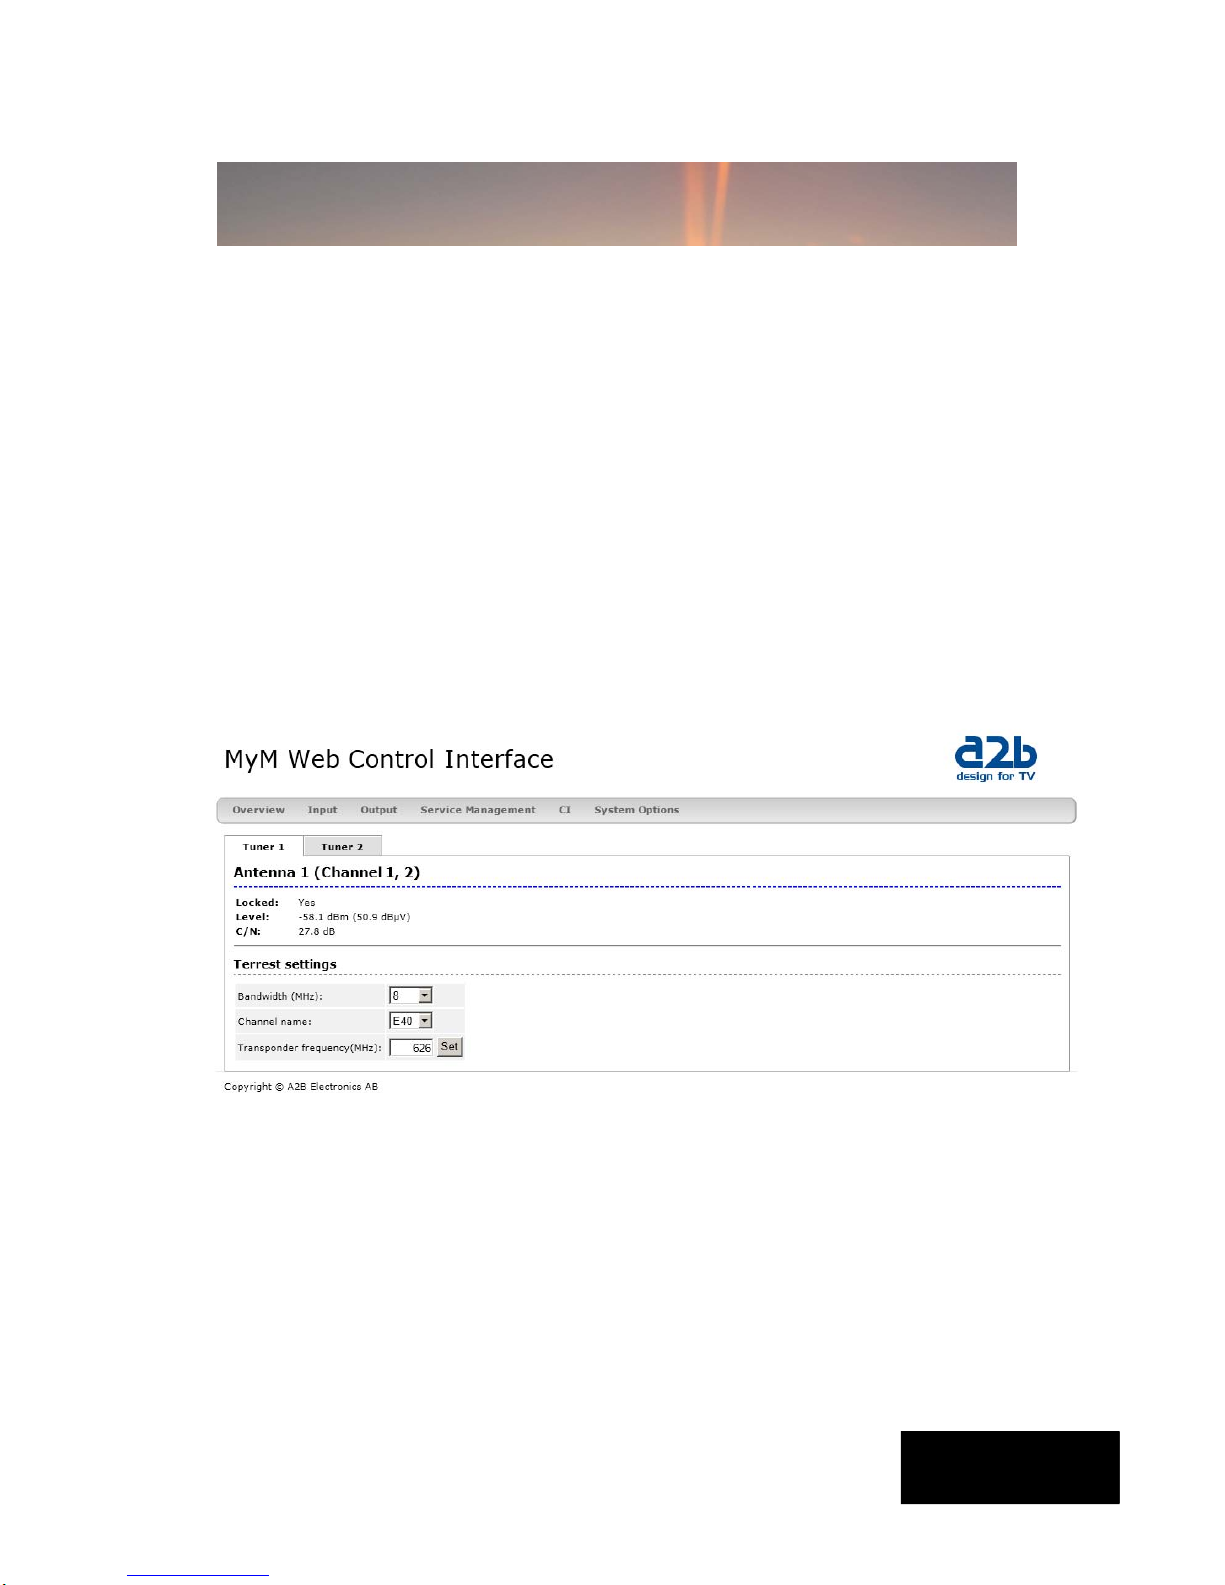
As the MyM-3T contains 2 separate tuners, start by selecting [Tuner 1]
for chosing tuner frequency for programs at Ch1 and Ch2 RF output. Click
on the [Tuner 2] banner to select tuner frequency for program at Ch 3 RF
output.
[Bandwidth] can be selected between 6, 7 or 8 MHz.
Chose [Channel name] or write the center frequency of the wanted Mux
and click on [Set].
NOTE! Don’t click on the [Set] if Channel name are used for
choosing input frequency.
5 Menus and settings (continued)
10
English
5.3 Output settings
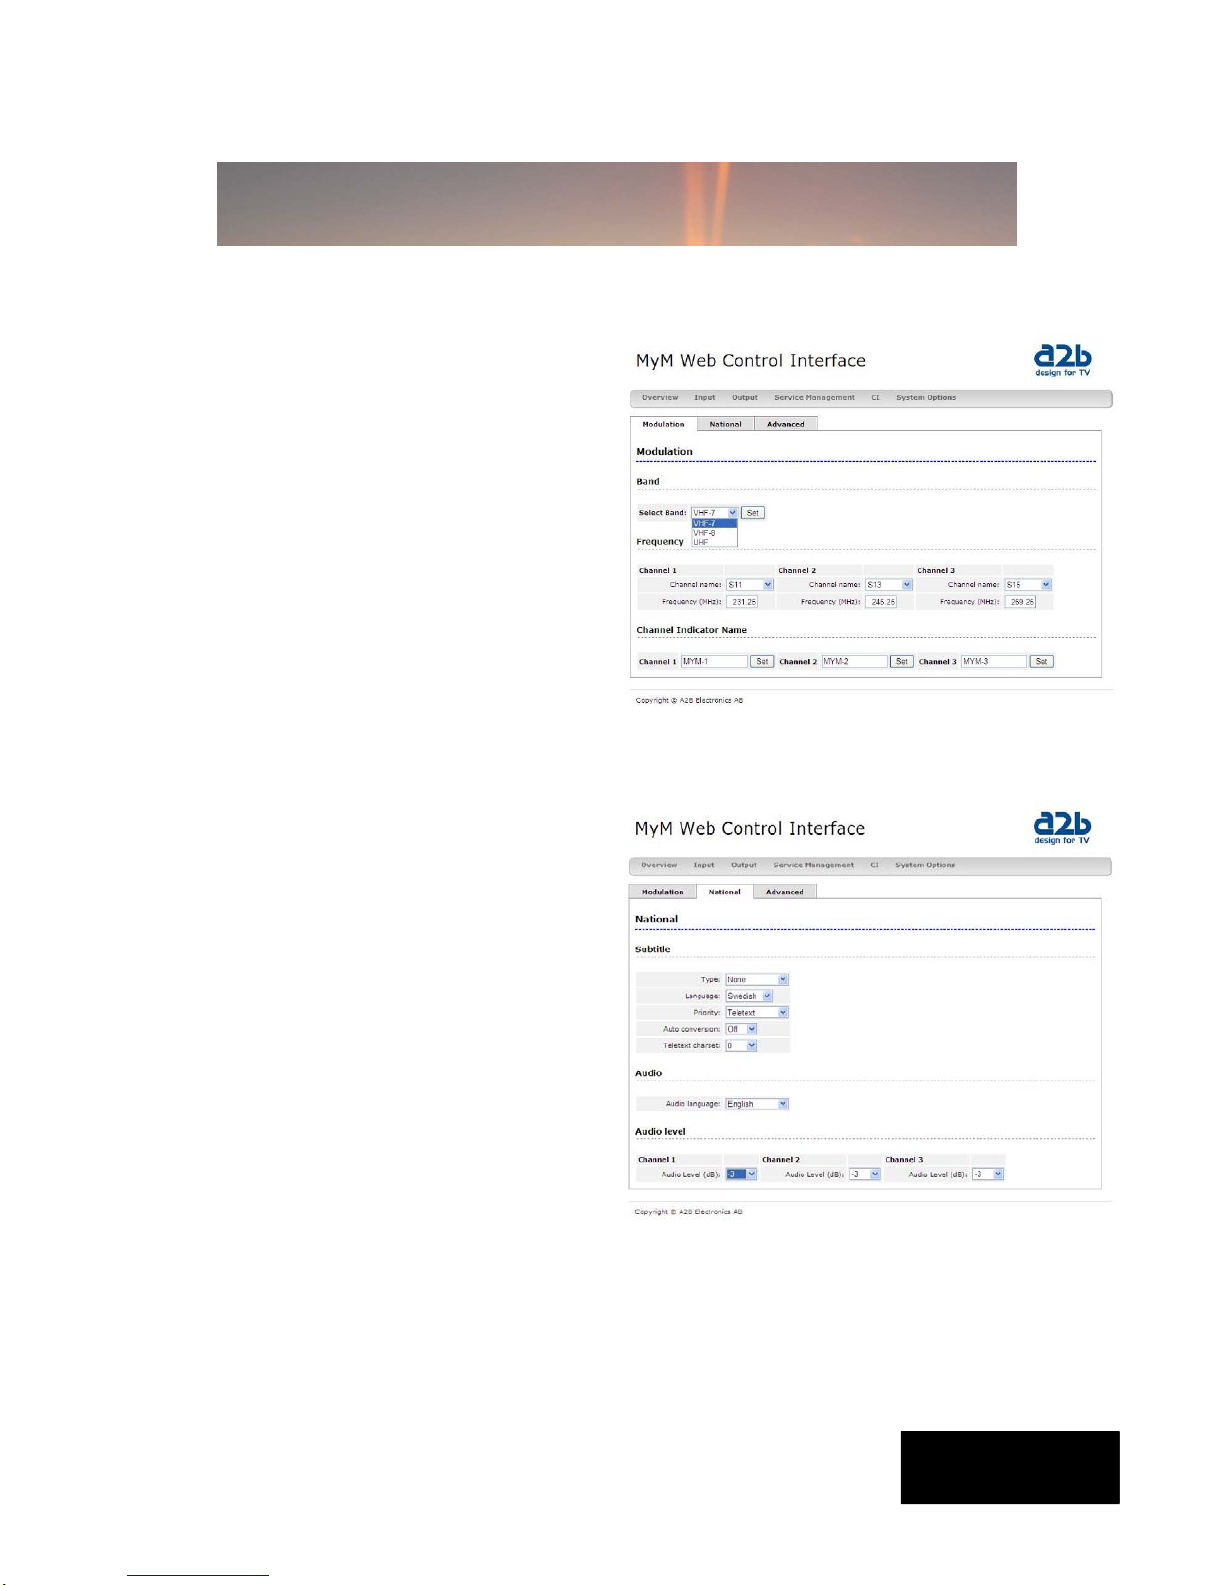
Modulation/
Band
Start the output setup by selecting
which band you want to use. You
can select VHF-7, VHF-8 and UHF.
VHF-7 and VHF-8 corresponds to 7
and 8 MHz bandwidth. After
selection press [Set].
Frequency
For each of the 3 possible output
channels, set the desired output
channel or frequency.
Channel Indicator Name
You can set the “Channel Indicator
name” by your personal preference.
The Channel Indicator will enable
you to detect on a TV-screen which
programs that are transmitted from
the MyM-3T. Press [Set] after each
entering.
National
Subtitle
Type
Set type of subtitling to Normal or
for Hearing Impaired or None
National settings enables language
and regional settings depending of
the region the MyM-3T is installed
in, or which parameters you want to
use for the output.
Language
Select subtitling language. Depends
of received languages in the satellite
signal.
Priority
Set DVB or Teletext subtitling as
default selection.
.
5 Menus and settings (continued)
Inhaltsverzeichnis
Andere a2b Fernsehempfänger Handbücher


