
Gram ACCUREX TXM Bedienungsanleitung
TXM
INDICATOR
USER MANUAL


3
INDEX
1. Main specications
5
2. Keyboard 5
2.1. Keyboard 5
2.2. Keyboard function 6
3. Connection of load cells to the indicator 6
4. Instructions for use and description 7
4.1. Tare 7
4.2. Zero 7
4.3. Animal weighing function 7
4.4. Accumulation function 7
4.5. Upper and lower limit alarm settings 7
5. System setup 8
6. Communication protocol instruction 9
6. Failure and correction 10
7. Use of battery 10
8. Maintenance and precautions 11
9. Calibration instructions 11

4
5
1. Main specications
1. Model: TXM Digital weighing indicator
2. Sampling rate: 10-20 times/second
3. Load cell sensitivity: 1.5~3mV / V
4. Intervall: 1/2/5/10/20/50 (Congurable)
5. Display: 6-digit LED display with 10 status indicators
6. Serial communication interface: RS232 signal transmission distance ≤ 20m
7. Power supply:
AC/DC adapter 100-240Vac/50-60Hz – 12Vdc-500mA
Rechargeable Lithium Ion battery 18659 3.7V 4000mAh
8. Operating temperature: -10~40ºC
9. Transport temperature: -25~50ºC
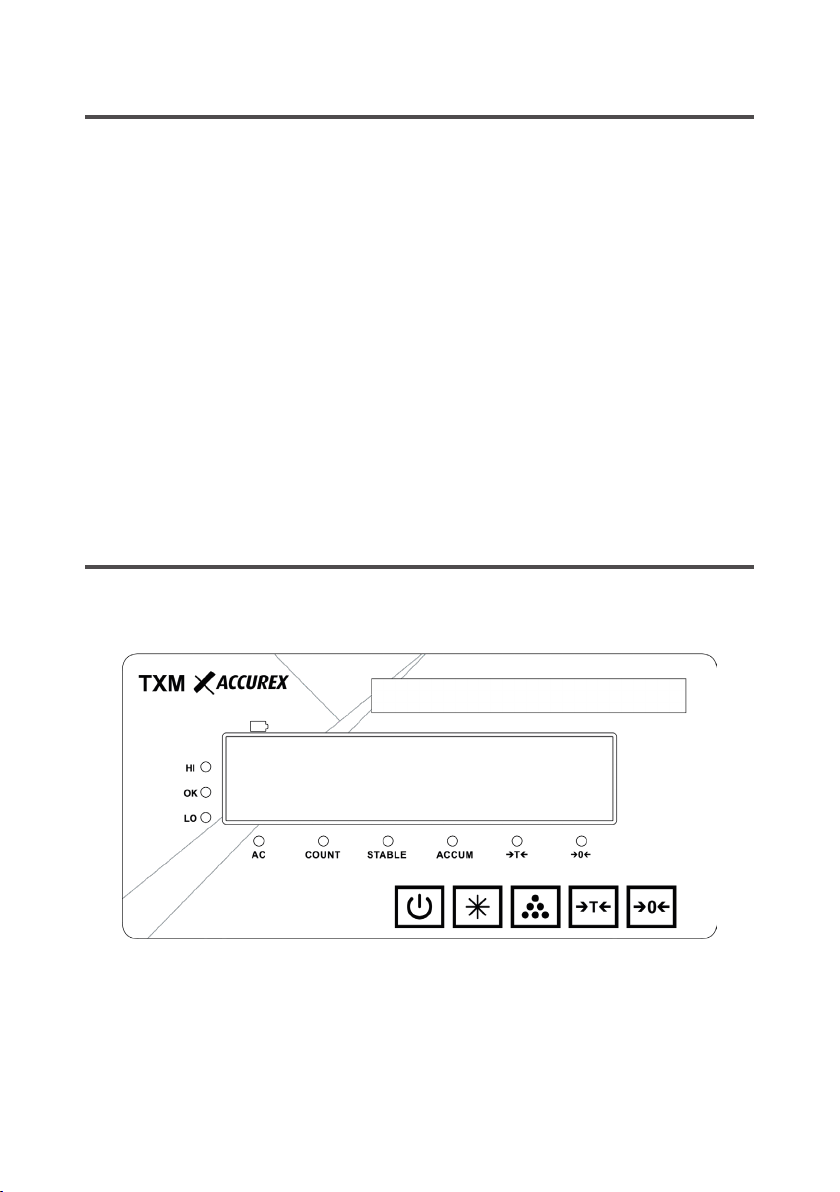
2. Keyboard
2.1. Keyboard
6
2.2. Function of the keyboard
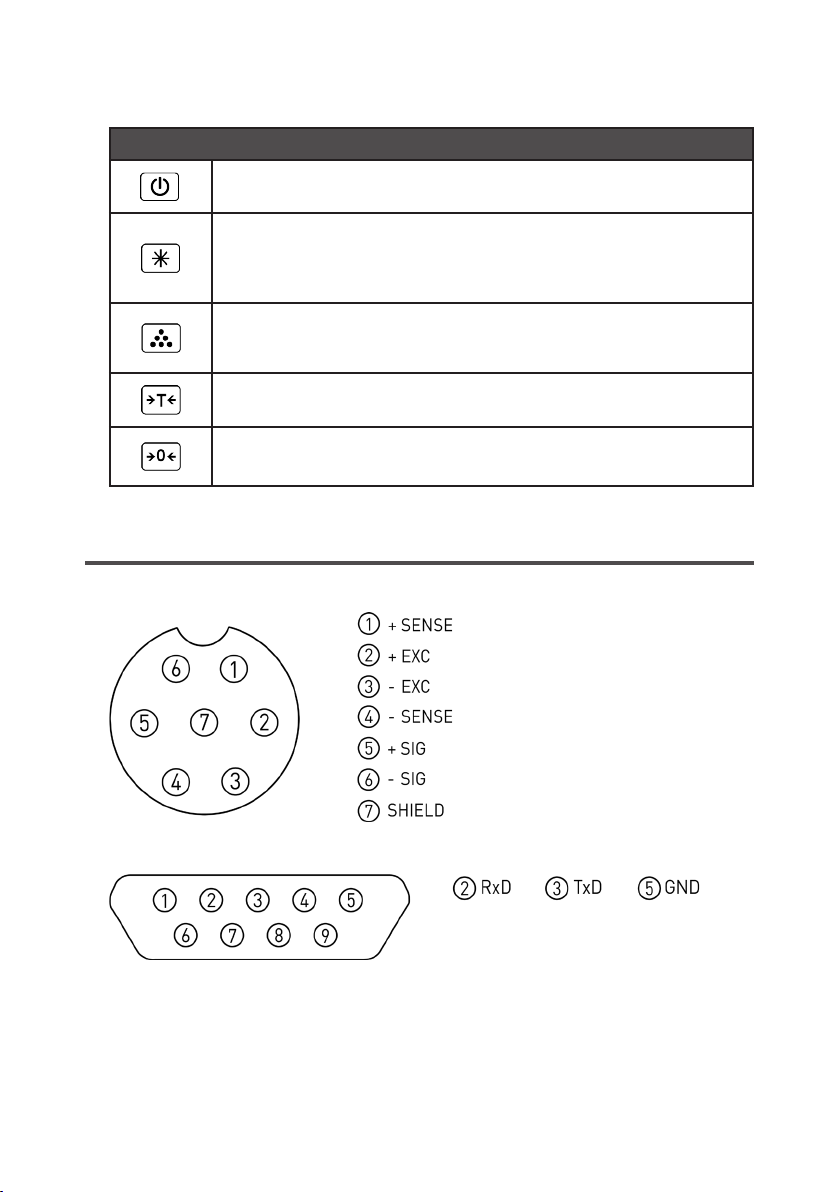
3. Connection of load cells to indicator3. Connection of load cells to indicator
Key Function
Press this key to turn the indicator on or off.
Press and hold this button for more than 5 seconds in the weighing
mode, it will enter the user parameter setting mode; when the serial
communication mode is manual output, press briey to send the weight
data.
In weighing mode, press this button to accumulate the weight; in self-test
mode, press and hold this button, it will enter calibration mode; in
calibration process, press this button to change the parameter settings.
In weighing mode, press this button to tare; in parameter setting mode,
press this button to change the parameter value.
In weighing mode, press this button to zero; in calibration process, press
this button to change the value.
7
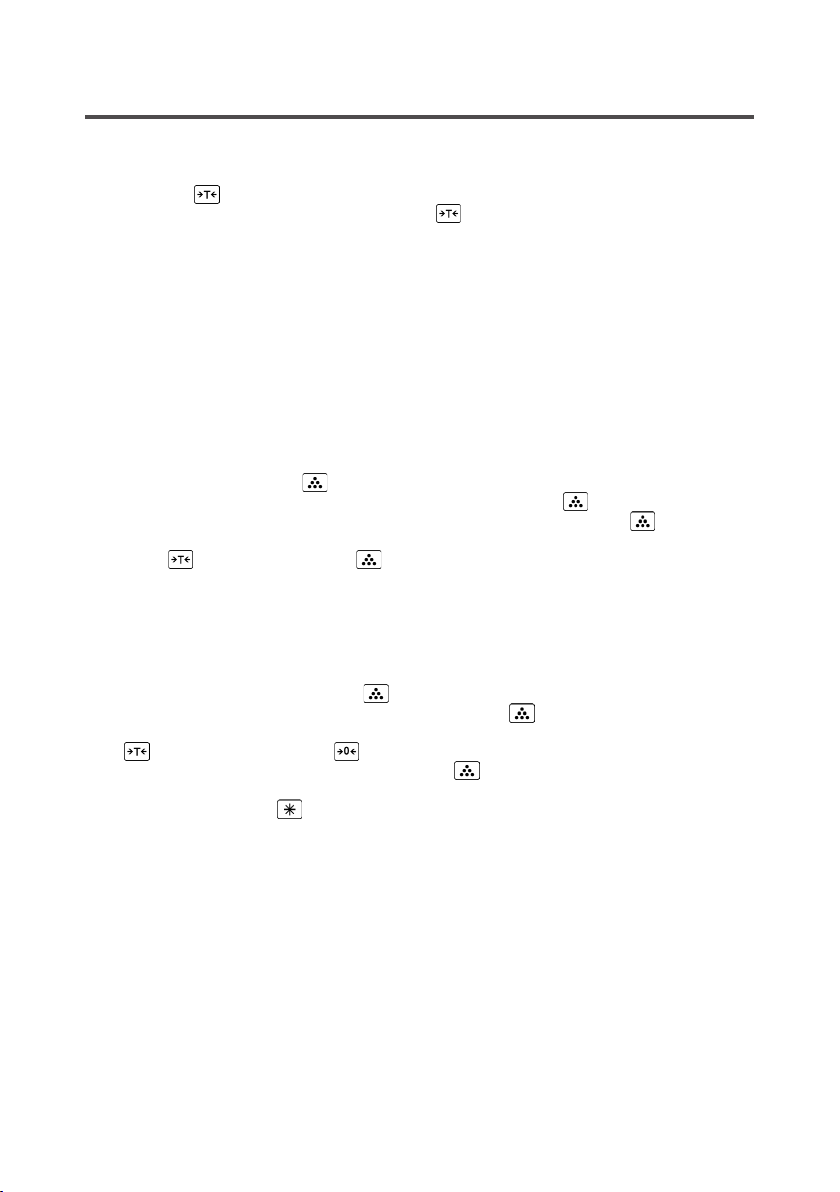
4.1. Tara
Place the load to be weighed on the scale platform, when the stability indicator lights up,
press the key to tare. The display shows zero and the net weight indicator light
illuminates. Remove the load and press the key again to cancel the tare, the net
weight indicator light will go out.
4.2. Zero
Zeroing of the scale. The stability indicator must be lit. While the scale is zeroed, the
zero indicator lights up. In addition to the zeroing button the scale shall perform an
automatic zeroing each time it is switched on. The automatic zeroing device at start-up
operates in a range of +-10% of the maximum capacity.
4.3. Weighing function of animals
In the parameterisation, set the value In the parameterisation, set the value [P 9][P 9] to to [2][2] to start the animal weighing function. to start the animal weighing function.
Set the value Set the value [P 9][P 9] to to [1][1] to deactivate the animal weighing function. to deactivate the animal weighing function.
4.4. Function of accumulation
In weighing mode, press the indicator will accumulate all the current weight, and at
the same time the ACCUM indicatorwill light up.press the key again, it will go to
normal weighing mode and the ACCUM light will turn off; press the key with the
counter at zero, to display the current accumulated value; under the accumulation status,
press to reset to zero, press can return to normal weighing mode and at the
same time the ACCUM lights will turn off.
Note: the balance must be zeroed before the next accumulation operation. otherwise,
you will not be able to perform the accumulation operation a second time.
4.5. Piece-counting function Piece-counting function
In weighing mode press and hold In weighing mode press and hold to enter the count function. The count light will to enter the count function. The count light will
come on and display come on and display [Count][Count]. When stable, press the . When stable, press the key to enter the sample key to enter the sample
number setting and number setting and [C00000][C00000] will be displayed. After placing a few samples, press the will be displayed. After placing a few samples, press the
key to change. Press the key to change. Press the key to set the value of sample numbers. After setting key to set the value of sample numbers. After setting
the value of the current sample number, press the value of the current sample number, press to sample and to sample and [------][------] will be will be
displayed. When number appears you can start counting. This sampling date will be displayed. When number appears you can start counting. This sampling date will be
saved. Press the key saved. Press the key to exit the counting mode. to exit the counting mode.
Note: If the sample weight is less than the minimum sampling weight, the sampling willNote: If the sample weight is less than the minimum sampling weight, the sampling will
fail and the data from the previous sampling will be taken. If the weight of the samplingfail and the data from the previous sampling will be taken. If the weight of the sampling
unit is less than the minimum weight of the sampling unit, the sampling will also failunit is less than the minimum weight of the sampling unit, the sampling will also fail
and the data from the previous sampling will be taken.and the data from the previous sampling will be taken.
4. Instructions for use and description
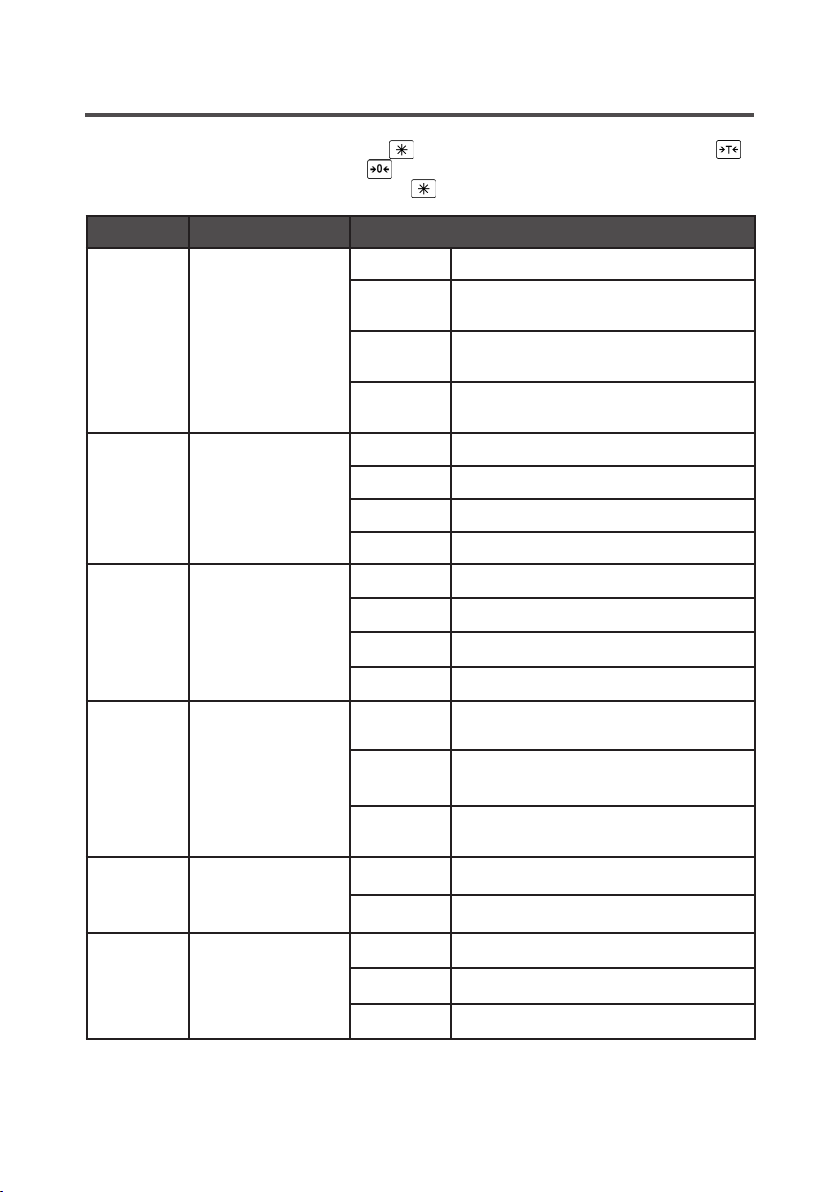
8
5. System conguration5. System conguration
In weighing mode, press and hold the key to enter the user setting mode. Press the
key to change the value. Press the key to enter the next parameter; when all parameter
settings have been completed, press the key to exit the user conguration mode.
Display Function Parameter Instructions
[P1 1] Automatic
shutdown
1No automatic shut-off function
210min
320min
430min
[P2 1] Baud rate
setting
14800
29600
314400
419200
[P3 1] RS232 output mode
option
1Continuous transmission
2Manual transmission
3Stable transmission
4Transmission once stable
[P4 1] Energy saving
mode
1LCD without backlight; LED without
energy saving function
2LCD with automatic backlight; LED with
[P4 1] energy saving function
3LCD backlight to maintain LED
illumination
[P5 1] Zero tracking
range
10.5e/2s
2No
[P6 1] Filtering depth
1Low
2Medium
3High

9
Display Function Parameter Instructions
[P7 1] Time of stability
1Fast
2Medium
3Slow
[P8 1] Range of stability
1Low
2Medium
3High
[P9 1] Animal weighing
1Deactivate
2Activate
[P10 1]
RS232 Output
protocol
selection
- Reference communication data
6. Instrucción del protocolo de comunicación6. Instrucción del protocolo de comunicación
The communication speed of the indicator and the communication method can be set and
selected in system conguration. The default baud rate is 9600 and the communication
mode is continuous transmission.
P10 =1:
Data format: =<weight data>. All data are ASCII code
Includes data format with 6 digit weight and bit signal. All lower position weight data are in
front. High position and sign bit. the negative number sign bit will send [-]. the positive
number sign bit will send [0]. For example, when the indicator shows [-500.00kg], the serial
output data is [=00.005-]. When the indicator shows [500.00kg], the serial output data is
[00.0050].
P10=2:
The indicator sends 13 characters as in the following list:
• 1-2: WN
• 3-9: Weight including decimal point
• 10: 0x20
• 11: unit kg
• 12-13: 0x0d 0x0a
P10=3:
The indicator will output gross weight, net weight, tare weight and serial number.
It can be used to connect a small ticket printer.

10
7. Failure and correction
Display Instructions
Err1 The AD value is too small when calibrated or the capacity is too low.
of the load cell is too large.
Err2 The zero point is out of range when calibrated.
Err3 The zero point is out of range at start-up or there is too much weight
on the scale.
Err5 No load is detected when calibrating the scale.
Err7 Incorrect load cell signal, check wiring.
Err8 The load cell signal is not stable.
Err9
The maximum supply voltage to the load cell has been exceeded.
If the combined sensor is not correctly connected or selected for
charging, connect or select correctly.
Err10 Error en la memoria de almacenamiento
8. Use of battery
• The battery charging is done while the indicator is connected to a 220Vac socket.
• The voltage indicator ashes to indicate low battery, please connect the power cable to
charge the device.
• When the electronic scale displays the message LOB (“low battery”) the weighing
function will stop. Please immediately switch off the equipment and plug it into a 220Vac
socket to recharge the battery.
• It is recommended that before the rst use the battery charging time is longer than 24h to
ensure that the battery meets safe and stable working conditions.
• It is recommended to charge immediately when the battery is low as failure to do so
may damage the battery and shorten its life. It is recommended that the charging time is
longer than 12h. If the battery is not used for a long time, it should be recharged every
two months for about 20-24 hours to protect the battery from damage and prolong the life
of the battery.
Caution: The battery cable must not be reversed (red +, black -), otherwise the
device may burn out. When using the device for the rst time, make sure that the
battery is fully charged.
Inhaltsverzeichnis
Andere Gram Messgerät Handbücher


