KONTINITRO EXPLOMET 3 Bedienungsanleitung

Page 1
User's manual
Explomet 3
Velocity Of Detonation Measuring Instrument
DESIGNED & MANUFACTURED BY
Swiss manufacturer of detonation velocity measuring
instruments since 1936

Page 2
Table of Contents
BATTERY .................................................................................................................................................. 3
USING THE EXPLOMET 3.......................................................................................................................... 4
MAIN MENU ............................................................................................................................................ 5
FIRST TIME SETUP.................................................................................................................................... 5
OPERATIONS FOR TIME ONLY ................................................................................................................. 7
OPERATIONS FOR VELOCITY AND TIME .................................................................................................. 8
MISSING MEASURE................................................................................................................................ 11
PRECAUTIONS OF USE ........................................................................................................................... 11
SD CARD MANAGEMENT....................................................................................................................... 12
DATA TRACEABILITY .............................................................................................................................. 13
CALIBRATION ......................................................................................................................................... 14
MAINTENANCE ...................................................................................................................................... 15
SPECIFICATIONS..................................................................................................................................... 16
APPENDIX .............................................................................................................................................. 17

Page 3
BATTERY
Important to know before you start using your Explomet 3
It is necessary to charge the Explomet 3 after each day of use in order to avoid excessive discharge of
the battery which could damage it.
The instrument has an operating capacity of approximately 10 hours.
When the instrument is switched off, the battery has a capacity of several weeks.
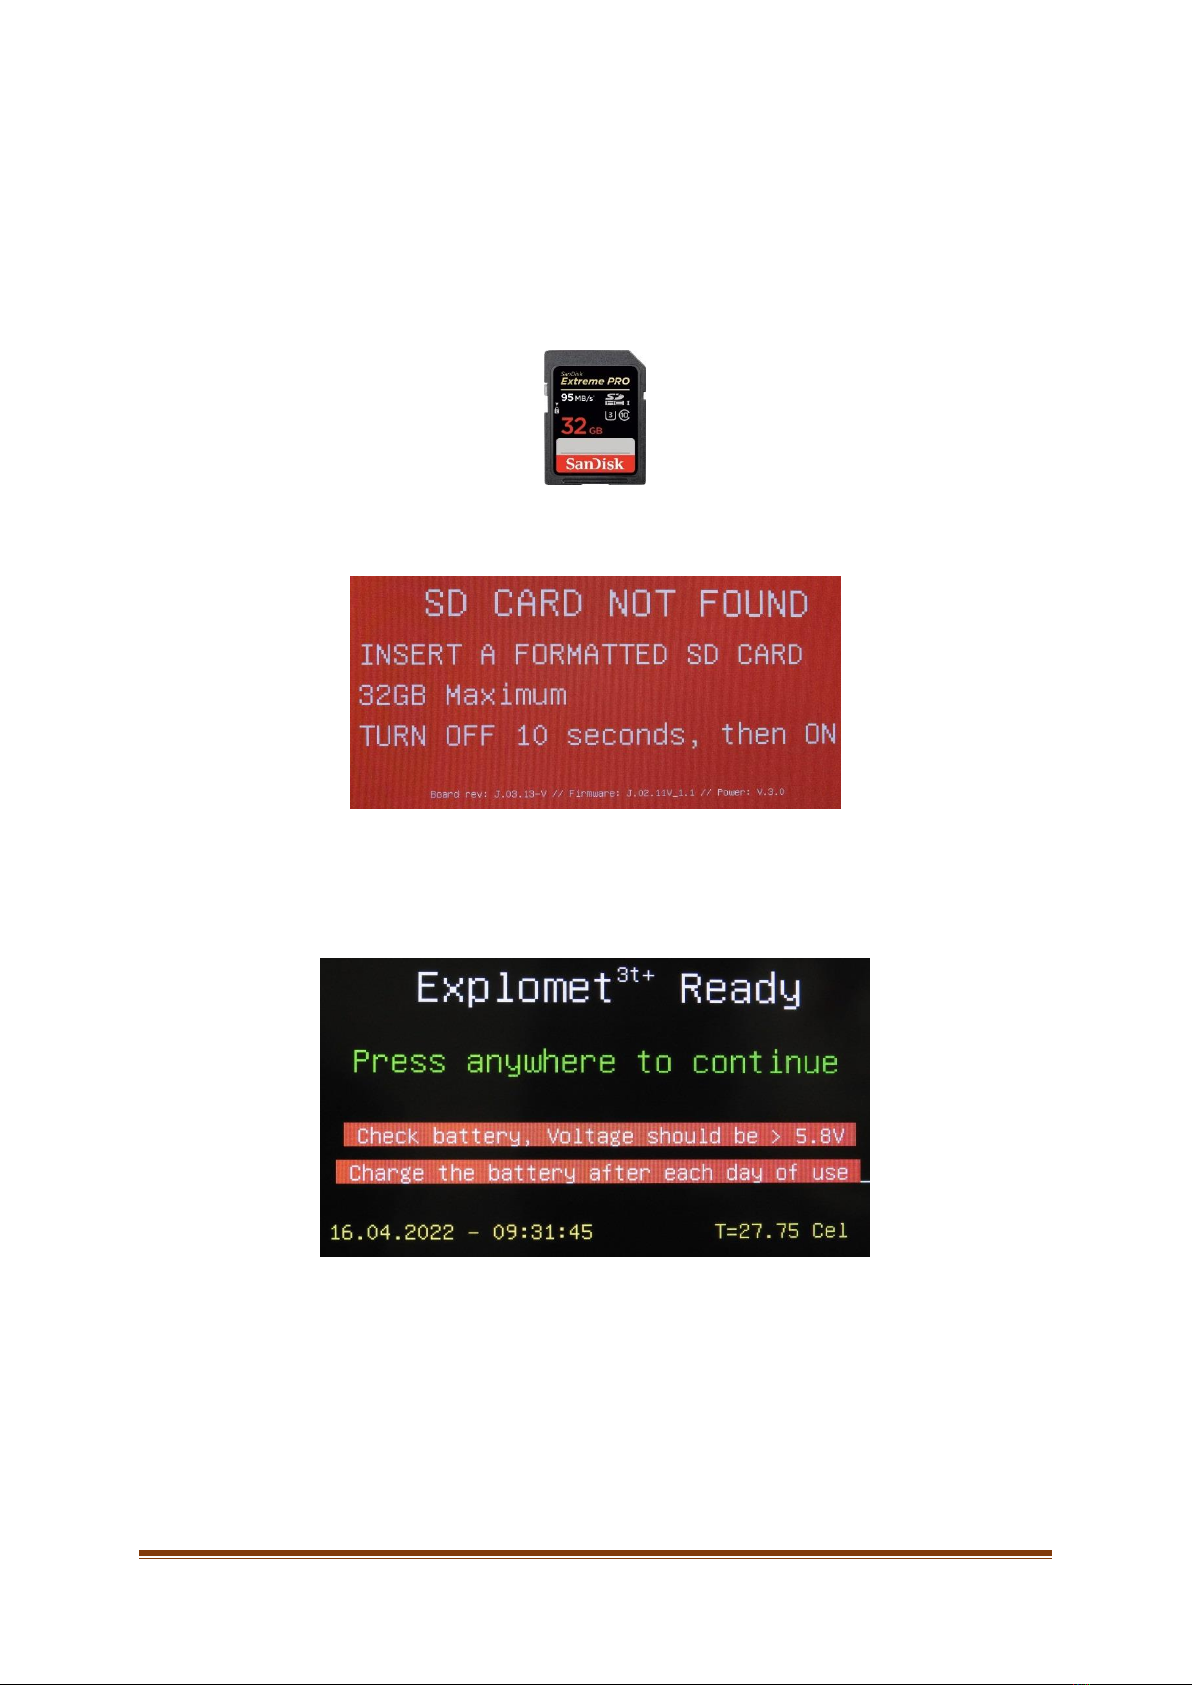
Please observe the following information in the start menu of your device:
Check battery, Voltage should be >5.8V
Charge the battery after each day of use.
You can check the voltage of your battery at any time by pressing the button on the bottom left of your
control panel for 2 seconds.
Max: 6.7[V]
Min: 5.8 [V] Never go below 5.8 [V]
you risk not being able to turn on your device!
Page 4
USING THE EXPLOMET 3
Make sure your SD card is inserted
Or …
TURN ON THE EXPLOMET 3™
Start menu with date, time (24:00), internal temperature of the instrument (T=).
The Explomet 3 is controlled by a touch screen. Touch the screen to access the main menu.
Touch the screen

Page 5
MAIN MENU
FIRST TIME SETUP
To start using the Explomet 3, you must first set your preferred language, time and current date.
Press Select the desired language
The instrument will restart, go back to the configuration to set the time.
Press Set Time
Enter the time in 24 hour format (00 to 24), for example 9h25m36s(9AM25m36s), you must press 0 9
then 2 5 on the next page and 3 6 on the last page.
The instrument will restart, go back to the configuration to set the date.

Page 6
Press Set Date
Enter the day in the format 01 to 31, then the month 01 to 12 and the year 19 to 99 (2019 to 2099).
The instrument will restart.
Your instrument is now ready to acquire data.
You have the choice between 2 measurement modes, “Velocity and Time” or “Time Only”
Basically, there is no big difference, except that in " Velocity and time " mode, you have the result
directly in m/s.
This means that you need to know the exact distances between the fibers in order to insert them into
the explomet.

Page 7
OPERATIONS FOR TIME ONLY
Press Time Only
Select the number of connected fibers (8 in our example)
Press YES to accept NO if you made a mistake, or Cancel to go back to Main Menu
As you can read on the screen, the screen turns off after 10 seconds, which allows us to save
batteries.
When you press OK in the previous screen. the LED lights up.
When the display turns off, the LED starts flashing to indicate that the instrument is waiting for a
measurement.
When the instrument receives the first pulse, the LED turns off.
You must wait at least 20 seconds after the LED has gone out to touch the screen, which will then turn
on again and display the results.
In the meantime, the results have been stored in 2 files on your SD card. (explanations in the SD
CARD section)

Page 8
OPERATIONS FOR VELOCITY AND TIME
Press Velocity and time
Select the number of connected fibers (6 in our example)
You have 2 choices, all your fibers have the same spacing between them or the spacings are different.
We will start with the same spacing.
EQUAL LENGTH
Enter the distance between 2 fibers.
This value must be between 1 and 9999 mm. (456mm in our example)
Press OK

Page 9
Press OK or Cancel to restart from the beginning.
As you can read on the screen, the screen turns off after 10 seconds, which allows us to save
batteries.
When you press OK in the previous screen. the LED lights up.
When the display turns off, the LED starts flashing to indicate that the instrument is waiting for a
measurement.
When the instrument receives the first pulse, the LED turns off.
You must wait at least 20 seconds after the LED has gone out to touch the screen, which will then turn
on again and display the results.
In the meantime, the results have been stored in 2 files on your SD card. (explanations in the SD
CARD section)

Page 10
DIFFERENT LENGTH
4 fibers selected for our example
Enter the spacing between each fiber independently as in our example
Press OK or Cancel to restart from the beginning.
As you can read on the screen, the screen will turn off after 10 seconds, this allows us to save the
batteries.
When you press OK in the previous screen. the LED lights up.
When the screen turns off, the LED starts flashing to tell you that the instrument is waiting for a
measurement.
When the instrument receives the first pulse, the LED turns off.
You must wait at least 20 seconds after the LED has gone out to touch the screen, which will then turn
on again and display the results.
In the meantime, the results have been stored in 2 files on your SD card. (explanations in the SD
CARD section)
Inhaltsverzeichnis
Andere KONTINITRO Messgerät Handbücher


