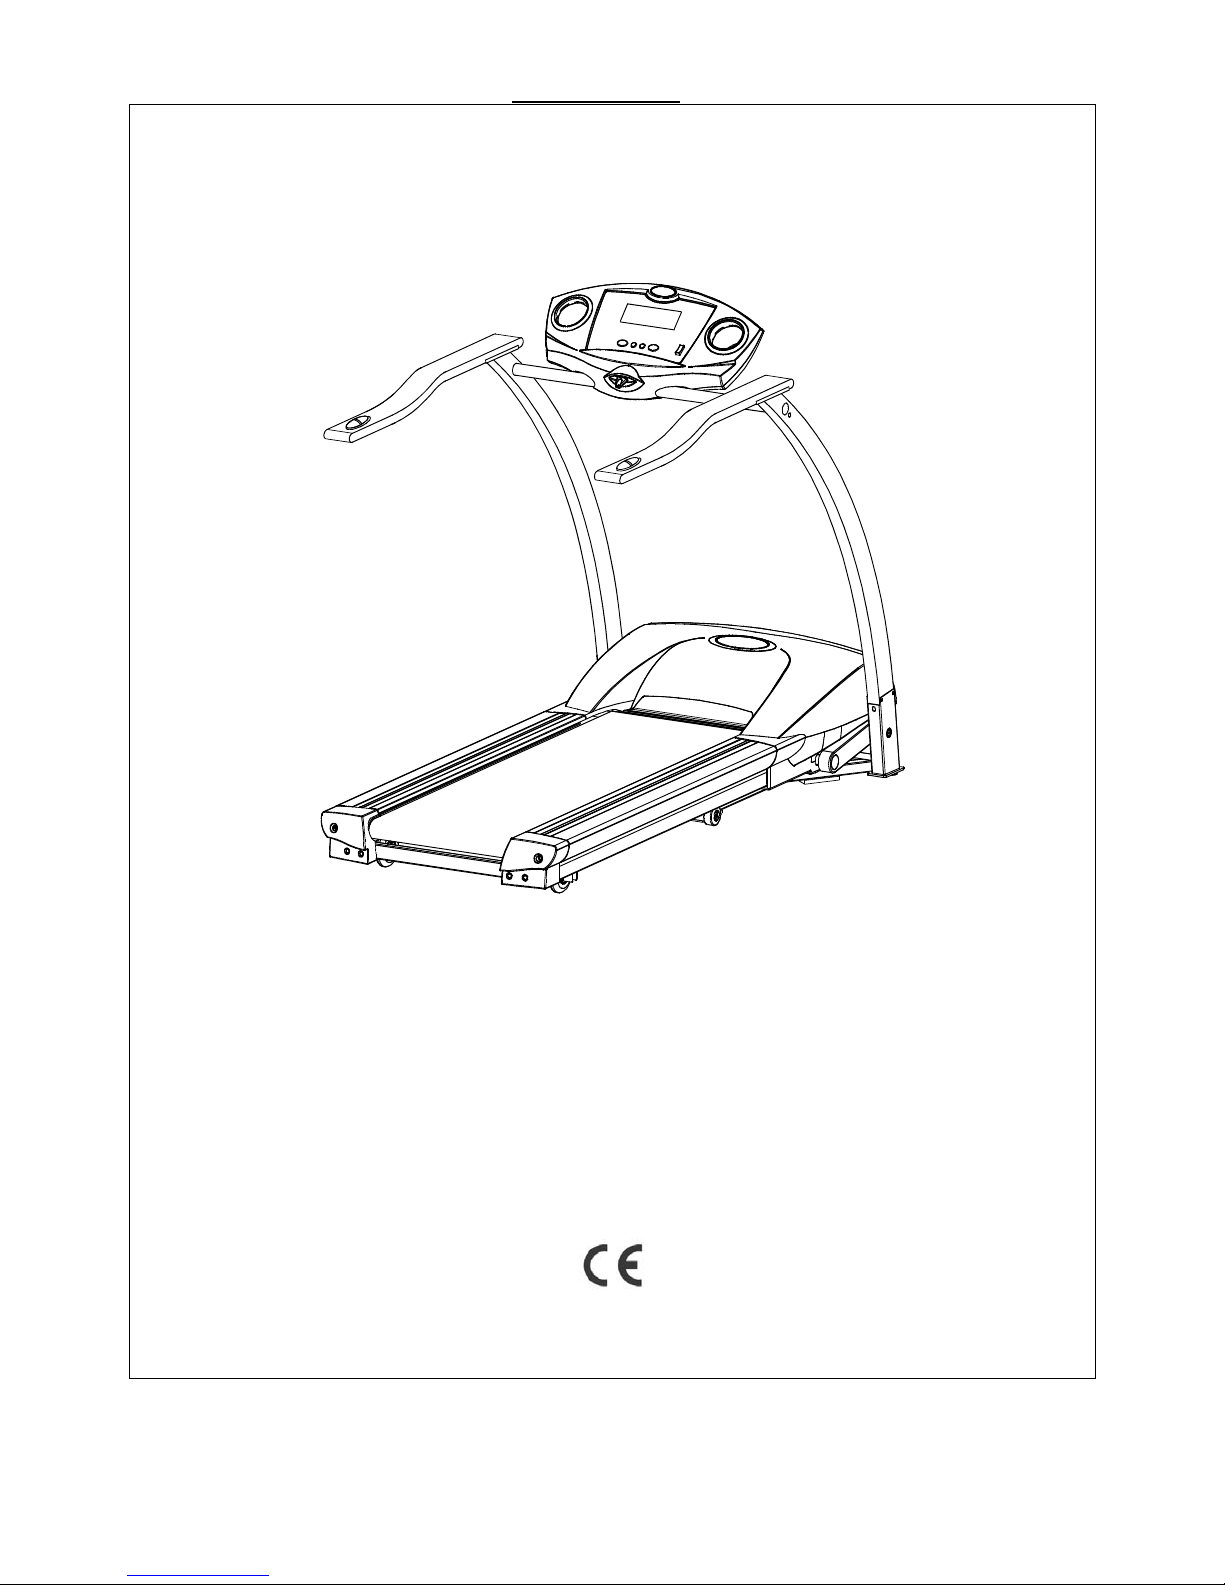
PRO RUN 300 MOTORIZED TREADMILL
5
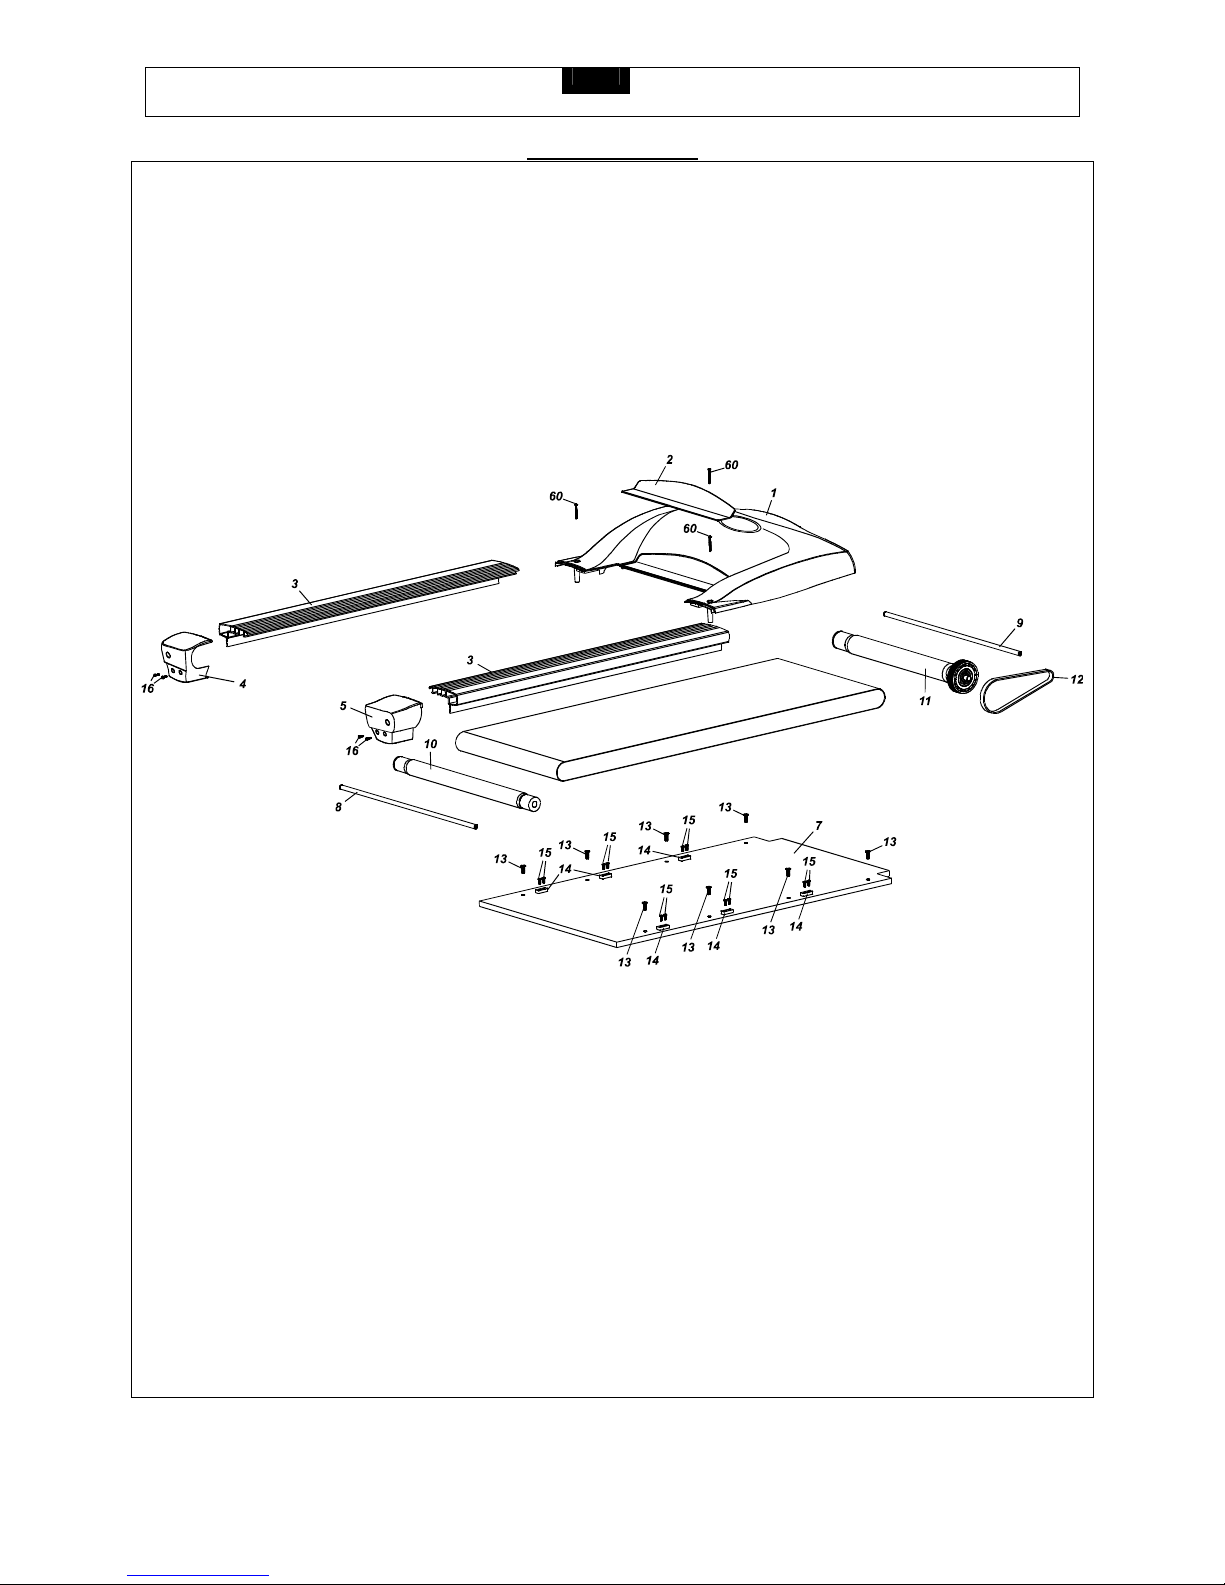
PARTS LIST
NO. DESCRIPTION QTY. ORDER NO. NO. DESCRIPTION QTY. ORDER NO.
1 Motor Hood 1 PR300-01 35 Cushion 4 PR300-35
2 Cushion 1 PR300-02 36 4.5 x 12mm Washer 8 PR300-36
3 Side Rail 2 PR300-03 37 M8 x 15 Screw 14 PR300-37
4 Deck End Cap-Left 1 PR300-04 38 M14 x 90mm Bolt 2 PR300-38
5 Deck End Cap-Right 1 PR300-05 39 Control Board 1 PR300-39
6 Running Belt 1 PR300-06 40 Elevation Motor 1 PR300-40
7 Running Deck 1 PR300-07 41 Motor 1 PR300-41
8 Rear Roller Shaft 1 PR300-08 42 Deck Frame 1 PR300-42
9 Front Roller Shaft 1 PR300-09 43 Motor Bracket 1 PR300-43
10 Rear Roller 1 PR300-10 44 Elevation Support 1 PR300-44
11 Front Roller 1 PR300-11 45
Elevation Support Cover-Right 1 PR300-45
12 Drive Belt 1 PR300-12 46
Elevation Support Cover-Left 1 PR300-46
13
Rubber Cushion
Bolt 8 PR300-13 47 Support 1 PR300-47
14 Rail Guide 6 PR300-14 48 Shock 1 PR300-48
15 Rail Guide Screw 12 PR300-15 49 Motor Belly Pan 1 PR300-49
16 Rear End Cap Bolt 4 PR300-16 50 Frame Cover-Right 1 PR300-50
17 Computer 1 PR300-17 51 Frame Cover -Left 1 PR300-51
18 Console Top 1 PR300-18 52 Bracket 2 PR300-52
19 Console Bottom 1 PR300-19 53 Plastic Clamp-Top 2 PR300-53
20 Safety Key 1 PR300-20 54 Plastic Clamp-Bottom 2 PR300-54
21 Handlebar Grip 2 PR300-21 55
M8 x 19mm Allen Head Bolt 4 PR300-55
22 Handlebar 2 PR300-22 56 Deck Cushion 8 PR300-56
23 Hand Pulse Sensor 2 PR300-23 57 M8 Nylon Nut 1 PR300-57
58 Washer 2 PR300-58
25 Handlebar End Cap 4 PR300-25 59 Rubber Cushion 1 PR300-59
26 Left Upright 1 PR300-26 60 M8 x 50mm Screw 2 PR300-60
27 Right Upright 1 PR300-27 61 M8 x 15mm Bolt 2 PR300-61
28 Base Frame 1 PR300-28 62 Spring Washer 2 PR300-62
29 Base Frame End Cap 2 PR300-29 63 8mm Washer 12 PR300-63
30 Fold Up Lock 1 PR300-30 64 M10 x 136mm Her Bolt 1 PR300-64
31 Spring 1 PR300-31 65 M10 Nylon Nut 3 PR300-65
32 Power Switch 1 PR300-32 66 M5 x 12mm Screw 2 PR300-66
33 Front Moving Wheel 2 PR300-33 67 Clip 2 PR300-67
68 Gear Sleeve 1 PR300-68