Robin SmartView SIP Bedienungsanleitung

Software release 3.5 or higher
Version: 3.1.0 Eng
Date: 01-11-2015
Manual
Robin SmartView SIP
SIP

gf1
1
Manual Robin SV ENG - v. 3.1.0

gf2
2
Manual Robin SV ENG - v. 3.1.0
About this manual
This manual describes mounting, installation and programming of the Robin SmartView SIP video
intercom in combination with software release 3.5.0. You can update the software of the Robin SV
to the latest version (see page 62).
This manual applies to Robin SmartView SIP with part no.: C01050 - C01057, C02050 - C02057
and C02058.
If you have any questions after reading this manual, please contact us at:
website: www.robin.nl
support website: support.robin.nl
e-mail: [email protected]
phone: + 31 72 534 64 26
A
About this manual

gf3
3
Manual Robin SV ENG - v. 3.1.0
Table of Contents
1 Introduction 5
1.1 Robin SmartView SIP Door Intercom 5
2 Operation 8
2.1 Operating the door phone 8
2.1.1 Robin SV with piëzo button(s) 8
2.1.2 Robin SV with Keypad 8
2.2 Answering 8
2.3 Controlling the built-in door opener 8
2.4 Access using a PIN code (Robin SV with Keypad only) 9
3 Installation 10
3.1 Package contents 10
3.2 Installation dimensions 10
3.3 Tools and materials required for mounting 13
3.4. Mounting instructions 13
3.5 Connecting the Robin SV 14
4 System Installation 15
4.1 Requirements prior to installation 15
4.2 Connecting the Robin SV to a network 15
5 Configuration 17
5.1 Logging in to the Robin SV 17
5.2 Configuration of the Robin SV 18
5.2.1 Telephony 19
5.2.1.1 Telephony / SIP 19
5.2.1.2 Telephony / Phonebook 22
5.2.1.3 Telephony / Call settings (SV 1, 2, 4 and 6 buttons) 26
5.2.1.4 Telephony / Call settings (SV Keypad) 29
5.2.1.5 Telephony / Call log 30
5.2.1.6 Telephony / Control 31
5.2.2 Audio 32
5.2.2.1 Audio / Settings 32
5.2.2.2 Audio / Detection 33
5.2.2.3 Audio / Media 34
5.2.3 Video 36
5.2.3.1 Video / Live 36
5.2.3.2 Video / H.264 37
5.2.3.3 Video / Settings 37
5.2.3.4 Video / AGC 40
5.2.3.5 Video / Overlay 41
5.2.3.6 Video / Motion 42
T
Table of Contents

gf4
4
Manual Robin SV ENG - v. 3.1.0
5.2.4 Network 43
5.2.4.1 Network / Status 43
5.2.4.2 Network / Settings 44
5.2.4.3 Network / HTTP 46
5.2.4.4 Network / Mail 47
5.2.4.5 Network / NAT 49
5.2.4.6 Network / RTSP 50
5.2.5 System 52
5.2.5.1 System / Device 52
5.2.5.2 System / Clock 54
5.2.5.3 System / Events 55
5.2.5.4 System / Security 59
5.2.5.5 System / Recording 60
5.2.5.6 System / Schedules 61
5.2.5.7 System / Software 62
5.2.5.8 System / Streams 63
5.2.5.9 System / Switch 64
5.2.5.10 System / Info 66
5.2.5.11 System / Debug 67
5.2.5.12 System / Logs 69
6 Support 70
Appendix A, List of key words 71
Appendix B, Electronic lock 74
T
Table of Contents
gf5
5
Manual Robin SV ENG - v. 3.1.0
1 Introduction
1.1 Robin SmartView SIP Door Intercom
Integrated functions
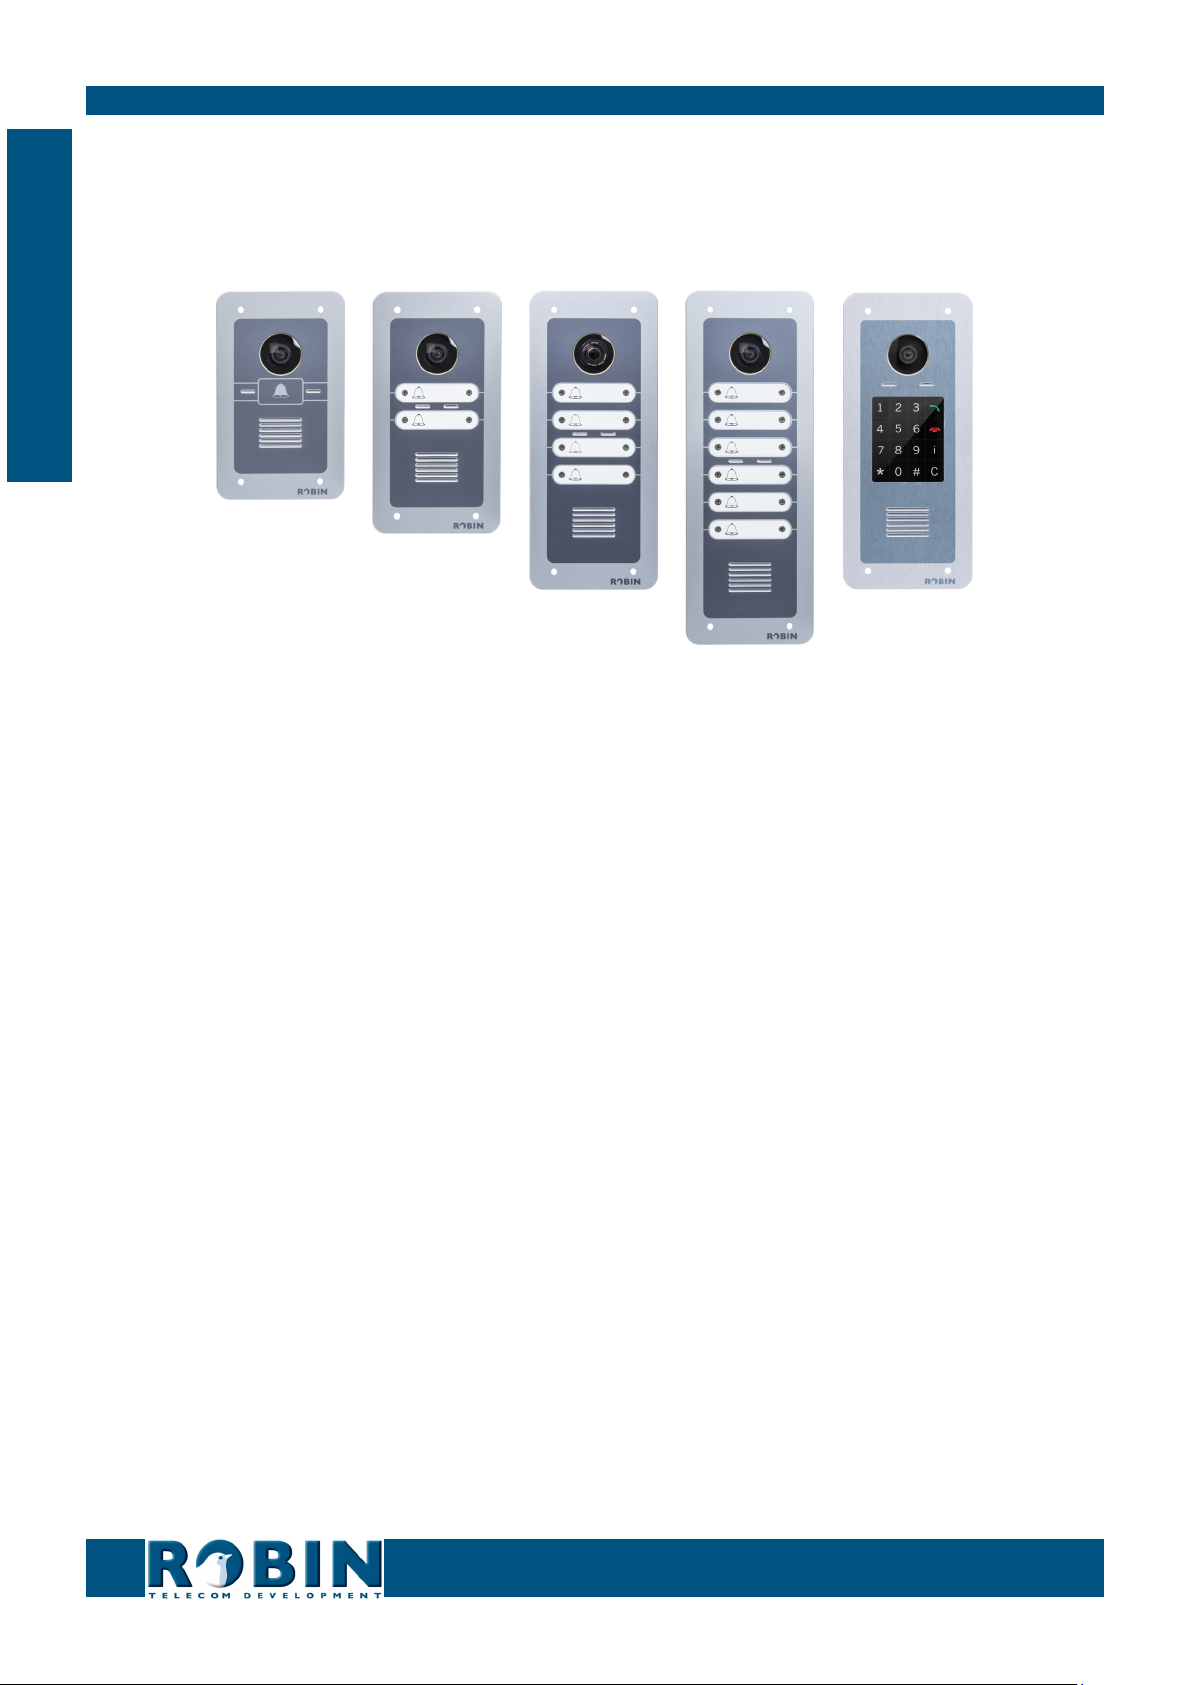
The Robin SmartView SIP (Robin SV) is the first “end-to-end” Internet Protocol (IP) entrance door
intercom video intercom to offer many fully integrated functions in one single device:
Telephone device with one, two, four or six piezo push-button(s) or an integrated Keypad
SIP support for audio and H.264 video
High-Definition, full colour camera with a wide-angle lens
Built-in door opener
Advanced events / actions mechanism
Security camera with movement- and audio detection
Extended API (Application Programming Interface)
RTSP streaming (audio and video)
Easy to install
A single module is all that has to be mounted; there are no individual modules.
Simple operation
The Robin SV is equipped with one, two, four or six piezo push-buttons or an integrated Keypad
to select and dial the pre-defined phone extension. The built-in door opener relay is activated via
the telephone set that answers the intercom call. The Robin SV with Keypad also provides a PIN
code feature that can be used to unlock the door. All Robin intercoms with an integrated camera
are capable of sending an e-mail containing a photograph of the person using the intercom to
predefined recipients.
1
Introduction

gf6
6
Manual Robin SV ENG - v. 3.1.0
SIP communication
The Robin SV uses the Session Initiation Protocol (SIP). This means that the video intercom can
be connected to any IP-PBX or VoIP provider that supports the SIP protocol. To check compatibility
please see the compatibility chart on the supplied USB drive or on our support website: http://
support.robin.nl.
Door opener
The built-in dry contact relay embedded in the Robin SV and the optional external IP-Quad-
Webrelay can be activated by entering a 2-digit combination on the receiving telephone station. The
2-digit key combination (door open command) is configurable via the WebGUI.
Built-in camera
A real-time video image of the person using the Robin SV is displayed on the screen of the H.264
compatible hard- or soft phone as soon as a call is answered.
! Note: When using an IP-PBX or VoIP provider, check the Compatibility Sheet or the distributor of
the IP-PBX for H.264 video support. !
High-Definition video quality
The build-in camera of the Robin SV is capable of displaying the video image in High-Definition.
The image can be set to an aspect ratio of 4x3 or 16x9. A maximum of three simultaneous video
streams is supported.
High-quality sound reproduction
Thanks to the advanced audio DSP in the Robin SV, it’s sound quality is exceptionally good, without
any echo or interference.
Video Surveillance
The built-in 5MP IP WideAngle camera can also be used for video surveillance purposes. The Robin
SV can provide a continuous video stream to an external Video Management System (VMS), either
MJPEG video or RTSP (G.711 uLaw audio & H.264 video). Please note that the Robin SV supports
up to a total of 3 (three) concurrent video streams at the time.
1
Introduction

gf7
7
Manual Robin SV ENG - v. 3.1.0
Picture to e-mail
As of software release 3.5, all Robin SmartView SIP intercoms with 1, 2, 4, 6 piezo push-buttons
as well as the Robin SV with Keypad support Picture to e-mail. This new feature will e-mail a photo
of the visitor to an e-mail address predefined for that particular button or preset.
For instructions on how to enable Picture to e-mail, see the document: How-To_Picture2Email_
ENG.pdf on the supplied USB drive. You can also download the latest version of this document on
our support-site: http://support.robin.nl
Please note that the use of Picture to e-mail may be subject to national privacy regulations that
vary from country to country. Please consult your relevant Local Administration for instructions on
how to deploy the Picture to e-mail feature.
No separate power supply
The Robin SV is powered via ’Power-over-Ethernet‘ (PoE IEEE 802.3af). This eliminates the need
for a separate power supply; connection to a PoE network switch or Midspan is all that is necessary.
Web-based configuration
The Robin SV can be configured on a PC or Mac via a web browser (e.g. Firefox, Chrome, Safari).
Using a web browser, modification of all the settings for the Robin SV is easy, regardless of the
physical location of the Robin SV.
In addition to configuring and programming the Robin SV via the web browser, it also offers the
option of viewing any activity in the vicinity of the Robin SV in real time with the built-in camera.
Viewing activity via the camera, running diagnostics and testing can be performed from a remote
location. You can even access the Robin SV from the other side of the world via Internet (depending
on your firewall / router settings).
Compatible with WEBRelay
The Robin SV is compatible with the ControlByWeb WEBRelay Quad-LS, an IP-Webrelay with 4
dry contacts, either normally opened or normally closed (max 28V/3A). The IP-Quad-Webrelay is
installed indoors, is powered via PoE and needs to be connected to the same LAN the Robin SV is
connected to. The ‘Events’ mechanism in the Robin SV can control the four individual relays (see
page. 55).
1
Introduction

gf8
8
Manual Robin SV ENG - v. 3.1.0
2 Operation
2.1 Operating the door phone
2.1.1 Robin SV with piëzo button(s)
Press the bell-sign on the Robin SV to dial the predefined destination. The intercom will play a
ringing sound and the predefined phone set will be called.
2.1.2 Robin SV with Keypad
The Robin SV with Keypad has 16 keys.
Keys 1, 2, 3, 4, 5, 6, 7, 8, 9 and 0: use these keys to enter the desired preset, followed by
the green call button
Green call button: start calling the just entered preset
Red disconnect button: disconnect the call
The ‘i’-key: call a preconfigured preset, for example the reception desk
The ‘C’-key: clear the input
The ‘*’- and ‘#’-key: used for entering a PIN code
The Robin SV provides a phone book where the Administrator configures “presets”. A preset is in
fact an “alias” and refers for instance to: an apartment number, a tenant, or a department within a
large corporation. For each preset defined in the Robin SVs phonebook you can assign up to three
phone numbers, an e-mail address (optional for Picture to e-mail) and a PIN code (optional) that
will activate the built-in door-opener relay. By dialing the preset number on the intercom it will
start calling phone number one. If the first number is engaged or not answering it will continue
wit the second number. If the second number is engaged or not answering it will continue wit the
third number. It also features a ‘i-button’ on the Keypad. This button can be programmed to dial a
predefined preset, for instance the reception or building manager.
Other Keypad specific settings can be changed in the menu -Telephony-Call settings-General-.
2.2 Answering
You answer a call initiated by the Robin SV by answering the phone that is being called. In case
you use a H.264 compatible videophone or softphone, live video is displayed on the screen of the
receiving telephone set.
2.3 Controlling the built-in door opener
The built-in door opener is controlled with predefined keys on the phone set that answers the call.
When you activate the door opener, the attached door, fence or barrier will open.
2
Operation

gf9
9
Manual Robin SV ENG - v. 3.1.0
You can change the default code to open the door in the interface of the Robin SV, see menu
-System-Switch- (default code: ##).
2.4 Access using a PIN code (Robin SV with Keypad only)
The Robin SV with Keypad can activate the door opener by entering a PIN code on the Keypad.
This PIN code is preset depended, so every preset can have his own PIN code. The intercom can
activate the build-in relay or an external relay using the ‘Events’ mechanism.
To enter a PIN code, press the “*”-key, followed by the PIN code, and to confirm press the “#” key.
Assuming the PIN code is 123456 you will need to enter: *123456# to unlock the door. When
the PIN code is entered successfully a tune will be played by the intercom and the door will be
unlocked.
2
Operation
Andere Handbücher für SmartView SIP
1
Dieses Handbuch passt für folgende Modelle
5
Inhaltsverzeichnis
Andere Robin Gegensprechanlage Handbücher

Robin
Robin SmartView SIP Bedienungsanleitung

Robin
Robin SlimLine Bedienungsanleitung

Robin
Robin Robin SmartView Bedienungsanleitung

Robin
Robin Compact SIP Bedienungsanleitung

Robin
Robin SIP Betriebsanleitung

Robin
Robin SV Series Bedienungsanleitung

Robin
Robin Compact Bedienungsanleitung

Robin
Robin SIP Betriebsanleitung


