
VDO MC 2.0 WL Bedienungsanleitung

ITNLPL FRES ENG DE
MC 2.0
Digital Wireless
MC 2.0 WL
DE Bedienungsanleitung
ENG Instruction Manual
FR Manuel d‘ Installation et d‘ Utilisation
IT Manuale d‘ Installazione e Funzionamento
ES Instalacion y operación manual
NL Handleiding
PL Instrukcja obslugi licznika

MC 2.0 WL VDO CYCLECOMPUTING
DE ENG FR ESIT NL PL
Introduction
Congratulations
In choosing a VDO computer, you have opted for high-quality device with the latest technology. In order to fully benefit from the potential of the
computer, we recommend that you carefully read this manual. It contains the full operating instructions and many useful tips.
We hope you enjoy cycling with your VDO bike computer.
Cycle Parts GmbH
Pack contents
First, please ensure that the contents of this pack are complete:
VDO computer
Accessories:
speed sensor
Battery installed
Cable ties for attaching the
bracket and the transmitter
universal handlebar
bracket
spoke magnet
(clip magnet)
battery V-
for computer
rubber pad
for speed sensor
ITNLPL FRES ENG DE
www.vdocyclecomputing.com MC 2.0 WL
Table of contents
1. Display 42
2. Operation 44
3. Functions 46
. Information functions, BIKE
. Information functions, ALTI
. PULSE option
. CADENCE option
. Information functions PULSE
. Information functions CADENCE
. Selection of BIKE or BIKE
. Pairing of transmitters, selecting the transmitters
. Display backlight
. Selecting an HR training zone
. Selecting the start altitude /
recalibrating the current altitude
. Auto-starting/stopping the computer
. Starting/stopping the stopwatch
4. Reset 56
. Resetting the trip data
. Resetting the stopwatch
. Resetting the NAVIGATOR
.. Resetting to factory settings
5. Installation 57
. Fitting the transmitter, magnet and handlebar bracket
. Installing the battery in the computer
. Inserting the computer into the handlebar bracket
6. Basic settings 59
.. Selecting the language
. Setting the units (kmh/mph, Meter/feet,
Celsius/Fahrenheit, KG/LBS)
. Setting the tyre size
. Setting personal data
. Selecting the transmitter (PULSE or CADENCE or NONE)
.. Setting the clock
.. Setting the odometer
.. Setting the navigator
.. Setting the ride time
. Setting the start altitude/home altitude
. Setting the current altitude/actual altitude
. Automatic altitude adjustment during bike transport
. Setting the altitude gain uphill
. Setting the altitude loss downhill
. Setting the beeper
7. Sleep mode 73
8. Terms of guarantee 74
9. Troubleshooting 75
10. Technical specifications 77
>>> P02 references at the start of a section refer to the pictures in the
picture book!
MC 2.0 WL VDO CYCLECOMPUTING
DE ENG FR ESIT NL PL
!
1. Display
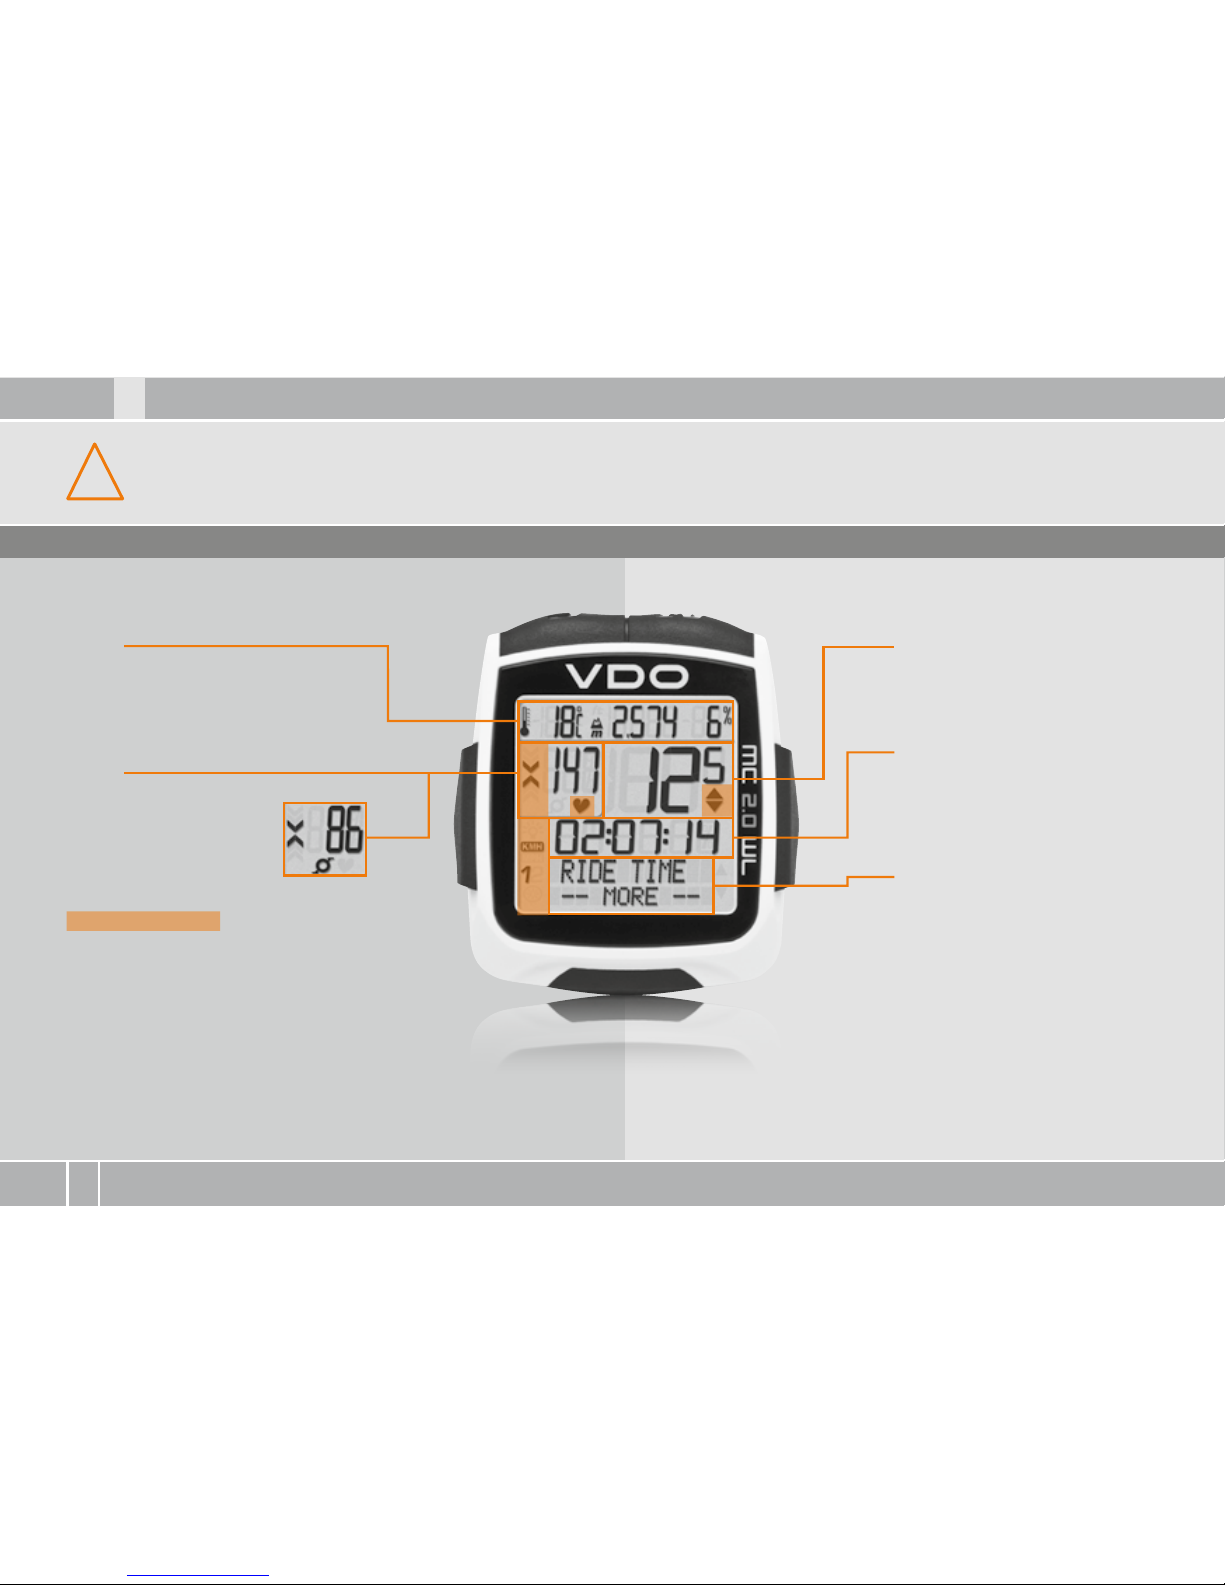
The display can be divided
into six areas:
Area
Temperature,
current altitude,
current uphill/
downhill gradient
Area
Current heart rate
Or:
Current cadence
Area
Current speed
Area
Data for the selected function
Area
Top line (info line) shows the name
of the selected function. Second
line (menu line) displays,
Bwhether there is more
information MORE.
Bwhether there is another
selection option SELECT.
Area
Indicator elements
The descriptionoftheindividual
indicators can be found on
the right-hand side.
Your VDO computer comes without battery built in. Before you start, please insert battery.
See also section 5.2.

ITNLPL FRES ENG DE
www.vdocyclecomputing.com MC 2.0 WL
Stopwatch indicator
Shows that the stopwatch is still running whilst other information is
provided on the display.
Indicator bike /bike
The computer can use two different settings for two bikes.
The indicator shows which of the two bikes you have chosen to use.
The total distance is measured and stored separately for bike and
bike .
Measurement unit (KMH or MPH)
The computer can display both KMH and MPH. Distances are
correspondingly displayed in kilometers or miles. The indicator
shows the selected measurement unit
Difference indicator – speed (current) to speed (average)
The computer compares the current speed with the average speed.
The indicator shows whether the current speed is
Bgreater than the average speed (+ km/h)
Bless than the average speed (- km/h)
Bor the same as the average speed (tolerance +/- km/h)
Menu prompt indicator
When a submenu has been accessed, these indicators flash and show
that there are other selection options or that the computer is waiting
for an entry (setting mode).
Display backlight
The LIGHT ICON indicates if the backlight-mode has been switched on.
Heart rate/cadence indicator
The indicator shows whether you have chosen the heartrate or the
cadence sensor.
Zone indicator
The zone indicator shows whether your heart rate or cadence
are within the set training zone.
BUp arrow: heart rate/cadence below the lower limit
BDown arrow: heart rate/cadence above the set upper limit
BBoth arrows: heart rate/cadence within the set training zone

MC 2.0 WL VDO CYCLECOMPUTING
DE ENG FR ESIT NL PL
C = CLEAR
A = ALTI
M = MENU
P = P/CAD
BIKE
Menu indicators on the display flash to show that there are other
selection options. In function mode, the computer is operated using
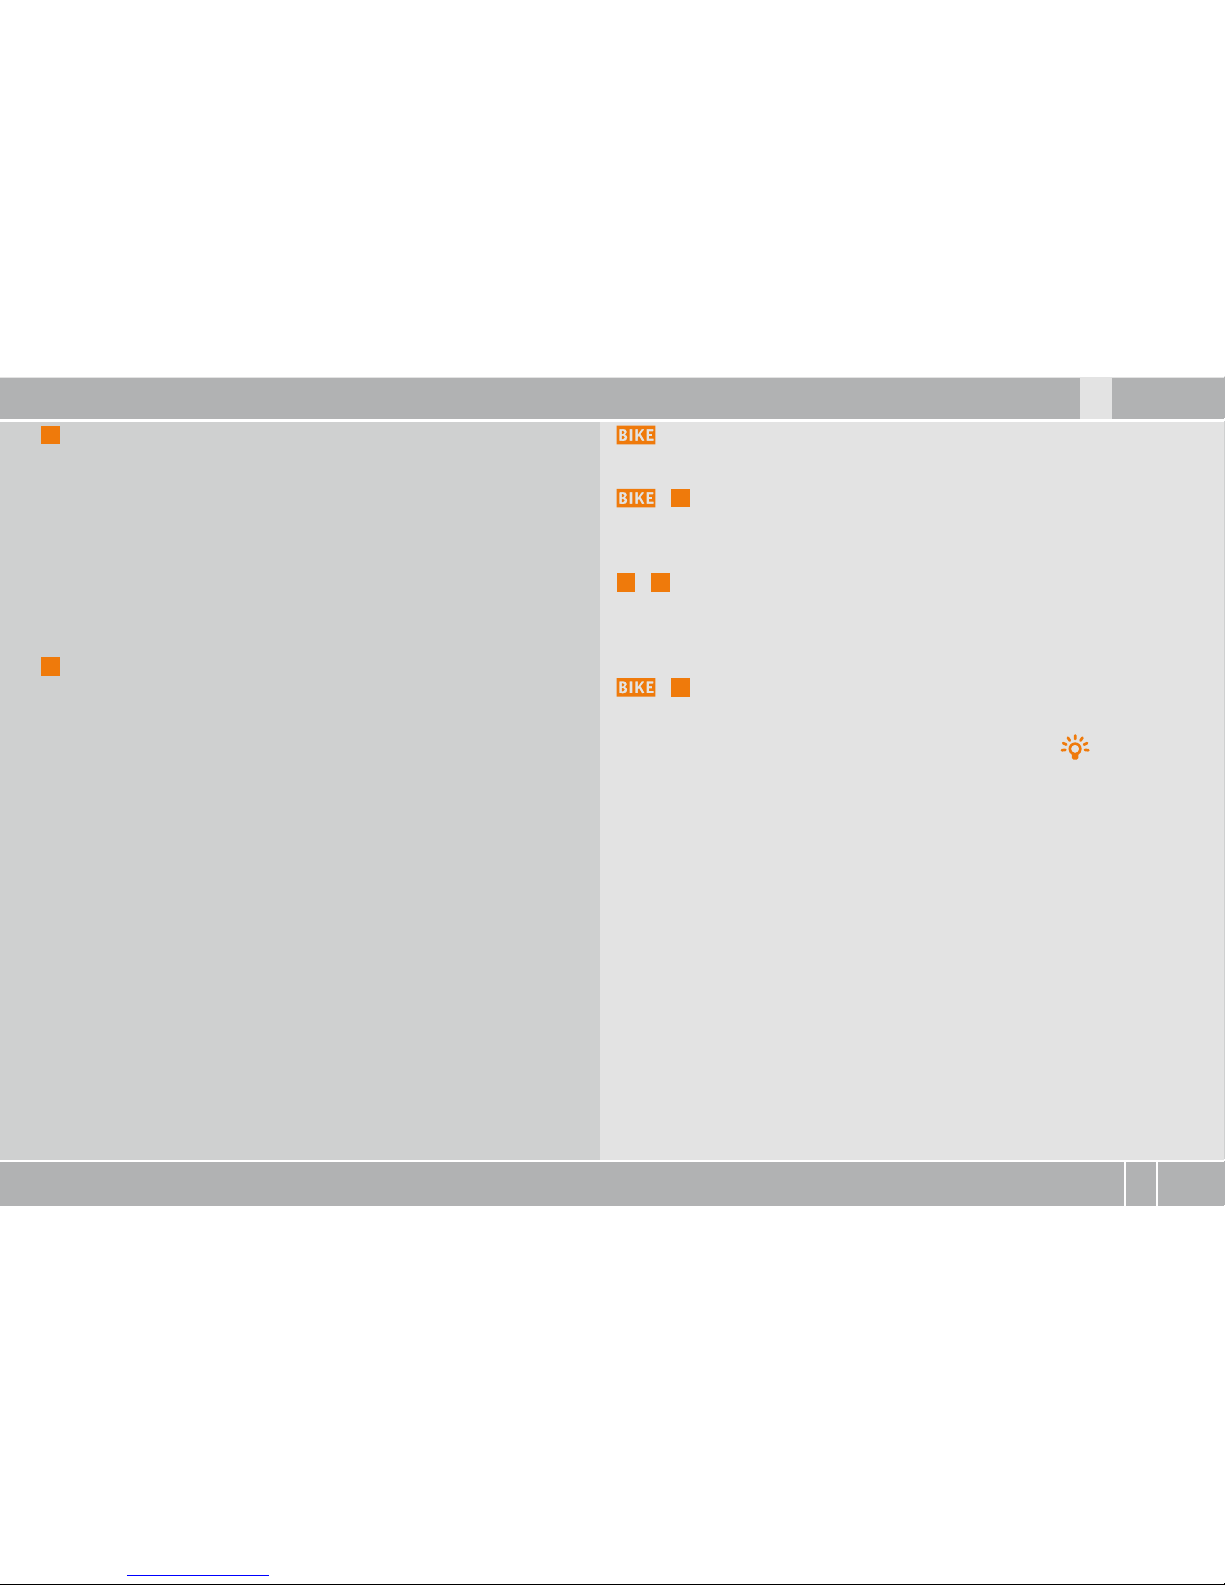
five buttons. In setting mode, the computer is operated using four
buttons.
2. Operation
To make your computer easy to use, we have developed the EMC =
Easy Menu Control system. The EMC makes your computer easier to
operate by means of full-text menu guidance, as is used on most
mobile phones.
FUNCTION
FUNCTION
FUNCTION
FUNCTION
C= CLEAR
In function mode:
BJump back a menu level from the submenu.
BPress and hold Cfor three seconds:
B Reset trip data to zero.
B Reset stopwatch to zero.
B Reset navigator to zero.
In setting mode:
BPress and hold Cfor three seconds:
Exit the settings menu,
return to function mode.
BCorrect an entry.
BJump back a digit.
M= MENU
In function mode:
BAccess available submenu.
You can recognise a submenu by
the flashing menu indicators.
BConfirm selection.
BStart/stop the stopwatch.
BPress and hold Mfor three seconds:
B Open the settings menu.
In setting mode:
BSelect a setting.
BConfirm a setting.
BConfirm a selection made.
A= ALTI
In function mode:
BAltitude information is displayed.
In setting mode:
BScroll backwards in the menu.
BDecrease the number to be set.
P= P/CAD
In function mode:
BHeart rate information
or
BCadence information
In setting mode:
BScroll forwards in the menu.
BIncrease the number to be set.
= BIKE
In function mode:
BBike functions
ITNLPL FRES ENG DE
www.vdocyclecomputing.com MC 2.0 WL
A= ALTI
In function mode:
BAltitude information is displayed.
BIf the submenu is open:
Scroll down in the submenu.
BPress and hold ALTI for three seconds:
Opens the menu for recalibrating the current altitude.
In setting mode:
BScroll down within the setting modes.
BDecrease a digit.
P= P/CAD
In function mode:
BDisplays the heart rate information and the stopwatch
(if heart rate has been paired).
BOr:
Displays the cadence information and the stopwatch
(if cadence has been paired).
BIf the submenu is open: Scroll up in the submenu.
BPress and hold HR/CAD for three seconds:
Opens the menu for selecting the heart rate training zone
(if heart rate transmitter has been paired).
In setting mode:
BScroll up within the setting modes.
BIncrease a digit.
= BIKE
BDisplays the bike functions, e.g. trip distance, average speed etc.
+ M= BIKE+MENU
BPress the buttons BIKE+MENU (hold for three seconds) to open
the menu for selecting the transmitter for heart rate or cadence.
A+ P= ALTI+P
BPress the buttons ALTI+P to start/stop the stopwatch.
BThe stopwatch immediately appears on the display and
is started or stopped.
+ C= BIKE+CLEAR
BPress the buttons BIKE+CLEAR to activate the display backlight.
BWhen the display backlight is activated, the LIGHT icon is
displayed.
BWhen the display backlight is activated, the display is lit for a few
seconds every time a button is pressed.
ATTENTION: press the buttons BIKE + CLEAR again to switch off the
display backlight during the day.
This SAVES BATTERY POWER.

MC 2.0 WL VDO CYCLECOMPUTING
DE ENG FR ESIT NL PL
3. Functions
3.1 Information functions, BIKE
CURRENT SPEED
Permanently shown on the display.
Accuracy: , KMH/MPH
TRIP DISTANCE
Shows the distance of the current trip since the last reset. Maximum
value . km. If the maximum value is exceeded, the odometer
starts again at zero.
TRIP DISTANCE/MORE
MORE indicates that there is a submenu
for the main menu TRIP DISTANCE.
Open the submenu by pressing M.
In the submenu you will find (scroll by pressing ALTI Aor P):
BTotal distance BIKE up to max. , km
BTotal distance BIKE up to max. , km
BTotal distance for bike + bike up to max. , km
Exit the submenu by pressing C.
RIDE TIME
Shows the ride time for the current trip distance since the last reset.
Maximum :: HH:MM:SS.
If the maximum value is exceeded, the ride time measurement starts
again at zero.
RIDE TIME/MORE
MORE indicates that there is a submenu for the
main menu RIDE TIME. Open the submenu by
pressing M.
In the submenu you will find (scroll by pressing ALTI Aor P):
BTotal ride time bike up to max. : HHH:MM
BTotal ride time bike up to max. : HHH:MM
BTotal ride time bike + bike up to max. : HHHH:MM
Exit the submenu by pressing C.
AVG SPEED
Shows the average speed since the last reset.
Accuracy: decimal places.
MAX SPEED
Shows the maximum speed on the current trip
since the last reset. Accuracy: decimal places.

ITNLPL FRES ENG DE
www.vdocyclecomputing.com MC 2.0 WL
NAVIGATOR
The navigator is a second trip distance counter. The NAVIGATOR:
Bis independent of the trip distance counter.
Bcan be reset to zero as often as you want.
Bcan be set to a starting value.
Bcan count forwards or backwards from this starting value.
These special options make it easier to follow instructions from
a touring book or road book.
NAVIGATOR/SET
SET indicates that there is a submenu for the
main menu NAVIGATOR. Open the submenu by
pressing M.
You can set a start value here and decide whether the NAVIGATOR
counts forwards or backwards from this start value.
3.2 Information functions, ALTI
ALTI UP
Shows the altitude gain uphill on the current trip since the last reset.
ALTI UP--MORE--
MORE indicates that there is a submenu for the
main menu ALTI UP. Open the submenu by
pressing M.
In the submenu, you will find (scroll by pressing ALTI Aor P):
BAltitude gain uphill for bike
BAltitude gain uphill for bike
BTotal altitude gain uphill for bikes +
Exit the submenu by pressing C.
ALTI MAX
Shows the maximum altitude (highest point) reached on the
current trip.
ALTI MAX--MORE--
MORE indicates that there is a submenu for the
main menu ALTI MAX. Open the submenu by
pressing M.
In the submenu, you will find (scroll by pressing ALTI Aor P):
ALTI MAX for BIKE :
highest point of all previous trips with bike .
ALTI MAX for BIKE :
highest point of all previous trips with bike .

MC 2.0 WL VDO CYCLECOMPUTING
DE ENG FR ESIT NL PL
AVG CLIMB: average uphill gradient (in percent) on
the current trip.
MAX CLIMB: maximum uphill gradient
(in percent) on the current trip.
ALTI DOWN
Shows the altitude loss downhill on the current trip since the last
reset.
ALTI DOWN--MORE--
MORE indicates that there is a submenu for the
main menu ALTI DOWN. Open the submenu
by pressing M.
In the submenu, you will find (scroll by pressing ALTI Aor PULSE P):
BAltitude loss downhill for bike
BAltitude loss downhill for bike
BTotal altitude loss downhill for bikes +
Exit the submenu by pressing C.
AVG DOWN: shows the average downhill
gradient of the current trip (in percent).
MAX DOWN: shows the maximum downhill
gradient of the current trip (in percent). 3.5 Information functions, PULSE
After pairing the PULSE transmitter, the current
heartrate is shown in area of the current HR
display. In function mode, the functions can be
accessed by pressing the button P/CAD P.
RESETTING the trip data also resets the HR data
to zero.
3.3 PULSE option >>> P04-05
Selecting the pulse or cadence option
The PULSE menu is only available if:
Bthe PULSE transmitter has been selected
(see transmitter selection in sections . and .).
Bthe PULSE transmitter was paired during pairing.
Note: the heart rate and cadence cannot be received simultaneously.
Andere Handbücher für MC 2.0 WL
1
Inhaltsverzeichnis
Andere VDO Fahrradzubehör Handbücher

VDO
VDO ECO LIGHT M60 Bedienungsanleitung

VDO
VDO M2WL Installations- und Benutzerhandbuch

VDO
VDO X1DW Bedienungsanleitung

VDO
VDO M1WL Leitfaden

VDO
VDO X2 Bedienungsanleitung

VDO
VDO M5 Bedienungsanleitung

VDO
VDO ECO LIGHT RED PLUS Bedienungsanleitung

VDO
VDO X2DW Bedienungsanleitung

VDO
VDO M1.1 WL Bedienungsanleitung

VDO
VDO M4WL Bedienungsanleitung


Beliebte Fahrradzubehör Handbücher anderer Marken

Sigma
Sigma BC 16.16 Bedienungsanleitung

Playcore
Playcore Dero Setbacks Bedienungsanleitung

VDO Cyclecomputing
VDO Cyclecomputing x3dw Bedienungsanleitung

Cateye
Cateye RAPID X2 Bedienungsanleitung

buratti meccanica
buratti meccanica Clorofilla Trail Bedienungsanleitung

Shimano
Shimano SG-8R20 Betriebsanleitung


