Anton/Bauer Interactive 2000 PowerCharger Bedienungsanleitung

STASISTM
FLEX
OWNER’S MANUAL
®
A7595-0326 Rev A
DA-C078 Sht 1 of 16

A7595-0326 Rev A
DA-C078 Sht 2 of 16

TABLE OF CONTENTS
INTRODUCTION.............................................................................. 1
SETTING UP YOUR STASISFLEX................................................. 2
START WITH STAND ALONE STASISFLEX ................................. 2
TO USE STASISFLEX WITH GOLD MOUNT................................. 3
TO MOUNT GOLD MOUNT ADAPTER PLATE TO
STASISFLEX.................................................................................... 4
TO USE STASISFLEX WITH ELIPZ BATTERY SYSTEM ............ 5
TO BACK MOUNT ELIPZ ON STASISFLEX .................................. 5
OPERATING STASISFLEX...............................................................6
PRECAUTIONS ............................................................................... 8
LIMITED WARRANTY.....................................................................10
A7595-0326 Rev A
DA-C078 Sht 3 of 16
Introduction
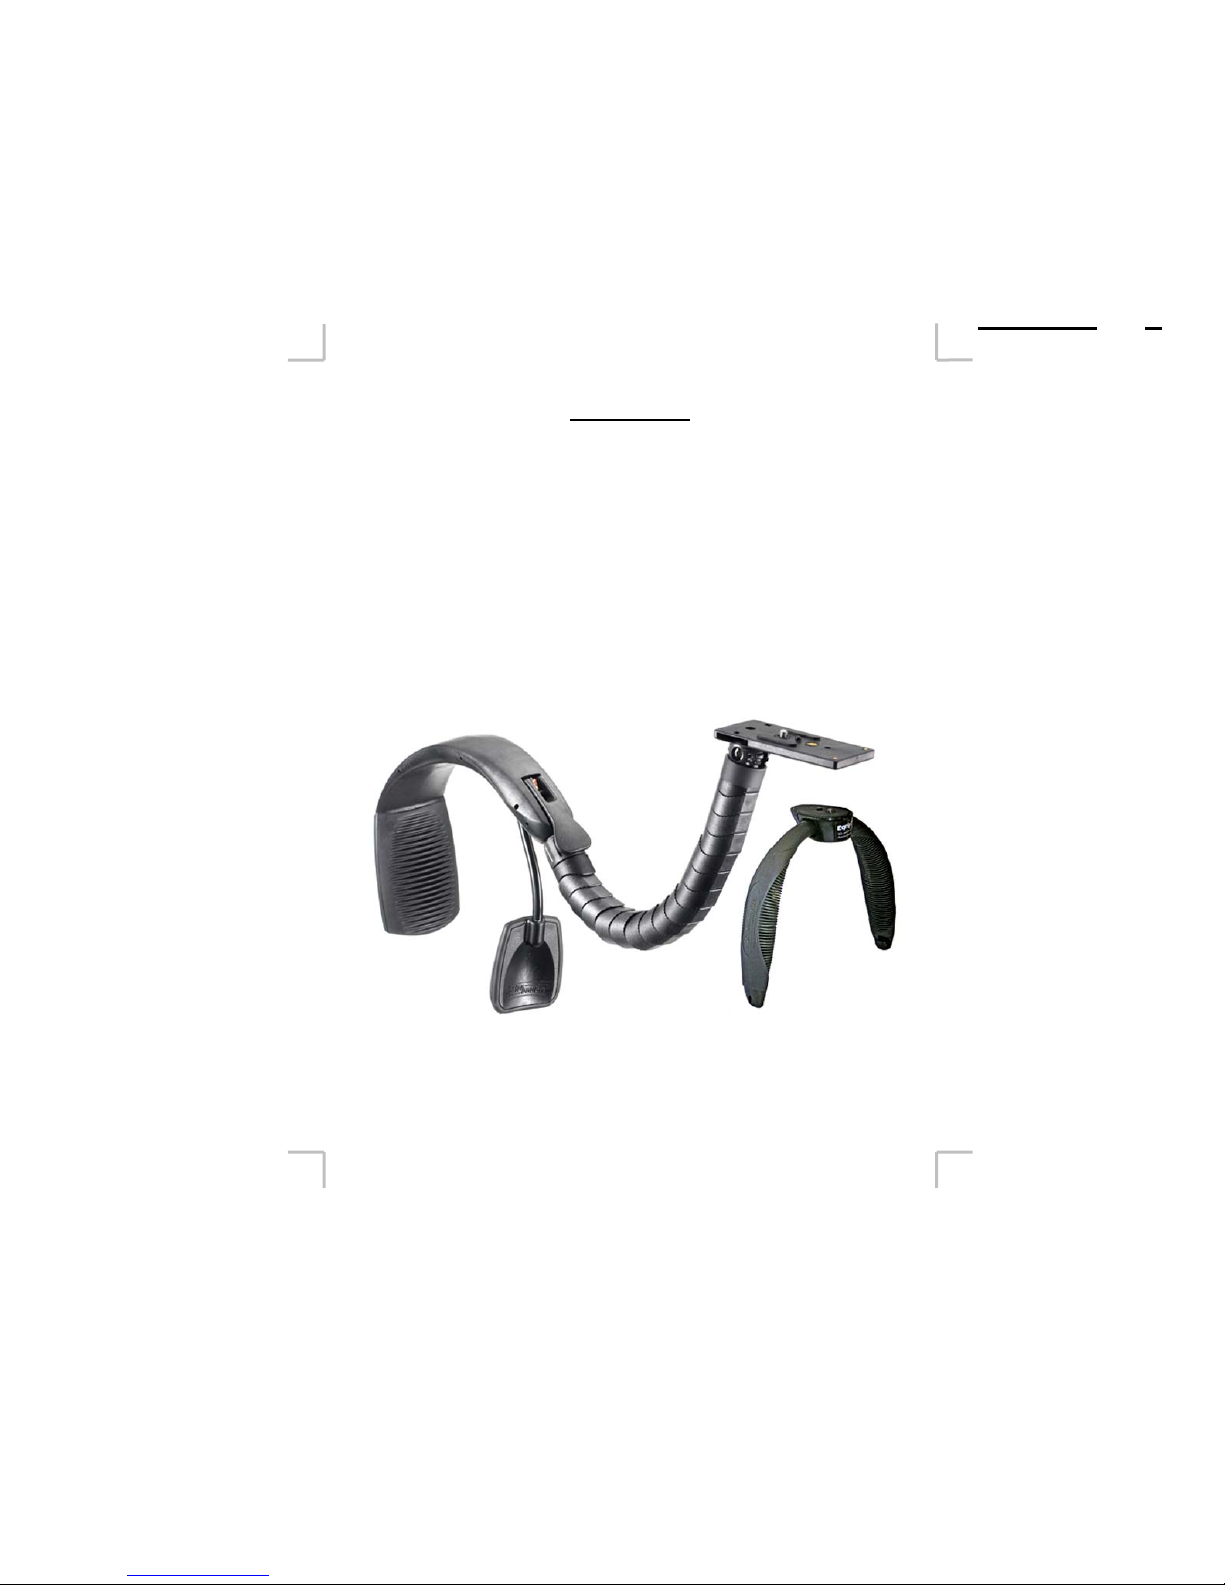
The Anton/Bauer StasisFlex is a versatile handheld support assist
device that can be used alone or as a power support with
Anton/Bauer Gold Mount or ElipZ batteries. The unique patent
pending locking Flex arm allows a camera to be instantly
adjusted to a variety of shooting positions and locked in place at
the touch of a lever.
Important note: For safe and comfortable shooting
operation, Anton/Bauer strongly recommends the use of the
Anton/Bauer EgripZ when StaisFlex is used with cameras
weighing over 4 lbs (1.8kg).
A7595-0326 Rev A
DA-C078 Sht 4 of 16
1
EgripZ
(optional)

SETTING UP YOUR STASISFLEX
Start with the stand alone StasisFlex
yAttach camera to mounting platform (Figure 1) using
¼-20 mounting screw. (Place and attach cushion pads
included in package to allow camera to fully tighten to
platform).
Tip: A standard quick release system such as the Manfrotto
3299 RC2 can be used to easily attach and remove camera
from mount.
Camera mounting platform
Knurled leveling ball
2
Figure 1
A7595-0326 Rev A
DA-C078 Sht 5 of 16

To use StasisFlex with Gold Mount
Requires one of the adapter plates below (see catalog for
information):
yFGM-S Gold Mount with DC-DC converter for 6 volt to
camera – 14 volt to PowerTap connector. With cable
and camera connector for Sony cameras
yFGM-P Gold Mount with DC-DC converter for 6 volt to
camera – 14 volt to PowerTap connector. With cable
and camera connector for Panasonic cameras
yFGM-C Gold Mount with DC-DC converter for 6 volt to
camera – 14 volt to PowerTap connector. With cable
and camera connector for Canon cameras
yFGM-EX1 Gold Mount with cable and camera
connector for Sony EX-1 cameras. Supplies native 14
volts to camera and to PowerTap.
A7595-0326 Rev A
DA-C078 Sht 6 of 16
3
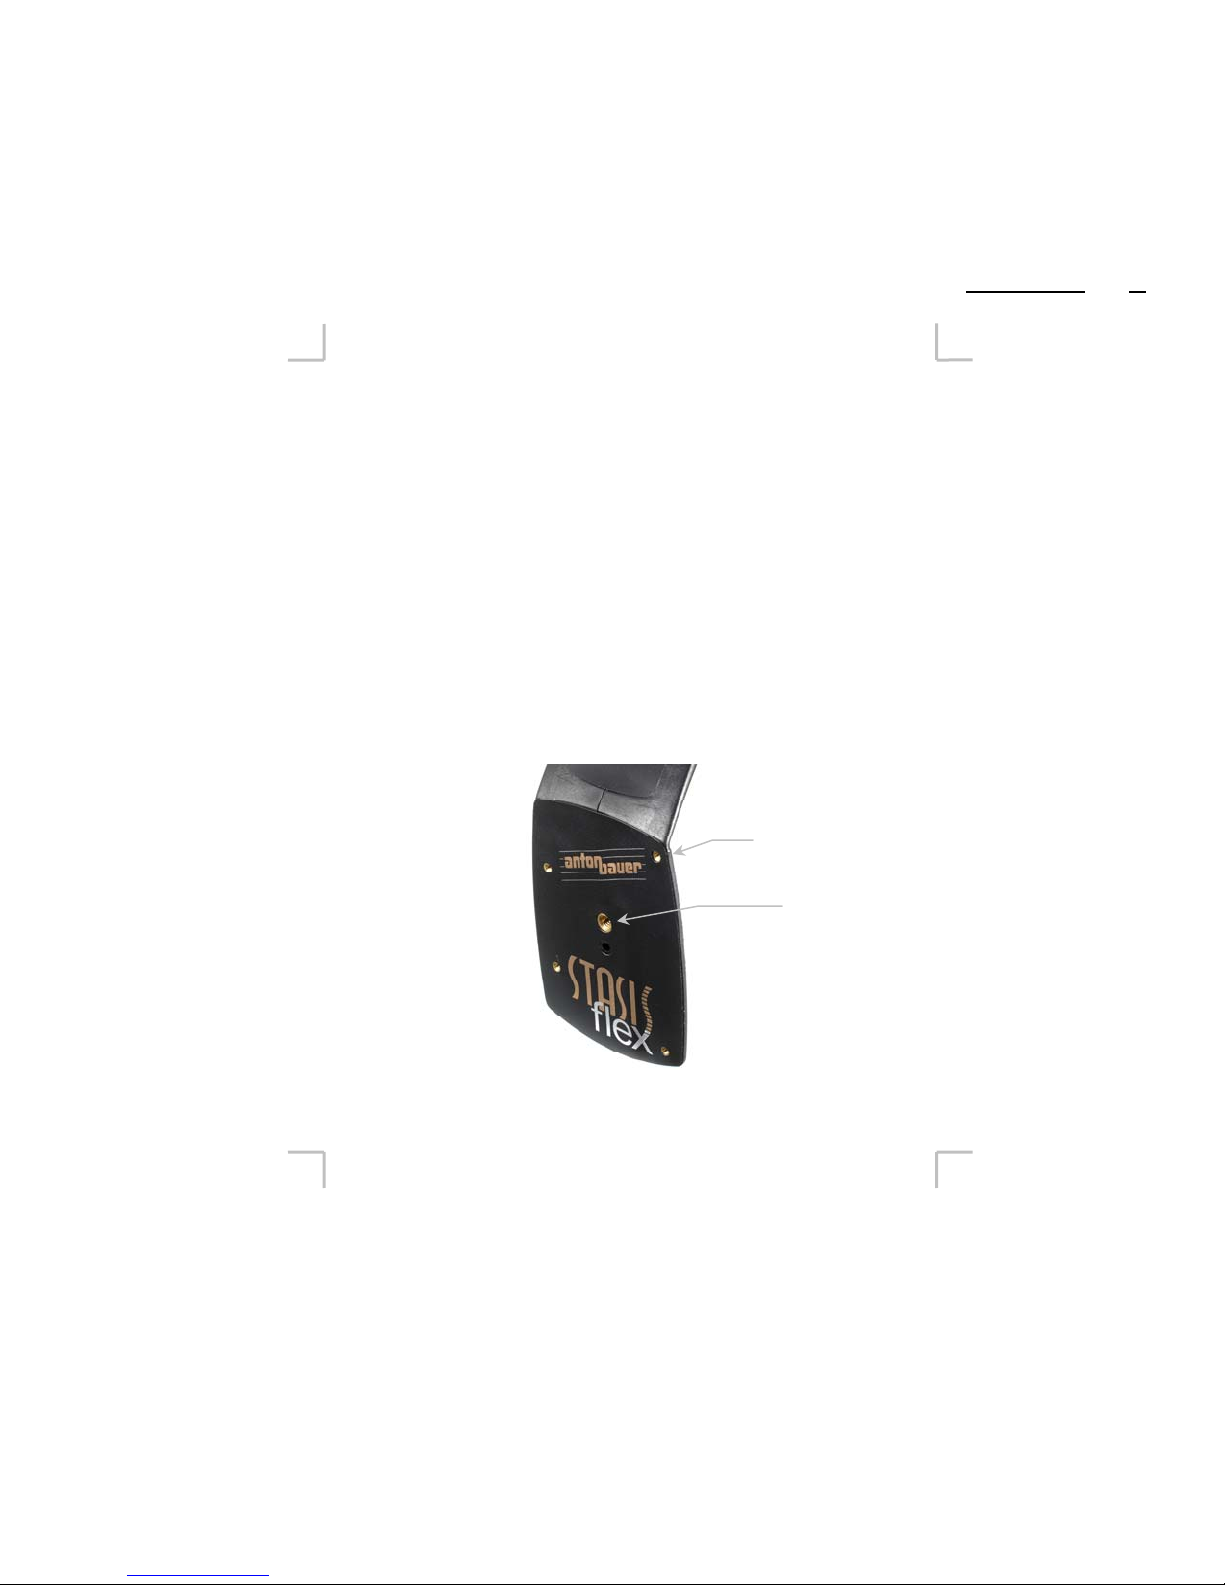
To mount Gold Mount adapter plate to StasisFlex
(1) Attach Gold Mount adapter to back of StasisFlex using
hardware supplied with adapter (remove cardboard backing
plate before attaching). If you are intending to attach wireless
microphone receivers to the camera the Universal BP (see
Anton/Bauer catalog) can be secured between the Gold Mount
and StasisFlex back.
(2) Mount camera as described on page 2.
(3) Attach camera power connector to camera
(4) Attach UltraLight UL2-L (purchased separately) to camera
and plug into PowerTap.
(5) Dress any wires with three wire guides along length of
StasisFlex body. Remove the appropriate size wire guides
from the three “trees” provided. See page 5.
4
A7595-0326 RevA
DA-C078 Sht 7 of 16
Gold Mount
mounting pattern
¼-20
hard mount

To use StasisFlex with ElipZ battery system
Requires:
yElipZ extension cable – Extends standard ElipZ camera
cable for back mounting of ElipZ – powers camera and
ElightZ with native 7.2V.
yConnector support (included with extension cable)
(Figure C)
ySpare ElipZ mounting shoe (optional)
To back mount ElipZ on StasisFlex
(1) Attach ElipZ mounting shoe to ¼-20 hard mount to back of
StasisFlex (Figure A)
(2) Attach ElipZ 10K battery to mounting shoe according to
ElipZ instructions.
(3) Mount camera as described on page 2
(4) Connect ElipZ extension cable (available separately)
(5) Attach camera power connector to camera
(6) Dress wires in wire guides along length of StasisFlex body.
Insert connector support to either side of camera platform to
hold extension cable connector (Figure B)
Tip: The hard mounts to the back of the StasisFlex can be used to
mount any variety of accessories even without the use of a
battery.
A7595-0326 RevA
DA-C078 Sht 8 of 16
5
Wire guides
Figure A
Figure B
Figure C

Operating StasisFlex
Operation of the StasisFlex is intuitive and easily handled. After
following the appropriate set up routine above, follow the tips
below for adjusting StasisFlex to fit you and your shooting style.
yAdjusting to your shoulder: Carefully bend the
adjustable chest pad arm (Figure 3) to the approximate
size for your body – take into account your camera
movements and your clothing (bulky coats / jackets
require more room!). Bending the flexible metal arm
from a point as close to the chest pad as possible will
provide the best support – bending the arm from a point
close to its connection to the StasisFlex body will allow
for less firm support but a wider free range of movement.
Tip: The flexible arm of the chest pad (see Figure 3) can be cut for
an individualized fit, especially for more slightly built persons.
Ideally, the pad will fit your body in the hollow of the front of
your shoulder, just below your clavicle. Use an allen wrench to
remove the chest pad from the arm. Then cut the arm using a
hack saw (the soft metal of the arm will cut easily) then reinsert
the pad to the arm and re-tighten the allen screw.
A7595-0326 Rev A
DA-C078 Sht 9 of 16
6
Locking lever
Adjustable
Chest Pad
Figure 3

yAdjusting the position of the camera: WHILE SUPPORTING
CAMERA, (As in picture on page 2) open locking lever (Figure 5).
The flexible arm will release completely when latch is open. IT IS
BEST TO RELEASE LOCKING LEVER ONLY WHEN THE
CAMERA IS ON THE STASIS FLEX, ON YOUR SHOULDER
AND YOUR HAND IS SECURELY HOLDING THE CAMERA
THROUGH LENS GRIP IN THE SAME MANNER AS YOU
WOULD OPERATE THE CAMERA - this allows the camera to be
securely held and assists in locating the camera to the best position. For
right handed people, this means holding the camera normally through
the lens/camera strap with your right hand while using your left hand to
release the locking lever. The camera can now be adjusted forward and
back, up or down, left or right – allowing you to place the viewfinder or
LCD in an accessible position.
TIP: As you move the camera into position with your right hand (in the
camera grip) use the left hand to smooth and position the “knuckles” of
the Flex arm. If too much of the form of the Flex arm is created by too
few knuckles, they may bind and make it difficult to close the lever. In
this case, simply move the camera away so that the arm is straight, then
re-form the positioning of the knuckles.
A7595-0326 Rev A
DA-C078 Sht 10 of 16
Figure 5
7
Locking lever
Andere Handbücher für Interactive 2000 PowerCharger
26
Inhaltsverzeichnis


