Erbauer ERB064VAC Bedienungsanleitung
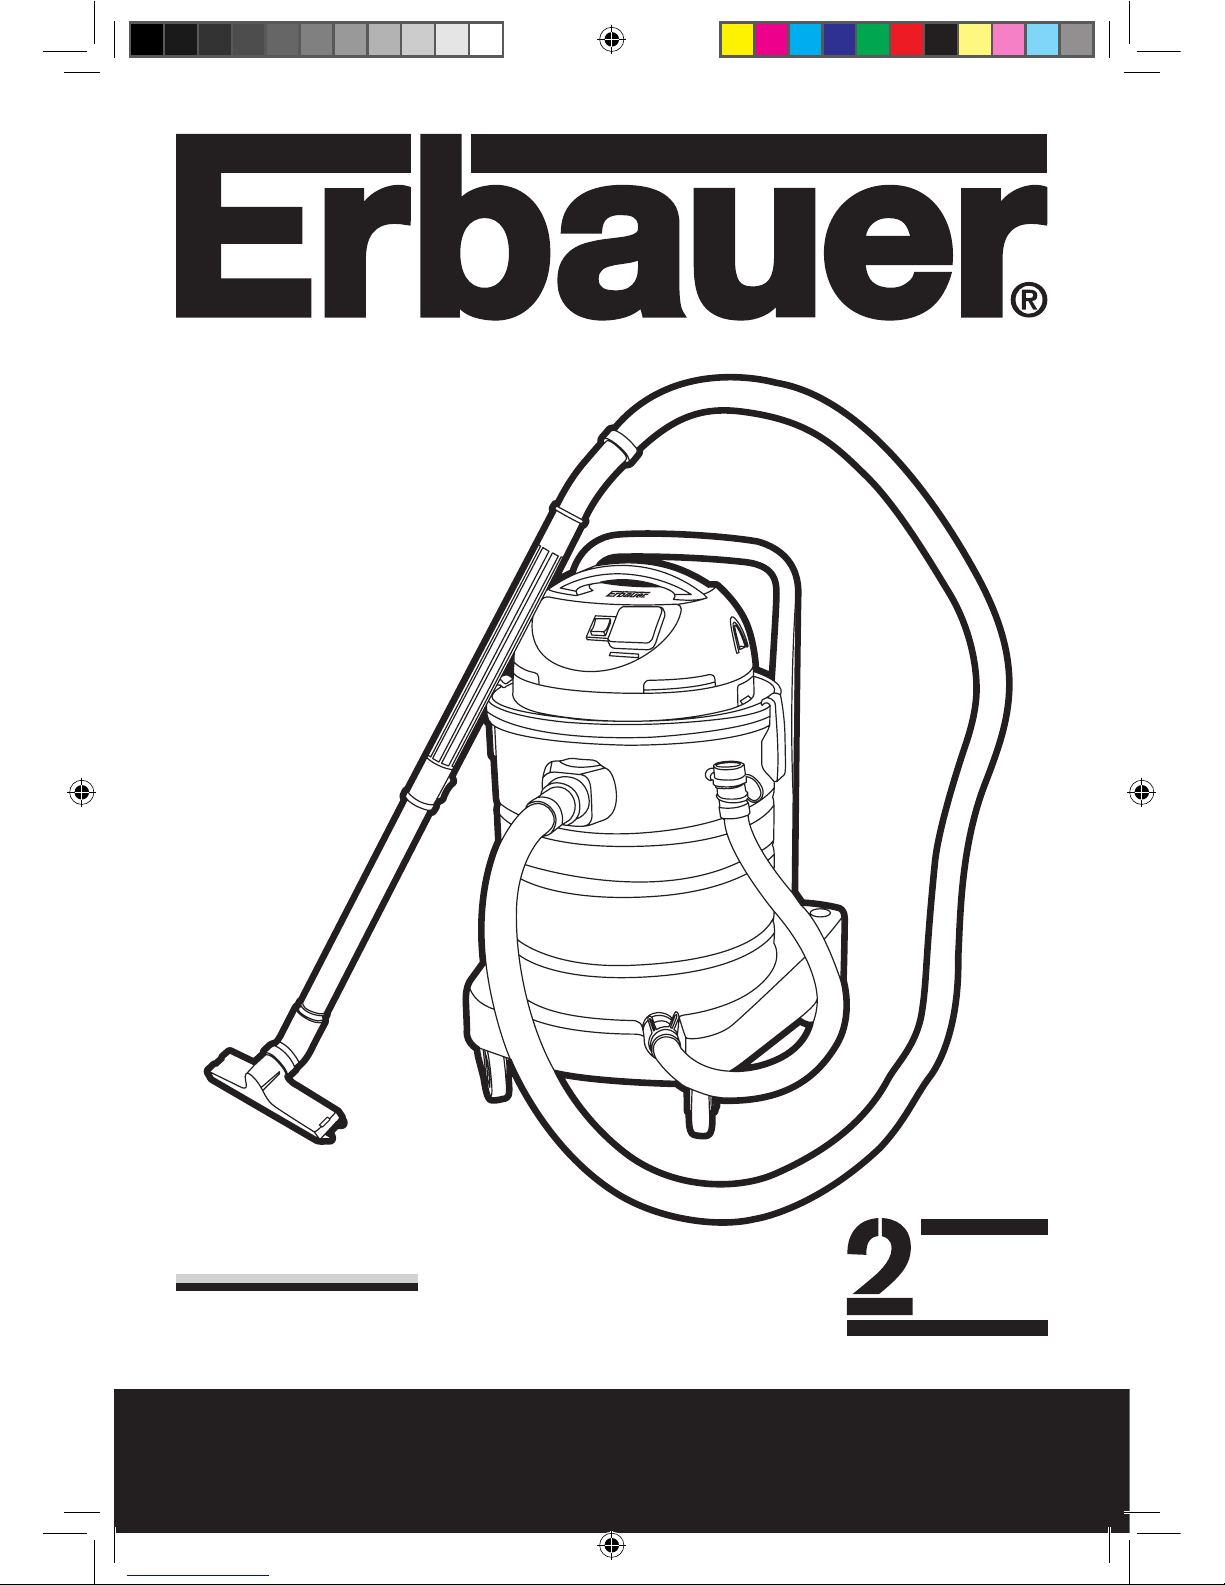
50L WET/DRY VACUUM
WARRANTY
YEARS
ERB064VAC
TVC141S1-M-070924.indd 1 2007-9-25 9:45:10

TVC141S1-M-070924.indd 2 2007-9-25 9:45:10
50L WET/DRY VACUUM
GUARANTEE
This product carries a guarantee of 24 months. If your product develops a
fault within this period, you should in the first instance contact the retailer where the
item was purchased.
This guarantee specifically excludes losses caused due to:
- Fair wear and tear
- Misuse or abuse
- Lack of routine maintenance
- Failure of consumable items (such as batteries)
- Accidental damage
- Cosmetic damage
- Failure to follow manufacturer’s guidelines
- Loss of use of the goods
This guarantee does not affect your statutory rights. This guarantee is only valid in the UK.
For further technical advice, spare parts or repair service (outside of guarantee) please
contact the customer helpline number on 0845 607 6380.
Congratulations on your purchase of a quality power tool from Erbauer (UK)
Ltd. This product should give you reliable service but for your peace of mind
this power tool does carries a 24-month guarantee, the terms of
which are detailed below.
If this product develops a fault within the guarantee period contact your
retailer.
Please retain this handbook in case you need to refer to safety, care or guarantee
information in the future.
TVC141S1-M-070924.indd 3 2007-9-25 9:45:10

SAFETY INSTRUCTIONS
Read all instructions. Failure to follow all instructions listed below
may result in serious injury. This product should never be left
unattended when connected to the mains supply.
SAVE THESE INSTRUCTIONS
• This appliance is not intended for use by persons (including children) with reduced
physical, sensory or mental capabilities, or lack of experience and knowledge, unless
they have been given supervision or instruction concerning use of the appliance by a
person responsible for their safety.
• Children should be supervised to ensure that they do not play with the appliance.
• If the supply cord is damaged, it must be replaced by the manufacturer, its service
agent or similarly qualified persons in order to avoid a hazard.
ELECTRICAL SAFETY
Before switching the product on, make sure that the voltage of your electricity supply
is the same as that indicated on the rating plate. This product is designed to operate on
230V AC 50Hz. Connecting it to any other power source may cause damage.
IMPORTANT NOTES
• Attention: Before assembly and starting operation, read the operating instructions
carefully.
• Check that the mains voltage corresponds to the details on the type plate.
• Only connect to a proper 230 volt, 50 Hz earthed socket.
• Pull the mains plug out of the socket when: the unit is not in use, before opening the
unit, before cleaning and maintenance.
• Never clean with solvents.
• Do not use the cable to pull the plug out of the socket. When unit is ready for use, do
not leave unattended.
• Safeguard from children.
• Care must be taken that the mains connection lead is not damaged by being driven
over, crushed,stretched, etc.
• The unit must not be operated if the mains connection lead is not in perfect
condition.
• Replacement mains connection leads must not differ from the versions indicated by
the manufacturer.
• On no account vacuum: burning matches, glowing ashes and cigarette ends,
inflammable, corrosive, fire hazard or explosive substances, vapours and liquids.
• This unit is not suitable for vacuuming dust which is damaging to health.
• Store the unit in a dry place.
• Do not operate a defective unit.
• Servicing only by an authorised service point.
• Use only for operations for which the unit is intended.
• Take great care when cleaning stairs.
• Use only manufacturer’s attachments and spare parts.
TVC141S1-M-070924.indd 4 2007-9-25 9:45:11
50L WET/DRY VACUUM
SYMBOLS
Read the manual Warning Wear gloves
Wear dust mask,eye & ear protection
Conforms to relevant safety standards
TVC141S1-M-070924.indd 5 2007-9-25 9:45:11

1. SOCKET FOR POWER TOOLS
2. BLOWER HEAD
3. PUSH HANDLE
4. LATCH
5. DRAIN TUBE HOLDER
6. REAR WHEEL
7. DRAIN OUTLET
8. FRONT WHEEL
9. VACUUM HOSE
10. HOSE CONNECTION PIECE
11. FILTER BASKET ( SEE FIG 15)
12. ON/OFF SWITCH/OPERATING MODE SWITCH
13. BUTTON
14. COMBI ZOZZLE
15. DUST BAG (SEE FIG 16)
16. FOAM FILTER (SEE FIG 15)
17. CREVICE NOZZLE
18. EXTENSION TUBE
1
3
4
12
9
2
5
7
6
8
10
14
13
17
TVC141S1-M-070924.indd 6 2007-9-25 9:45:12

50L WET/DRY VACUUM
TECHNICAL DATA
Rated voltage
Rated input power
With power take-off socket
Capacity
Protection against ingress of water
Machine weight
230V~50Hz
1400W
1500W
50L
IPX4
11.9kg
ACCESSORIES
Vacuum hose 1pc
Extension tube 1pc
Combi nozzle 1pc
Crevice nozzle 1pc
Foam filter 1pc
Dust bag 1pc
Drain tube 1pc
Front wheels 2pcs
Rear wheels 2pcs
TVC141S1-M-070924.indd 7 2007-9-25 9:45:12
Note: Before using the tool, read the
instruction book carefully.
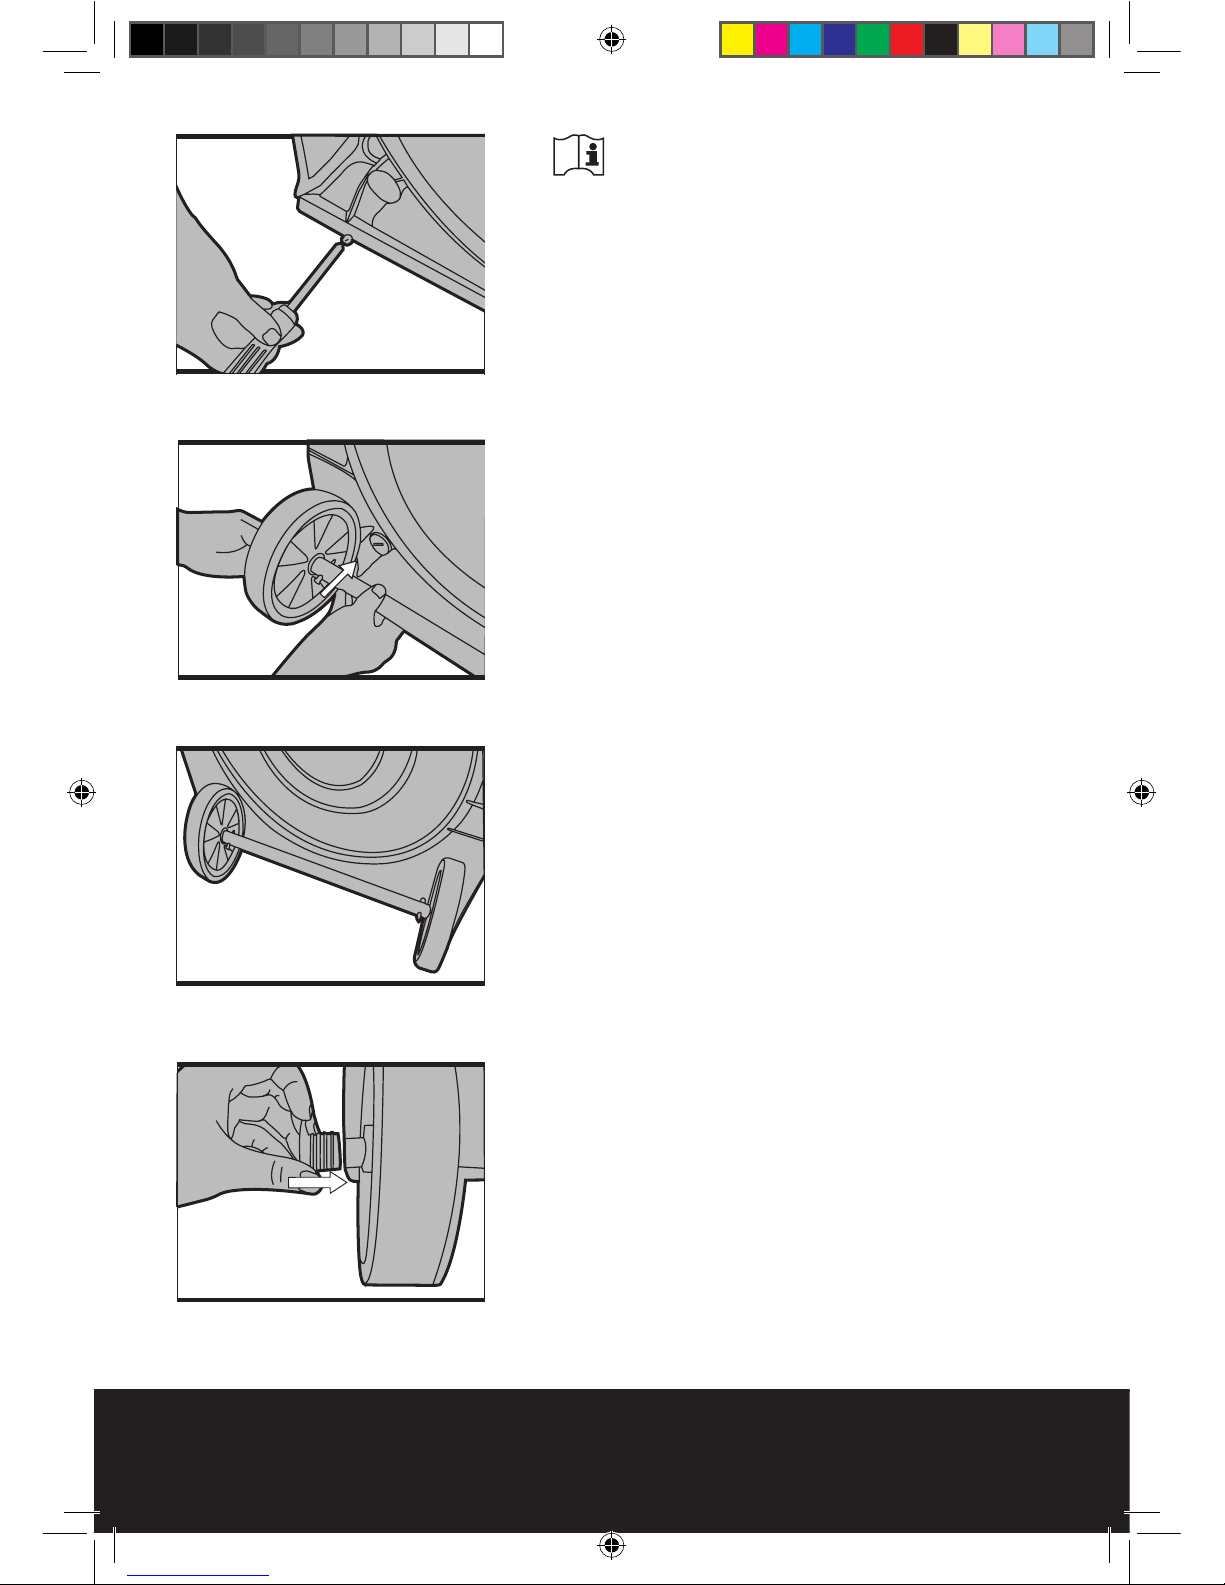
MOUNTING
1. Assemble the wheels
a. Push the front wheels into the base of the
container ensuring correct orientation. The wheels
are friction fit.
b. Unscrew the bolts on the steel bar and take off
the bar from the base. (See fig 1)
c. Simply thread the steel bar through the two
holes of the rear wheels and fix the bar back to
the body as it initially was, then tighten the bolts.
(See fig 2,3)
d. Push the wheel cover into the hole of the steel
bar. (See fig 4)
Fig 2
Fig 1
Fig 3
Fig 4
TVC141S1-M-070924.indd 8 2007-9-25 9:45:14
50L WET/DRY VACUUM
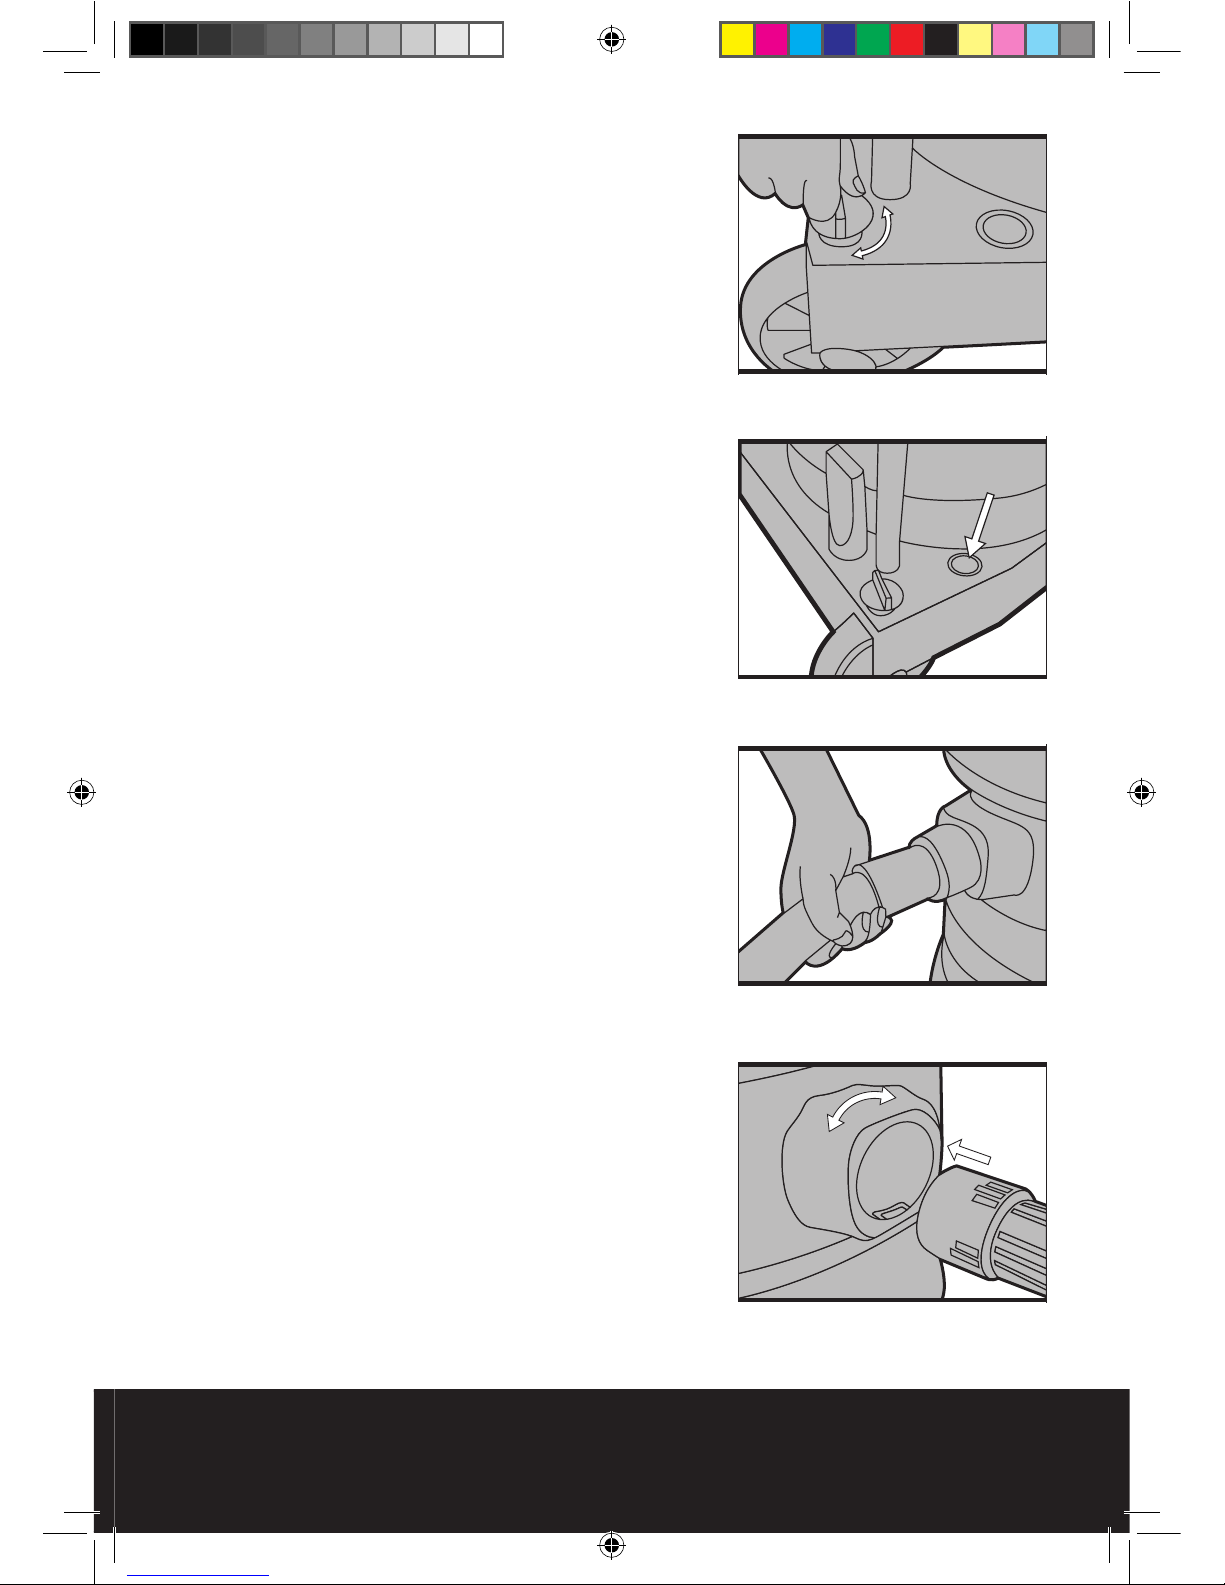
e. Screw the wheel lock-knob into the hole above
the rear wheel. Screw tightly to fix the wheel, vice
versa. (See fig 5)
f. For convenience, put the crevice nozzle into
the hole on the base of the container. (See fig 6)
2. Assemble the hose
CAUTION: This hose contains electrical
connections:
- do not use to suck up water (for vacuum
cleaners only);
- do not immerse in water for cleaning;
- the hose should be checked regularly and must
not be used if damaged.
a. Push the flexible hose into the hose connection
piece.(See Fig 7) Rotate the head of the flexible
hose. Make sure the pin on the hose is locked in
the slot.(See Fig 8)
Fig 6
Fig 5
Fig 7
Fig 8
TVC141S1-M-070924.indd 9 2007-9-25 9:45:16
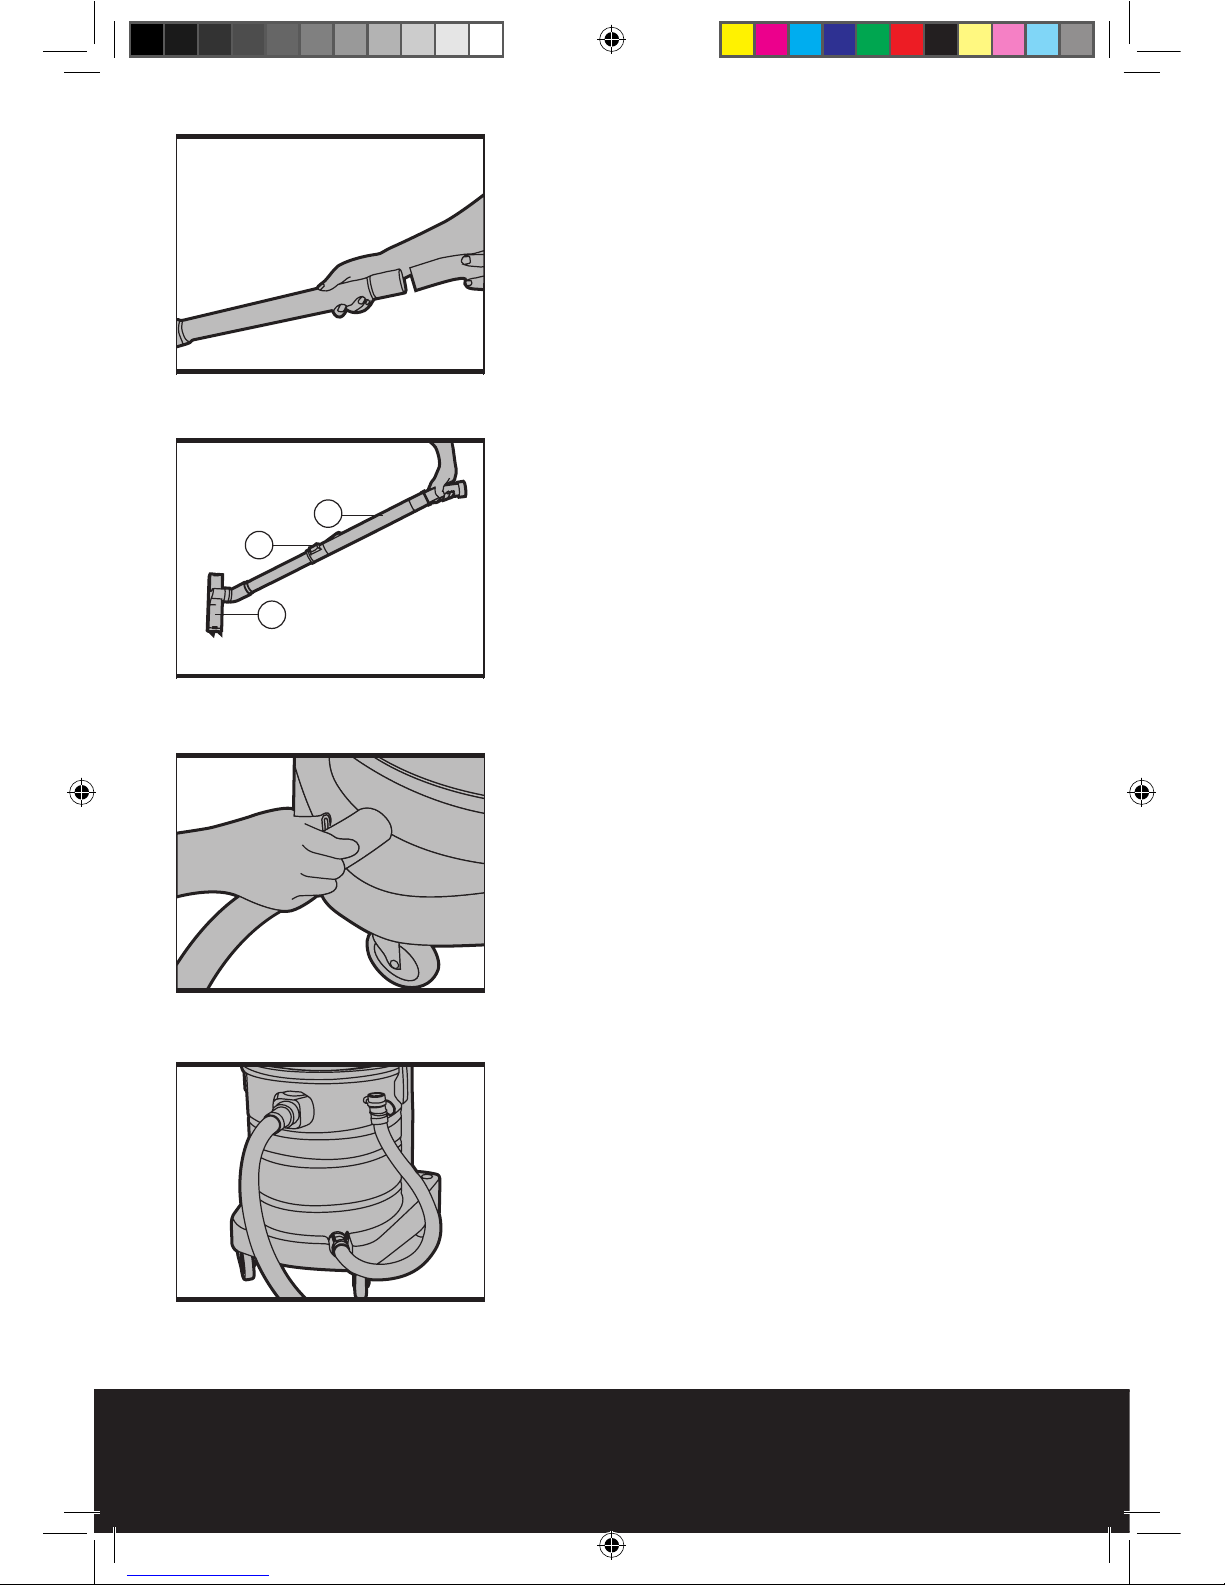
b. Connect one end of the extension tube to the
vacuum hose firmly. (See Fig 9)
c. Push the combi nozzle (14) to the other end of
the extension tube. (See Fig 10)
d. Pressing the button (13) and pulling the end of
the extension tube can change the length of it.
e. Push one end of the short flexible hose into
the drain outlet firmly and the other end into the
drain tube holder. ( See Fig 11,12)
Fig 10
Fig 9
Fig 11
Fig 12
18
14
13
TVC141S1-M-070924.indd 10 2007-9-25 9:45:17
Inhaltsverzeichnis
Andere Erbauer Staubsauger Handbücher


Beliebte Staubsauger Handbücher anderer Marken

Bissell
Bissell LittleGreen Proheat 1425 Series Bedienungsanleitung

Panasonic
Panasonic MC-YL637S147-AE Bedienungsanleitung

NEFF
NEFF N17XH10 0 Series Bedienungsanleitung

LG
LG A9 Series Bedienungsanleitung

Oreck
Oreck Cordless Captura BK51700 Series Bedienungsanleitung

Kogan
Kogan KAVACROBVWA Bedienungsanleitung


