Sanlien pALERT S303 Bedienungsanleitung
pALERT S303
Quick Start Guide
http://www.sanlien.com

1
Sensor Quick Start Guide
Table of Contents
1
Hardware Requirement ...............................................................................3
1.1
Sensor and Accessories........................................................................................................3
1.2
Delay Time Functions from Button ...................................................................................5
The IP Showing ...............................................................................................................6
The Power Off .................................................................................................................6
1.3
LCD Showing Description ..................................................................................................7
Main Status Description .................................................................................................7
Booting Sequence ............................................................................................................7
2
Installation.....................................................................................................8
2.1
Installation Sequence...........................................................................................................8
2.2
Mount Direction Description............................................................................................10
Components Definition.................................................................................................10
Mount Mode ..................................................................................................................10
3
Software Description ..................................................................................11
3.1
Computer IP setting..........................................................................................................11
3.2
Web Service........................................................................................................................13
Web Login......................................................................................................................13
Parameter settings.........................................................................................................14
Waveform & Recording................................................................................................14
Waveform Report..........................................................................................................15
Password........................................................................................................................16
NTP (Network Time Protocal) Setting........................................................................16
Self-IP Setting................................................................................................................17
DNS Setting....................................................................................................................17
Record Download & SOH ............................................................................................18
3.3
WinSCP Operation (Engineer Use) .................................................................................20
WinSCP Login...............................................................................................................20
WinSCP Interface .........................................................................................................20

2
Sensor Quick Start Guide
WinSCP Retrieves Parameter File ..............................................................................21
Earthquake Event Checking........................................................................................23
3.4
PuTTY Operation (Engineer Use) ...................................................................................24
PuTTY Login.................................................................................................................24
PuTTY Login Window .................................................................................................24
Modify Sensor IP...........................................................................................................25
Modify NTP ...................................................................................................................27

3
Sensor Quick Start Guide
1Hardware Requirement
1.1 Sensor and Accessories
Sensor Power Cable &
GPS Antenna
Sets
Ethernet Cable
& Connector Server &Hub

4
Sensor Quick Start Guide
Sensor Outlook
1. LCD Monitor:Live status presentation.
2. Button Function:Delay time in seconds for function.
3. Ethernet Port:Connecting Ethernet.
4. Power Port:DC Power connector.
5. A X Port:Auxiliary port for digital output and GPS antenna.
6. Sensor Port:Additional port for external velocity sensor.
7. GPS Antenna Port:Connector for GPS antenna.
2
3
4
5
6
1
7

5
Sensor Quick Start Guide
1.2 Delay Time Functions from Button
1 Second IP Showing
2 Seconds NTP restart
3 Seconds Exercise cancel function
4 Seconds Hardware part reloading parameters
5 Seconds Firmware version showing
6 Seconds Reloading parameters without IP check (for saving time)
7 Seconds Firmware upgrading via internet
8 Seconds 1. Global recoding mode
2. Confirm this mode by following 2 seconds pressing
3. Stop this mode by following 3 seconds pressing
9 Seconds Test mode
Following 4 seconds:EEW Exercise in 30 seconds
Following 3 seconds:Warning cancel
Following 9 seconds:Back to normal mode
Following 10seconds:Relay self-test
12 Seconds Power off
Factory Reset:Time delay in seconds from sensor button following the
sequence 15162612
Default IP
Address:192.168.255.1
Netmask:255.255.255.0
Gateway:192.168.255.254
Note:See the figures below

6
Sensor Quick Start Guide
The IP Showing
Press 1 second from button, LCD shows sensor IP.
The Power Off
Press 12 seconds from button, LCD shows sensor “Power off” - >”System is
off”. After that removing power connector, LCD will disappear message.
7
Sensor Quick Start Guide
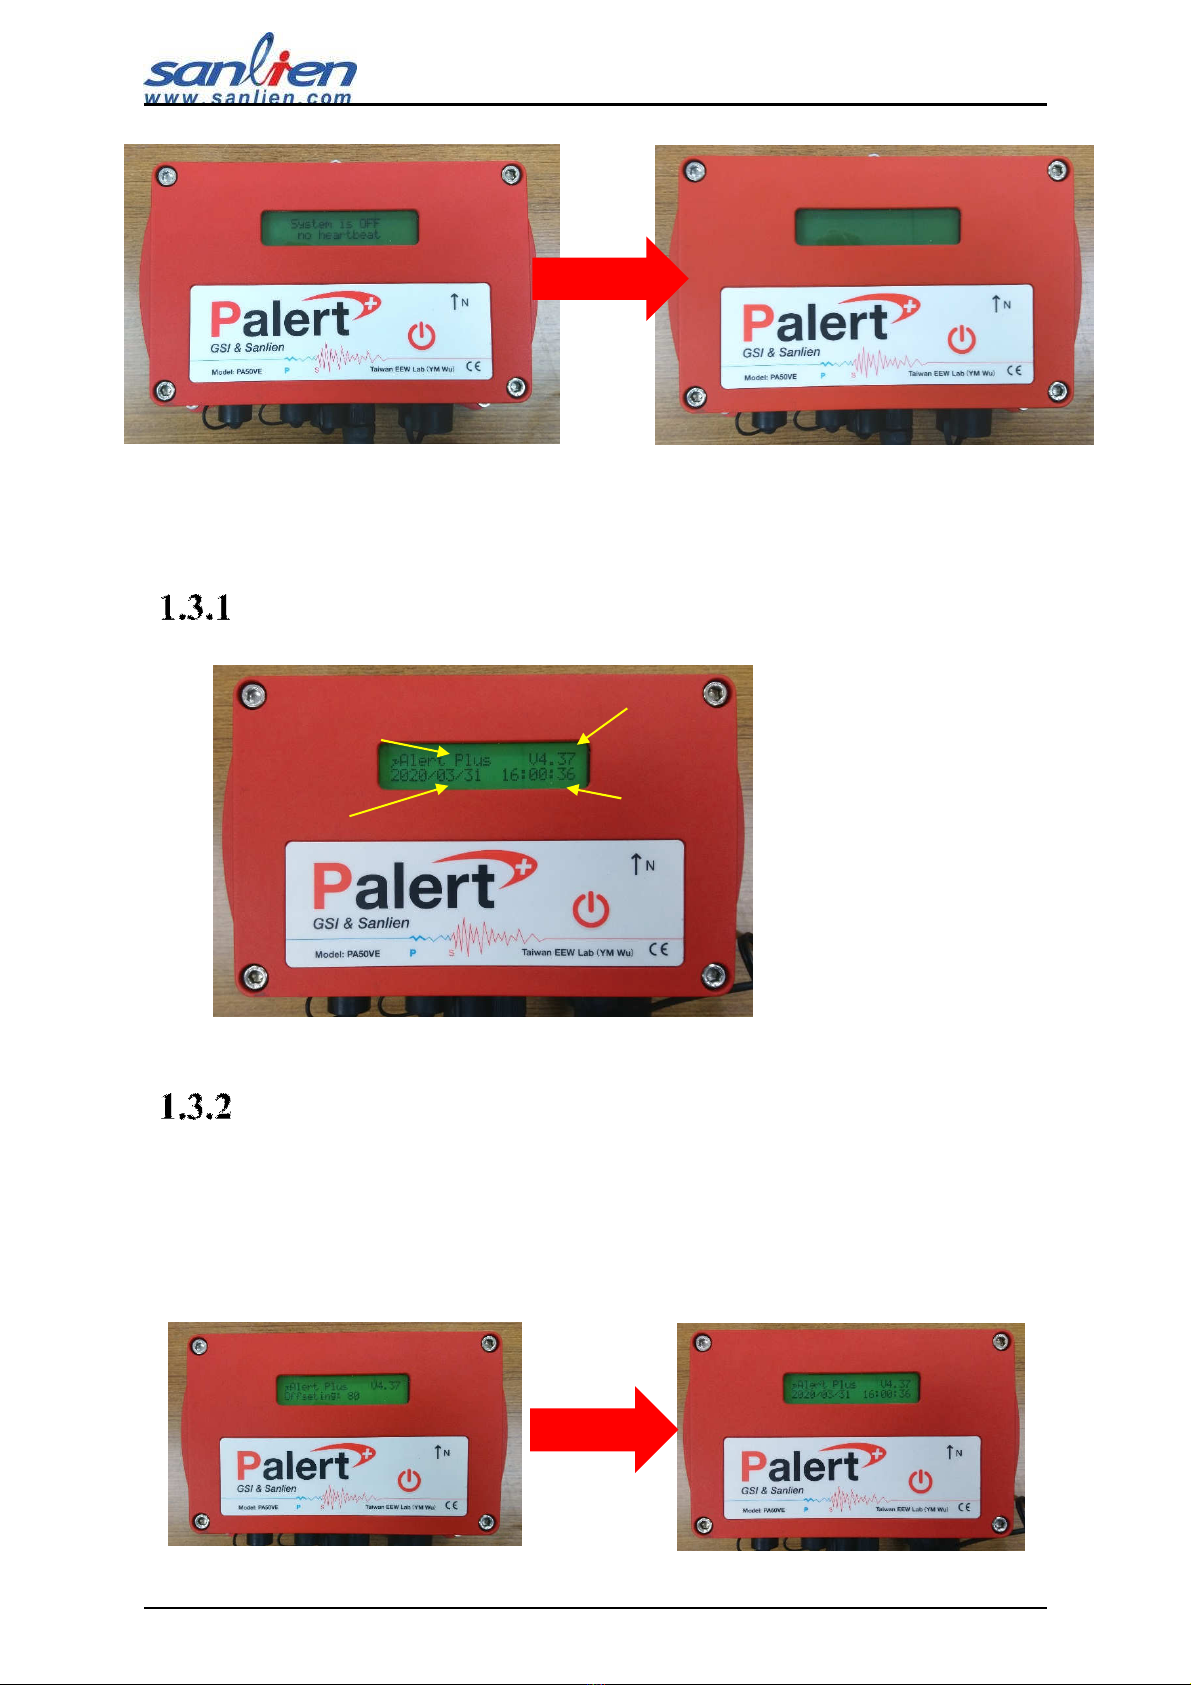
1.3 LCD Showing Description
Main Status Description
Booting Sequence
After the powering is on, the LCD will show “Booting” and “Offsetting”, if it
keeps showing “Offsetting”, please put sensor to the more stable platform(ground)
to avoid the background noise.
Current Date Current Time
Sensor Type Firmware version
8
Sensor Quick Start Guide
2Installation
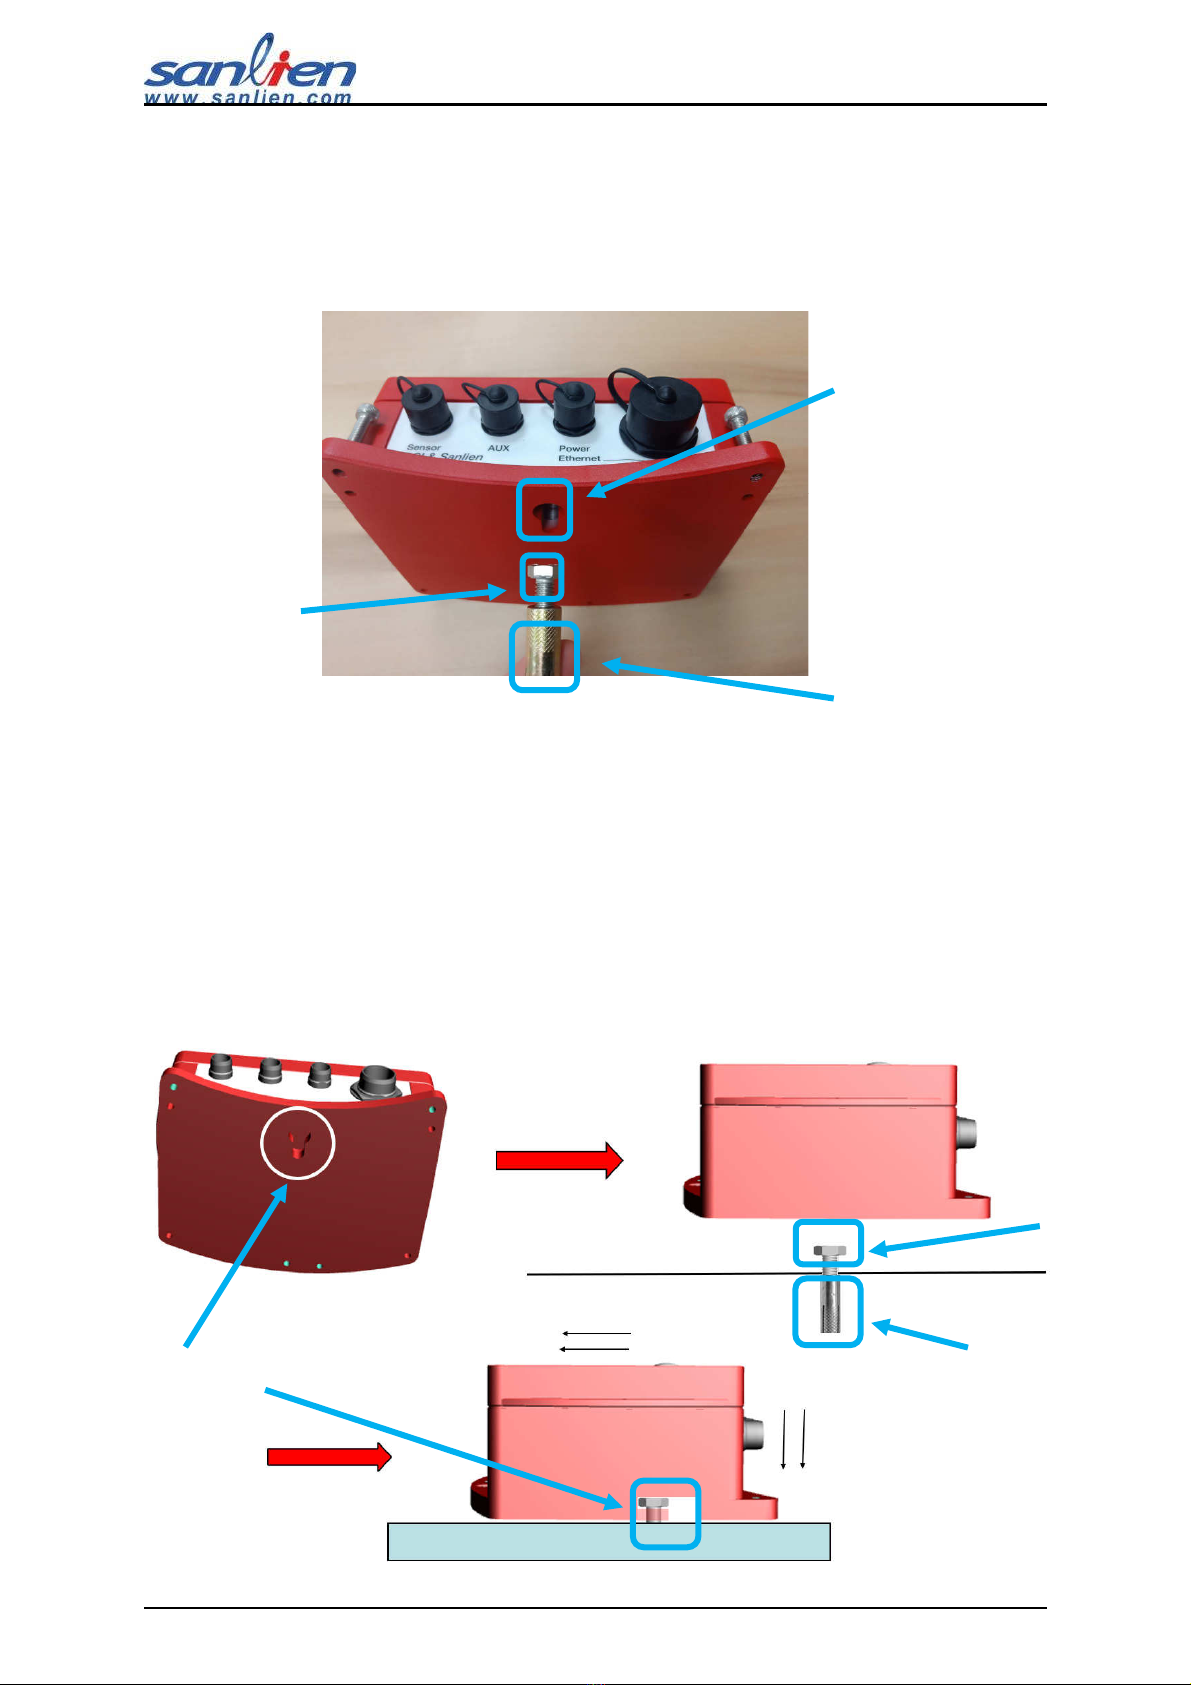
2.1 Installation Sequence
Step 1:Drilling a hole with sleeve anchor diameter and depth on the wall or
platform(ground), diameter and depth around 0.5 and 1.58 inches.
Step 2:Taps the sleeve in hole with hammer.
Step 3:Drive the anchor into sleeve part and keep a sufficient distance (around
0.31 inch).
Step 4:Hook sensor on anchor.
Anchor Hole
Sleeve
Anchor
Anchor hole Sleeve
Anchor

9
Sensor Quick Start Guide
Step 5:Tight these 3 hex screws on the wall or platform(ground). Level the
bubble on the center (horizontal requirement).
Step 6:GPS Antenna should be encapsulated with glue as below.
#. Put the GPS connector cover.
#. Inject the glue.
#. Cover the cap after injected.
Hex screws
Bubble on the center
Inhaltsverzeichnis


