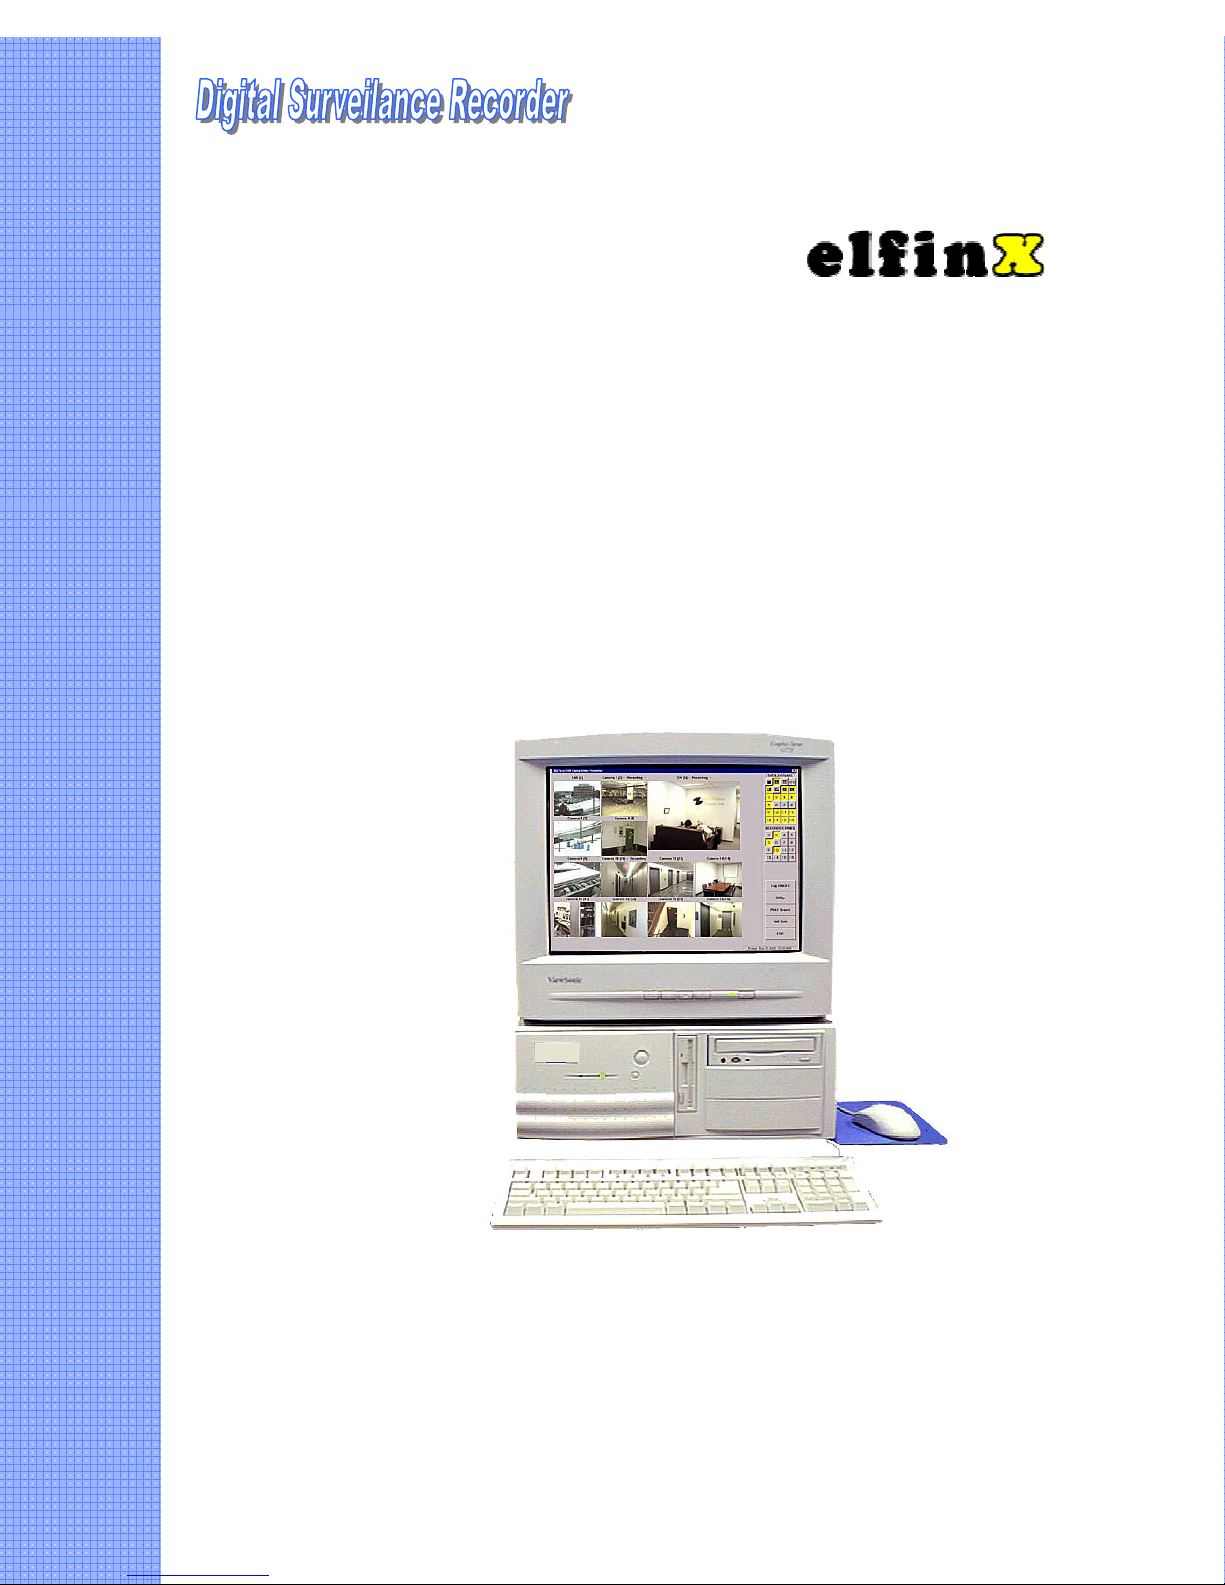
Section 2 Upgrading Video Display Board for TV Out Feature
www.elfinx.com TX-DSR04 Installation Guide Page 10 of 32
Section 2 Upgrading Video Display Board for TV Out Feature
Updating Video Display Board (For TV Out):
From time to time, there is the need to update the Video Display Board of the PC Main processing Unit, the
system for various reasons, such as to provide a secondary Video Out (to VGA Monitor or a TV Monitor).
For the latter, you may need the original video board on the system, the ATI LT Rage Pro to be replaced
with the ATI Rage Pro Turbo video board, hereby called the new one. The following procedure is used to
update the video board:
Remove the original video board
1. You must first remove the original video board driver:
2. Open the Control Panel by clicking on Start/Settings/Control Panel.
3. Now pop the System properties setup by double clicking on its icon.
4. Click on the Device Manager folder.
5. Double click on Display adapters, then the ATI LT Rage Pro
6. Click on the Remove button.
7. Shut Down the computer
8. Remove the original video board from the system.
Install the new video board
1. Insert the new video board into the system, tight up the screw. Replace the system covers.
2. Turn on the system, when a dialog box with “Add New Hardware wizard” appears, click Cancel
3. When the system boots up to Windows98, put the Installation CD which comes with the video board
into the CR-ROM drive. Autorun process will start shortly.
4. Select express Install option from the Displayed Menu, then follow the pop up instructions to
complete the remaining processing step.
5. Shut Down and Re-start the system to effect the change.
Activate the TV Monitor
1. Connect the composite video out signal from the RCA jack of the new video board to the video in of
the TV Monitor, which has a standard input impedance of 75 ohm.
2. Open the Control Panel by clicking on Start/Settings/Control Panel
3. Now pop the Display properties setup by double clicking on its icon
4. Click on the Setting tab, and then click the Advanced.. button, a setting Menu will appear.
5. Click the Display tab, Check on the TV display as it is enable for selection. (If the TV Monitor
selection box is not enabled, you have to check that all the connection are properly set up, restart the
computer system and ensure the display driver function properly). The display resolution and rate of
refreshment will be automatically adjusted to fit the standard TV signal.
6. If the display on the TV screen shows at the system boot up but there is no display on the TV Monitor
after booting into the Windows 98, Adjust the Display resolution to 800 x 600 with 16 bit color. And
restart the system.
7. If both the VGA and TV Monitor display are selected. The Displayed height on the VGA Monitor will
be changed you may need to adjust (enlarge) the height of the display using the scale button control of
the VGA Monitor. This is due to the fact the sweeping signal of both displays has to be synchronized
to that of the standard TV signal
Note: If you have problem identifying the type of ATI video board you are handling, before and
after the installation process, you can simply insert the Installation CD into the system drive and
Select Adapter Information from the Menu. The type of video board will be displayed.