USAVision UA-XVL810 Bedienungsanleitung

Before attempting to connect or operate this product,
please read these instructions carefully and save this manual forfuture use. UVSUAV102-QG-A
Quick Start Guide
UA-XVL810, UA-XVL1610, UA-XVR810

© 2022 GeoVision, Inc. All rights reserved.
Under the copyright laws, this manual may not be copied, in whole or in part,
without the written consent of GeoVision.
Every effort has been made to ensure that the information in this manual is
accurate. GeoVision, Inc. makes no expressed or implied warranty of any kind
and assumes no responsibility for errors or omissions. No liability is assumed
for incidental or consequential damages arising from the use of the information
or products contained herein. Features and specifications are subject to
change without notice.
GeoVision, Inc.
9F, No. 246, Sec. 1, Neihu Rd.,
Neihu District, Taipei, Taiwan
Tel: +886-2-8797-8377
Fax: +886-2-8797-8335
http://www.geovision.com.tw
Trademarks used in this manual: GeoVision, the GeoVision logo and GV
series products are trademarks of GeoVision, Inc. Windows is the registered
trademark of Microsoft Corporation.
July 2022
Scan the following QR codes for product warranty and technical support
policy:
[Warranty] [Technical Support Policy]

Contents
1. Introduction.........................................................................................................1
1.1 Packing List............................................................................................................1
1.2 Overview ................................................................................................................2
1.2.1 UA-XVL810 Font Panel ............................................................................................ 2
1.2.2 UA-XVL810 Rear Panel............................................................................................ 3
1.2.3 UA-XVL1610 Front View........................................................................................... 4
1.2.4 UA-XVL1610 Rear View ........................................................................................... 5
1.2.5 UA-XVR810 Front View............................................................................................ 6
1.2.6 UA-XVR810 Rear View............................................................................................. 7
2. Installation...........................................................................................................8
2.1 HDD Installation......................................................................................................8
2.2 Connection Diagram...............................................................................................9
2.3 Power Supply Connection.......................................................................................9
3. Getting Started..................................................................................................10
3.1 Start Wizard..........................................................................................................10
3.1.1 Start Wizard ............................................................................................................ 10
3.1.2 Connecting IP Cameras..........................................................................................10
3.2 Live View Overview ..............................................................................................12
3.2.1 Main Window ..........................................................................................................12
3.2.2 Task Menu Bar........................................................................................................14
3.2.3 Camera Quick Toolbar............................................................................................14
4. Remote Access via Web Client........................................................................16
4.1 Basic System Requirements.................................................................................16
4.2 Looking Up the Dynamic IPAddress.....................................................................17
4.3 Web Client Manager Live Interface.......................................................................18
5. Upgrading Firmware.........................................................................................20

1
1. Introduction
Welcome to the UA-XVL1610, UA-XVR810 Quick Start Guide. In the following sections, you
will learn about the basic installations and configurations. For more details, see UA-XVL1610,
UA-XVR810 User’s Manual.
1.1Packing List
UA-XVL810 / UA-XVL1610 /
UA-XVR810
USB mouse
3.5”HDD screw Kit
Power adapter (DC 12V, 2A, 24W)
2.5”HDD screw kit
Download guide

2
1.2Overview
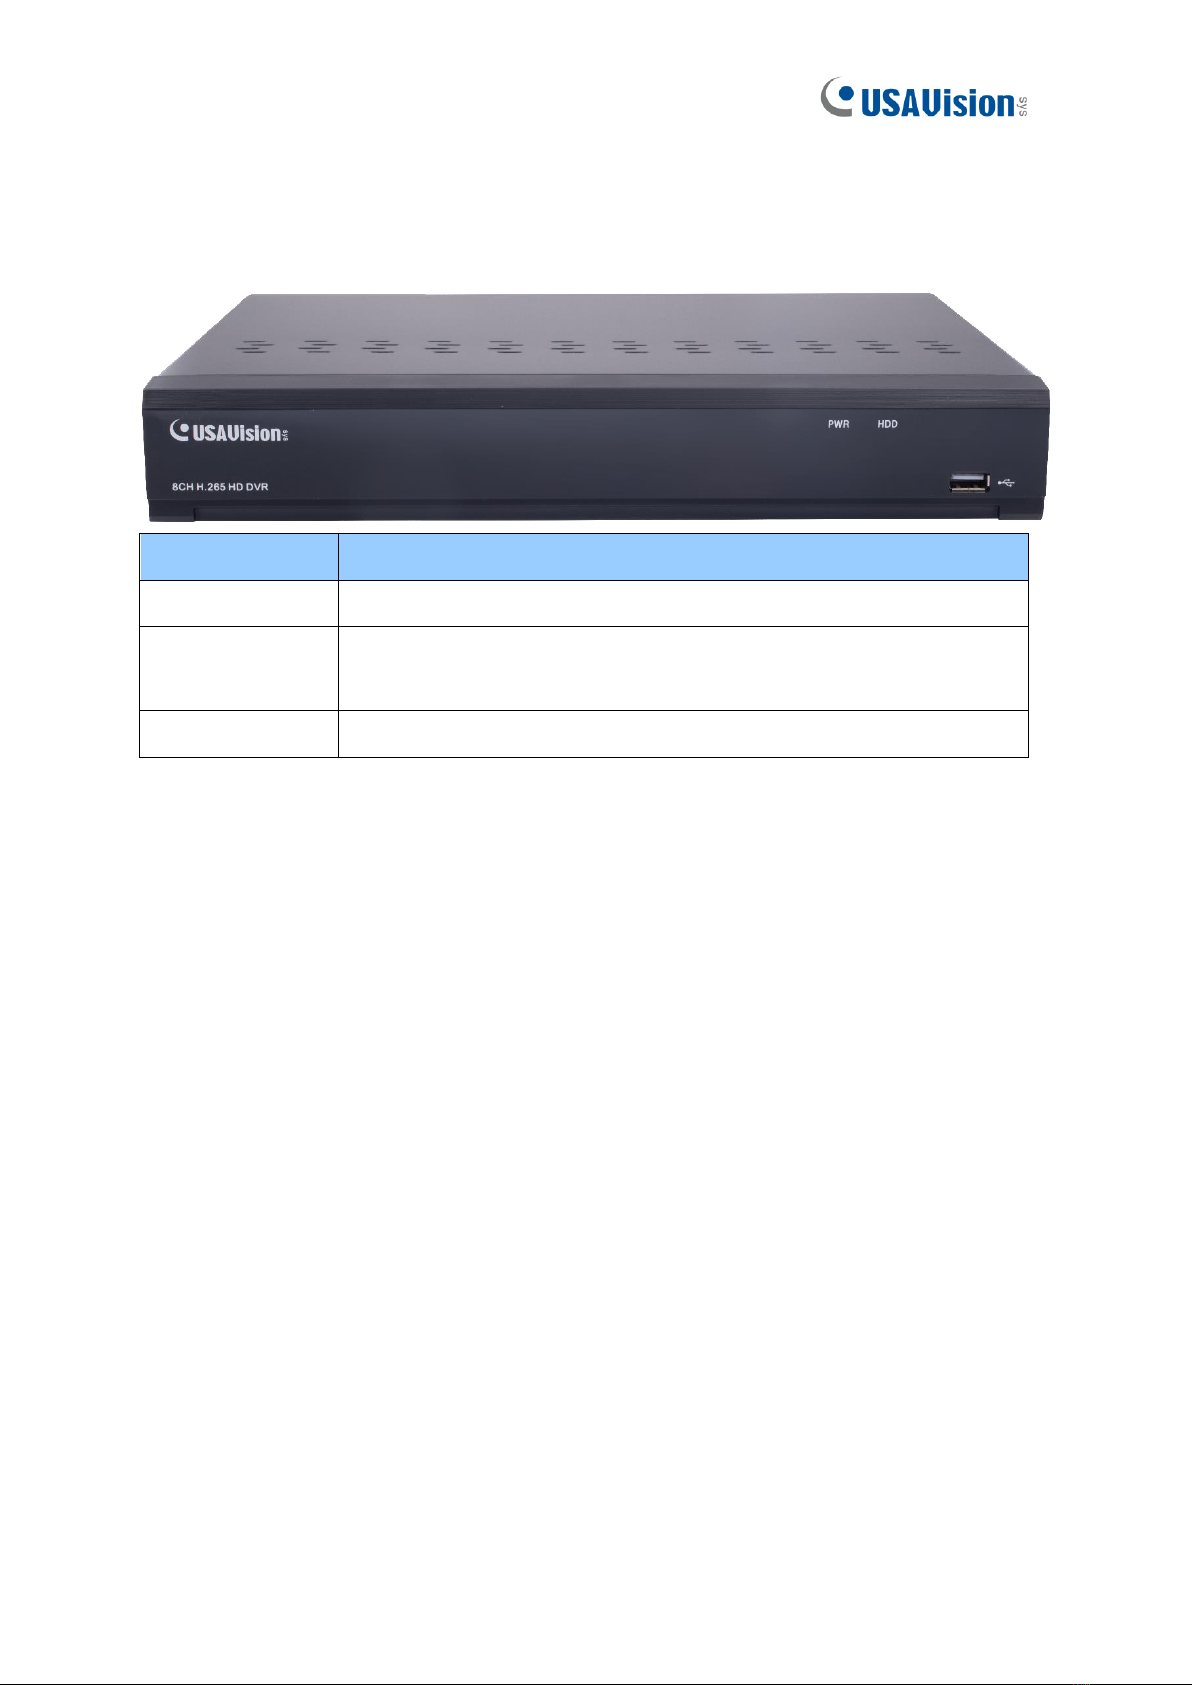
1.2.1 UA-XVL810 Font Panel
Item
Description
Power LED
Show constant green when power is supplied.
HDD LED
Blink red when the HDD is writing or reading data.
No LED when no HDD is installed.
USB port
Connect the supplied mouse or USB flash memory.

3
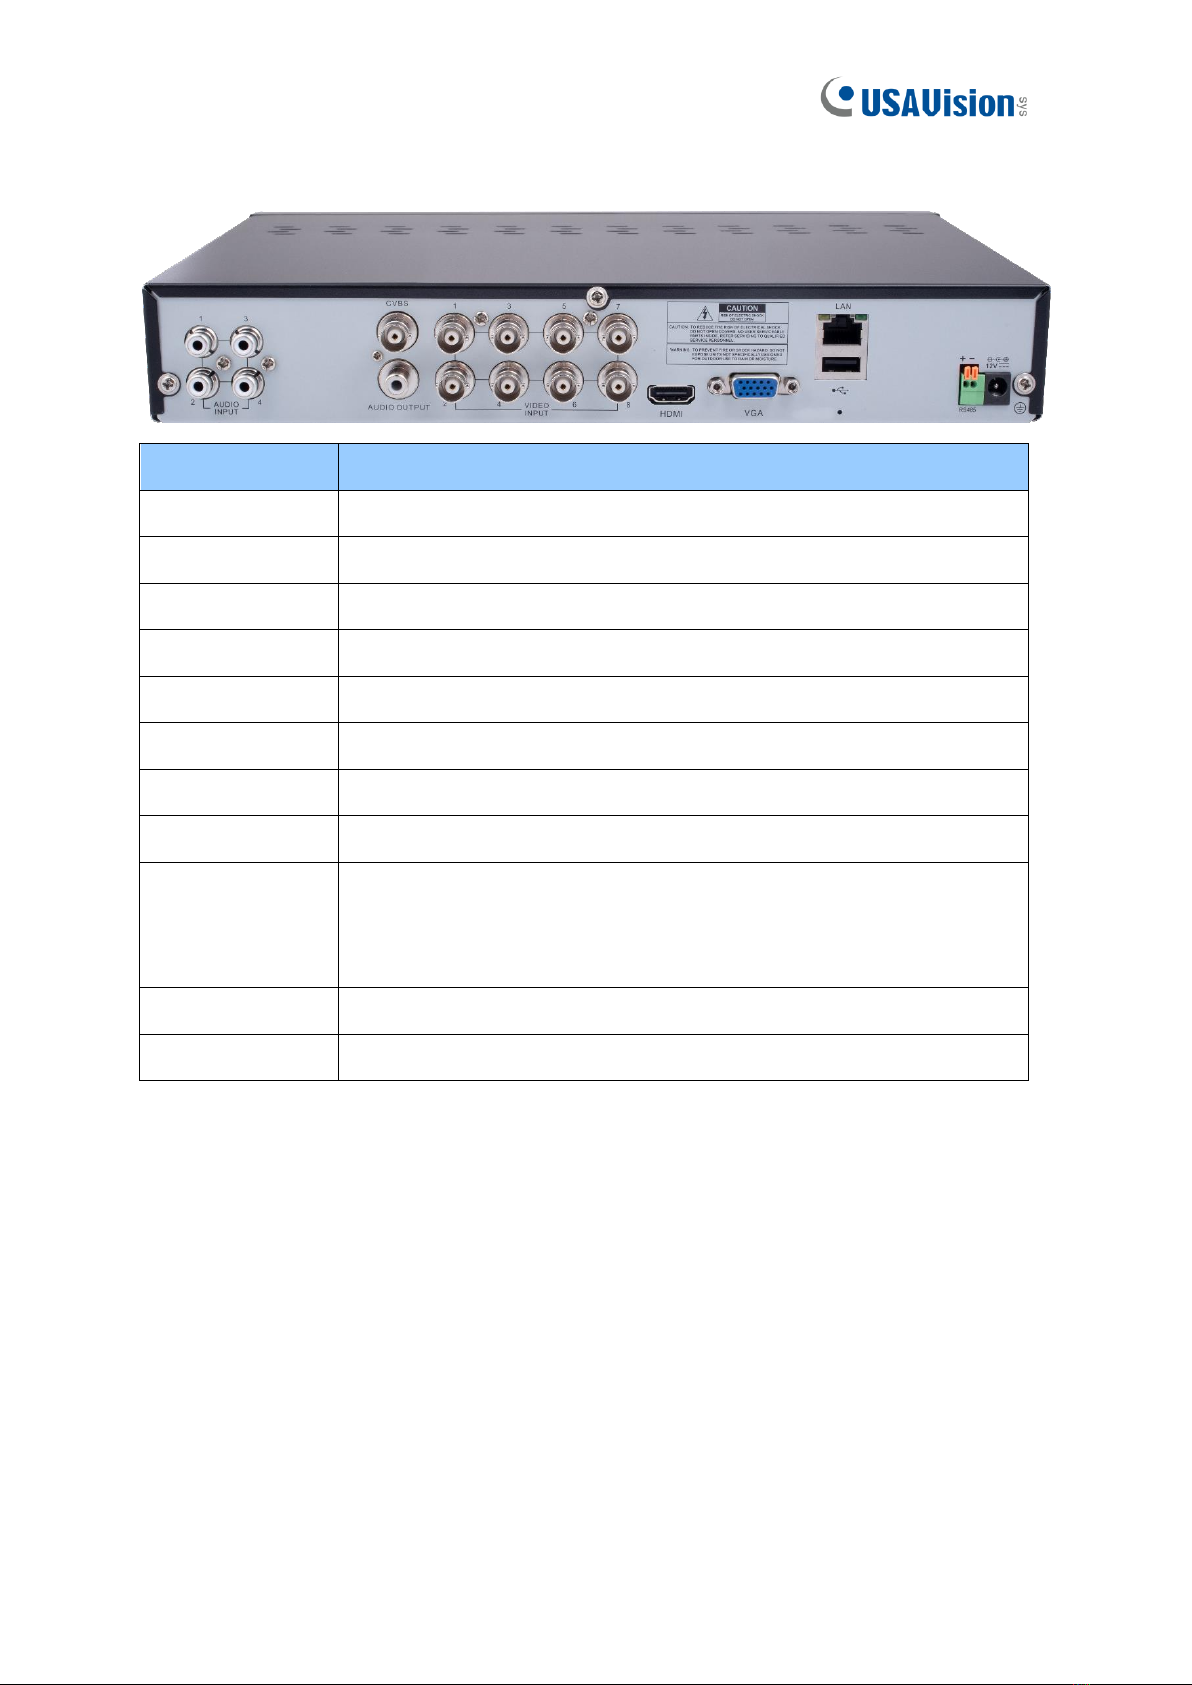
1.2.2 UA-XVL810 Rear Panel
Item
Description
Audio Input
Connect with audio input signals, RCAport.
CVBS
Connect with video input signals, BNC port.
Audio Output
Audio signal output, RCA port.
Video Input
Connect with video input devices, BNC port.
HDMI
Connect to your digital TV or monitor with HDMI input.
VGA
Connect to your TV or a monitor with VGA input.
LAN
Connect to your home network.
USB port
Connect the supplied mouse or USB flash memory.
Reset
Load default settings of the DVR.
Note: The Reset button is below the USB port. Poke the Reset button
to load default settings.
RS-485
Connect to PTZ devices.
Power
Connect to the supplied power adaptor.

4
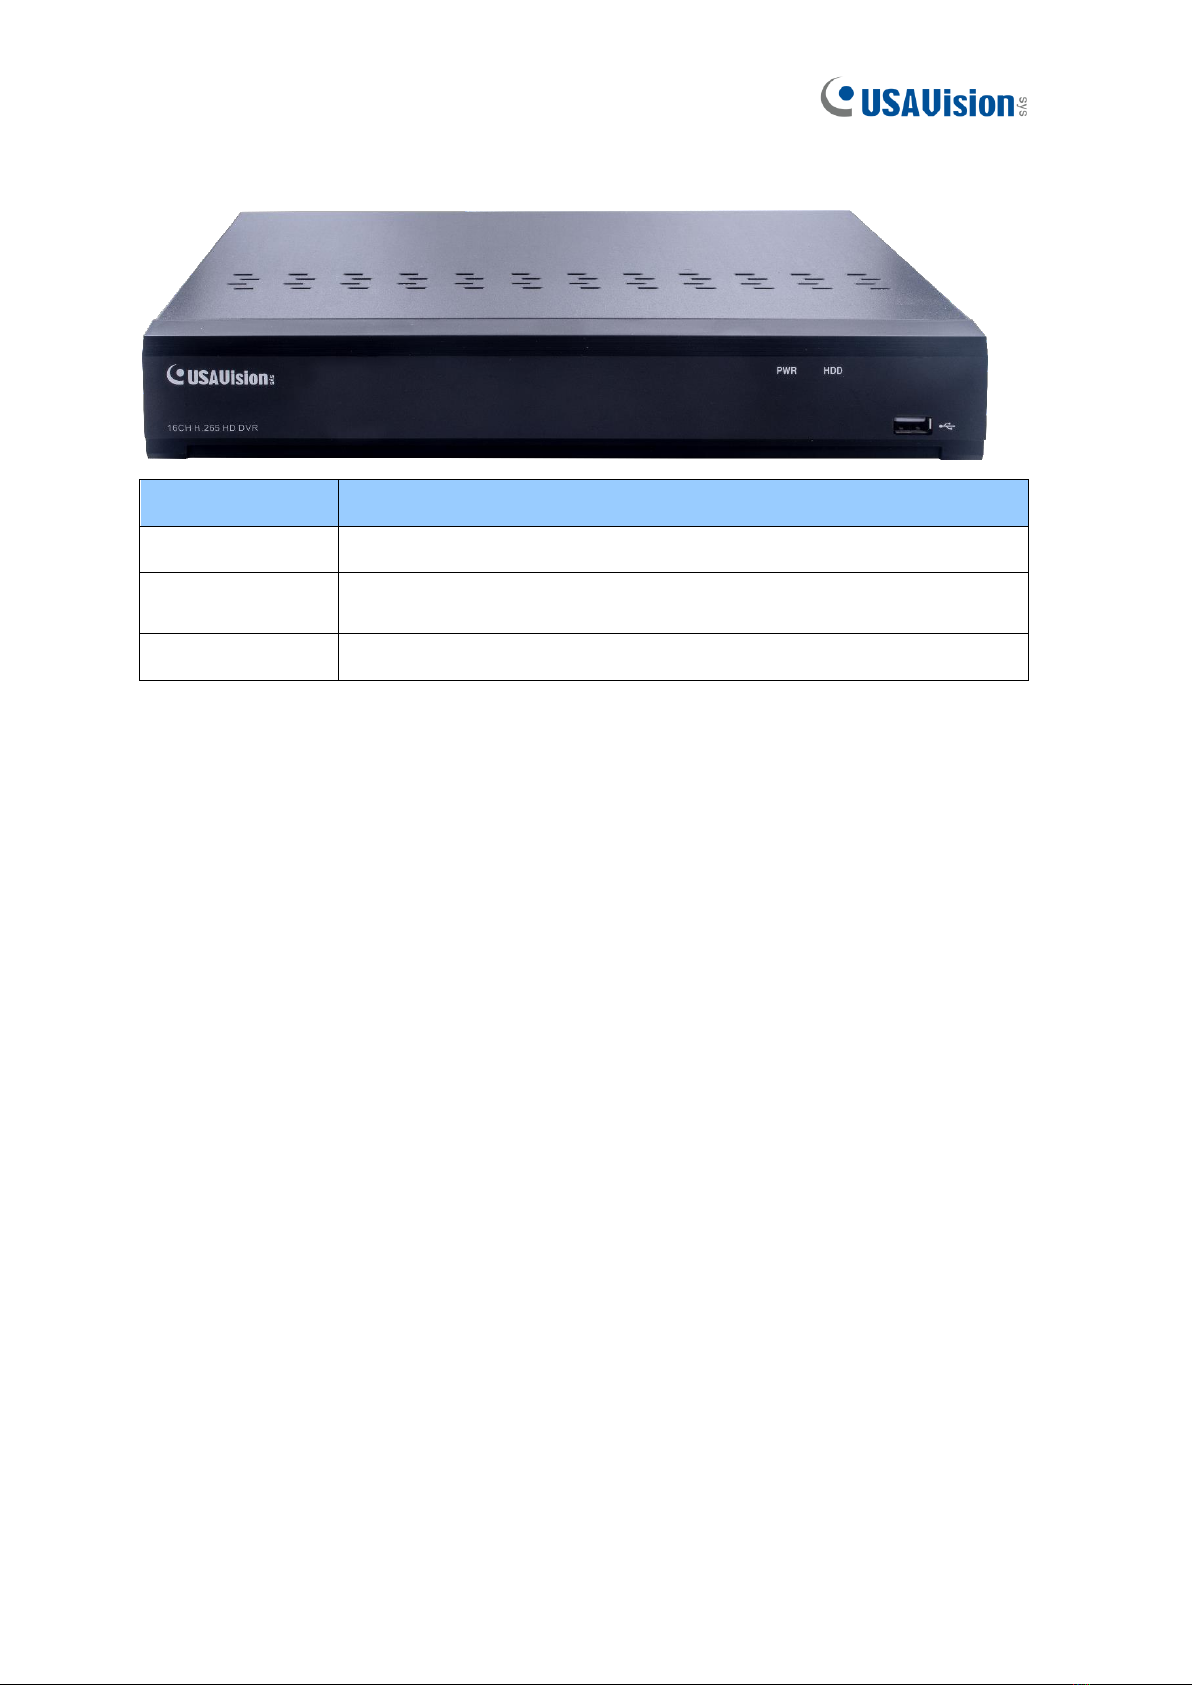
1.2.3 UA-XVL1610 Front View
Item
Description
Power LED
Show constant green when power is supplied.
HDD LED
Blink red when the HDD is writing or reading data.
Show no LED when no HDD is installed.
USB port
Connect the supplied mouse or USB flash memory.

5
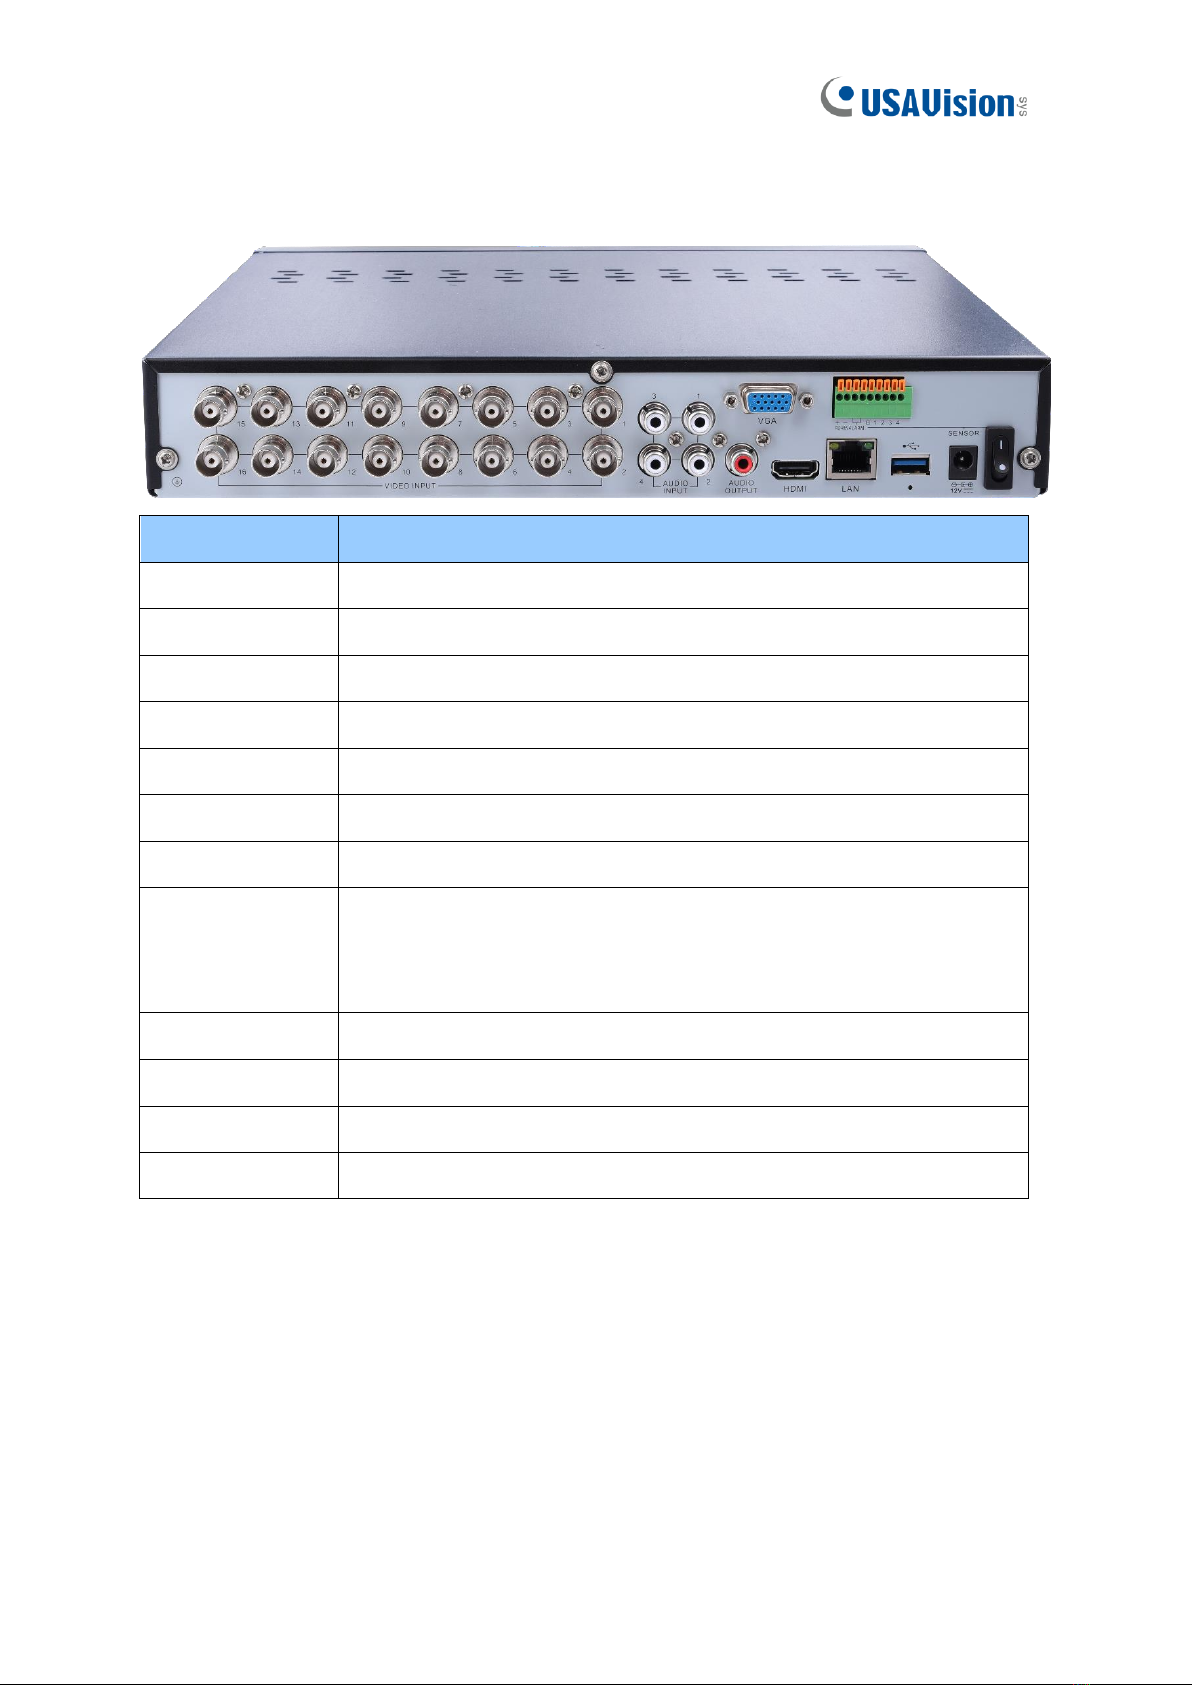
1.2.4 UA-XVL1610 Rear View
Item
Description
Video Input
Connect with video input devices, BNC port.
Audio Input
Connect with audio input signals, RCAport.
Audio Output
Audio signal output, RCA port.
VGA
Connect to your TV or a monitor with VGA input.
HDMI
Connect to your digital TV or monitor with HDMI input.
LAN
Connect to your home network.
USB port
Connect the supplied mouse or USB flash memory.
Reset
Load default settings of the DVR.
Note: The Reset button is below the USB port. Poke the Reset button
to load default settings.
Power
Connect to the supplied power adaptor.
RS-485
Connect to PTZ devices.
Sensor & Alarm
Optional. Connect to external sensor & alarm devices.
Power Switch
Turn on / off power supply.

6
1.2.5 UA-XVR810 Front View
Item
Description
Power LED
Show constant green when power is supplied.
HDD LED
Blink red when the HDD is writing or reading data.
No LED when no HDD is installed.
USB port
Connect the supplied mouse or USB flash memory.

7
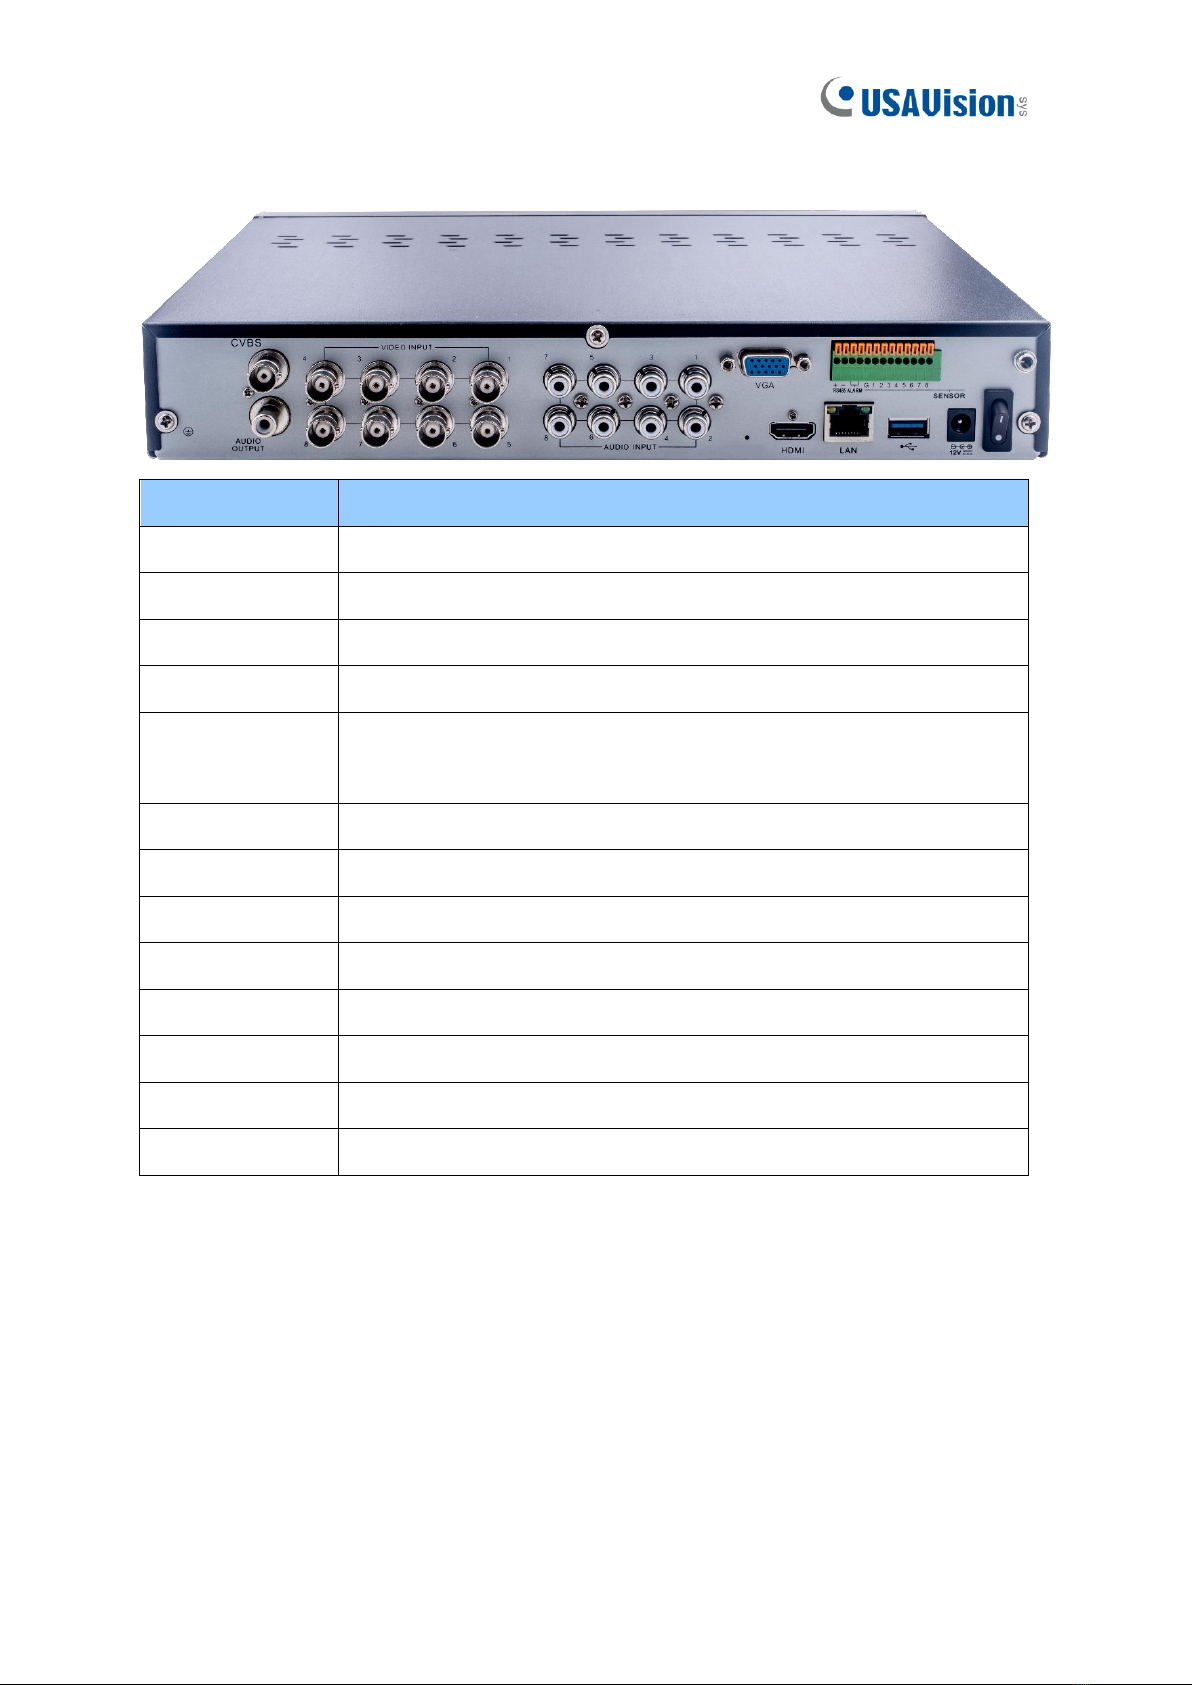
1.2.6 UA-XVR810 Rear View
Item
Description
CVBS
Connect with video input signals, BNC port.
Audio Output
Audio signal output, RCA port.
Video Input
Connect with video input devices, standard BNC port.
Audio Input
Connect with audio input signals, RCAport.
Reset
Load default settings of the DVR.
Note: The Reset button is next to the HDMI port. Poke the Reset
button to load default settings.
VGA
Connect to your TV or a monitor with VGA input.
HDMI
Connect to your digital TV or monitor with HDMI input.
LAN
Connect to your home network.
USB port
Connect the supplied mouse or USB flash memory.
Power
Connect to the supplied power adaptor.
RS-485
Connect to PTZ devices.
Sensor & Alarm
Optional. Connect to external sensor & alarm devices.
Power Switch
Turn on / off power supply.
Dieses Handbuch passt für folgende Modelle
2
Inhaltsverzeichnis