
Optica XDS-3FL Bedienungsanleitung
MICROSCOPES
I T A L Y
OPTIKA MICROSCOPES - ITALY
Ver. 1.0.0
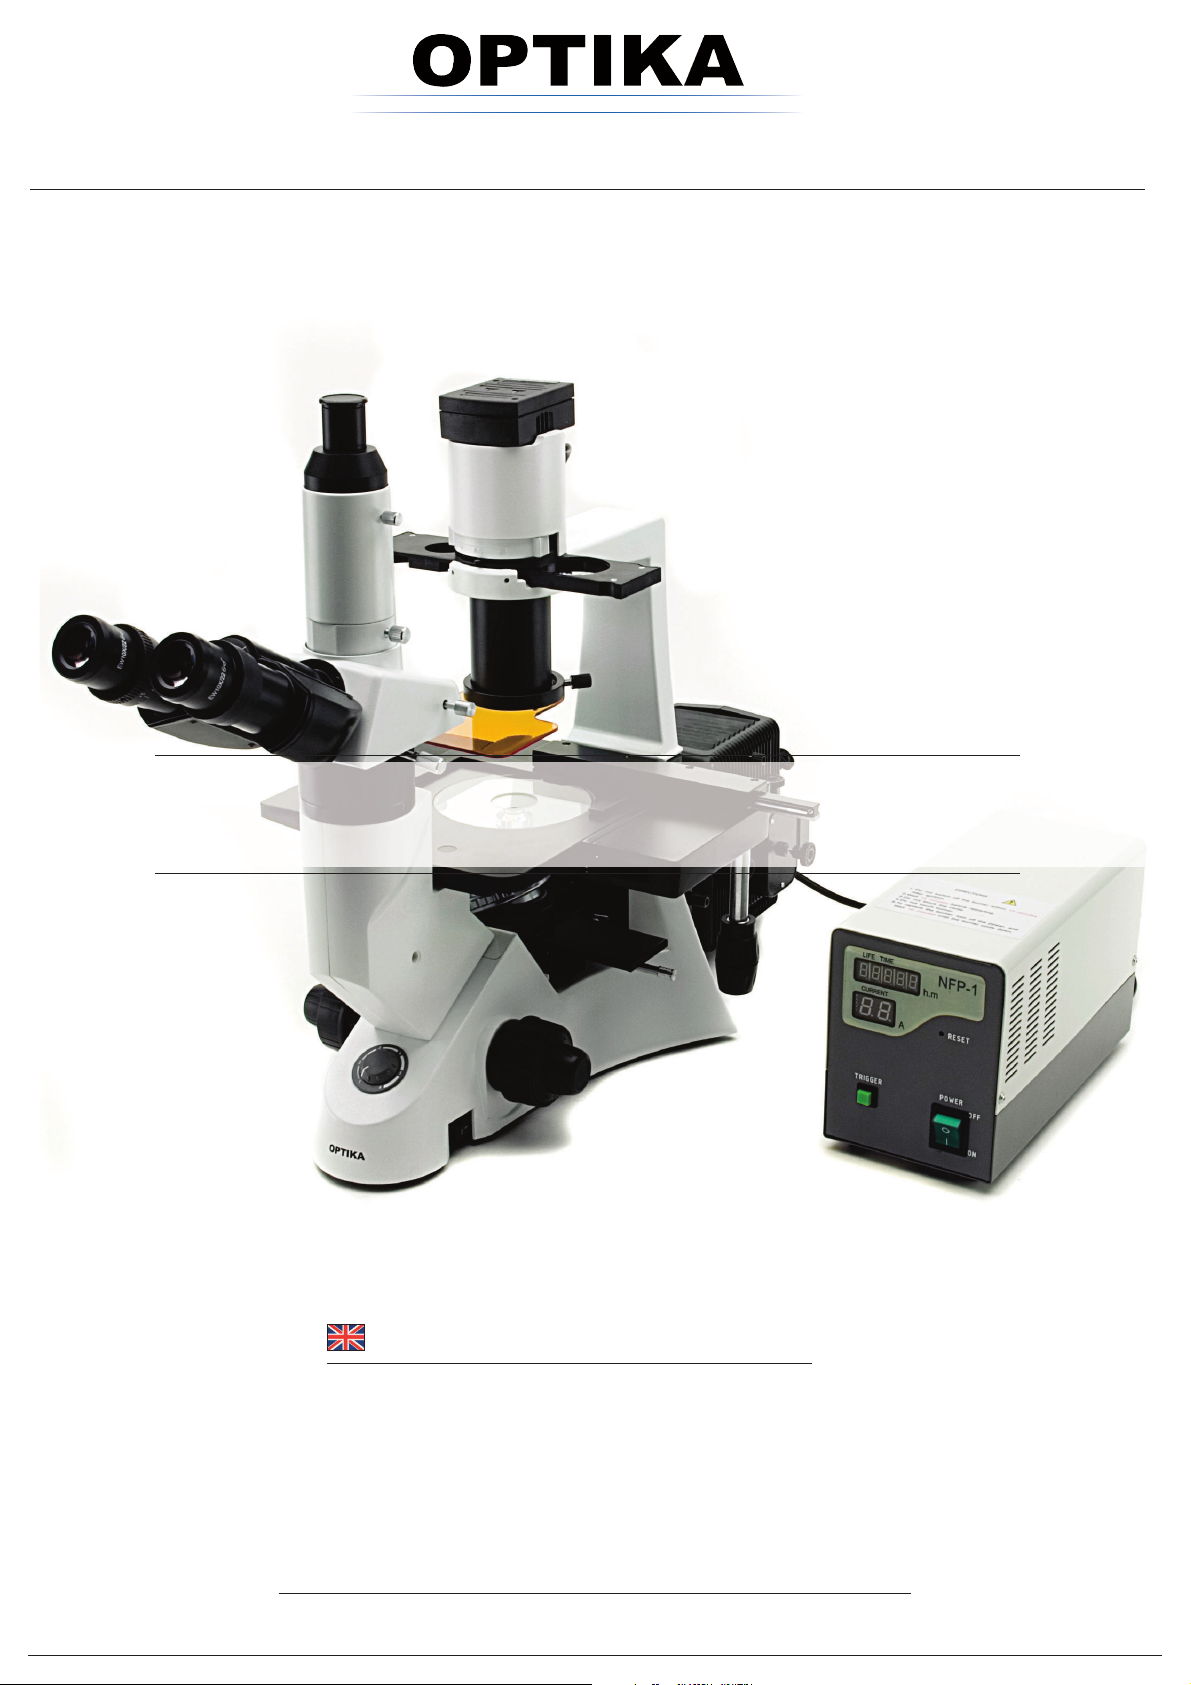
XDS-3FL
OPERATION MANUAL

1
Contents
XD
S
–
3
FL
Before use
1. Nomenclature…………………………………………………………………4
2. Assembl
ing
……………………………………………………………………5
2-1. Assemble scheme …………………………………………………………5
2-2. Assemble steps …………………………………………………………………6
3. Operation ………………………………………………………………………………9
3-1. Illuminaton…………………………………………………………………………11
3-2. Filter preventing board ………………………………………………….………11
3-3. Centering bulb……………………………………………………………….…… 12
3-4. View field diaphragm………………………………………………………………13
3-5. Select fluorescence filter block………………………………………………….…13
4. General specification…………………………………………………………………14
5. Troubleshooting…………………………………………………………………….…15

Before use
X D
S – 3FL
Inverted fluorescence microscopesspecially suit for research work for activity cell, tissue, fluidness and sediment,
especially for biology, cytology, oncology, genetics and immunology etc. It is widely used in Lab, university,
medical, epidemic prevention and so on.
Figure 1
1. Notice:
ŁAs the microscope is a precision instrument, a lways
operate it with care, avoiding physical shake during the
operation.
łDo not let the microscope emerge in the sun directly, e
ither not in the high temperature, damp, dusty or acute
shake place. Make sure the worktable is horizontal.
Following environment is required: Indoor temperature:
5ć40 , Max relative humidity:80%.ć
ŃWhen moving the microscope, you should use both
hands to hold ķand ĸas shown on figure, and lay it
down carefully. (Figure 1)
Figure 2 ńFluorescence microscope should be used under dark
environment.
ŅIn order to protect eyes, do not stare at fluorescence light
directly.
ņThe bulb should be vertical under using, the inclined
angle should be less than 15 degrees, otherwise it will
make bulb damage.
ŇFluorescence sample will be faded by ultraviolet
radiation, so it can not for long save. Do not expose the
sample under fluorescence light for long time, it will be
quenched.
Figure 3 ňWhen working, the surface of the lamp holder Ĺand
bulb house ĺwill be very hot. Make sure there is
enough space (especially its above) for the heat
dissipating. (Fig. 1)
ʼnConnect the microscope to the ground to avoid lightning
strike.
ŊMake sure the switch Ļ,ļare at “!” position, cut off power supply and wait all parts cool down before
replace bulbs, fuse the fuse. It would be better to do so after cooling the bulb and the lamp holder. (Fig. 2, 3)
ƾStandard bulb:
Fluorescence light: 100W mercury bulb Transmitted light: 6V30W halogen bulb
ŋPower supply: 90-240V
ŌPlease use the plug provide our company.
2

XDS – 3FL
2
ˊ
Maintenance
ŁWipe the lens gently with a soft lens tissue. Carefully wipe off oil or fingerprints on the lens surfaces with
tissue moistened with a little of 3:7 mixture of alcohol and ether or dimethy lbenzene.
ƾAlcohol and ether is flammable. Don’t place these chemical near to fire or fire source. For example,
when turning on or turning off the electric device, you should use these chemical in a ventilated place.
łDon’t use organic solution to wipe the surfaces of the other components. Please use the neutral detergent.
ŃIf the microscope damped by the liquid, you should cut off the power immediately and wipe it dry.
ńNever disassemble or service the microscope yourself. It will influence its function or damage it.
ŅAfter using, cover the microscope with a dust cover.
3. Safety Sign
Sign Signification
Hot at surface, do not touch.
Read manual before using. Faulty operation would lead to person hurt or instrument
trouble.
|Power swatch ON
OPower swatch OFF
3

1 . Nomenclature X D S - 3
FL
Ⓒܝᵓ:Filter plate
㤻ܝ㺙㕂䖲ԧFluorescence device connector
∲♃♃⑤Light source of mercury bulb
XD30 ᑻXD30 base
㤻ܝⒸܝ䬰Fluorescence filter
U-RFLT100 ⬉⑤ㆅU-RFLT100 Power box
Eye-protecting board connector for fluorescence
Light source of mercury bulb
XDSmicroscope stand Fluorescence filter blocks
U-RFLT100 Power supply
4
2. Assembling
XDS – 3FL
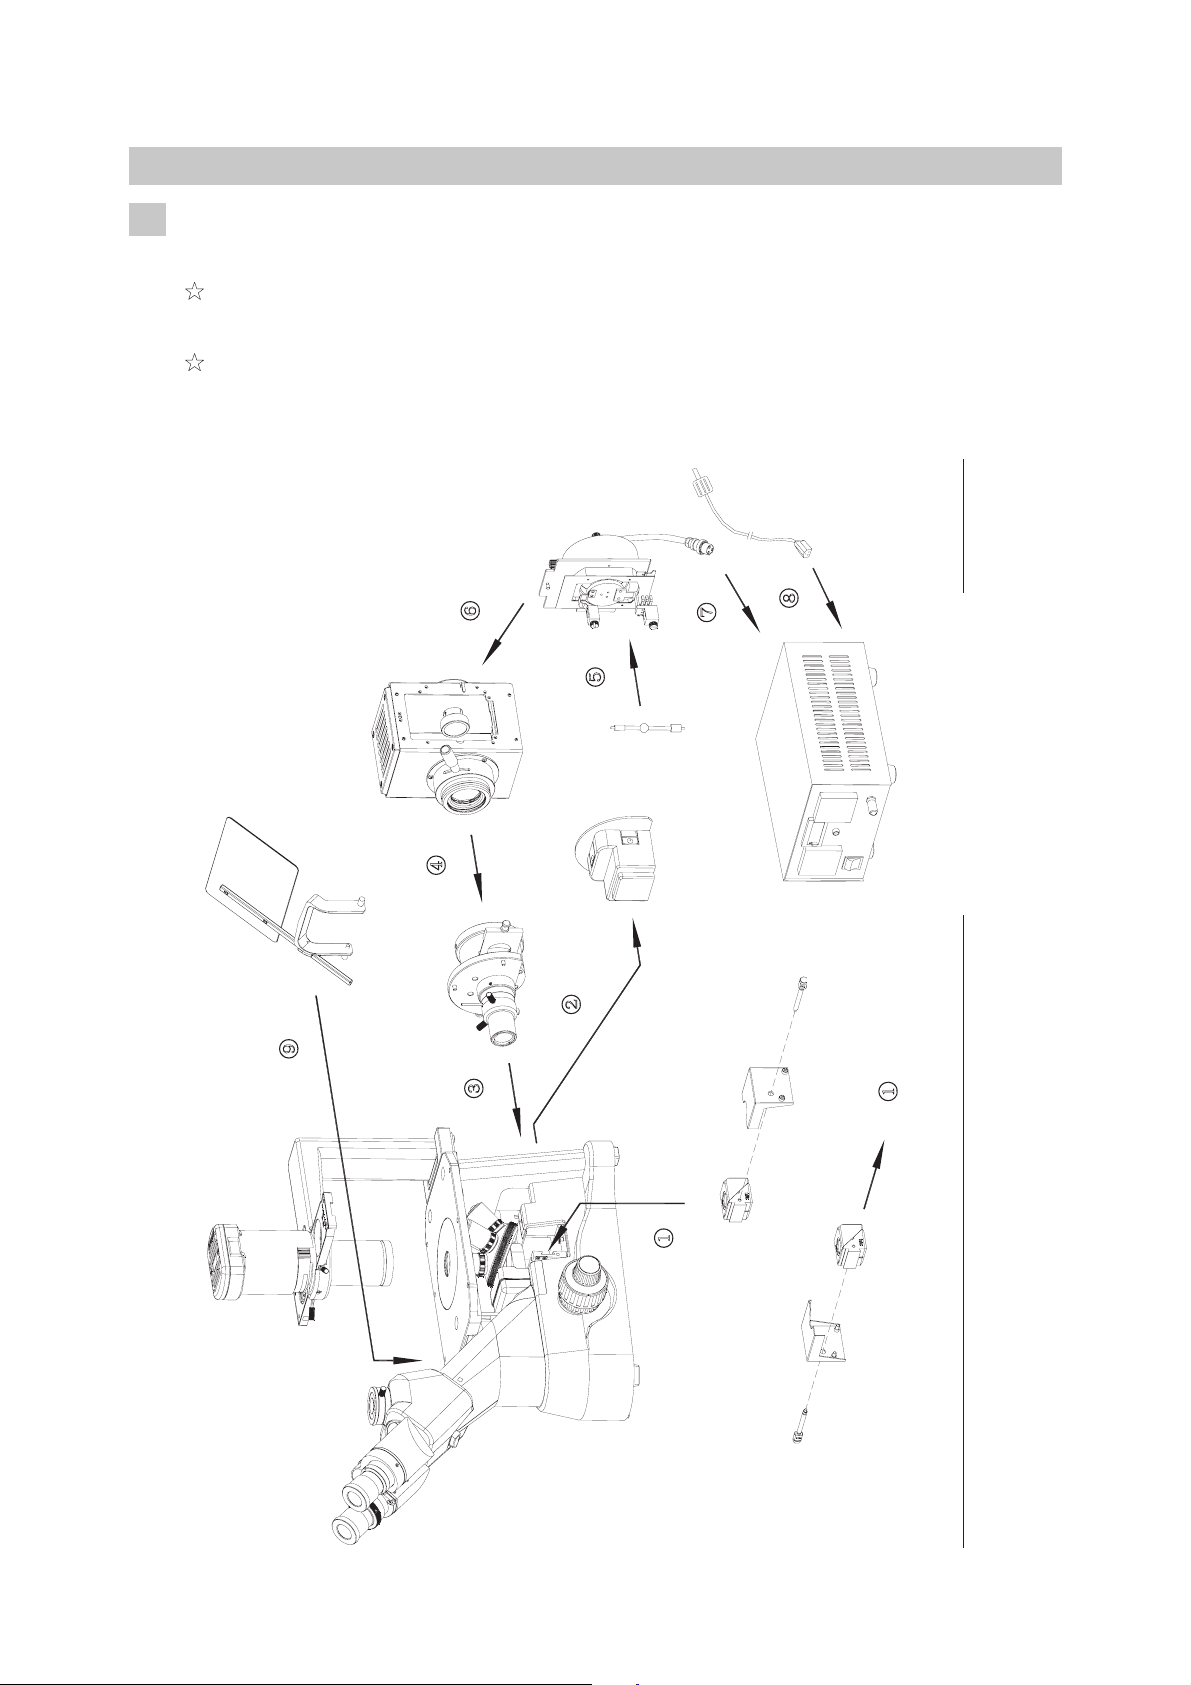
2-1 Assembling scheme:
Numbers denote the assembling order.
ƾBefore assembling, make sure there is no dust or dirt. Assemble carefully and do not scrap any
part or touch the glass face.
ƾDuring assembling, please be aware of no scratching and no touching on lenses.
5
ĿľĻļĽķĸ
p
ower plug
p
ower supply for 100W fluorescence
b
ulb holde
r
mercury bulb
Light source with mercury bulb 100W
fluorescence hole cove
r
connector for fluorescence ĺĹEye-protecting board
Fluorescence filter blocks
right cove
r
ķother side
p
ole for fluorescence
Fluorescence filter blocks
left cove
r
p
ole for fluorescence
XDSmicroscope stand

Fluoecence
2-2 Assembling steps: ƾBefore assembling for fluorescence parts, please set
power supply at “OFF” and take off the plug in order
to operator’s safety.
Figure 4
2-2-1 Set fluorescence filter blocks
ŁLoose the lock-screw withķM4 inner hexagon spanner
and take off right cover (Fig. 4)ĸ
łMatch the dovetail glut of filter block B1 Ĺto the groove
of sliding channel ĺ, and push Ĺinto sliding channel
ĺat right.
ŃPut on the right cover ĸ, point the screw ķto the hole
Ļon sliding channel ĺand tight it with M4 spanner.
ńInsert the pole Ľinto the hole ļon right cover ĸ, and
point it to the hole at side of filter block B1Ĺ, then tight.
(Fig.5)
ŅLoose the screw cap Ŀa little, and turn the remark block
ľto make the letter “B” point to operator, then tight Ŀ.
ƾXD
S-3FL
fluorescence microscope can only be equipped
with 2pcs filter blocks. The standard is B1 and G1.
Others for selection.
Figure 5
Figure 6 ƾUse the same way to set filter block G1 to the left.
ƾPlease be aware the remark (such as: DMB1) on the side
should be correctly, do not overturn with up and down.
ƾDuring observation, both right and left cover can’t be
taken off because it protects the filter while filter
exchanging.
2-2-2 Set the fluorescence connector
ŁHook the hole ķto take off the fluorescence hole cover
ĸ. (Fig. 6)
łInsert the fluorescence connector to the fluorescence holeĹto make the screw point to thread , and tight 3 screwsĺĻwith M4 spanner. (Fig.7)
ŃTurn off one of handles frĽom fluorescence preventing
board ľand insert the board ľinto connector, you will
find sound to mean it at middle position (there are 3
positions). And tight the handle Ľ. (Fig. 8)
6
Figure 7

XDS – 3FL
Figure 8
2-2-3 Set light source with mercury bulb
ŁLoose screw ķwith M4 inner hexagon spanner. (Fig.9)
łInsert the light source with mercury bulb ĸinto
fluorescence connector Ĺ, and rotate ĸto make its upper
plane ĺas horizontal, then tight the screw ķwith M4
spanner.
ƾDuring observation, please make sure enough space for
heat-reek around the bulb source, especially the upper
and bottom of bulb.
ƾDuring observation, please make sure enough distance
between light source and power plug to avoid power
plug melted by heat on light source.
Figure 9
2-2-4 Set mercury bulb
ŁLoose the lock-screw completely bķy M4 inner hexagon
spanner, rotate about 45 degrees as the direction showed,
and take off the bulb holder ĸ. (Fig. 10)
łLoose the lock screw Ĺfor mercury bulb and take off the
supporting pole ĺ. Insert the anode side (big side) on
mercury bulb into the anode holder ļand set negative
holder on small side of bulb, then tight the screw Ĺ. (Fig.
11)
Figure 10 ƾPlease make sure the mercury bulb put vertically. If
there is aspirating hole on bulb, please make sure the
hole directly to ceramic holder.
ŃPut the bulb holder ĸinto its house and tight the screw
ķ.
ƾIt is the same way to replace bulb.
ƾReplace bulb during or after operation:
During or just after operation, the bulb, bulb house
and around is very hot. Before replace the bulb, please
set the power supply for fluorescence at “o”(OFF) and
take off the power plug. After all cooling down to
replace bulb.
ƾAfter replace bulb, please be aware the timer on power
s upply at zero. See details “3-1”
Fi
g
ure 11
7

XDS – 3FL
2-2-5 Connect power supply
ŁMake sure that the main power supply and fluorescence
power supply at “o” (OFF).
łConnect one side the plug ķto the connector ĸon light
source with mercury bulb and lock the screo. (Fig. 12)
ŃUse same way to connect other side of the plug ķto
connector fluoĹrescence power supply.
ńConnect one side of the plug ĺto socket Ļon
fluorescence power supply and other side to power supply
socket.
ƾThe fluorescence power supply is 110-240V.
ƾPlease curve and enlace the plug wire softly to avoid
damage it.
ƾPlease use the standard plug wire provide our
company. Select suitable one when missing or
damagment.
ƾConnect the power supply correctly, be sure the
instrument earth-connecting.
2-2-6 Replace fuse
Before replace fuse, please set the main power supply and f
luorescence power supply at “o” (OFF) and take off plug.
Use “_” screw driver to take off fuse set ķfrom holder ĸ
and change a new one. (Fig. 13)
ƾFuse specification: 250V, 3.15A
2-2-7 Set eye-protecting board
Figure 12
Figure 13
Figure 14 ŁLoose screw ķtill enough to put in trinocular cover.
(Fig.14)
8
łSet the holder ĸclose with trinocular cover Ĺand
horizontal the eye-protecting board, then tight the screw
ķ.
ŃLoose the screw ĺa little to let connecting pole Ļ
moving as showed direction. And adjust the
eye-protecting board to suitable position, then tight the
screw ĺ.
Figure 15

3. Operation
XDS – 3FL
centring screw for view field diaphragm
handle on filter preventing board
filter
p
reventin
g
boar
d
adjusting pole for view field diaphragm
fluorescence filter blocks
!fluorescence filter block B1
!fluorescence filter block G1
filter exchanging pole
!filter exchanging pole B1
!filter exchanging pole G1
9
Inhaltsverzeichnis
Andere Optica Mikroskop Handbücher



Beliebte Mikroskop Handbücher anderer Marken

Thermo Scientific
Thermo Scientific Nicolet iN10 Leitfaden

National
National DC3-163 Bedienungsanleitung

KERN Optics
KERN Optics OPE-1 Bedienungsanleitung

OPTIKA MICROSCOPES
OPTIKA MICROSCOPES B-150D Bedienungsanleitung

Prior
Prior Lux POL Bedienungsanleitung

Opitec
Opitec Smartscoop 115615 Bedienungsanleitung


VWR
VWR VisiScope 384 Series Bedienungsanleitung

Nikon
Nikon ECLIPSE E200 POL Bedienungsanleitung

Leica
Leica DI C800 Handbuch

ThermoFisher Scientific
ThermoFisher Scientific Continuµm Bedienungsanleitung

ThermoFisher Scientific
ThermoFisher Scientific Continuµm Bedienungsanleitung

Olympus
Olympus SZ61 Bedienungsanleitung