2
Installation
The luminaire must be installed and maintained by a suit-
ably qualified person in compliance with latest construc-
tion and electrical regulations and relevant legislation.
The given information from the lamp manufacturer about
the correct lamp, operation and maintenance are strictly to
be observed.
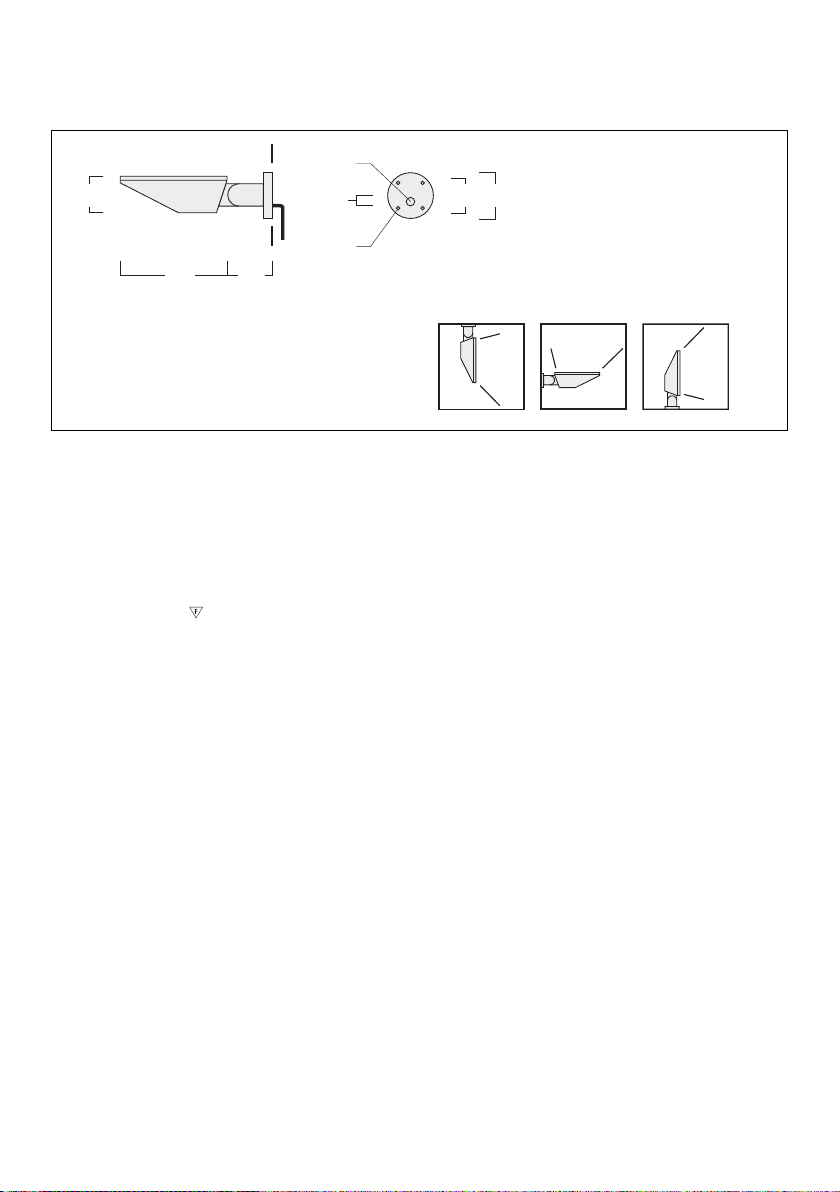
The minimum distance to the illuminated object has to be
observed (see sign inside of luminaire).
The luminaire shall be operated only with complete protec-
tion cover. Replace any broken protection cover.
In case of questions please contact our technical hotline:
+49 5194 909209 (from Monday - Friday from 08.00 until
16.00 hours.
Installation Procedure
1) Switch off the mains electrical supply.
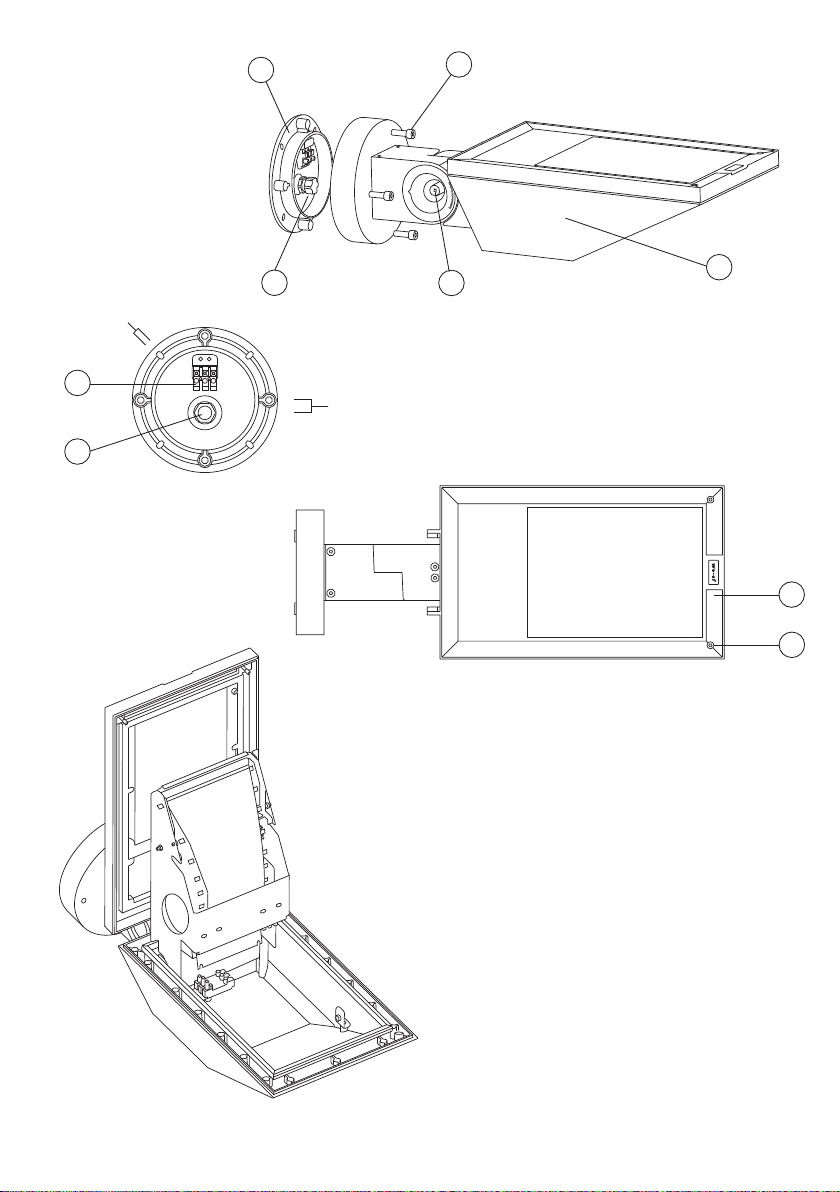
2) Loosen screws Aof the connecting box and take off
luminaire B.
3) Insert the corresponding cut connecting cable through
the cable gland C. Install the fixing plate Dat the
assigned position and firmly tighten cable gland C. Use
suitable installation material (depending on
material of the installation section).
4) Connect the neutral conductor (N), phase (L1) and the
earthing to the corresponding marked contacts of
the terminal clamp E.
Compare the local voltage and frequency with the data
mentioned on the label of the luminaire.
5) Place luminaire Bon the fixing plate Dand firmly tight-
en screws A.
6) The luminaire can get adjusted to the inclination + 30°
by loosening of the screw
I
.
Montage
Montage und Wartung darf nur von geschultem Fachper-
sonal mit entsprechender beruflicher Qualifikation in Über-
einstimmung mit den neuesten elektrischen Installations-
und Sicherheitsvorschriften durchgeführt werden.
Die Hinweise der Leuchtmittelhersteller der eingesetzten
Lampe für Betrieb und Wartung sind unbedingt zu beachten.
Der Mindestabstand zu beleuchteten Gegenständen (siehe
Bildzeichen in der Leuchte) ist unbedingt einzuhalten.
Die Leuchte darf nur mit vollständiger Schutzabdeckung
betrieben werden. Ersetzen Sie jede gebrochene Schutz-
abdeckung.
Bei Fragen wenden Sie sich bitte an unsere technische
Hotline unter +49 5194 909209 (Montag - Freitag von
08:00 Uhr bis 16:00 Uhr).
Vorgehensweise
1) Spannungsfreiheit der Anschlussleitung herstellen.
2) Schrauben Ader Anschlussbox lösen und die Leuchte
Babnehmen.
3) Die entsprechend zugeschnittene Anschlussleitung
durch die Kabelverschraubung Cziehen, die
Befestigungsplatte Dan der dafür vorgesehenen Stelle
befestigen und die Kabelverschraubung Cfest anzie-
hen. Es ist geeignetes Befestigungsmaterial zu benut-
zen (abhängig vom Material der Befestigungsfläche).
4) Nulleiter (N), Phase (L1) und Schutzleiteranschluss
an die entsprechend markierten Kontakte des
Steckverbinders Eanschließen.
Vergleichen Sie die örtliche Spannung und Frequenz
mit den Daten auf dem Leisungsschild.
5) Die Leuchte Bauf die Befestigungsplatte Dsetzen und
die Schrauben Afest anziehen.
6) Die Leuchte kann durch Lösen der Schraube
I
in der
Neigung + 30° ausgerichtet werden.